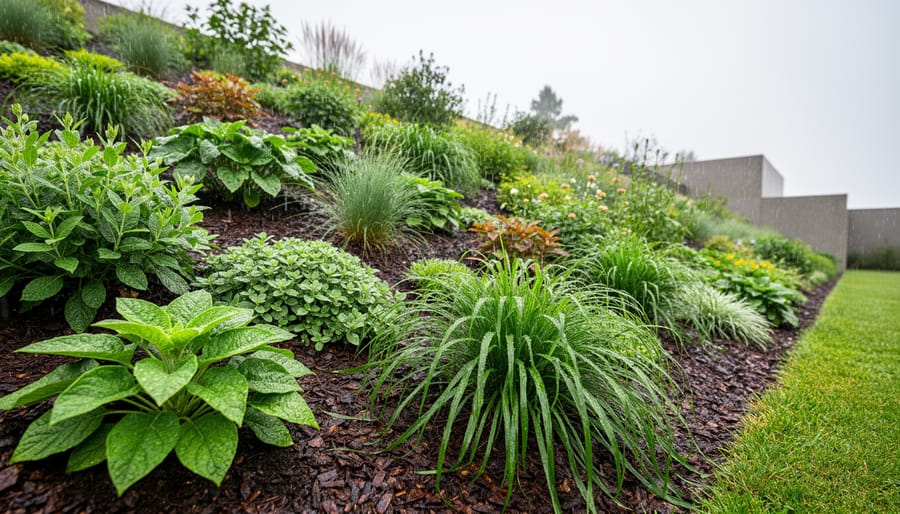
You can stop erosion in your perennial garden by planting deep-rooted groundcovers, grasses, and shrubs that anchor soil while absorbing rainfall before it carries away your topsoil and nutrients. This method works because plant roots create a living network that holds soil particles together, while foliage breaks the impact of heavy rain that would otherwise dislodge bare earth. Most gardeners see noticeable stabilization within one growing season, and the approach costs far less than hardscaping solutions like retaining walls.
If you’ve noticed gullies forming after rain, exposed roots on hillside beds, or muddy runoff pooling at the bottom of slopes, erosion is already stealing the organic matter and fertility you’ve worked to build. Left unchecked, it thins your planting beds, weakens established perennials, and washes fertilizer into storm drains before your plants can use it. The good news? Strategic plant selection transforms problem areas into low-maintenance garden assets that actually improve over time.
The key is matching the right plants to your specific conditions. Steep slopes need aggressive root systems and quick establishment. Gentle grades allow more flexibility with ornamental options. Wet areas call for plants that thrive in moisture, while dry banks require drought-tolerant species that won’t demand constant irrigation. This guide walks you through selecting plants that fit your site, preparing the ground properly so they establish fast, and confirming your solution is working before the next heavy storm arrives.
Understanding Erosion in Perennial Gardens
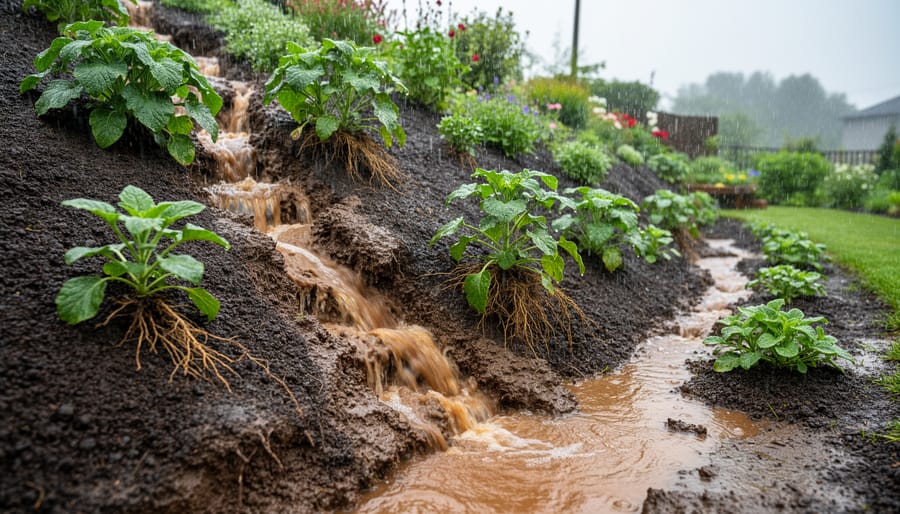
Erosion quietly steals the foundation of your perennial garden, layer by layer. When rain hits bare or poorly protected soil, it dislodges particles and carries them away along with the nutrients and organic matter you’ve worked so hard to build. On sloped beds or areas with sparse plant cover, water cuts channels through the soil, creating gullies that deepen with each storm. Even gentle rainfall accumulates over time, washing topsoil, the most fertile layer, downhill or into storm drains.
This constant movement doesn’t just remove soil. It takes your fertilizer investments with it. The nitrogen, phosphorus, and potassium you’ve applied wash away before your perennials can absorb them, making nutrient loss from erosion a significant concern for gardeners working with slopes or heavy clay soils. Compost you’ve amended into the bed erodes away, along with beneficial microorganisms that live in the topsoil. You’re left with compacted subsoil that drains poorly, holds fewer nutrients, and creates a hostile environment for perennial roots.
The visible signs appear gradually. You might notice exposed roots on perennials that were once properly planted, or soil settling around crown areas. Mulch disappears faster than it should, and puddles form where water used to drain evenly. Perennials on the downhill side of a bed may grow more vigorously than those upslope, fed by the nutrients washing from above, a pattern that reveals the theft happening under your feet. Once erosion establishes pathways through your garden, each rain event accelerates the damage, making intervention increasingly urgent.
What You’ll Need to Control Erosion with Plants
Before you head to the nursery or garden center, gather everything you’ll need for a successful erosion-control planting. Having the right materials on hand makes the process smoother and gives your plants the best chance to establish quickly and start holding soil in place.
Here’s what to collect:
- Erosion-control plants: Choose perennials with fibrous root systems and spreading habits suited to your zone
- Compost or aged manure: Two to three cubic feet per 100 square feet of planting area
- Mulch: Shredded bark or wood chips work well; plan for a two to three inch layer
- Garden spade or trowel: For digging planting holes without disturbing surrounding soil
- Landscape fabric pins or biodegradable erosion mat: Optional but helpful on steeper slopes until plants fill in
- Watering equipment: A gentle spray nozzle or soaker hose to avoid washing away loose soil
You might also want a wheelbarrow for hauling materials on sloped terrain and a rake for light soil smoothing, though use it carefully to avoid creating channels that direct water flow. If your slope is particularly challenging, biodegradable jute or coir matting can bridge the gap between bare soil and full plant coverage, giving roots time to knit the soil together.
Don’t skimp on plant quantity. Erosion control requires denser spacing than typical ornamental plantings, so buy enough to place plants closer together than you would in a flat border. This investment pays off as coverage happens faster and vulnerable soil gets protected sooner.
Before You Plant: Important Considerations
Before you rush to plant, take time to assess your situation honestly. Not every erosion problem is a simple plant-and-go fix, and pushing ahead without evaluating the conditions can waste time, money, and plants.
Start by gauging your slope. A gentle incline works beautifully with erosion-control perennials, but steep grades present real challenges. Walk the area after a moderate rain and watch where water flows fastest. If you find yourself leaning back to stay balanced or if rainwater cuts visible channels down the slope, you’re dealing with something more serious.
Next, check for underlying drainage problems. Plants stabilize soil, but they can’t fix a broken downspout dumping hundreds of gallons in one spot or a subsurface spring that keeps soil saturated. If water pools for hours after rain or you notice soggy patches even in dry weather, address the drainage issue first. Planting into poor drainage sets your perennials up to fail and won’t solve the erosion.
Timing matters, too. Avoid planting during active erosion events or heavy rain periods. Freshly disturbed soil on a slope is incredibly vulnerable, and new plants need a few calm weeks to establish roots. Wait for a dry spell when soil is workable but not bone-dry.
Finally, understand your soil type. Pure sand drains fast but holds roots poorly. Heavy clay resists water penetration, causing runoff even on mild slopes. Extremely rocky or compacted soil may need amendment before plants can take hold. Knowing what you’re working with shapes your plant choices and preparation steps.
Choosing the Right Erosion-Control Plants
The best erosion-control plants share three essential traits: deep or fibrous root systems that grip soil tightly, dense foliage that shields the ground from pounding rain, and vigorous growth that fills in bare spots quickly. Look for perennials adapted to your hardiness zone, plants struggling to survive won’t protect anything.
Ornamental grasses are erosion-fighting champions. Their extensive root networks can reach several feet deep while their arching foliage deflects rainwater. Try blue fescue for smaller slopes, switchgrass for larger areas, or fountain grass where you want movement and texture. These work beautifully in three-season planting schemes, offering visual interest from spring through winter.
Creeping perennials spread horizontally to knit soil together. Creeping phlox cascades over slopes with spring flowers, creeping thyme releases fragrance underfoot while handling foot traffic, and ajuga forms a tight mat even in partial shade. For sunnier spots, sedums combine drought tolerance with erosion control, their shallow but dense roots create a living blanket.
Native perennials deserve special consideration. They’ve evolved alongside local soils and weather patterns, establishing faster and requiring less maintenance than exotic choices. Wild ginger anchors shady slopes, goldenrod stabilizes sunny banks, and Pennsylvania sedge handles dry shade where little else grows.
Match plant height and spread to your slope’s dimensions. Steep grades need aggressive spreaders and deep-rooted anchors like daylilies or purple coneflower. Gentler slopes give you more options, including lower growers like catmint or lady’s mantle. Combine plants with different root depths, pair deep-rooted perennials with shallow groundcovers, to create a multi-layered defense that holds soil at every level.
Step-by-Step: Planting for Erosion Control
Step 1: Prepare the Erosion-Prone Area
Start by walking the slope or vulnerable area to identify where water flows during rain. You’ll often see small channels or bare patches where soil has already washed away. Remove any large debris, fallen branches, rocks, or old plant material, that could disrupt water flow or interfere with planting.
Next, tackle weeds, especially aggressive types with shallow roots that won’t hold soil. Pull them by hand rather than using a hoe, which can loosen the slope further. If you’re dealing with persistent weeds, spot-treat with herbicide several weeks before planting, following label directions.
Resist the urge to heavily till or rake steep areas. Instead, use a garden rake lightly to level only the spots where you’ll plant, working parallel to the slope rather than up and down. This preserves existing soil structure while creating small pockets for your erosion-control plants.
Step 2: Amend and Improve Your Soil
On slopes, the temptation is to dig deeply and work the soil into a fluffy bed, but that approach invites the very erosion you’re trying to prevent. Instead, spread a one- to two-inch layer of compost across the planting area without disturbing the underlying soil structure. Use a garden fork to gently work the compost into the top few inches, moving horizontally across the slope rather than up and down, which can create channels for water flow. Research shows that compost increases water retention while improving soil binding, giving new roots the moisture and stability they need to establish quickly. If your slope is steep, consider amending only the individual planting holes rather than the entire bed, minimizing soil disruption while still giving each plant the nutrient boost it needs.
Step 3: Plant in a Staggered Pattern
Start at the bottom of your slope and work your way upward. This approach lets you establish anchor points for stability as you move, and you won’t accidentally step on newly planted areas.
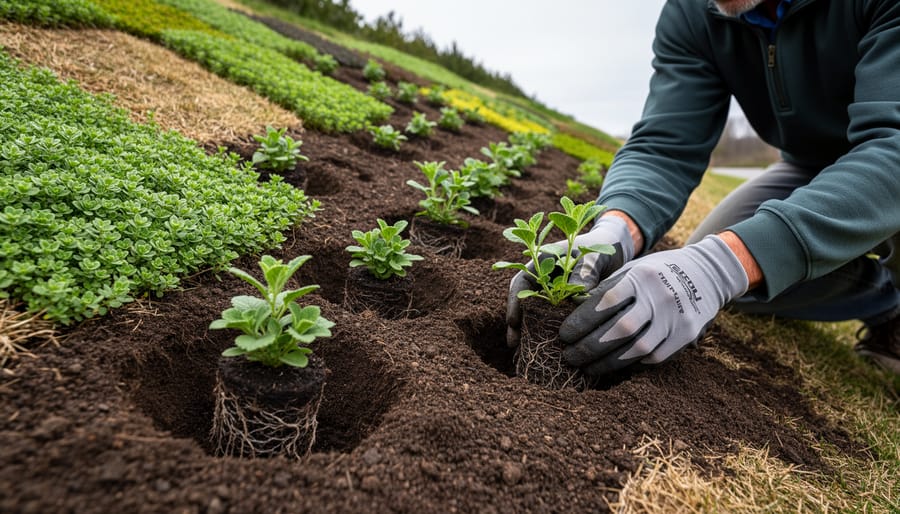
Plant in a staggered, zigzag pattern rather than straight rows. Imagine a brick wall: each plant sits between two plants in the row below. This offset arrangement forces water to weave around plants instead of rushing straight downhill through channels. Those channels become erosion gullies, which defeats the entire purpose.
Space plants according to their mature spread, typically 12 to 18 inches apart for groundcovers. Dig each hole just deep enough to match the root ball, then firm soil around the plant without creating a depression that collects water. On steeper slopes, create small level terraces around each plant by building up a shallow berm on the downslope side.
Work across the slope horizontally for one row before moving to the next level up. This systematic approach ensures even coverage and prevents missed spots where erosion can start.
Step 4: Mulch and Water Thoroughly
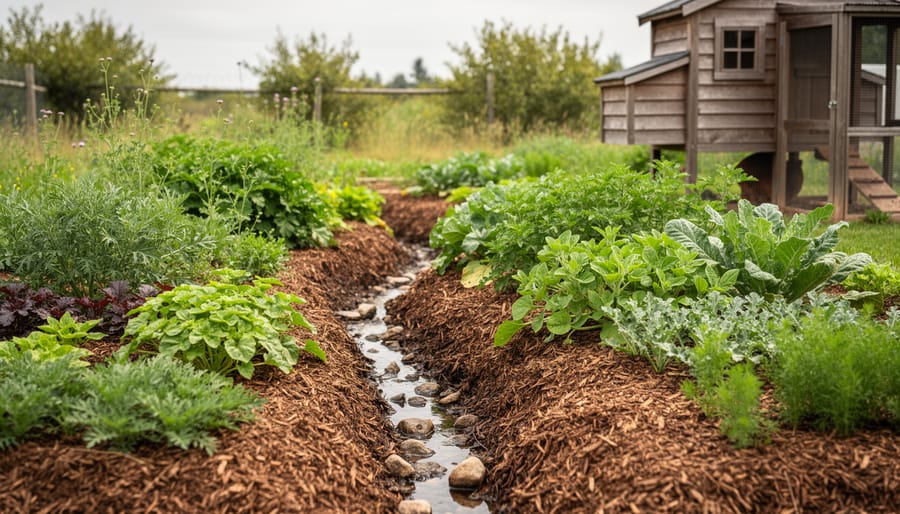
After placing your plants, immediately apply a protective layer of mulch between them, keeping it 2-3 inches deep. Shredded bark or wood chips work best on slopes because they knit together and resist sliding down. Spread the mulch right up to the plant base, but don’t pile it against stems where it can hold moisture and cause rot.
Now comes the critical part: watering without triggering erosion. Use a gentle shower setting on your hose or a soaker hose laid across the slope. Water slowly and deeply, allowing moisture to soak in rather than pooling and running off. If you see water starting to flow downhill, stop and let it absorb before continuing. Your goal is to settle the soil around roots and activate the mulch layer without creating the very runoff you’re trying to prevent.
Plan to water this way for the first few weeks until roots establish. During this period, check after each watering session to ensure mulch hasn’t shifted. If it has, redistribute it evenly to maintain coverage across bare soil.
How to Tell If Your Erosion Control Is Working
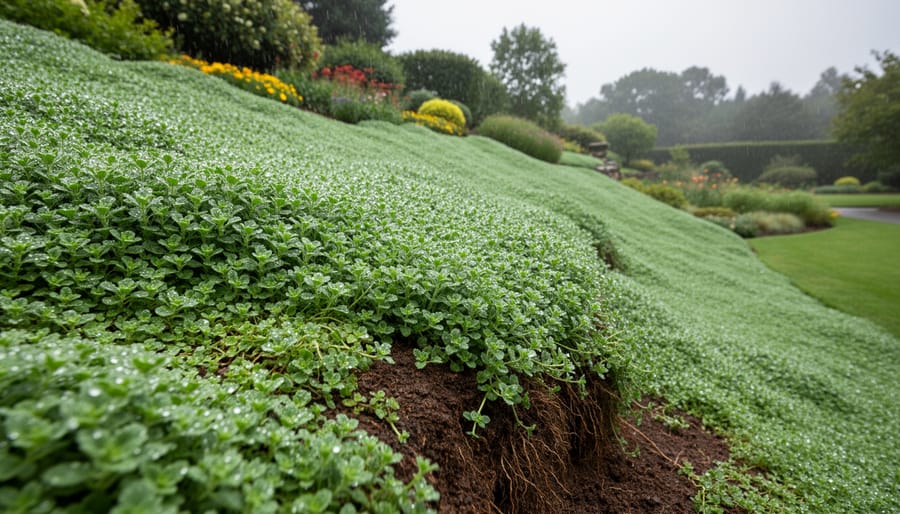
Give your new plantings a few weeks to settle in, then start watching for the signs that your erosion-control strategy is doing its job. The most obvious indicator happens during or right after a good rain, walk out and observe how water behaves on your slope. If it’s soaking into the soil rather than streaming downhill in muddy rivulets, you’re on the right track. Check the base of your slope, too. Before planting, you probably noticed soil deposits or small gullies where runoff concentrated. Those trouble spots should diminish as your plants establish.
Within six to twelve months, you should see clear success indicators:
- No bare soil patches visible between established plants
- Water absorbing into the ground instead of running off in sheets
- Healthy plant growth spreading naturally to fill gaps
- Minimal soil deposits at the bottom of slopes after storms
- Roots visible when you gently pull back mulch near plant bases
Don’t just check once and forget about it. Make it a habit to inspect your erosion-prone areas after heavy rains, especially during the first growing season. Look for new bare spots, plants that seem stressed or slow to spread, and any areas where water has carved fresh channels. These trouble spots need quick attention, fill them with additional plants or adjust your mulch coverage before small problems become big ones.
If you’re not seeing improvement after a full growing season, it’s time to reassess. Your plants might need better soil conditions, different species better suited to your slope’s angle, or supplemental erosion barriers like coir logs while roots develop. Patience matters here, but so does staying observant and ready to adjust your approach.
Maintaining Your Erosion-Control Plantings
Once your erosion-control plants are established, keeping them healthy ensures they continue to protect your soil. Start by checking mulch levels twice a year, replenish to maintain a 2-3 inch layer, which suppresses weeds and retains moisture without smothering plant crowns. In early spring, apply a balanced, slow-release fertilizer sparingly; excessive nitrogen encourages lush foliage with shallow roots, exactly what you don’t want on a slope. Aim for steady, moderate growth that builds strong root systems instead.
Watch for bare patches where plants haven’t filled in as expected. Divide overcrowded clumps every three to four years to reinvigorate growth and use the divisions to fill gaps, maintaining continuous soil coverage. This approach ties directly into thoughtful perennial design where spacing and timing matter as much as plant selection.
After heavy storms, walk your slope to identify any new erosion channels or exposed roots. Address trouble spots immediately by adding mulch, replanting, or adjusting drainage. Consistent attention prevents small issues from becoming major soil-loss problems, protecting both your garden investment and the nutrient-rich topsoil your perennials depend on.
Expert Insight: A Conversation with a Landscape Designer
I spoke with Sarah Chen, a landscape designer with twenty years of experience transforming erosion-prone yards into thriving gardens. She’s passionate about proving that erosion control doesn’t mean sacrificing beauty.
What are your go-to perennials for stopping erosion?
“I always start with prairie dropseed grass. It develops roots up to five feet deep and looks stunning year-round. For groundcovers, I love creeping phlox on sunny slopes and sweet woodruff in shade. Clients are shocked when something this pretty also solves their erosion headaches.”
What mistakes do you see gardeners make?
“The biggest one is planting in straight rows down the slope. That creates water channels that make erosion worse. Always plant in staggered, horizontal patterns. Another mistake is skipping mulch because they think it’s ugly. I tell them mulch is temporary protection while roots establish. Within a season, the plants fill in and you barely see it.”
How do you make erosion solutions look intentional?
“Think in drifts and layers, not just ‘plants that hold soil.’ I’ll use three or five different species with varying heights and bloom times. Fountain grass anchors the design, catmint spills over in waves, and sedums fill gaps. The erosion control is there, but what people see is a gorgeous, textured planting. Integration with seasonal care routines keeps everything healthy without extra work.”
Any final advice?
“Start small. Pick your worst trouble spot, fix it properly, then expand. Success builds momentum.”
Common Questions About Plants and Erosion
Plants work surprisingly fast to slow erosion, but they don’t create miracles overnight. Understanding realistic timelines and how to maximize your investment helps you plan effectively and avoid common pitfalls that undermine your erosion-control efforts.
How long does it take for plants to stop erosion?
Groundcovers typically provide noticeable erosion reduction within 6-8 weeks as roots establish, with significant control by the end of the first growing season. Deep-rooted perennials and grasses may take a full year to develop extensive root systems that hold soil firmly during heavy rains.
Can I use annual flowers for erosion control?
Annuals aren’t ideal because they die each year, leaving soil exposed during winter when erosion risk peaks. However, you can use them as temporary cover while perennials establish, or as fillers between permanent erosion-control plants during the first season.
What’s the best approach for erosion near my existing perennial borders?
Extend erosion-control plantings upslope from your borders to prevent runoff from washing soil and mulch into your established beds. Choose plants with similar water and light needs so you can maintain both areas together without conflicting care routines.
Do erosion-control areas still need fertilizer?
Yes, but use a balanced, slow-release formula that encourages strong root development rather than excessive top growth. Over-fertilizing creates lush foliage with weak roots that won’t hold soil effectively, defeating your erosion-control purpose.
The key is patience during establishment. Mulch protects bare soil while plants spread, and resisting the urge to over-fertilize ensures your plants develop the robust root systems that actually prevent erosion rather than just looking green.
Taking steps to control erosion in your perennial garden isn’t just about keeping soil in place. It’s about protecting everything you’ve invested in your landscape, from the amendments you’ve worked into the ground to the established perennials you’ve nurtured over seasons. When you stabilize slopes and vulnerable areas with the right plants, you’re creating conditions where fertilizers and organic matter stay where they belong, feeding your garden instead of washing away with the next storm.
The beauty of this approach is that it gets better with time. Those erosion-control plants will establish deeper roots each season, knitting the soil together more effectively while their foliage adds layers of visual interest to your beds. You’ll spend less time repairing damage and more time enjoying a garden that sustains itself naturally.
Start small if the project feels overwhelming. Tackle one trouble spot this season, watch how those plants perform, and expand your erosion solutions from there. Every plant you add to a vulnerable area is working around the clock to hold your garden together, even when you’re not watching.
Your perennial garden deserves a solid foundation. With thoughtful plant selection and the techniques we’ve covered, you can give it exactly that while creating a landscape that’s both resilient and beautiful. The soil you save today supports the blooms you’ll enjoy for years to come.