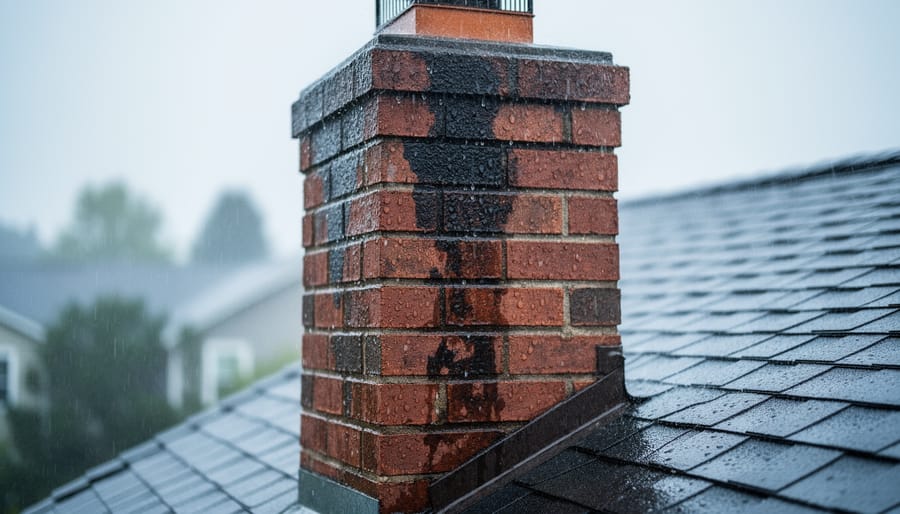
Inspect your chimney’s brick surface during a light rain to spot where water penetrates—these wet spots reveal exactly where protection is needed. Before professionals like those offering chimney repair Clearwater services tell you it’s urgent, understanding waterproofing saves you from costly repairs down the road.
Water is your brick chimney’s silent enemy. Unlike garden soil that drains freely, masonry absorbs moisture through tiny pores, and when temperatures drop, that trapped water freezes and expands. This freeze-thaw cycle cracks bricks, crumbles mortar joints, and sends water cascading into your home’s interior walls. A single season of neglect can cause damage that takes years and thousands of dollars to reverse.
The good news? Waterproofing your brick chimney is surprisingly manageable, even if you’ve never tackled exterior masonry work. You’ll need the right breathable sealant that blocks water while allowing vapor to escape, proper surface preparation, and ideal weather conditions—think of it like preparing a garden bed before planting, where timing and preparation determine success.
This guide walks you through the complete waterproofing process, from choosing between professional-grade and DIY-friendly products to applying the sealant correctly. You’ll learn which warning signs demand immediate attention, how to prepare your chimney’s surface properly, and maintenance tips that extend your waterproofing investment for years. Whether you’re preventing future problems or addressing existing water damage, protecting your chimney protects your entire home.
Why Water Is Your Brick Chimney’s Worst Enemy
The Freeze-Thaw Cycle Explained
Think of what happens when you put a water bottle in the freezer and forget about it overnight. That liquid expansion is exactly what’s happening inside your brick chimney during winter months, and it’s causing more damage than you might realize.
Here’s how it works: brick is naturally porous, much like a sponge. When rain or snow falls on your chimney, the masonry absorbs that moisture deep into its tiny pores. During the day, everything might seem perfectly fine. But when temperatures drop below freezing at night, that absorbed water turns to ice and expands by about 9 percent. This expansion creates tremendous pressure from within the brick itself.
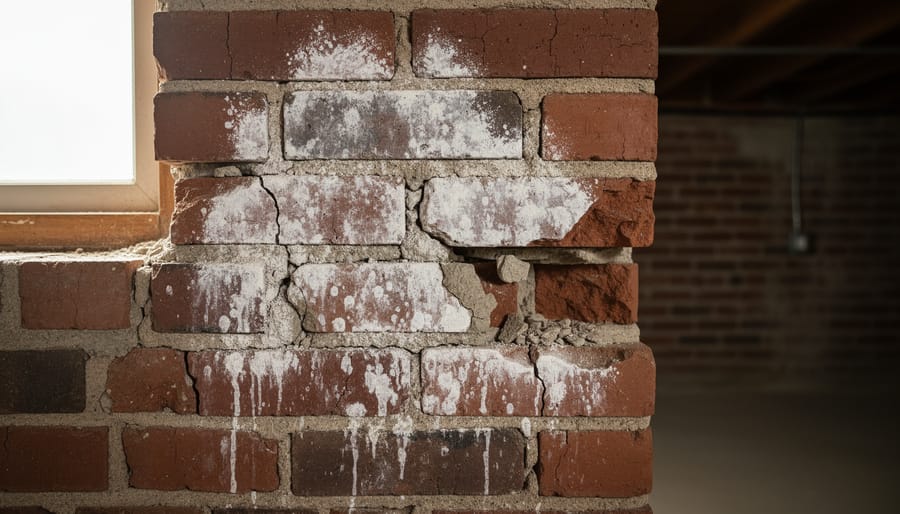
Imagine filling a jar completely with water, sealing it tight, and freezing it. The glass eventually cracks because ice needs more room than water. Your chimney bricks experience this same force, except this freeze-thaw cycle happens repeatedly throughout winter and early spring. Each time water freezes and thaws, it widens existing cracks and creates new ones. Over several seasons, this process leads to crumbling mortar, spalling bricks, and potentially serious structural damage that becomes increasingly expensive to repair.
Signs Your Chimney Needs Help Now
Just like keeping an eye on your garden for early signs of trouble, catching chimney problems early makes all the difference. Taking a walk around your home every season can help you spot issues before they become expensive repairs. Here’s what to look for:
White, chalky residue on your bricks, called efflorescence, signals that moisture is seeping through your masonry. Think of it as your chimney’s way of waving a red flag. You might also notice mortar between bricks that’s crumbling or feels soft when you touch it—similar to how soil erosion weakens garden beds. Loose or shifted bricks are another clear warning sign that water has been doing damage.
Don’t forget to check inside your home too. Water stains on ceilings near your chimney or dampness on interior walls around the fireplace indicate that water damage prevention should be your next priority. You might even notice a musty smell or see actual moisture during rainy weather.
Catching these signs early means you can address waterproofing before minor issues turn into major structural problems, protecting both your home and your budget.
How Brick Chimney Waterproofing Actually Works
Think of brick chimney waterproofing like giving your outdoor plants a protective layer of mulch. Just as mulch shields roots from harsh weather while still letting water drain through, chimney sealers create a barrier against rain while allowing your brickwork to breathe.
Here’s what makes waterproofing different from regular paint: when you paint brick, you’re creating a solid film that traps moisture inside. That trapped moisture freezes, expands, and causes those frustrating cracks and spalling you might already be seeing. Waterproof sealers work completely differently.
The magic is in the chemistry. Quality chimney sealers use siloxane or silane-based formulas that penetrate deep into the brick’s pores, creating a water-repellent barrier at the molecular level. Imagine tiny umbrellas opening up inside each brick pore. Rain hits the surface and beads right off, just like water rolling off a freshly waxed car.
But here’s the crucial difference: while blocking water from entering, these sealers still allow water vapor to escape from inside. Your chimney naturally absorbs some moisture from indoor humidity and combustion gases. If that moisture can’t escape, it gets trapped and causes damage from within. Breathable sealers solve this problem by letting vapor molecules pass through while stopping liquid water from penetrating.
This breathability is why professionals call proper waterproofing a vapor-permeable system. The technical-sounding name simply means your chimney can still exhale moisture while staying protected from rain, snow, and ice.
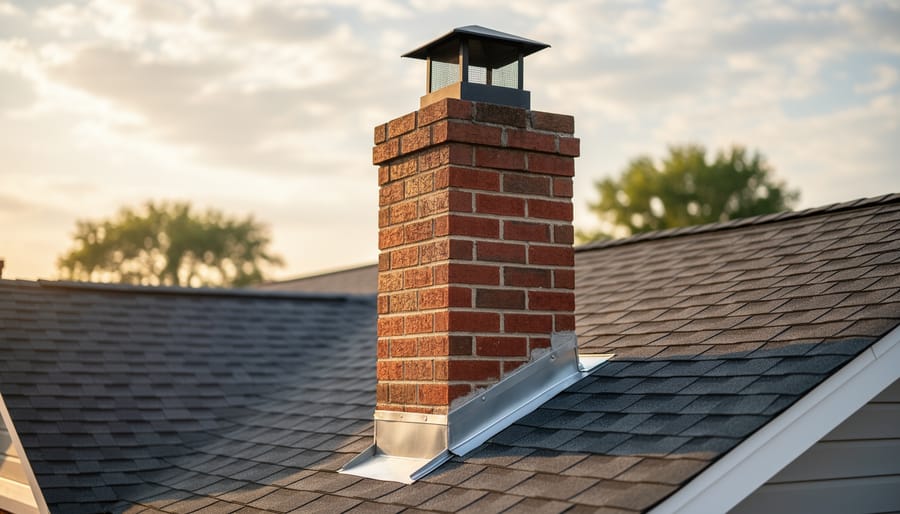
When applied correctly, these sealers don’t change your chimney’s appearance either. Unlike paint’s obvious coating, good waterproofing remains invisible while doing its protective work, maintaining your home’s natural brick character while extending your chimney’s lifespan by years.
Choosing the Right Waterproofing Product for Your Brick Chimney
Water-Based vs. Solvent-Based Sealers
When choosing a sealer for your brick chimney, you’ll encounter two main options: water-based and solvent-based formulas. Each has distinct characteristics worth considering for your project.
Water-based sealers are wonderfully user-friendly, especially for DIY enthusiasts. They have minimal odor, making application much more pleasant, and cleanup is as simple as soap and water. These sealers are environmentally friendlier and safer to use around your garden and landscaping. They dry relatively quickly and won’t yellow over time. However, they typically require reapplication every 3-5 years and may not penetrate quite as deeply into porous brick.
Solvent-based sealers offer exceptional durability and deeper penetration into brick surfaces, potentially lasting 7-10 years. They perform particularly well in harsh weather conditions. The trade-offs include stronger fumes during application (you’ll want good ventilation), the need for mineral spirits for cleanup, and higher environmental impact. They also take longer to cure fully.
For most homeowners tackling chimney waterproofing, water-based sealers provide an excellent balance of effectiveness, safety, and ease of use. They’re particularly suitable if you’re working near plants or in enclosed spaces. Solvent-based options make sense when maximum longevity is your priority and proper ventilation is available during application.
What to Look for on the Label
When you’re standing in the store aisle looking at waterproofing products, the labels can feel like they’re written in another language. Let me help you decode the important terms so you can choose confidently.
First, look for products labeled “vapor permeable” or “breathable.” These are your friends! Just like plants need to breathe (we know this well from gardening), brick needs to release moisture that naturally migrates from inside your home. A breathable sealer lets water vapor escape while blocking liquid water from entering. If you trap moisture inside the brick, you’ll create worse problems down the road.
Next, check if the product is “siloxane-based” or “silane-siloxane blend.” These are the gold standard for brick chimneys because they penetrate deeply into the masonry rather than just sitting on the surface. Think of it like watering your garden deeply at the roots rather than just spritzing the leaves.
Avoid products that say “film-forming” or list acrylic or latex as main ingredients. These create a surface coating that can trap moisture and eventually peel away, much like paint that wasn’t meant for the job.
Finally, look for UV resistance and a lifespan of at least 5-10 years. You’re making an investment in your home’s protection, so choose a product designed for the long haul.
Step-by-Step: Waterproofing Your Brick Chimney
Before You Begin: Repairs Come First
Before applying any waterproofing sealer, you’ll need to address existing damage. Think of it like painting a fence—you wouldn’t seal in rot or loose boards, right? The same principle applies to your chimney. Waterproofing products work best on sound surfaces, and sealing over crumbling mortar or cracked bricks actually traps moisture inside, accelerating deterioration.
Start by inspecting your chimney closely. Small hairline cracks and minor mortar gaps are typically DIY-friendly fixes. Repairing mortar joints requires basic tools and patience—skills you’ve likely developed through gardening projects. However, if you notice significant structural damage, large cracks, or deteriorating bricks, it’s time to call a professional mason. They’ll ensure the repairs are done properly, giving your waterproofing efforts a solid foundation for success.
Cleaning and Preparing the Brick Surface
Think of preparing your brick chimney like preparing garden soil before planting – proper prep work makes all the difference! Start by removing any loose mortar, dirt, moss, or debris using a stiff wire brush. For stubborn grime, a pressure washer on a gentle setting works wonderfully, but keep the nozzle at least 12 inches away to avoid damaging the mortar joints.
Once clean, timing becomes crucial. Your chimney needs to dry completely before applying any waterproofing product, which typically takes 24 to 48 hours in good weather. Just as you wouldn’t fertilize your garden before a rainstorm, don’t waterproof your chimney when rain is forecasted. Check the weather report and choose a stretch of dry, mild days with temperatures between 40 and 90 degrees Fahrenheit.
Why does this matter? Any moisture trapped beneath the waterproofing sealant can cause serious problems when temperatures drop, leading to spalling and cracking. I learned this the hard way when I rushed a project before unexpected rain – the sealant didn’t bond properly and had to be redone.
Patience during this preparation stage ensures your waterproofing effort will protect your chimney for years to come.

Applying the Waterproof Sealer
Now comes the rewarding part – applying your sealer! You have two main application methods to choose from: a pump sprayer or a good quality brush. I’ve found that sprayers work wonderfully for larger chimneys and provide excellent coverage quickly, while brushes give you more control on smaller areas and ensure the sealer really penetrates the brick’s surface. Whichever method you choose, work from top to bottom to catch any drips.
Most quality brick sealers require two coats for optimal protection. Apply your first coat generously but avoid creating puddles or runs down the surface. The sealer should soak into the brick rather than sit on top. Coverage rates typically range from 100 to 200 square feet per gallon, depending on how porous your brick is – older, weathered chimneys tend to drink up more sealer than newer ones.
Here’s a helpful tip I learned from a seasoned mason: work in manageable sections, maintaining a wet edge to prevent lap marks. Pay special attention to the mortar joints, as these areas are particularly vulnerable to water infiltration.
Between coats, you’ll need patience. Most sealers require 4 to 6 hours of drying time, though humid conditions may extend this. Check your product’s label for specific recommendations. The second coat goes on much faster since the brick won’t absorb as readily. Apply it the same way as the first, ensuring complete coverage for maximum protection against the elements.
Making Your Waterproofing Last Longer
Think of your chimney’s waterproofing like the mulch layer in your garden beds. Just as mulch breaks down over time and needs refreshing to protect your plants, waterproofing sealant gradually wears away and requires reapplication. The good news? With proper preventative maintenance, you can maximize your investment and keep your chimney protected for years to come.
Most quality waterproofing treatments last between 5 to 10 years, depending on your climate and the product you’ve chosen. Just like checking your garden for pests and problems, establishing a simple annual inspection routine makes all the difference. Each spring, grab your binoculars and examine your chimney from ground level. Look for white staining, which signals water penetration, or any visible cracks in the mortar. After heavy rainstorms, peek into your attic to check for moisture around the chimney.
Keep a simple log of when you applied the waterproofing treatment. Set a reminder for year five to start monitoring more closely. You’ll likely notice the brick appearing slightly more saturated after rain as the treatment begins wearing thin. That’s your cue to plan for reapplication.
Between treatments, maintain good drainage around your chimney crown and keep gutters clear. These small efforts, much like regular weeding in your garden beds, prevent bigger headaches down the road and help your waterproofing perform its best for the longest possible time.
Common Mistakes That Waste Your Time and Money
We’ve all made mistakes in home maintenance projects—I certainly have! When it comes to brick chimney waterproofing, a few common missteps can turn what should be a straightforward task into a frustrating and costly do-over. Let’s talk about these so you can avoid them from the start.
The most frequent mistake? Applying waterproofing over dirty or dusty surfaces. I get it—cleaning sounds like the boring part when you’re eager to finish the project. But waterproofing needs a clean surface to bond properly, just like paint does. Take the time to thoroughly brush or power wash your chimney first, then let it dry completely. Your effort will actually stick around!
Another common error is skipping necessary repairs before waterproofing. Think of it like trying to waterproof a leaky bucket—you need to fix the holes first! If you seal over crumbling mortar or damaged bricks, you’re just trapping moisture problems inside. Always inspect carefully and make repairs before applying any sealant.
Weather timing trips up many well-intentioned homeowners too. Applying waterproofing when rain is forecast within 24 hours, when temperatures are too cold, or when your chimney is already damp basically guarantees poor results. Check the forecast and choose a stretch of dry, mild weather.
Finally, using interior sealants or non-breathable products is surprisingly common. Your chimney needs a breathable, vapor-permeable waterproofing designed specifically for exterior masonry. The wrong product can trap moisture inside the bricks, causing more damage than doing nothing at all.
These mistakes are completely understandable—and completely avoidable once you know what to watch for. Consider them learning opportunities on your path to becoming a more confident homeowner!
Taking care of your brick chimney with proper waterproofing is one of those smart preventative measures that truly pays off over time. Just like mulching your garden beds to protect plant roots through winter, sealing your chimney safeguards your home from costly water damage down the road. By investing a weekend and a modest budget now, you’re potentially saving yourself thousands in future repairs from crumbling mortar, interior water stains, or structural issues.
Whether you decide to roll up your sleeves and tackle this project yourself or call in a trusted professional, you’re making a wise choice for your home. The DIY approach can be incredibly satisfying and budget-friendly, especially if you’re comfortable on ladders and enjoy hands-on projects. However, there’s absolutely no shame in hiring an expert, particularly if your chimney needs extensive repairs first or if heights aren’t your thing.
Think of chimney waterproofing as an essential part of your home’s seasonal care routine. Your house is likely your biggest investment, and these manageable maintenance tasks keep it strong and beautiful for years to come. You’ve got this!