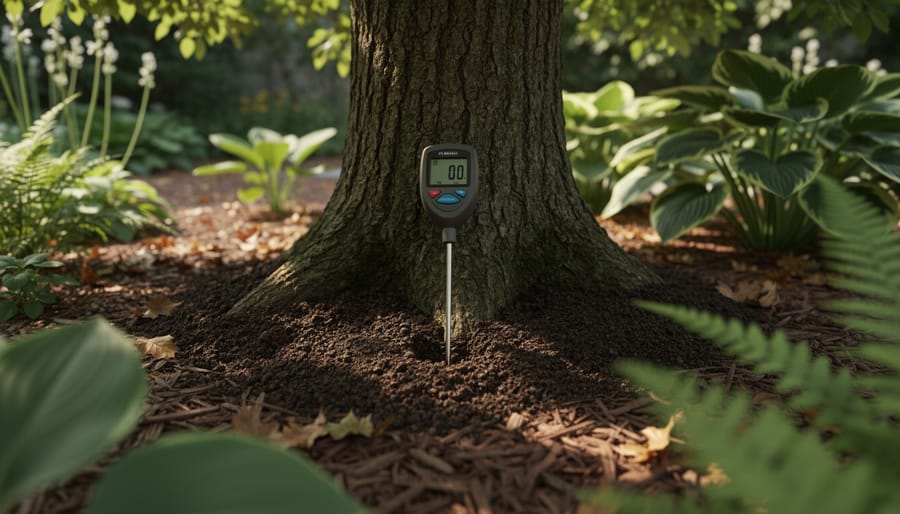
A soil moisture meter gives you an accurate, instant reading of water levels beneath the surface, removing the guesswork from watering in shaded gardens where damp leaves and dim light make visual assessment nearly impossible. In about 30 seconds, you can measure moisture at root depth and know precisely whether your plants need water or if you’re on the verge of overwatering. This simple tool becomes essential in shade gardens, where tree roots compete for moisture, evaporation rates vary wildly under the canopy, and wilting symptoms show up too late to prevent stress.
Most gardeners know the frustration: hostas with crispy edges, ferns that look fine on top but struggle below, or rhododendrons that suddenly collapse from root rot despite appearing fine days earlier. Shade creates its own microclimate. Soil under a mature oak might stay bone-dry even after rain, while a dense canopy elsewhere can trap humidity and keep soil waterlogged for weeks. Your finger poked into the top inch tells you nothing about what’s happening six inches down, where feeder roots actually live.
That’s where a moisture meter proves its worth. Whether you’re fine-tuning newly planted tree care or rescuing struggling shade perennials, measuring moisture at multiple depths gives you the data to water smarter, not harder. This guide walks you through selecting the right meter, using it safely around roots, interpreting readings in different soil types, and verifying your results to build lasting confidence in your watering decisions.
Why Moisture Meters Matter Under Trees
Trees create a moisture puzzle that even experienced gardeners struggle to solve. When you water a shade garden, you’re often guessing, the soil surface can look damp while roots struggle with drought, or seem dry while staying waterlogged underneath. That guesswork costs plants their health and wastes your time and water.
The problem starts with root competition. Mature trees drink gallons of water daily through extensive root systems that spread far beyond their canopy. Your shade-loving hostas and ferns compete for every drop in that same soil, and they usually lose. What looks like adequate watering at the surface may never reach your garden plants because tree roots intercept it first.
Add uneven distribution to that challenge. Tree canopies funnel rain and irrigation toward drip lines while leaving dry zones near trunks. Dense foliage blocks rainfall from reaching some areas entirely, creating pockets of parched soil right next to sections that stay soggy. Your eyes can’t detect these hidden gradients, especially under mulch layers.
Shade compounds the confusion by slowing evaporation. Soil in sunny beds dries predictably, but shaded ground holds moisture longer in some spots and not others, depending on root density, slope, and soil composition. Without direct observation of moisture levels, you risk overwatering shade-tolerant plants or underwatering those in unexpectedly dry microenvironments.
Moisture meters cut through this uncertainty by showing you what’s actually happening below ground. They reveal:
- Dry pockets hidden under dense canopy where rain never penetrates
- Oversaturated clay areas where water pools and oxygen disappears
- Root competition zones where trees dominate water uptake
With objective readings at root depth, you stop guessing and start responding to real conditions. That shift transforms shade gardening from frustrating trial-and-error into informed plant care.
What You’ll Need to Get Started
You don’t need much to start monitoring moisture in your shade garden, but having the right tools makes the process smoother and more useful. Here’s what I recommend gathering before your first round of testing:
Essential Items:
- A soil moisture meter with probes long enough to reach 6-8 inches deep, bypassing mulch layers and surface roots common under trees
- A soft, damp cloth for cleaning the metal probes between readings and preventing disease transfer from one area to another
- A notebook or garden journal to record readings, dates, and locations so you can track moisture patterns over weeks and months
Optional but Helpful:
- Small wooden or plastic stakes to mark zones where you consistently test, making it easier to compare readings from the same spots
- A garden trowel for clearing mulch or debris before inserting the probe
- A pencil or waterproof pen that won’t smudge if your journal gets damp
The meter itself is your most important investment. For shade gardens, look for one with sturdy probes that won’t bend when they encounter roots or harder soil. Analog meters (the ones with a dial) are inexpensive and reliable, while digital versions offer precise numeric readings that some gardeners find easier to track. Both work well, choose based on your comfort level with reading results.
Keep everything in a small bucket or tote near your garden. When testing becomes a quick, five-minute routine rather than a project requiring a supply hunt, you’ll do it more consistently.
Choosing the Right Moisture Meter for Shade Gardens
You don’t need the fanciest meter on the market, but picking one that handles shade garden realities makes a real difference. I learned this after my first cheap probe bent trying to push through the dense root mat under my maple.
Start with probe length. Look for at least 6 to 8 inches if you mulch heavily or have established trees with thick surface roots. Those short 3-inch probes can’t reach past the dry mulch layer to where your plants actually feed. In my garden, the extra length means I can test the root zone of hostas and ferns without clearing away all my carefully placed wood chips every time.
Analog meters cost less and never need batteries, which matters if you’re the type who forgets to charge things. They give you a simple dial reading from dry to wet. Digital versions offer numeric precision and sometimes measure light or pH too, but honestly, for moisture monitoring alone, a basic analog dial does the job. Save your money unless you genuinely want those extra features.
Durability counts more than you’d think. Shade gardens mean working around roots, rocks that hide under leaf litter, and soil that stays damp enough to corrode cheap metal. Stainless steel probes outlast everything else I’ve tried. The plastic housing should feel solid, not flimsy.
Skip anything labeled “decorative” or “indoor plant.” Those break outdoors within weeks. Look for meters marketed for garden or outdoor use. They’re built to handle weather, soil grit, and the occasional accidental stomp when you’re hauling mulch bags around.
Before You Start: Safety and Site Considerations
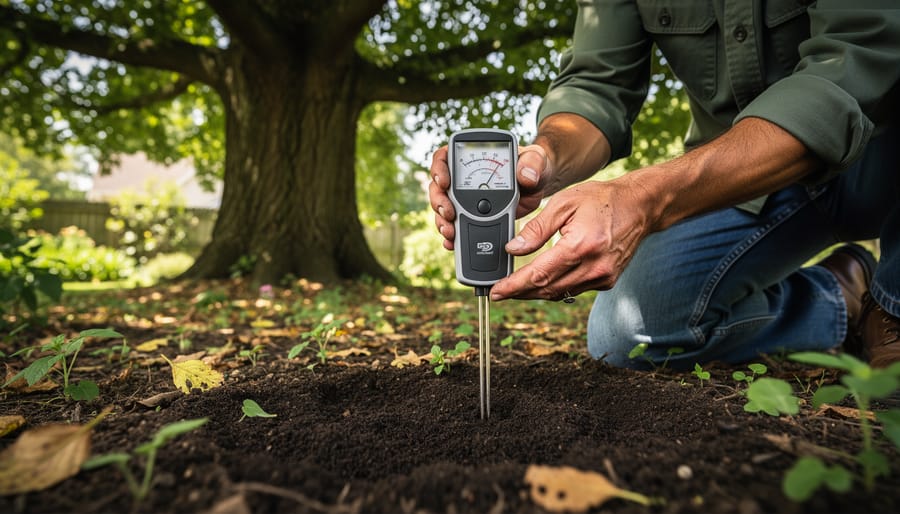
Before you push that probe into the ground, take a minute to think about what’s underneath. Tree roots spread far wider than most gardeners realize, often two to three times the width of the canopy, and established perennials have root systems you can’t see from above. Insert your moisture meter gently and at a slight angle, rather than straight down like a stake. If you meet resistance, stop. That’s probably a root or a rock, and forcing past it can snap your probe or tear through feeder roots that keep your plants healthy.
Rocky or heavily compacted soil needs a different approach. Loosen a small test spot with a trowel first, or choose a softer area nearby that still represents the planting zone. Frozen ground in winter and bone-dry soil in summer can both give false readings and bend probes, so test when conditions are moderate. You’ll get better data and protect your equipment.
Clean your probe between garden beds, especially if you’re testing areas with different plants. A quick wipe with rubbing alcohol or a diluted bleach solution (one part bleach to nine parts water) takes seconds and helps disinfect tools to prevent disease spread from one planting area to another. Dry it before storing, and your meter will be ready when you need it next.
How to Take Accurate Moisture Readings
Where to Test in Your Shade Garden
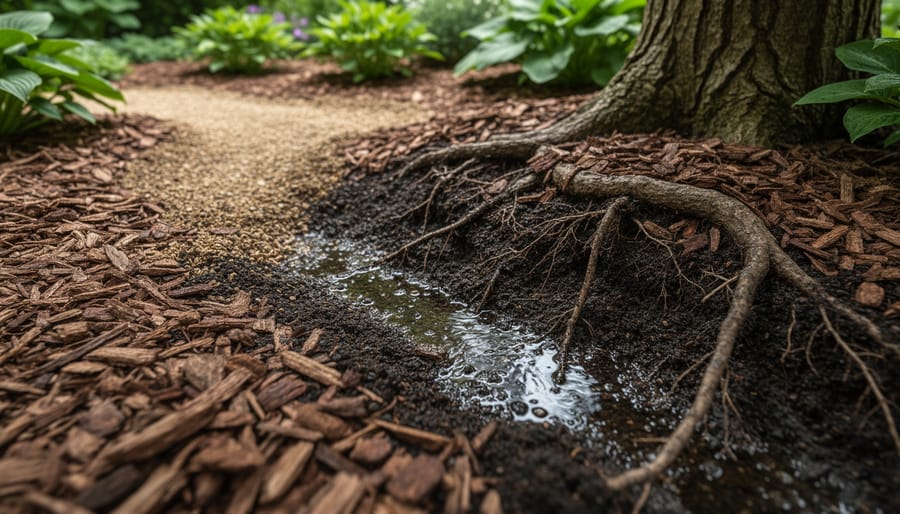
Shade gardens aren’t uniform, moisture varies dramatically depending on where you’re standing. Start by testing in zones rather than random spots. The most critical area sits at the tree’s drip line, where rainwater runs off the canopy edge. Test here first, then move closer to the trunk (where it’s often drier due to the canopy umbrella effect) and farther out toward open areas.
If your garden has any slope, moisture collects at the bottom while higher ground dries faster. Test both uphill and downhill positions within the same bed to understand how water moves across your space. I’ve seen gardeners water their whole shade bed evenly, only to discover the upper third was parched while the lower section stayed soggy.
Different planting beds need separate attention too. A bed tucked under dense evergreen boughs will read differently than one beneath deciduous trees with dappled light. Test each distinct area, under the oak, near the azaleas, by the hostas, and note the patterns you find.
Aim for at least three to five test spots per major garden zone. Over a few weeks, you’ll build a mental moisture map showing which areas dry out quickly and which stay damp. This knowledge transforms how you water, letting you target only the zones that actually need it instead of guessing or treating everything the same.
Reading and Interpreting the Numbers
Most moisture meters use a simple 1-10 scale or color-coded zones: 1-3 registers as dry (red), 4-7 as moist (green), and 8-10 as wet (blue). Some digital models show percentages instead, where 10-30% reads dry, 40-60% moist, and 70-100% wet. Under trees, you’re aiming for the middle of that moist range, around 5-6 on a dial meter or 45-55% on a digital one.
Here’s where shade gardens get interesting: your low-light plants actually prefer slightly different moisture levels than their sun-loving cousins. Hostas, ferns, and astilbes thrive when readings sit between 6-7, staying consistently moist without tipping into soggy territory. Meanwhile, sun plants often do fine bouncing between 4 and 6. The slower evaporation under tree canopies means your soil holds moisture longer, so what reads as “perfect” can shift toward wet faster than you’d expect.
Soil type matters too. Clay holds water stubbornly, so a reading of 6 in clay feels wetter than 6 in sandy loam. In spring, a reading of 5 might mean “wait a few days,” while that same 5 in August heat could signal it’s time to water. Track your readings across seasons and you’ll start recognizing your garden’s rhythm, when 4 means drought stress is coming and when 7 means you’ve overdone it.
Checking Your Results and Next Steps
Your meter shows a reading, but is it telling you the truth? Press your finger into the soil near the probe site, dig down a couple of inches if needed. The soil should feel consistent with what the meter reported: dry soil crumbles and resists forming a ball, moist soil holds together when squeezed but doesn’t feel wet, and saturated soil leaves moisture on your skin. This quick physical check builds your confidence in the meter and trains your eye to recognize moisture levels without always needing a tool.
Over several testing sessions, you’ll start noticing patterns. One area under the maple might consistently read drier than the space near the rhododendrons, even after watering. Another zone stays wet longer because water drains toward it from uphill. These patterns tell you where to adjust your watering schedule, where to improve drainage with organic matter, or where plants are thriving and need no intervention. When a meter consistently shows dry readings below 3 on a 1-10 scale and plants look wilted or stressed, it’s time to water deeply. Readings above 7 that persist for days, especially with yellowing leaves or slow growth, signal poor drainage or overwatering, consider tree stress solutions if the problem affects established trees. Stable mid-range readings paired with healthy plant growth mean you can leave things alone and focus your efforts elsewhere in the garden.
Common Mistakes and How to Avoid Them
Even experienced gardeners slip into habits that throw off their readings. Here’s what to watch for:
- Testing only one spot: Shade gardens have wildly different moisture zones. Take at least three readings per tree, near the trunk, mid-canopy, and at the drip line.
- Checking right after watering: Wait 24 hours after rain or irrigation. Fresh water hasn’t yet moved through the root zone, so you’ll get false wet readings.
- Ignoring the calendar: Spring readings mean something different than August readings. Your “normal” range shifts with the seasons, especially under deciduous trees.
- Forgetting about microclimates: That fern bed on the north side of your maple stays wetter than the hosta patch catching afternoon sun. Track each zone separately.
- Skipping the cleanup: Dirty probes spread disease and give inaccurate readings. Wipe them down between plants.
The biggest mistake? Treating your meter like a one-time diagnostic tool instead of a learning device. Regular testing reveals patterns that change how you approach smart soil management. You’ll notice that the east side dries faster, or that heavy mulch keeps moisture trapped longer than you thought.
Also, don’t let meter readings override common sense. If your tree pruning methods recently opened up the canopy, old moisture patterns no longer apply. The tool gives you data, but you still need to interpret it through what you know about your specific garden.
From a Shade Gardener’s Perspective
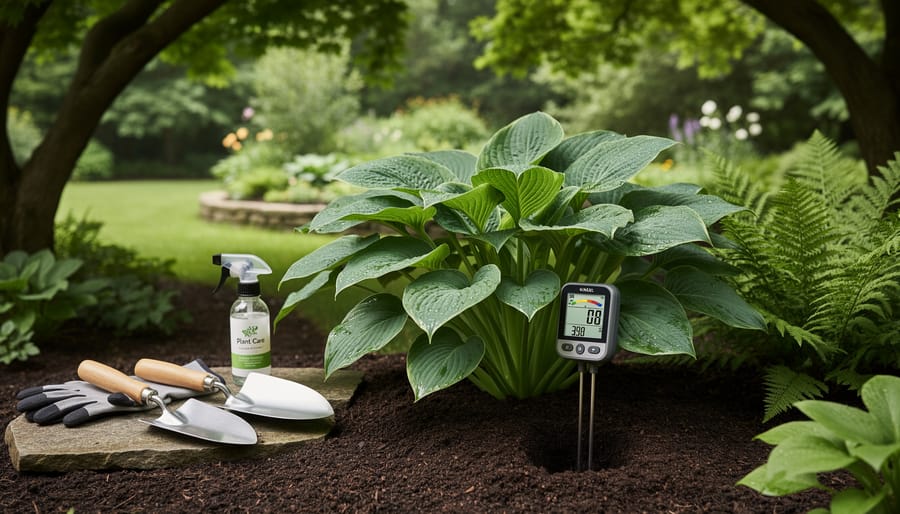
“I used to think my hostas were just finicky,” admits Margaret Chen, who has tended a mature oak and maple canopy garden in Chicago for fifteen years. “I’d water what looked dry, then wonder why some plants thrived while others sulked three feet away.”
Everything changed when she started testing systematically with a simple analog meter. “The readings told a completely different story than my eyes did,” she explains. “Under the big oak, the north side stayed consistently moist while the south side read bone-dry, even though they got the same rainfall. The tree’s roots were hogging all the water on one side.”
Margaret now tests weekly during growing season, rotating through eight marked spots. “I learned my garden has three distinct moisture zones, not one. Now I group plants accordingly and water only where the meter says it’s needed. My water bill dropped, and honestly, everything looks better because I’m not guessing anymore.”
Her advice? “Test the same spots regularly. The patterns you discover will teach you more about your garden than any book can.”
Your Questions About Moisture Meters Answered
Testing your soil moisture for the first time can bring up plenty of questions, especially when you’re working in the unique conditions of a shade garden. Here are answers to the concerns I hear most often from gardeners managing moisture under trees.
How often should I test moisture in my shade garden?
During the growing season, check every 3-4 days until you understand your garden’s patterns, then shift to weekly monitoring. In established shade gardens, test before watering and a day after rain to track how quickly different zones dry out.
Will my moisture meter work in heavy clay soil?
Yes, but you’ll need to insert the probe slowly and avoid forcing it. Clay holds moisture longer than other soils, so your readings will often stay in the moist range even when surface soil looks dry, this is actually helpful information under trees.
Can I damage tree or plant roots when testing?
A thin probe causes minimal disturbance if you insert it gently and avoid the same spots repeatedly. Stay at least 6 inches from plant stems and don’t force the probe if you hit major roots, just test a few inches to the side instead.
What should I do when readings vary wildly across my garden?
That variation is normal and valuable data. Map out which zones stay wet longest and which dry out fast, then adjust your watering to give each area what it needs rather than treating the whole garden the same way.
How do I use these readings to actually improve my watering schedule?
Track readings in your garden journal for two weeks, noting when and where you water. You’ll spot patterns, maybe the north side of your oak stays wet for five days while the south side needs water every three, and can tailor your schedule to match what each zone actually needs.
The questions you encounter while learning your meter will teach you as much as the readings themselves. Each “why is this happening?” moment pushes you to observe more closely, and that deeper attention makes you a better gardener. Your shade garden’s moisture patterns tell a story about roots, drainage, and microclimates, the meter just helps you read it.
You don’t need to master everything at once. Start by testing the same few spots each week, and you’ll quickly notice patterns that transform how you think about your shade garden. That dry patch near the maple’s trunk? Now you know it needs attention. The consistently moist area under the oak? You can confidently add moisture-loving ferns there.
Your moisture meter is a learning tool, not a one-time fix. Each reading teaches you something about how water moves through your particular garden, under your specific trees, in your climate. Over time, you’ll develop an intuition for when and where to test, what the numbers mean for different plants, and how to adjust your watering to match what your garden actually needs rather than guessing.
The trees and shade plants in your care will thank you with healthier growth and fewer stress symptoms. Consistent monitoring takes the mystery out of watering decisions and replaces it with knowledge you can act on. Give yourself a few weeks of regular testing, keep simple notes, and watch your confidence grow alongside your plants.