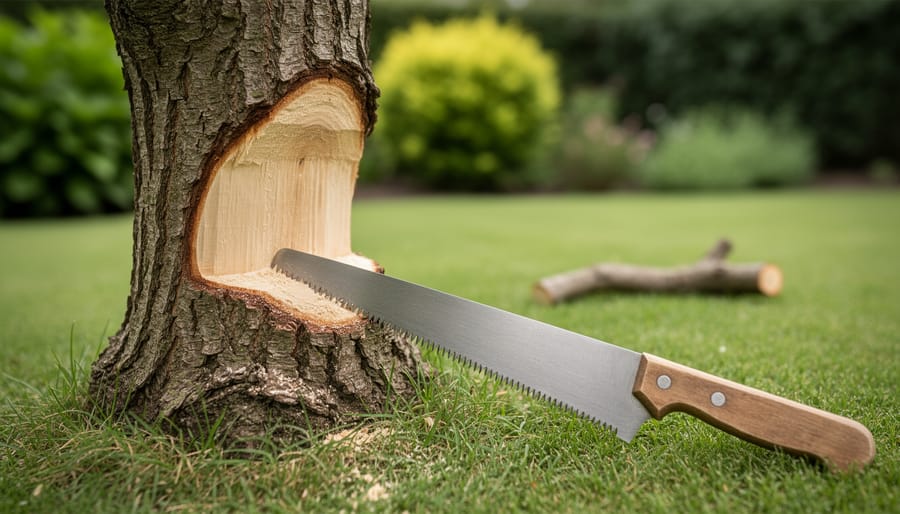
When a tree in your yard suffers a broken branch, storm damage, or an accidental gash from lawn equipment, the best treatment is surprisingly simple: clean the wound edges with a sharp knife or pruning saw, remove any torn bark, and let the tree heal itself naturally without applying wound dressings or sealants. This approach takes about 15 to 30 minutes depending on wound size and represents a significant shift from older gardening advice that recommended slathering cuts with tar or paint.
Trees possess remarkable self-healing abilities through a process called compartmentalization, where they create protective barriers around damaged tissue to wall off decay. Research over the past few decades has shown that wound dressings actually trap moisture against the cut surface, creating ideal conditions for fungal and bacterial growth rather than preventing it. Your job isn’t to seal the wound but to give the tree the cleanest possible edge to work with.
The timing of your intervention matters. Fresh wounds need immediate attention to prevent ragged bark edges from dying back further into healthy tissue. If you’re dealing with damage from a storm or pruning accident, address it the same day if possible. Winter injuries can wait until early spring when the tree enters its active growing season and compartmentalization happens most efficiently.
Understanding what not to do is just as important as knowing the correct steps. Throughout this guide, you’ll find detailed instructions for assessing damage severity, the specific tools that make clean cuts possible, and safety protocols for working near broken limbs under tension. We’ve also included expert insights and answers to the questions gardeners ask most often about protecting their trees after injury.
Understanding How Trees Heal Themselves
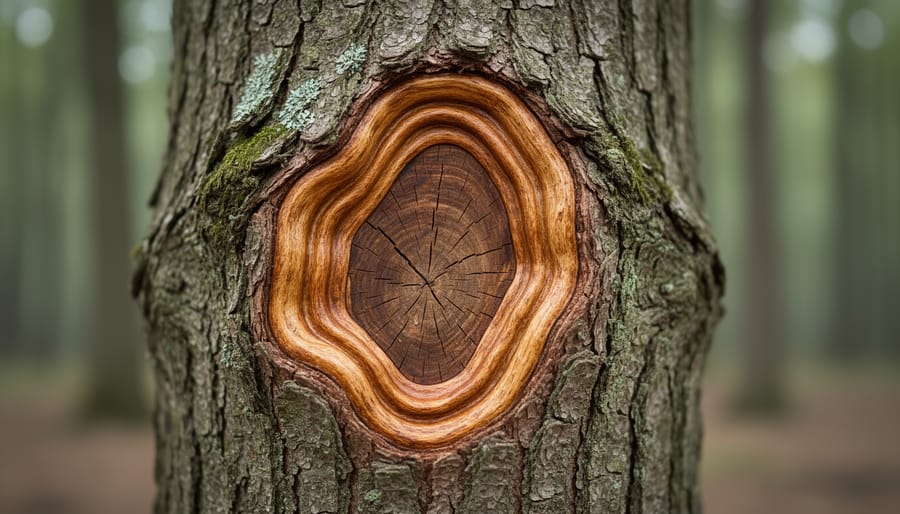
Trees have a remarkable defense system that’s completely different from how our bodies heal. When you cut your finger, new skin grows to replace what was damaged. Trees don’t work that way. Instead, they use a process called compartmentalization, where they essentially wall off the wounded area and grow around it. Think of it as building a fortress around the damage rather than repairing it.
This defense mechanism, known as CODIT (Compartmentalization of Decay in Trees), happens in four distinct barriers. When a tree is wounded, it immediately begins producing chemical compounds that create walls around the damaged tissue. The CODIT model walls work in multiple directions: up and down the trunk, side to side, and inward from the bark. The strongest barrier forms between the old wood and new growth, which is why you’ll often see a wound that looks contained within an oval of new tissue over time.
Here’s what matters for your wound care approach: when left alone, a healthy tree will successfully compartmentalize most wounds within weeks to months, depending on the size. The tree forms new growth tissue called callus that gradually rolls over the edges of the wound. However, when wounds are treated incorrectly, especially when covered with wound dressings or paints, you can actually trap moisture and create an environment where decay fungi thrive behind the sealant. This undermines the tree’s natural barriers and can lead to more extensive internal rot than if you’d done nothing at all. Your job is to help the tree help itself, not to try healing it artificially.
When Tree Wounds Need Your Attention
Not every nick or scrape on your tree needs your intervention. Trees are remarkably resilient, and most minor wounds heal themselves through their natural compartmentalization process. However, certain situations do call for careful attention and proactive care.
Pay attention to wounds that meet these criteria:
- Large bark tears exposing more than a few inches of inner wood
- Storm damage that has split major limbs or cracked the trunk
- Broken branches hanging loose or creating jagged wounds
- Signs of disease or pest invasion around the wound area, such as oozing, discoloration, or insect activity
- Wounds on young trees, which have fewer resources to compartmentalize damage effectively
Location matters significantly. Wounds on the main trunk pose greater risk than those on outer branches, since trunk damage can compromise the entire tree’s vascular system. Wounds that encircle more than one-third of the trunk’s circumference deserve immediate attention.
Timing also plays a role in your response. Fresh wounds benefit from prompt cleaning to prevent infection, especially during the growing season when trees are actively moving nutrients and pathogens can spread quickly. For newly planted tree care vigilance is crucial since young trees lack the established root systems to recover from significant damage.
Small scratches, minor bark abrasions, and shallow cuts smaller than a coin can generally be left alone. The tree will handle these without your help, sealing them off as it grows.
Tools and Materials You’ll Need
You don’t need a garage full of equipment to care for tree wounds properly. Most homeowners can handle basic wound care with a few quality tools and some common household items.
Essential Tools for Basic Wound Care
Start with these fundamentals that cover most common situations:
- Sharp hand pruners for branches up to 3/4 inch diameter
- Bypass loppers for cuts between 3/4 inch and 1.5 inches
- Pruning saw for larger branches and clean trunk cuts
- Safety glasses to protect from falling debris
- Work gloves with good grip and forearm protection
- Rubbing alcohol or 10% bleach solution for tool sterilization
- Clean cloths or paper towels for wiping tools
Optional Items Worth Considering
As you gain experience or tackle larger projects, these additions prove helpful: pole saw for high branches without a ladder, dedicated spray bottle with sterilizing solution for quick tool cleaning between cuts, and a basic moisture meter if you’re monitoring wound healing over time.
Quality matters more than quantity. Invest in sharp pruning tools with replaceable blades rather than cheap models that crush instead of cut. Dull tools cause ragged wounds that heal slowly and invite infection. Your hand pruners should slice through green wood cleanly with one squeeze, not require sawing back and forth.
Beginners should start with good hand pruners and a folding pruning saw. These two tools handle about 80% of typical wound care situations. Add loppers when you’re ready to tackle thicker branches. Save specialized equipment like pole saws for when you’ve developed proper technique with ground-level work.
Safety First: What to Know Before You Start
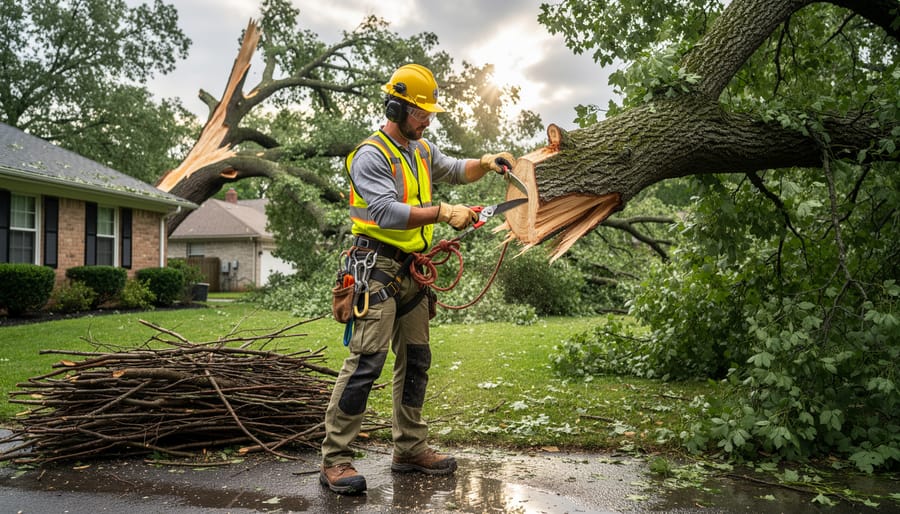
Before you touch any damaged tree, take a moment to assess whether the job is actually safe for you to handle. Working around trees involves real hazards that can cause serious injury if you’re not properly prepared.
Start by looking up. Power lines near tree branches are an absolute no-go zone for homeowners. Even branches that aren’t touching lines can conduct electricity if they’re close enough, and falling limbs can easily strike power lines during cutting. If your tree is anywhere near electrical wires, stop and call a professional arborist or your utility company.
Ladder work adds another layer of risk. You’ll need stable, level ground and a helper to steady the ladder. If you’re uncomfortable on a ladder or the wound is more than eight feet high, that’s a clear sign to hire help. Similarly, wounds requiring a chainsaw or involving branches thicker than your wrist typically exceed safe DIY territory.
Proper protective equipment isn’t optional. At minimum, wear safety glasses, sturdy gloves, long sleeves, and closed-toe boots. For larger jobs, add a hard hat and consider hearing protection if you’re using power tools. Our tree pruning guide covers additional equipment considerations for more involved cutting work.
Be honest about your physical capabilities and experience level. If the tree shows signs of instability (leaning, mushrooms at the base, extensive deadwood, cracks in the trunk), if you feel uncertain about the scope of work, or if the tree is valuable or large, calling a certified arborist isn’t admitting defeat. It’s smart stewardship that keeps both you and your tree safe.
Step-by-Step: Caring for Tree Wounds
Step 1: Assess the Damage
Stand back and look at the whole tree before you touch anything. A wound that seems manageable up close might be part of a larger pattern of decline. Check for multiple wounds, dead branches in the canopy, or lean that wasn’t there before.
Examine the wound itself. Is it deeper than the bark, exposing pale sapwood or darker heartwood? Note its size, wounds larger than three inches across or those that wrap more than one-third around the trunk need careful consideration. Location matters: wounds near the base threaten stability, while those on main scaffold branches affect structure.
Look for active bleeding, unusual discoloration, fungal growth, or insect activity around the edges. If the tree is already stressed, sparse leaves, dieback, or poor growth, even a modest wound becomes serious. When you see extensive decay, large cavities, or feel uncertain about the tree’s structural integrity, stop and call a certified arborist.
Step 2: Clean the Wound Area
Once you’ve assessed the damage, it’s time to clean the wound, but gentle is the keyword here. Use your pruning knife or hand pruners to carefully remove any loose, hanging bark or splintered wood. Work from the edges toward the center, taking only what comes away easily. Don’t cut into healthy tissue or peel back bark that’s still firmly attached; this causes more harm than good.
Clear away debris like dirt, sawdust, or broken twigs from the wound surface with a soft brush. If you’re moving between multiple wounds or trees, wipe your blade with rubbing alcohol between cuts to prevent spreading disease. Think of this as surgery for your tree, cleanliness matters, but overhandling doesn’t help healing.
Step 3: Make Clean Cuts When Necessary
Sometimes damaged branches or torn bark must be removed to help the tree heal properly. Start by examining the wound to determine what needs cutting, remove only tissue that’s truly damaged, hanging loosely, or creating a jagged edge that prevents clean compartmentalization. For small branches under an inch in diameter, a single clean cut with sharp hand pruners usually suffices.
When removing larger damaged branches, use the three-cut method to prevent bark tearing. Make your first cut on the underside of the branch, about 12-18 inches from the trunk, cutting roughly one-third through. Your second cut goes on top of the branch, slightly farther out from the first, cutting completely through until the branch falls. This leaves a manageable stub that won’t tear bark as it drops. The final cut removes this stub. Cut outside the branch collar that slightly swollen area where the branch meets the trunk, but not so far out that you leave a protruding stub. The collar contains specialized cells that compartmentalize decay, so preserving it is crucial for proper healing. Angle your cut parallel to the bark ridge running between branch and trunk, making it as smooth as possible without gouging into the collar itself.
Step 4: Shape the Wound (If Needed)
Most tree wounds don’t need shaping at all. Trees compartmentalize damage effectively without our intervention, and unnecessary cutting can actually slow healing. However, certain large wounds with ragged edges or torn bark may benefit from minimal smoothing to help the tree form clean compartment boundaries.
Consider shaping only when a wound has loose, hanging bark flaps that will die anyway, or when torn edges extend well beyond the actual damaged area. Use a sharp, sterilized knife to trim these loose sections back to living tissue. Make smooth cuts that follow the natural oval shape of the wound, never create sharp corners or geometric shapes that disrupt the tree’s natural barriers.
Keep cuts minimal and perpendicular to the bark surface. Remove only what’s clearly dead or torn, not healthy bark. The goal isn’t creating a perfect edge but removing obstacles to compartmentalization. For most backyard wounds under six inches, skip this step entirely and let the tree handle it.
Step 5: Leave the Wound to Heal Naturally
Here’s the thing most homeowners get wrong: doing nothing is actually the right move. After you’ve cleaned and shaped the wound, step back and let the tree do its job. Modern research shows that wound dressings, paints, and sealants don’t help trees heal, they often trap moisture and create perfect conditions for decay. Do not paint pruning wounds even though hardware stores still sell those products and your neighbor swears by them. Trees evolved to compartmentalize damage on their own, and that crusty callus tissue forming around the wound edges is exactly what you want to see. The exception? If you’re in an area with active oak wilt or a similar disease that spreads through fresh cuts, a temporary sealant applied immediately after pruning can block disease-carrying insects, but that’s a specific situation requiring local guidance, not standard practice.
Step 6: Monitor for Problems
After treating your tree wound, check it weekly for the first month, then monthly throughout the growing season. Look for new callus tissue forming around the wound’s edges, this raised, lighter-colored growth signals healthy compartmentalization. The wound should gradually darken and shrink as the tree walls it off.
Watch for trouble signs: oozing sap (especially foul-smelling), soft or discolored wood spreading beyond the original wound, mushrooms or fungal growth, sawdust near the wound indicating boring insects, or cracks expanding from the damaged area. Leaves on affected branches may wilt, yellow, or drop prematurely if the tree’s struggling.
If you spot concerning changes, photograph them to track progression. Some weeping is normal initially, but persistent problems warrant calling a certified arborist for assessment.
Special Cases: When to Use Wound Dressing
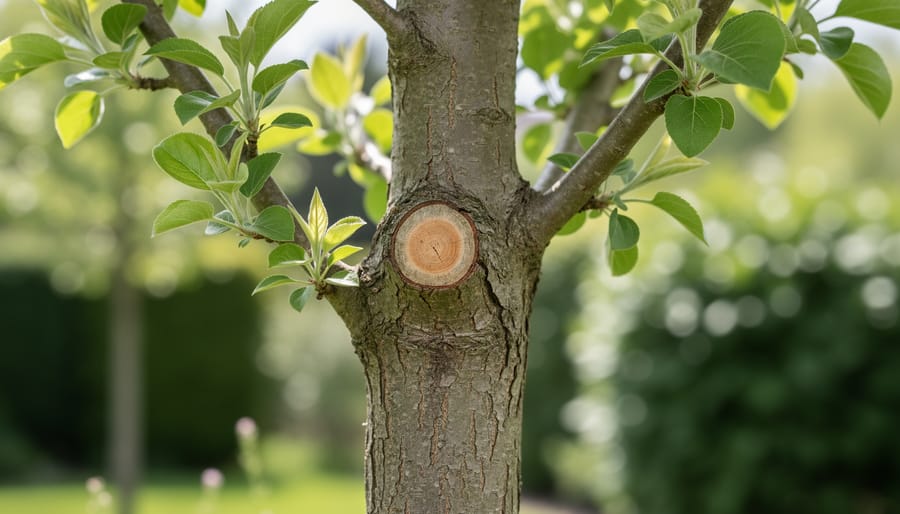
While modern tree care emphasizes natural healing, a few specific situations call for wound dressings. If you live in an oak wilt zone (primarily Texas, the Midwest, and mid-Atlantic states), applying a latex-based paint to fresh oak wounds during spring and early summer can prevent the spread of this deadly fungal disease. The beetles that carry oak wilt spores are attracted to the scent of fresh cuts, and a simple coating blocks their access during the high-risk months of April through June.
Similarly, if Dutch elm disease threatens your area and you’re pruning an elm, a wound dressing applied immediately after cutting can reduce infection risk during the beetle-active season. Some areas with fire blight problems also recommend protective treatments on fresh pruning cuts of susceptible fruit trees during wet spring weather.
The key word here is “fresh”, these dressings work only when applied within minutes of making the cut, before fungal spores or disease-carrying insects arrive. For most other situations and tree species, wound dressings do more harm than good by trapping moisture and slowing the tree’s natural compartmentalization process. When in doubt, contact a certified arborist familiar with your local disease pressures rather than applying treatments your tree doesn’t need.
Verification and Next Steps: How to Know Your Tree Is Healing
After caring for your tree’s wound, patience becomes your most important tool. Healing happens on the tree’s schedule, not yours, and knowing what to look for helps you rest easier.
Within the first few weeks, watch the wound edges for early signs of progress. You should notice the area drying out rather than staying wet or weeping sap. The exposed wood will darken and harden as it begins to dry, which is normal and healthy.
Over the following months, proper compartmentalization becomes visible through several encouraging signs:
- Callus tissue forming around the wound edges, appearing as raised, lumpy growth that gradually covers the damaged area
- No signs of decay, mushrooms, or persistent wetness in or around the wound
- Bark slowly integrating and growing inward from the edges toward the center
- Steady new growth appearing in the crown, showing the tree is directing energy to normal functions
Timeline expectations vary dramatically with wound size. A small branch wound might show significant callus formation within a single growing season, while a large trunk wound could take five to ten years to compartmentalize fully. Some extensive wounds never close completely but still compartmentalize successfully, with the tree thriving despite visible scars.
Seek additional help if you notice soft, punky wood developing in the wound, fungal growth appearing, bark peeling back further from the edges, or the tree showing overall decline like dying branches or sparse foliage. A certified arborist can assess whether intervention is needed.
Check your tree seasonally during its first year post-injury, then annually thereafter. Trees are remarkably resilient. Most wounds, when left to heal naturally and monitored appropriately, result in healthy, thriving trees that live full lifespans.
Expert Insights: A Conversation with a Certified Arborist
I spoke with Michael Chen, an ISA Certified Arborist with 18 years of experience managing urban tree health programs, about what he sees homeowners getting wrong most often.
What’s the biggest mistake you encounter?
“Hands down, it’s people rushing to seal wounds with paint or tar. I’ll get calls about a damaged tree, and when I arrive, it’s already coated in black goop. That actually traps moisture and fungi against the wood, creating the exact problem they’re trying to prevent. Trees have been healing themselves for millions of years without our help.”
What surprises people most about tree healing?
“How fast it actually happens when we don’t interfere. I’ve seen six-inch wounds on healthy oaks start forming new tissue within weeks. The tree knows what to do. Our job is just to keep things clean and get out of the way. This applies whether you’re dealing with weeping cherry care or maintaining shade tree health the principles remain the same.”
Your top tip for homeowners?
“Sharp tools and clean cuts. A ragged wound from dull shears does far more harm than the original damage. Invest in quality pruning tools and keep them clean. And honestly? Know when to step back. If you’re on a ladder looking at a wound near power lines, or the branch is bigger than your arm, call someone like me. Trees are forgiving, but gravity isn’t.”
Common Questions About Tree Wound Care
Homeowners often have similar questions when they’re caring for wounded trees. Here are the answers to concerns we hear most often, based on current arboriculture best practices.
Should I use tree wound paint or sealant?
In most cases, no. Modern research shows that wound dressings can actually trap moisture and decay organisms against the wood, interfering with the tree’s natural compartmentalization process. The exceptions are oak wilt prevention in high-risk areas or specific fungal diseases your local extension office recommends treating.
How long does it take for a tree wound to heal?
Small wounds (under two inches) typically show visible compartmentalization within one growing season, while larger wounds can take several years to fully wall off. The tree isn’t actually “healing” in the human sense but rather isolating the damaged tissue and growing new wood around it.
Can a tree recover from really large wounds?
Yes, many trees survive and thrive despite substantial wounds, especially if the damage affects less than one-third of the trunk’s circumference. Trees are remarkably resilient. The key factors are the tree’s overall health, species characteristics, and whether the wound becomes infected.
What about wounds near the ground or at the base?
Ground-level wounds deserve extra attention because they’re vulnerable to soil-borne pathogens and may compromise structural stability. Keep the area clean, ensure good drainage around the base, and monitor closely for signs of rot or fungal growth.
When is a tree beyond saving?
If more than 50 percent of the trunk circumference is damaged, the main trunk is split or cracked through, or the tree shows extensive decay in the central heartwood, it may not be salvageable. A certified arborist can assess whether the tree poses a safety risk and should be removed.
Do different tree species heal at different rates?
Absolutely. Fast-growing species like willows and poplars compartmentalize wounds more quickly than slow-growing trees like oaks or hickories. Conifers generally seal pitch over wounds faster than hardwoods but may take longer to fully compartmentalize the damage internally.
Remember that every tree and wound is unique. What looks alarming today might compartmentalize successfully over the next few seasons, while a small wound on a stressed tree could lead to bigger problems. When you’re uncertain, taking photos over time helps you track progress and gives an arborist useful information if you need to consult one later.
Trees are remarkably resilient when given the right support. By understanding how they naturally compartmentalize damage and avoiding outdated practices like wound sealants, you’re working with your tree’s biology rather than against it. Most wound care situations are well within reach for homeowners willing to follow proper techniques and safety precautions.
The key is knowing your limits. Clean cuts on smaller branches? You’ve got this. Large wounds, unstable limbs, or work near power lines? That’s when calling a certified arborist makes sense. There’s no shame in recognizing when expertise and specialized equipment will serve your tree better than a DIY approach.
Remember, you’re not just treating a wound, you’re giving a living organism the best chance to thrive for decades to come. Every careful cut, every properly cleaned wound, every decision to leave nature’s healing process undisturbed contributes to a healthier landscape. Your trees have survived storms, seasons, and centuries of challenges. With your informed care, they’ll continue standing strong, providing shade, beauty, and habitat for generations. That’s stewardship worth taking pride in.