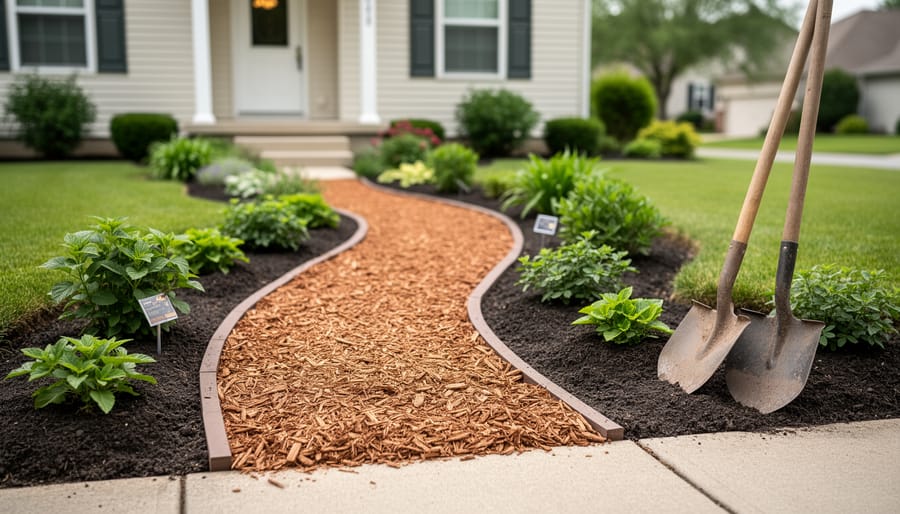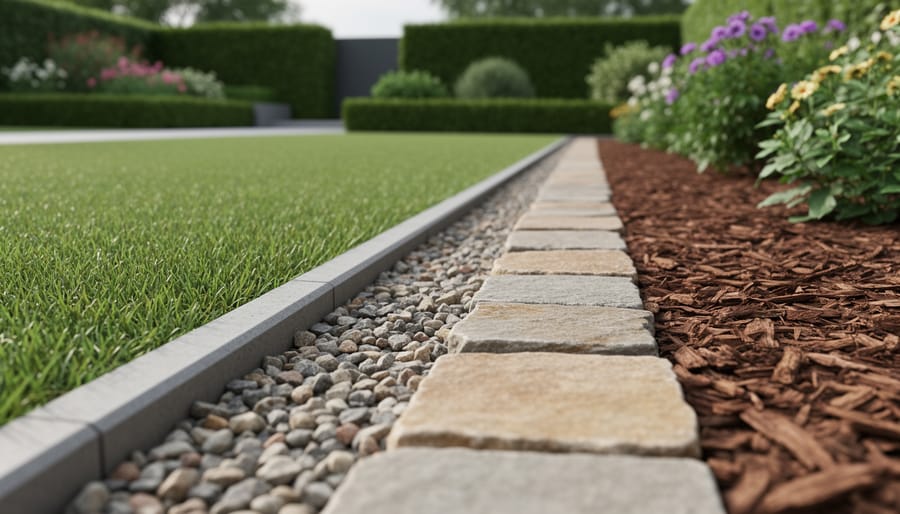
Hardscape edging transforms garden beds from floppy, grass-invaded disappointments into crisp, professional-looking borders that last for years with minimal upkeep. Unlike flexible plastic strips that pop out of the ground or mulch that constantly needs refreshing, permanent edging materials like stone, brick, concrete, and metal create a physical barrier that keeps lawn out, mulch in, and mowing simplified. The right choice depends on your budget (which ranges from about $2 per linear foot for basic concrete pavers to $15 or more for natural stone), your DIY comfort level, and the overall style of your landscape.
Most homeowners tackle this project during the planning stage after they’ve mapped out beds but before investing heavily in plants and soil amendments. Smart timing matters because installing edging later means disturbing established roots and potentially redoing irrigation lines. The good news? Nearly half of these options work beautifully as DIY weekend projects if you’re comfortable with digging, leveling, and a bit of problem-solving. The rest either require specialized tools or benefit significantly from a pro’s experience with grading and drainage.
We’ve gathered twelve distinct hardscape edging approaches that span traditional and contemporary aesthetics, each with enough installation insight to help you decide whether to grab your shovel or your phone. You’ll also find guidance from a landscape designer who’s seen what holds up and what fails after five years of freeze-thaw cycles and enthusiastic string trimmers.
How We Selected These Hardscape Edging Ideas
We didn’t just throw together a random collection of border materials. Each hardscape edging idea in this guide earned its place by meeting specific criteria that matter to real gardeners tackling real projects. Whether you’re planning your first garden border or you’ve installed dozens, these standards ensure you’re looking at options worth your time and money.
Here’s what every idea on our list had to deliver:
- Durability that stands up to weather, foot traffic, and freeze-thaw cycles without constant repairs
- Ease of installation, with clear paths for both confident DIYers and those who prefer professional help
- Cost-effectiveness across multiple price points, from budget-friendly to premium investment pieces
- Design flexibility to complement everything from cottage gardens to modern minimalist landscapes
- Environmental impact, considering both material sourcing and long-term sustainability
We also factored in availability. A stunning edging material that you can’t actually buy in North America doesn’t help you finish your project. Each option here is accessible through local suppliers, big-box stores, or specialized landscape centers, though some may require more hunting than others.
The mix intentionally spans skill levels. Some installations require nothing more than a weekend and basic tools. Others demand specialized equipment or professional expertise. We’re upfront about which is which, because the last thing you need is to start a project only to discover it’s beyond your current abilities or budget halfway through.
1. Natural Stone Edging for Timeless Elegance
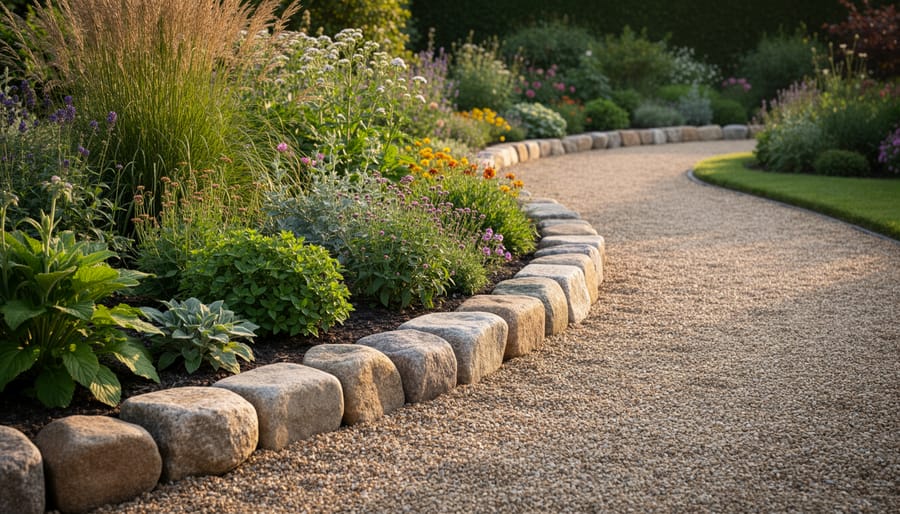
Natural stone brings an organic sophistication to garden borders that synthetic materials simply can’t match. Flagstone, limestone, and fieldstone each offer distinct personalities, flagstone delivers flat, stackable surfaces perfect for clean lines; limestone provides warm, neutral tones that soften over time; fieldstone gives you irregular shapes that create wonderfully textured, cottage-style edges.
The beauty of stone edging lies in its permanence. These materials won’t rot, fade, or crack from UV exposure, and they actually improve with age as moss and patina develop character. For installation, you have two approaches: dry-stacked or mortared. Dry-stacking works brilliantly for informal gardens, simply dig a shallow trench, add 2-3 inches of compacted gravel for drainage, then nestle stones firmly against each other. This method allows flexibility if you ever want to rearrange borders and permits better water drainage.
Mortared stone creates more formal, fixed borders that resist shifting in freeze-thaw cycles. You’ll need a solid concrete footing (4-6 inches deep) and masonry skills to point joints cleanly. This technique suits estate gardens and high-traffic areas where stability matters most.
When selecting stone, visit a local quarry if possible. Seeing full pallets helps you understand color variation, and buying locally reduces transportation costs while supporting regional stone industries. Plan on 15-20% overage for cuts and breakage, stone isn’t forgiving when you miscalculate quantities.
2. Brick Borders for Classic Charm
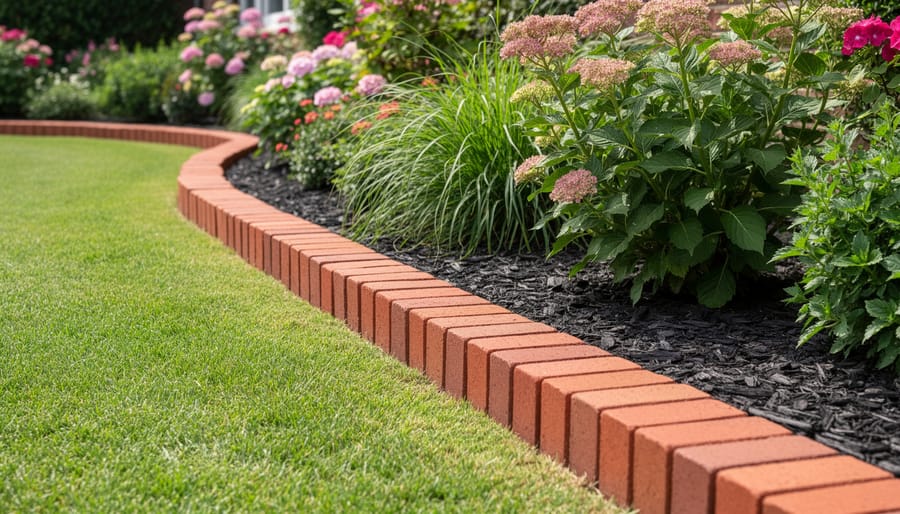
Brick edging brings a warmth and structure to garden beds that few materials can match. Whether you’re drawn to the formal look of a Victorian-era garden or prefer something more relaxed, brick adapts beautifully to both traditional and modern landscapes.
The three most popular patterns each create a distinct visual effect. Soldier course, where bricks stand vertically in a row, gives you crisp, clean lines perfect for straight edges and formal beds. Running bond, with bricks laid horizontally in a staggered pattern, offers classic appeal and exceptional stability. Basket weave, alternating pairs of horizontal and vertical bricks, adds textural interest and works wonderfully for wider borders.
Material choice matters more than many gardeners realize. Clay bricks rated for outdoor use (SW grade) resist freeze-thaw damage far better than standard building bricks. Reclaimed bricks deliver instant character but inspect them carefully for crumbling mortar and significant chips that could shorten their lifespan.
Proper installation starts below ground. Excavate to accommodate three to four inches of compacted crushed stone base, then add a one-inch sand layer for final leveling. This foundation prevents the shifting and sinking that plague quick-and-dirty installations. Set each brick firmly, checking frequently with a level, and sweep fine sand into joints to lock everything in place. For curves, cut bricks with a masonry saw rather than forcing whole bricks into awkward angles, the extra effort shows.
3. Concrete Pavers for Versatile Design
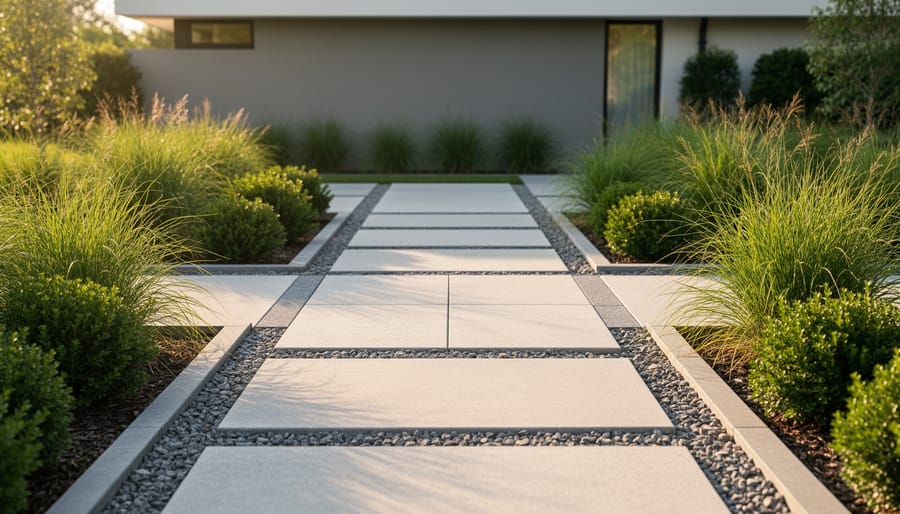
Concrete pavers deliver remarkable flexibility for garden edging, available in dozens of shapes, from traditional rectangles and squares to interlocking hexagons and irregular flagstone-look pieces. You’ll find colors ranging from natural gray and tan to deep charcoal, terracotta, and even multicolor blends that mimic natural stone at a fraction of the cost.
The beauty of pavers lies in their modular nature. Mix sizes within the same color family for visual interest, or create geometric patterns like herringbone or basketweave along straight borders. For curves, use smaller pavers that adjust more easily to organic shapes, or select fan-pattern kits designed specifically for rounded edges.
Installation starts with excavation: dig a trench 6-8 inches deep along your border line. Add 4 inches of compacted gravel base for drainage and stability, then top with 1-2 inches of leveling sand. Screed the sand smooth with a straight board, then set pavers edge-to-edge, tapping each with a rubber mallet to nestle it firmly. Leave tiny gaps (about 1/8 inch) between units.
Once your edging is laid, sweep polymeric sand across the surface to fill joints. This specialized sand hardens when misted with water, locking pavers together and resisting weeds. The result is a crisp, professional-looking border that stays put through seasons of freeze-thaw cycles without shifting.
4. Poured Concrete Curbing for Seamless Lines
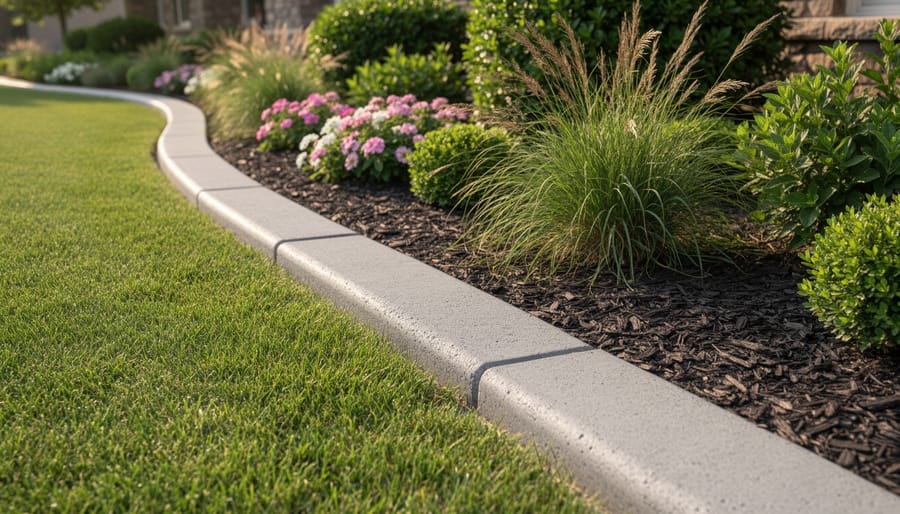
Poured concrete curbing creates smooth, flowing borders that follow garden curves without visible joints or seams. A professional crew extrudes mixed concrete through specialized equipment, producing continuous ribbons that can be shaped, stamped, and colored to match your landscape vision. The result looks custom-built because it is, each installation is unique to your space.
You’ll find concrete curbing offered in dozens of colors, from earth tones that blend with natural stone to vibrant hues that make bold statements. Stamped patterns mimic brick, stone, or decorative tile, giving you high-end looks at mid-range prices. The machine-applied technique ensures consistent height and width, eliminating the wobbly lines that sometimes plague DIY edging projects.
Realistically, this is a job for professionals. The equipment alone costs thousands, and achieving smooth results requires practiced technique. Most contractors complete typical residential projects in a few hours, handling site prep, forming, pouring, and finishing in one visit.
Expect concrete curbing to last 15-20 years with minimal upkeep, just occasional power washing and resealing every few years. While you’ll pay more upfront than for loose pavers, the seamless aesthetic and hands-off installation make poured curbing worth considering for gardeners who want polished results without the DIY learning curve.
5. Steel Edging for Contemporary Clean Lines
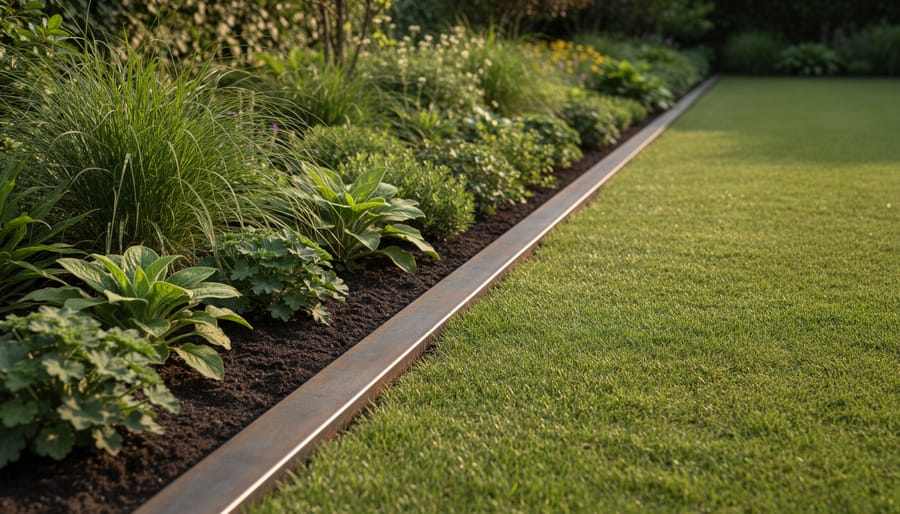
Steel edging delivers that crisp, architectural look modern gardens crave. You’ll find two main options: Corten steel develops a protective rust patina that adds warm tones while resisting further corrosion, and galvanized steel maintains its silvery finish for a cooler aesthetic.
The installation is surprisingly straightforward. Steel edging typically comes in long, thin strips with a bottom flange that anchors into the ground. Dig a narrow trench slightly deeper than the flange height, position your edging strip along your desired border line, and backfill firmly while keeping the top edge level. Use stakes every three feet for extra stability in loose soil.
This material excels in contemporary landscapes where you want separation without visual weight. The thin profile practically disappears, letting your plants and hardscape take center stage. I’ve seen steel edging work beautifully defining geometric gravel patios, separating minimalist plantings from mulched areas, and creating sharp lines between different ground cover types.
One practical note: steel conducts heat, so avoid placing it where intense sun might scorch adjacent plant roots. In shaded or partially shaded applications, you’ll get years of crisp definition with almost no maintenance required.
6. Granite Cobblestones for Old-World Character
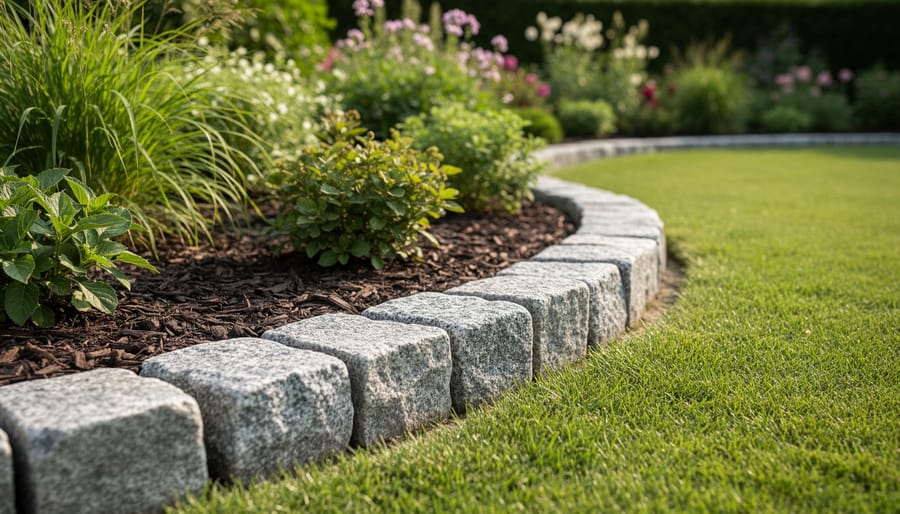
Granite cobblestones bring centuries-old charm to modern gardens, creating borders that look like they’ve weathered decades of use. These dense, durable stones, available as reclaimed pieces pulled from historic streets or freshly quarried cubes, resist frost, foot traffic, and time better than almost any other edging material. Reclaimed cobbles offer authentic patina and character marks, while new granite provides uniform sizing that simplifies installation.
Before setting cobblestones, excavate a trench four to six inches deep and slightly wider than your stones. For sand-set installations, fill the trench with three inches of compacted gravel topped by one to two inches of leveling sand.
Place cobbles tightly together or with quarter-inch gaps for a looser, more rustic look. Use a rubber mallet to tap each stone level with its neighbors, checking frequently with a straight board laid across the top. For high-traffic areas or steeper slopes, set cobbles in a mortar bed over the compacted base instead. Mix one part Portland cement to three parts sand, spread a two-inch layer, and press stones firmly into place.
Granite’s natural color variation, from speckled gray to warm pink tones, means each border develops its own personality. Expect to pay two to four dollars per cobble for reclaimed stones or slightly more for new cuts, making this a mid-range investment that delivers unmatched durability and timeless aesthetic appeal.
7. Railroad Ties and Timber Edging for Rustic Appeal
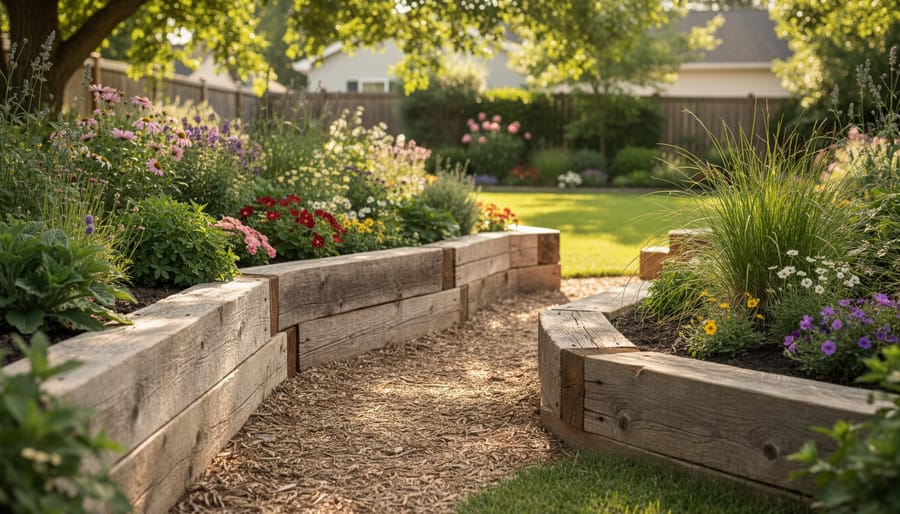
Railroad ties and timber edging bring warmth and rustic character to garden borders, especially in cottage gardens, vegetable plots, or woodland settings. These hefty wood elements excel at creating raised beds and defining different levels in sloped yards.
For safety and longevity, skip used railroad ties, they’re often saturated with creosote, a toxic preservative that can leach into soil and harm plants. Instead, choose naturally rot-resistant woods like cedar, redwood, or black locust. These species last 10-15 years without chemical treatment and smell wonderful when you’re working around them. If you prefer treated lumber, specify ground-contact-rated timber free from arsenic-based preservatives.
Installation requires anchoring to prevent shifting. Dig a trench 2-3 inches deep for the bottom timber to sit partially below grade. Drill pilot holes every 3-4 feet, then drive 18-24 inch rebar stakes through the wood deep into the soil. For stacked borders, offset the joints like brickwork and secure each layer with galvanized landscape spikes or long screws driven at angles.
The wood will weather to silvery gray unless you apply a natural wood sealer every few years. That patina actually enhances the rustic look, blending timber borders beautifully into naturalistic landscapes.
8. Decorative Aggregate and Gravel Borders
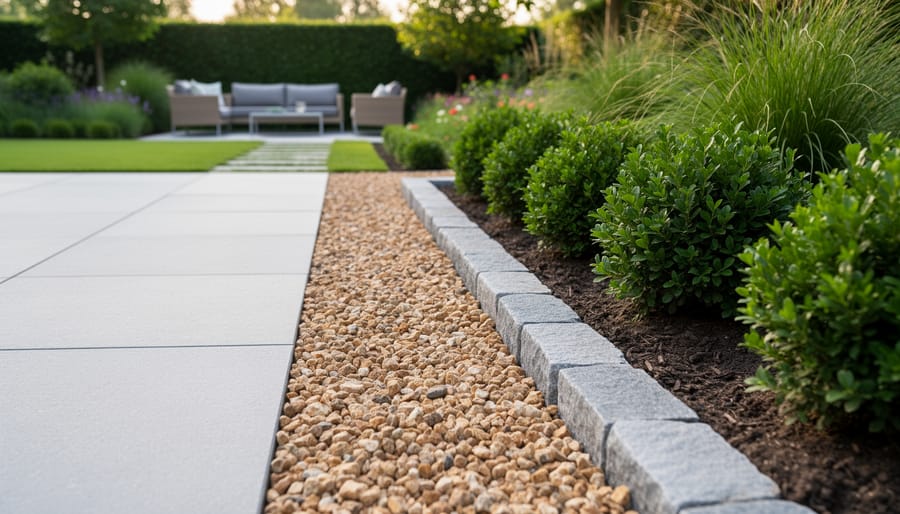
Decorative aggregates offer a softer, more organic alternative to rigid edging materials while still providing clear definition between garden beds and lawns. River rock, pea gravel, and crushed stone create gentle transitions that complement naturalistic planting schemes and cottage-garden styles.
The key challenge with loose materials is containment. Without a barrier, stones gradually migrate into adjacent areas through foot traffic, mowing, and weather. Install a hidden metal or plastic edge along the perimeter, sinking it just below the gravel surface to remain invisible while preventing spread. For a 3-inch gravel border, dig down 4 inches to accommodate landscape fabric beneath, which suppresses weeds while allowing drainage.
River rock (1-3 inches) works beautifully along pathways and around specimen plants, its smooth, rounded shape comfortable underfoot. Pea gravel creates a classic crunch along walkways and fills gaps between stepping stones elegantly. Crushed stone, with its angular edges, locks together better on slight slopes and provides a firmer walking surface than rounded options.
Layer aggregate 2-3 inches deep for adequate coverage. Thinner applications let weeds poke through and expose fabric, while deeper layers feel unstable and costly. Match stone color to your home’s exterior or existing hardscape for visual cohesion.
9. Composite and Recycled Plastic Edging
Composite and recycled plastic edging has come a long way from the flimsy strips of decades past. Today’s products combine recycled plastics with wood fibers or other materials to create surprisingly durable borders that won’t rot, splinter, or require painting. They’re a smart choice if you’re looking to reduce your environmental footprint while keeping installation simple.
These edging systems typically feature interlocking sections or stakes that push directly into the soil, making them ideal for curved beds and flowing garden lines. Most types are flexible enough to bend around organic shapes without cutting or special tools. Installation takes minutes rather than hours: just position, stake, and you’re done.
The environmental story is compelling. Many brands use post-consumer plastics diverted from landfills, and the products themselves can last 20+ years without deteriorating. You’re essentially creating a permanent border from materials that would otherwise pollute.
Aesthetically, though, they require careful consideration. While newer textured finishes mimic natural materials more convincingly than earlier versions, composite edging still reads as manufactured up close. It works best in casual cottage gardens or utility areas where function trumps formality. For formal beds or high-visibility borders, you might find natural materials more satisfying visually, even if they’re less sustainable.
10. Boulder and Rock Edging for Natural Landscapes
Large boulders and substantial rocks create dramatic, naturalistic edges that work beautifully in informal garden designs. Unlike smaller stones that line a path, boulders make a statement, they anchor plantings, define zones, and add instant maturity to landscapes.
The key to successful boulder edging is making it look like the stones belong there. Bury at least one-third of each boulder so it appears to be emerging from the ground rather than sitting on top. This simple technique mimics how rocks naturally weather and settle over time. Cluster boulders in odd-numbered groups of three or five, varying their sizes to avoid a uniform, artificial appearance.
Scale matters tremendously with boulder edging. In smaller gardens, use moderately sized rocks (12 to 24 inches diameter) to avoid overwhelming the space. Larger properties can handle true statement boulders of 36 inches or more. Consider sight lines from your home and patio, the best boulder placements become focal points that draw the eye through the landscape.
Space boulders irregularly rather than in a straight line. Allow plants to spill between rocks, softening the hardscape with foliage. Native grasses, groundcovers, and low-growing perennials blur the boundary between stone and soil, strengthening that naturalized look.
11. Glass Block Edging for Unique Style
Glass blocks bring an unexpected contemporary twist to garden edging, catching and refracting sunlight in ways that stone and metal simply can’t. These translucent cubes create luminous borders that glow during the day and can be backlit at night for dramatic effect.
Installation requires a stable foundation since glass blocks are heavier than they appear. Dig a four-inch trench, fill with compacted gravel, and set blocks in landscape adhesive or outdoor construction adhesive designed for glass. Stack them in running bond or geometric patterns, leaving slight gaps for drainage. Seal joints with clear silicone caulk to prevent moisture infiltration while maintaining visibility.
This option works best in modern or eclectic garden designs where visual surprise is welcome. Consider glass block edging along pathways that receive strong morning or afternoon sun, around water features where light reflection multiplies the effect, or as accent borders in courtyard gardens. The material’s reflective quality helps brighten shaded areas naturally.
Mix frosted and clear blocks for texture variation, or choose colored glass to complement your planting palette. While not traditional, glass edging creates unforgettable garden moments.
12. Interlocking Concrete Blocks for DIY-Friendly Projects
Interlocking concrete blocks offer one of the most beginner-friendly approaches to hardscape edging, especially when you need a little extra height or want to create a raised border. These systems snap or stack together without mortar, relying on their weight and interlocking design for stability.
The beauty here is simplicity. Most systems feature a lip on the back that locks into the course below, automatically setting the correct setback for a stable wall. You can build borders up to two or three feet high without special tools or masonry skills. Just excavate a level trench, add four to six inches of compacted gravel base, and start stacking. Check level frequently as you go.
These blocks come in various textures and colors, from smooth contemporary finishes to split-face stone looks. The wider the base of your blocks, the more stable your border will be, particularly if you’re creating any sort of retaining function. For borders taller than eighteen inches or dealing with significant soil pressure, you’ll want blocks specifically designed as retaining wall systems, which often include pinning options.
The modular nature makes curved designs surprisingly manageable. Gentle curves work with most systems by varying the spacing slightly between blocks. The result? Professional-looking raised borders without the professional price tag or skill requirement.
Expert Insights: Interview with Landscape Designer Maria Chen
What are the biggest hardscape edging trends you’re seeing in 2026?
“We’re definitely moving toward more natural, organic looks,” Maria explains. “Clients want hardscape that doesn’t fight with the landscape, they’re choosing weathered materials like Corten steel that ages beautifully and irregular stone that mimics what you’d find in nature. The Instagram-perfect, overly manicured look is fading. People want their gardens to feel lived-in and authentic.”
What installation mistakes do you see most often?
Maria doesn’t hesitate: “Skipping the base prep. I’ve rescued so many edging projects where homeowners laid materials directly on soil. Six months later, everything’s heaved and shifted. You need at least three to four inches of compacted gravel base for stability, especially in freeze-thaw climates. The other big one? Not accounting for drainage. Water needs somewhere to go, or it’ll pool against your edging and undermine everything.”
How do you match edging materials to garden styles?
“For cottage gardens, I love reclaimed brick, it has that softness and history. Modern landscapes call for clean steel or poured concrete with crisp lines. In native plantings, I’ll use local fieldstone or boulders that echo the regional geology. The edging should feel like it belongs there naturally.”
She shares a favorite project: “Last year, we installed granite cobblestone edging around a client’s herb garden. She wanted something that referenced her grandmother’s Italian garden. We set the stones slightly irregular, not perfectly aligned, and planted creeping thyme in the gaps. Now it looks like it’s been there for decades.”
Essential Installation Tips for Success
Regardless of which material you choose, a few universal principles make the difference between edging that lasts decades and a border that shifts or settles within a season.
Start by excavating to the right depth. Most hardscape edging needs a trench at least 6 inches deep to sit below the frost line in moderate climates and prevent heaving. For areas with deep freezes, go 8 to 10 inches. Remove all grass, roots, and organic matter from the trench bottom, then compact the soil firmly with a hand tamper. This stable foundation keeps your edging from sinking unevenly over time.
Next, lay a proper base. A 2- to 4-inch layer of crushed gravel or stone dust provides drainage and a level setting bed. Compact this base in 2-inch lifts rather than all at once. For mortared installations, a concrete footing beneath the base adds critical stability. Skip this step with flexible materials like steel or composite edging that can handle minor ground movement.
Drainage matters more than most beginners realize. Always slope your edging slightly away from buildings, typically a 2 percent grade or about a quarter-inch per foot. This subtle angle directs water where you want it rather than pooling against foundations or drowning plant roots.
As for tools, keep a few essentials on hand: a sturdy spade for clean cuts, a hand tamper or plate compactor for base prep, a rubber mallet for setting pavers without chipping, and a 4-foot level for checking alignment as you work. A wheelbarrow, mason’s line for straight edges, and work gloves round out a solid DIY toolkit that handles most edging projects without specialized equipment.
You’ve explored twelve distinct hardscape edging options, each with its own character and installation requirements. The best choice for your garden isn’t dictated by trends or what your neighbor installed, it’s the one that matches your aesthetic vision, fits your budget, and aligns with your DIY comfort level. Whether you’re drawn to the timeless elegance of natural stone, the crisp modernity of steel, or the accessible simplicity of interlocking blocks, you now have the knowledge to move forward with clarity.
How much should I budget for hardscape edging?
Expect to spend anywhere from $3 to $30 per linear foot depending on material choice, with DIY gravel and composite options at the lower end and mortared natural stone or poured concrete at the higher end. Labor costs can double or triple material expenses if you hire professionals.
How long does hardscape edging typically last?
Natural stone, brick, and concrete pavers can last 50+ years with proper installation, while steel edging typically performs well for 20-30 years. Timber and composite materials generally need replacement every 10-20 years depending on climate and maintenance.
Do I need a permit to install garden edging?
Most simple border edging projects don’t require permits, but check with your local building department if you’re creating retaining walls over 24 inches high or doing significant excavation near property lines.
What maintenance does hardscape edging require?
Most stone and concrete options need little more than occasional cleaning and weed removal from joints. Steel may need rust treatment, timber requires periodic sealing, and loose aggregate borders need replenishing every few years.
Don’t let perfection paralyze you. Start with one bed, one border, one section of your yard. The satisfaction of seeing a clean, defined edge transform a garden space is immediate and remarkably rewarding. Your plants will look more intentional, your lawn maintenance will become easier, and your outdoor spaces will carry a sense of completion they’ve been missing. Pick your material, gather your tools, and give your garden the frame it deserves.