Budget landscaping costs typically range from $1,500 to $5,000 for a small to medium-sized yard, though you can bring that number down significantly with the right approach. The difference between a $500 DIY weekend project and a $10,000 professional overhaul comes down to three main factors: how much labor you’re willing to tackle yourself, the materials you choose, and whether you tap into available grants and rebates.
The good news? You have far more control over landscaping costs than you might think. While a professional designer might steer you toward premium pavers at $15 per square foot, mulch paths at $2 per square foot deliver similar curb appeal for a fraction of the price. Choosing native plants over exotic specimens cuts both your initial investment and long-term maintenance costs. Even the timing matters: purchasing perennials at end-of-season sales can save you 50% or more.
What really shifts the budget in your favor is understanding where to invest your money and where to save it. Some tasks, like grading for drainage or installing retaining walls, genuinely benefit from professional expertise. Others, like spreading mulch, planting shrubs, or building simple garden beds, are perfect weekend projects that require more sweat than skill.
This guide breaks down exactly what drives landscaping costs up or down, shows you the real numbers behind common projects, and reveals often-overlooked funding opportunities that can offset your expenses. Whether you’re working with $300 or $3,000, you’ll learn how to maximize every dollar while creating outdoor space you’ll actually enjoy.
What You’ll Actually Pay for Budget Landscaping
Small Yard Projects (Under $1,000)
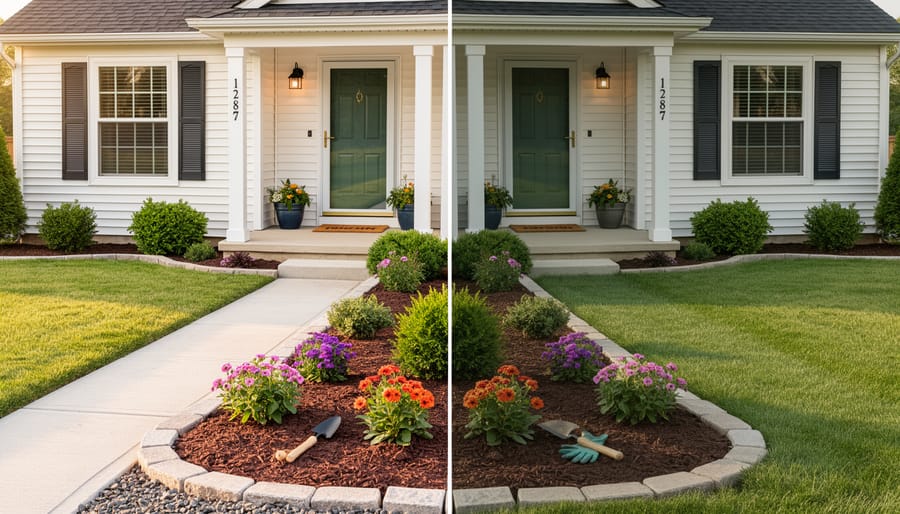
For small yards under 1,000 square feet, you can make noticeable improvements for $300 to $1,000, depending on your starting point and ambitions. At the lower end, $300 gets you fresh mulch for existing beds, a dozen native perennials in 4-inch pots, and basic edging materials. Step up to $600, and you can add a simple gravel pathway, double your plant count, or tackle soil amendments for healthier growth.
The sweet spot for most small-yard refreshes sits around $800. That budget covers two to three cubic yards of quality mulch, 20-25 plants chosen strategically for year-round interest, landscape fabric or cardboard for weed suppression, and either basic edging or enough gravel for a modest walkway. You won’t transform a barren lot into a lush garden at this price point, but you’ll create defined beds, eliminate muddy patches, and establish the bones of an attractive landscape that fills in over time as plants mature.
Medium Yard Transformations ($1,000-$3,000)
A $1,000, $3,000 budget transforms the typical suburban yard, picture 2,000 to 3,000 square feet, into a cohesive landscape with real curb appeal. This range covers a mix of foundation plantings (shrubs, perennials, groundcovers) strategically placed around your home, plus a focal feature like a small patio area, raised beds, or a defined border garden. You’ll spend roughly $400, $800 on plants if you buy smaller sizes and native species, another $300, $600 on mulch and soil amendments to prep beds properly, and $200, $500 on basic materials for one hardscape element, gravel for a simple seating area, timbers for raised beds, or stepping stones for a pathway.
If irrigation is a priority, a DIY drip system for targeted beds runs $150, $300 in parts. The rest goes toward edging, tools you don’t already own, and perhaps a half-day of professional grading or consultation to ensure drainage works before you plant. Phase the work over two seasons if cash flow is tight: tackle beds and plantings in spring, add the hardscape feature in fall.
Larger Property Budgets ($3,000-$5,000+)
Larger properties demand strategic thinking rather than a bigger checkbook. The $3,000-$5,000+ budget tier lets you tackle meaningful improvements on yards exceeding 2,000 square feet, but success depends on choosing your battles wisely. Focus first on the areas people actually see and use, the front entry, the view from your main windows, the backyard entertaining space, and leave peripheral zones for future phases.
A phased approach transforms intimidating large-scale projects into manageable chunks. Year one might establish framework plantings and critical pathways. Year two could add garden beds near the patio. Year three extends improvements outward. This strategy spreads costs across multiple seasons while giving earlier plantings time to fill in, reducing the total number of plants you’ll ultimately need.
Smart substitutions scale beautifully on bigger properties. Seed mixes replace expensive sod for large lawn areas. Native shrubs bought in one-gallon pots instead of five-gallon sizes reach mature size within two years at a quarter of the cost. Mulched paths delay permanent hardscaping until you’ve confirmed traffic patterns. One client transformed a half-acre yard over three years by concentrating 60% of each year’s budget on a single high-visibility zone while maintaining the rest with low-cost groundcovers and mulch.
Where Your Landscaping Dollar Goes
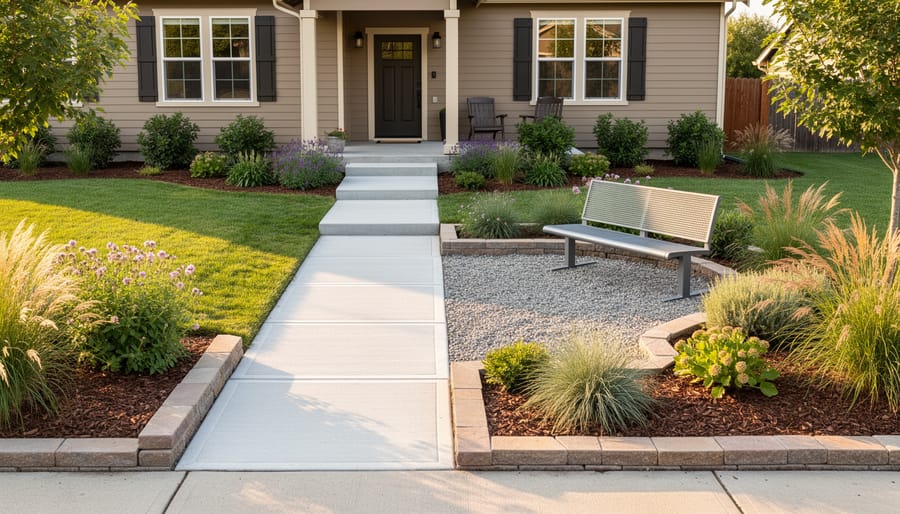
Understanding how your budget landscaping dollars distribute across different expense categories helps you plan smarter and spot opportunities to save. A typical $2,000 budget project breaks down quite differently than you might expect, with some categories eating more of your funds than others.
| Expense Category | Typical % of Budget | Cost Range ($2,000 project) |
|---|---|---|
| Plants and Materials | 35-45% | $700-$900 |
| Soil and Amendments | 20-25% | $400-$500 |
| Hardscaping Elements | 15-25% | $300-$500 |
| Tools and Equipment | 10-15% | $200-$300 |
| Professional Help | 0-15% | $0-$300 |
Plants and materials claim the biggest chunk because they create the visual impact you’re after. This category includes everything from perennials and shrubs to mulch, compost, and decorative stones. You can shift these percentages dramatically by starting plants from seeds, accepting divisions from neighbors, or choosing smaller container sizes that fill in over time.
Soil and amendments deserve more budget than most beginners allocate. Good soil is the foundation that determines whether your plants thrive or just survive. Skimping here means replacing dead plants later, which costs more than doing it right initially. A cubic yard of quality compost runs $30-50, and most projects need several yards to properly amend existing soil.
Hardscaping elements like edging, small pathways, or a simple patio border add structure and reduce maintenance. Even budget-friendly materials such as gravel, recycled brick, or wood chips require more investment than expected once you account for base materials and transportation.
Tools and equipment costs vary wildly based on what you already own. If you’re starting from scratch, basic tools like a quality spade, garden rake, and wheelbarrow are worthwhile investments that last decades. Renting expensive equipment for one-time tasks (a sod cutter or power tiller) makes more financial sense than buying.
Professional help sits at zero for pure DIY projects, but allocating even a small amount for expert advice on design or tricky installations can prevent expensive mistakes. A two-hour consultation with a landscape designer costs $100-200 and might save you from planting shade lovers in full sun or creating drainage problems.
What Drives Landscaping Costs Up or Down
Plant Selection and Sourcing Strategy
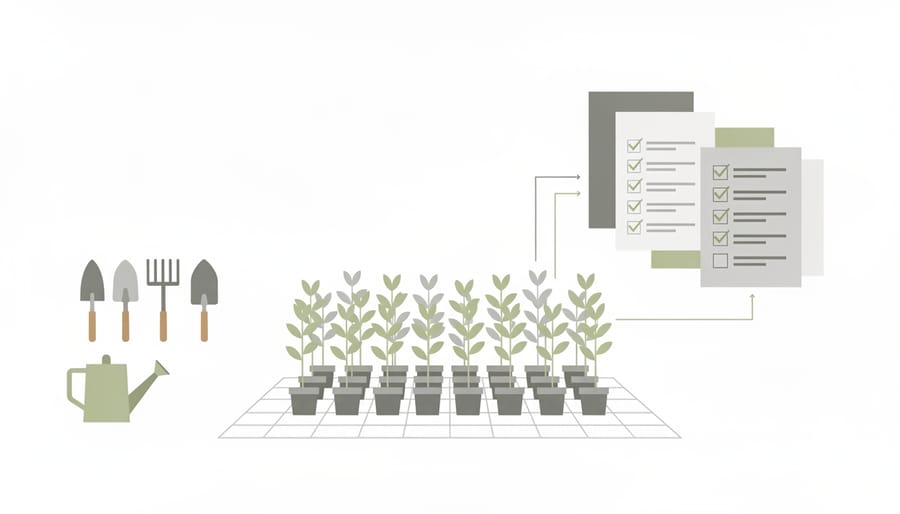
Your plant choices make the single biggest impact on your landscaping budget. Native plants adapted to your region typically cost 20-40% less than exotic ornamentals at local nurseries, and they thrive with minimal care once established. Start with smaller pot sizes, a one-gallon perennial runs $8-12 versus $25-35 for the same plant in a three-gallon container, yet catches up in size within one growing season.
Master basic propagation to multiply your investment. Many perennials like hostas, daylilies, and ornamental grasses divide easily in spring or fall, turning one $15 purchase into four plants. Shrubs like forsythia and hydrangea root readily from cuttings taken in early summer and stuck directly in moist potting mix.
Timing transforms your buying power. Shop end-of-season clearance sales in late summer and fall when nurseries discount inventory by 50-75%. These “distressed” plants establish better in cool weather anyway. Spring plant swaps with neighbours and gardening groups cost nothing while building community connections. Buy bare-root perennials and shrubs in early spring for half the price of potted equivalents, they look scraggly initially but outperform container plants by mid-season.
Material Choices and Alternatives
Material choices might be your single biggest opportunity to slash landscaping costs without anyone noticing the difference. Premium cedar mulch runs $5, $8 per bag, but shredded hardwood mulch at $2, $3 delivers the same weed suppression and moisture retention. For edging, steel or aluminum borders cost $3, $5 per linear foot installed, while plastic edging at $0.50, $1 per foot holds beds just as effectively. Pathways show dramatic savings: flagstone can hit $15, $25 per square foot, but crushed gravel at $1, $2 creates equally functional walkways with better drainage.
The real budget wins come from creative sourcing. Check Craigslist or Facebook Marketplace for leftover pavers, bricks, and stone, homeowners often give away surplus materials after their own projects wrap. Municipalities sometimes offer free wood chip mulch from tree trimming operations; you haul, they load. Broken concrete (urbanite) makes striking garden edging and retaining walls at zero cost beyond pickup. River rock from landscaping supply yards costs half what bagged versions do at big-box stores. For raised beds, untreated lumber or salvaged boards work fine for vegetables, saving $50, $100 versus cedar kits. The key is matching the material’s durability to its purpose, paths need longevity, but annual bed edging can use whatever’s cheapest.
Regional and Seasonal Factors
Your location and timing choices can swing landscaping costs by 30% or more. If you garden in a harsh climate zone, you’ll spend extra on soil amendments, winter protection, and hardier plant varieties that survive your conditions. Conversely, mild-climate gardeners enjoy longer planting seasons and access to a wider range of affordable plants.
Material availability varies dramatically by region. Coastal areas often pay premium prices for mulch and stone due to transportation costs, while rural properties near quarries or farms can source these materials cheaply. Shopping locally reduces delivery fees and connects you with plants already adapted to your area.
Seasonal timing affects your wallet significantly. Spring often brings higher nursery prices when demand peaks, while late summer and fall sales can cut plant costs by 40-60%. Buying mulch in bulk during off-season months saves money compared to bagged products at peak gardening time.
Grant and rebate availability differs widely across provinces and municipalities. Over 500 funding programs exist across Canada, with each province maintaining its own list of opportunities. Water-scarce regions typically offer more generous rebates for drought-tolerant landscaping, while urban municipalities may prioritize tree planting incentives. Check local water districts and provincial programs to discover what’s available where you live.
DIY vs. Hiring Professional Help
Best Tasks for DIY Beginners
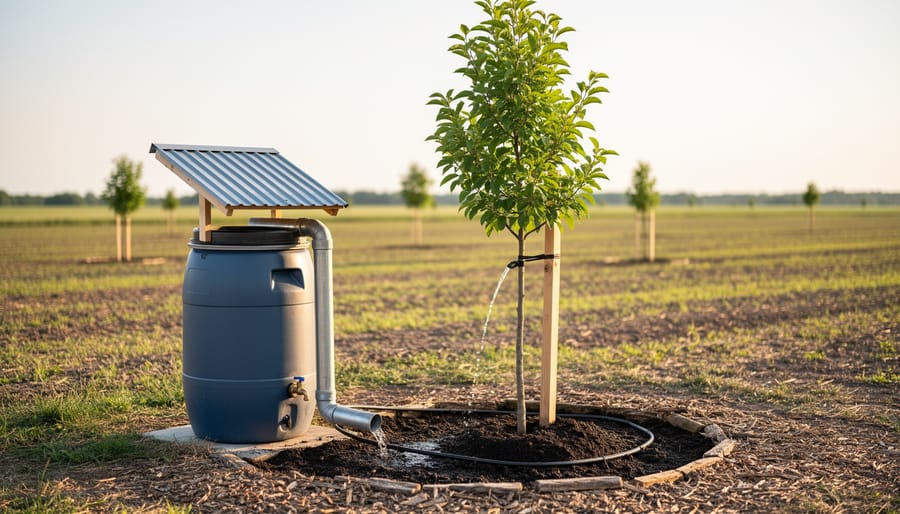
Starting with projects that match your current skill level keeps costs down and builds the confidence you’ll need for bigger transformations later. Mulching beds stands out as the most forgiving first project, you’re spreading material over soil, not wrestling with precise measurements or technical know-how. Purchase bags during seasonal deals in late fall when garden centers clear inventory, and you’ll pay 30-50% less than spring prices.
Basic planting follows naturally once you’ve prepped beds. Container-grown perennials and small shrubs require only a hole twice the root ball’s width, some loosened soil, and consistent watering for the first few weeks. Skip complicated soil amendments for now and focus on choosing plants suited to your existing conditions, natives especially tolerate whatever you’ve got without fussy requirements.
Seed starting cuts plant costs to pennies while teaching you propagation basics. Annuals like zinnias and marigolds sprout reliably indoors six weeks before your last frost date, needing only containers, seed-starting mix, and a sunny window. Simple edging with a half-moon edger or flat spade creates clean bed lines that make any landscape look intentional, costing nothing beyond the tool and your effort.
When to Call in the Pros
Some landscaping projects pose genuine risks or require specialized expertise that makes professional help a smart investment, even on a tight budget. Grading and drainage work tops this list, poor drainage can cause foundation damage, erosion, and thousands in repair costs, while proper grading requires equipment and experience to calculate slopes correctly. Similarly, underground irrigation systems need precise layout, knowledge of water pressure and backflow prevention, and trenching tools most homeowners don’t own. Getting this wrong means digging everything up later.
Heavy hardscaping like retaining walls, large patios, or structural features demands engineering knowledge for stability and drainage. A collapsing wall will cost far more to fix than hiring a pro upfront. Tree work, especially removing large trees, pruning near power lines, or dealing with diseased specimens, can be dangerous and requires equipment like chainsaws, chippers, and aerial lifts best left to insured professionals.
For these tasks, get at least three quotes, ask for references, and confirm licensing and insurance. The money you save on DIY planting and maintenance can fund professional help where it really counts.
Unlocking Rebates and Grants to Slash Your Costs
Canadian Grants and Programs
Canadian homeowners and community groups have access to substantial funding for landscaping through more than 500 programs spanning federal, provincial, and municipal levels. These programs collectively distribute over $37 billion annually in grants, subsidies, and tax credits, though navigating them requires some research since each province maintains its own exclusive funding options.
Tree Canada operates two particularly relevant national programs for 2026. The Greening School Grounds initiative funds tree planting and green infrastructure projects at educational institutions, with applications accepted until December 1, 2025. The Edible Trees program casts a wider net, supporting fruit and nut tree plantings for schools, First Nations communities, municipalities, community gardens, food banks, and community housing projects, also closing December 1, 2025.
Provincial programs vary widely in focus and funding amounts. British Columbia, for instance, prioritizes water conservation landscaping through regional district rebates, while Ontario municipalities often support rain garden installations and native species plantings. Quebec offers funding through environmental stewardship programs, and Alberta focuses on xeriscaping and drought-resistant landscapes.
Start your search by checking provincial environment ministry websites and your local municipality’s sustainability or water department. Many funding opportunities are announced in early fall for spring implementation, so planning ahead maximizes your chances of securing support before application deadlines pass.
Water District and Municipal Rebates
Water conservation rebates represent one of the most overlooked opportunities to fund budget landscaping projects. Many municipal water utilities and regional water districts offer cash-back programs for converting lawns to drought-tolerant plantings, installing efficient irrigation systems, or removing grass altogether. Unlike competitive grant applications, these rebates are typically available to any property owner within the service area who meets basic requirements.
Start by contacting your local water utility directly, most have dedicated conservation departments with current rebate information on their websites. Search for terms like “landscape rebate,” “turf replacement program,” or “water-wise landscaping incentive” along with your city or water district name. Regional programs may differ dramatically: some districts offer flat-rate rebates per square foot of lawn removed, while others reimburse a percentage of project costs up to a maximum amount.
Most programs require pre-approval before you begin work. You’ll typically submit a simple application with photos, property details, and a basic project plan showing what you intend to replace and with what plants. After completion, you submit final photos and receipts for reimbursement. The paperwork is usually straightforward compared to grant applications, and funding is processed on a first-come basis rather than competitively judged. Check application windows carefully, many programs operate seasonally or until annual funding is depleted.
Application Tips from the Experts
Maria Chen, who has reviewed over 400 grant applications as a municipal sustainability advisor, emphasizes starting six weeks before deadlines. “Applications submitted last-minute rarely succeed because you can’t gather proper documentation or refine your proposal,” she explains. She recommends creating a simple timeline that works backward from the deadline, allocating time for photos, measurements, quotes from suppliers, and revision.
When describing your project, be specific about outcomes rather than vague intentions. Instead of “beautify the neighborhood,” write “plant 15 native shrubs to reduce stormwater runoff by approximately 30% and provide pollinator habitat.” Quantify wherever possible, square footage, number of plants, estimated water savings.
Documentation separates strong applications from weak ones. Take before photos from multiple angles, save all supplier quotes (even if you plan DIY work), and sketch your planting plan to scale. Many programs require proof of property ownership or landlord permission, so gather these documents early rather than scrambling at submission time.
For community-scale projects, letters of support from neighbors, local environmental groups, or watershed organizations strengthen applications significantly. A single endorsement letter can demonstrate broader community benefit beyond your property line, which many grant committees prioritize when selecting recipients.
Smart Shopping Strategies That Actually Save Money
Cutting your landscaping expenses doesn’t mean settling for inferior plants or materials, it means shopping smarter. The difference between paying retail and finding the best deals can easily save you 40-60% on the same quality items, which stretches your budget dramatically further.
Time Your Purchases Strategically
Nurseries and garden centers follow predictable sales cycles that savvy gardeners exploit. Late summer and fall bring clearance pricing on perennials and shrubs as retailers make room for seasonal inventory. Spring clearances happen after Mother’s Day when the initial rush ends. Big-box stores discount damaged bags of soil and mulch by 50% or more, perfectly usable if you’re not picky about packaging.
To maximize year-round savings and avoid overspending plan major purchases around these cycles:
- January-February: Buy tools, hardscaping materials, and plan your design when demand is lowest
- March-April: Purchase seeds, soil amendments, and early-season supplies before the spring rush
- May: Wait until after Mother’s Day for first round of plant clearances
- July-August: Score deep discounts on perennials, shrubs, and summer annuals
- September-October: Buy trees, fall-blooming plants, and bulbs at end-of-season prices
- November-December: Snap up leftover mulch, decorative stone, and hardscaping at year-end closeouts
Explore Alternative Sources
Municipal composting facilities often provide free or cheap compost and mulch to residents, call your local public works department. Habitat for Humanity ReStores carry reclaimed pavers, bricks, and edging materials at a fraction of retail cost. Facebook Marketplace and Craigslist frequently feature neighbors dividing perennials or clearing out leftover materials.
Plant swaps organized by garden clubs let you trade divisions for new varieties without spending a dime. Many communities host annual events where experienced gardeners bring extras to exchange. University extension offices sometimes offer plant sales featuring locally-adapted varieties at below-market prices.
Buy Smart at Retail
Smaller plant sizes (4-inch pots versus gallons) cost less and often catch up within a season. Buying multiples of the same plant usually triggers quantity discounts. Don’t overlook the “sad plant” rack where wilted specimens sell cheap but recover quickly with proper care.
Budget-Friendly Landscaping Projects You Can Start Today
Create a Pollinator Garden for Under $200
You can create a vibrant 100-square-foot pollinator garden for under $200 by focusing on native perennials bought as small starter plants rather than mature specimens. Start with a simple garden supply list: basic hand tools you likely own, three yards of mulch ($45), and twelve to fifteen native plants in 4-inch pots ($90-120 from native plant sales or nurseries). Choose a mix like purple coneflower, black-eyed Susan, wild bergamot, and asters that bloom at different times. Mark out your 10×10 foot bed, remove existing turf by smothering it under cardboard (free from retailers), and edge with rocks you collect or inexpensive metal edging ($25). Plant in spring or fall when nurseries discount inventory, spacing plants closer than you would with expensive specimens since you want them to fill in quickly. Save significantly by joining native plant society sales where member-grown plants cost $3-5 each, or ask gardening neighbors for divisions of established clumps. Water deeply the first season using a basic soaker hose ($15), mulch thickly to suppress weeds, and within two years you’ll have a self-sustaining pollinator haven that cost a fraction of a professionally installed bed.
Build a Simple Pathway for $150
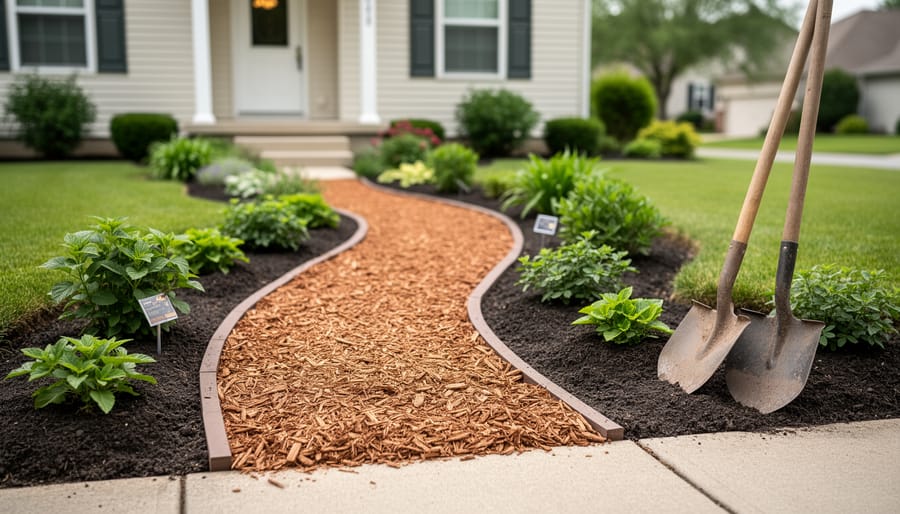
A simple pathway costs just $100 to $150 in materials and transforms muddy spots or undefined edges into an attractive landscape feature you’ll use for years.
Start by marking your desired path with spray paint or a garden hose, keeping it 24 to 36 inches wide for comfortable walking. Remove existing grass or weeds by cutting through with a flat spade, going 3 to 4 inches deep. For stability, you don’t need perfect excavation, just clear the vegetation.
Lay landscape fabric over the entire path to suppress weeds. Overlap the edges by 6 inches and secure with landscape staples every 2 feet. This step alone prevents most maintenance headaches down the road.
For a mulch path, spread 3 inches of shredded hardwood or pine bark directly over the fabric. Wood chips cost $3 to $4 per bag, and you’ll need roughly 12 bags for a 20-foot path. For gravel, use pea gravel or crushed stone at similar depth. Gravel runs slightly higher at $5 per bag but lasts longer without replenishing.
Edge your pathway with whatever suits your budget: recycled bricks set on their sides ($0 if salvaged), pressure-treated 2x4s ($8 each), or even large stones collected from your property. The edging contains your material and creates clean lines.
Rake the surface level, water lightly to settle, and top up any low spots. When you buy smarter by shopping seasonal clearance sales in late fall, you’ll cut material costs by 30 to 50 percent.
Transform a Problem Spot with $100
Every yard has that one frustrating spot, a barren patch under a maple where grass refuses to grow, a slope that washes out after every rain, or a corner overtaken by weeds no matter how often you pull them. The good news? You can flip these problem zones into landscape assets for around $100 using the right plants and minimal materials. Start by diagnosing what’s happening: dense shade calls for woodland natives like hostas or wild ginger (often $3-5 per plant at end-of-season sales); erosion-prone slopes need deep-rooted groundcovers such as creeping thyme or sedum that knit soil together; persistent weeds signal poor soil that benefits from aggressive spreaders like ajuga or pachysandra that outcompete invaders once established. For a typical 50-square-foot problem area, buy 15-20 small perennials ($40-60), add a bag of compost to improve planting holes ($8), lay down cardboard as a weed barrier before planting ($0, save shipping boxes), and top with two bags of mulch ($12). This simple formula works whether you’re tackling dry shade, wet clay, or a neglected strip along the fence, turning your yard’s weakest link into a low-maintenance feature that actually thrives.
Common Questions About Budget Landscaping
What’s a realistic cost per square foot for budget landscaping?
Most budget landscaping projects run between $0.50 and $3.00 per square foot, depending on whether you’re just adding mulch and a few plants or including simple hardscaping elements. DIY projects with native plants and recycled materials can hit the lower end, while contractor-installed designs with modest hardscaping typically reach the higher range.
Will budget landscaping hurt my home’s resale value?
Not if done thoughtfully. Clean, well-maintained landscaping with healthy plants and neat edges improves curb appeal regardless of budget, while neglected or poorly executed work can detract from value. Focus on foundation plantings, lawn edges, and removing problem areas rather than attempting elaborate features you can’t maintain.
How long until budget landscaping looks established?
Expect smaller, budget-friendly plants to fill in within two to three growing seasons with proper care. Starting with smaller specimens saves money upfront, and most native perennials reach mature size by year three, while shrubs typically need three to five years to achieve their full impact.
Can I qualify for landscaping grants as a homeowner?
Some programs accept homeowner applications, particularly water conservation rebates through municipal utilities and certain community greening initiatives. Educational institutions, municipalities, and community groups have access to broader funding options like Tree Canada programs, but individual homeowners should check their local water district and provincial environmental programs for available rebates.
Budget landscaping doesn’t mean settling for a yard that looks cheap or temporary. The main difference between budget and premium landscaping is timeline rather than final result. When you choose smaller plants, they need more time to reach their mature size, but they’ll get there with basic care. Native species actually outperform expensive exotics in most cases because they’re adapted to your climate and soil, requiring less maintenance and fewer inputs once established.
The key to lasting results on a budget is prioritizing plants over hardscaping initially. A well-designed planting bed with healthy native perennials will look better in three years than expensive pavers surrounded by struggling, high-maintenance plants. You can always add decorative elements like pathways and edging later as your budget allows, but getting the right plants in the ground first builds the foundation for a landscape that improves with age rather than requiring constant replacement.
What Changes the Price
The biggest price swing in budget landscaping comes from how much of the work you tackle yourself versus hiring out. A weekend warrior who handles their own planting, mulching, and bed prep can complete a medium yard refresh for $1,200 in materials, while the same project professionally installed might run $3,500 or more once labor charges hit the bill.
Your material choices create the next major cost gap. Premium bagged soil runs three times what bulk delivery costs, and choosing two-inch nursery plugs over gallon containers drops plant expenses by 60 percent or more. Similarly, gravel pathways cost a fraction of pavers, and recycled mulch undercuts cedar by half.
Project complexity directly impacts your bottom line. Simple additions like mulch beds and basic plantings require minimal tools and skill, keeping costs low. The moment you introduce grading work, irrigation lines, retaining walls, or mature trees, expenses jump because you’re either renting specialized equipment or paying professionals who own it.
Finally, timing matters more than most homeowners realize. Shopping end-of-season clearances at nurseries, buying bulk materials in spring when suppliers compete, and starting seeds indoors months before planting season can collectively trim 30 to 40 percent off your total landscaping investment.
You don’t need a huge budget to create a landscape you’ll love. The projects and strategies in this guide prove that smart planning, DIY effort, and strategic material choices deliver impressive results at any price point. Whether you’re working with $100 or $5,000, the principles remain the same: prioritize high-impact improvements, phase work over time, and maximize every dollar.
The Landscaping Rebates and Grants Finder can significantly reduce your out-of-pocket costs by connecting you with funding opportunities you might not know existed. With over 500 programs available across Canada, the right rebate could cover a substantial portion of your project expenses.
Start small if you’re new to budget landscaping. Pick one project from this guide that addresses your yard’s biggest problem or excites you most. Success with a single bed or pathway builds both confidence and skills, making your next project easier and faster. You’re not creating a finished landscape overnight; you’re starting a process that improves your outdoor space season by season, project by project, within whatever budget works for you.