Creating a wildlife friendly yard transforms your outdoor space into a thriving habitat for birds, butterflies, pollinators, and beneficial insects through strategic plant selection, water features, and shelter zones. Most homeowners can establish the foundation in a single weekend, though your yard will continue to develop and attract more species over the coming seasons. The core method centers on layering native plants that provide food and cover, eliminating pesticides, and adding simple features like shallow water sources and brush piles.
The shift from conventional landscaping to wildlife habitat doesn’t require special skills or expensive materials. You’re essentially working with nature rather than against it, which often means less mowing, fewer inputs, and more time watching hummingbirds visit your salvias or spotting native bees on your coneflowers. We spoke with Maya Chen, a wildlife biologist and garden designer based in Oregon, who’s helped hundreds of homeowners make this transition. “The biggest surprise for most people is how quickly wildlife responds,” she told us. “Within days of adding a birdbath or planting native milkweed, you’ll notice new visitors.”
This guide walks you through the complete process, from assessing your current yard conditions to selecting regionally appropriate plants, installing wildlife features, and maintaining your space to support animals year-round. Whether you’re starting with a blank slate or converting an existing lawn, you’ll learn exactly what to plant, where to place feeding and nesting zones, and how to measure your success as your yard becomes a genuine refuge for local wildlife.
Why Your Yard Matters for Wildlife
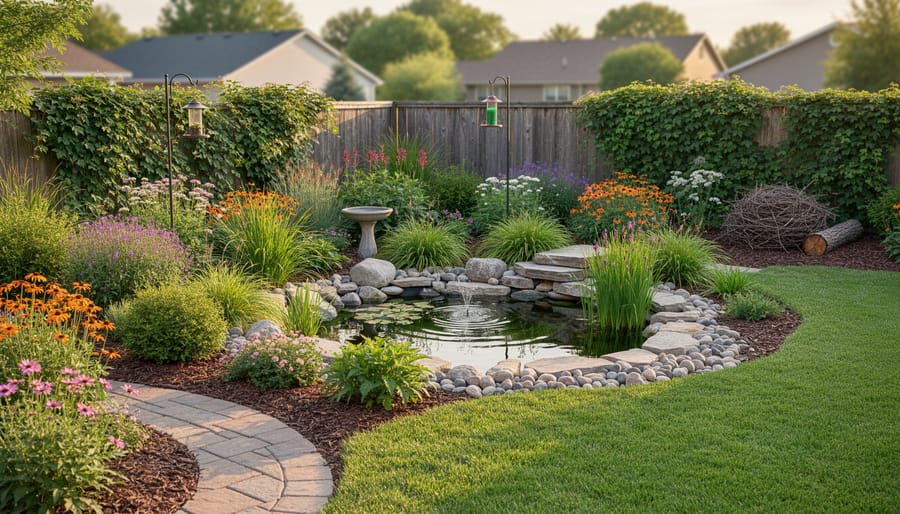
Every year, natural habitats disappear at an alarming rate. Forests become subdivisions, prairies turn into parking lots, and wetlands are drained for development. For the creatures that once called these places home, the songbirds, native bees, butterflies, and countless other species, this relentless habitat loss creates a survival crisis. They need food, water, shelter, and safe passage, but these essentials are vanishing from the landscape.
That’s where your yard comes in. Even a small suburban lot can serve as vital backyard habitat as corridors that connect fragmented wild spaces. When your garden offers native plants and natural features, it becomes a stepping stone in a larger network that allows wildlife to move, feed, and breed across otherwise hostile terrain. Collectively, these yards form a patchwork of refuge that can sustain biodiversity in places you’d least expect it.
The benefits extend directly to you. Pollinators like native bees and butterflies will visit your flowers, boosting any vegetable or fruit crops you grow. Birds and beneficial insects provide natural pest control, reducing aphids, caterpillars, and other garden nuisances without chemicals. You’ll notice improved soil health as diverse plants and organisms work together, creating a more resilient ecosystem right outside your door.
I transformed my own patch of lawn three years ago, replacing turf with native wildflowers and adding a small water feature. Within months, I spotted goldfinches I’d never seen before, followed by monarch butterflies in late summer. Now, every morning brings new surprises, a family of wrens nesting in the shrubs, dragonflies patrolling the garden. Watching this small space come alive reminded me that restoration doesn’t require acreage. It just requires intention.
What You’ll Need to Get Started
You don’t need to invest in expensive equipment or specialty gear to create a wildlife-friendly yard. Most of the essentials are basic gardening tools you may already own, plus natural materials you can source locally or even find in your own yard. The key difference from traditional landscaping is choosing items that prioritize ecological function over manicured appearance.
- Basic tools: Hand trowel, spade, garden fork, pruning shears, wheelbarrow or garden cart, and work gloves
- Native plants: 15-20 species suited to your region, including groundcovers, perennials, shrubs, and at least one small tree if space allows
- Water features: Shallow dishes or bird baths, terra cotta saucers, or materials for a small pond (liner, pump if desired)
- Shelter materials: Untreated wood logs, branches and twigs for brush piles, rocks of varying sizes, and mulch (preferably leaf litter)
- Reference materials: Local native plant guide or regional wildlife gardening book for identification and planning
Start by identifying native plants through your county extension office, native plant society chapter, or specialized local nurseries that stock regionally appropriate species. These sources understand your specific climate, soil type, and which plants support your area’s wildlife. Big-box garden centers often carry cultivars or non-native ornamentals that won’t provide the same ecological benefits.
For natural materials like logs and stones, check your own property first. Fallen branches, rocks unearthed during digging, and autumn leaves all become valuable wildlife habitat. Neighbors often have downed wood they’re happy to share, and landscaping companies sometimes offer free mulch or tree trimmings. The beauty of wildlife gardening is that “waste” materials from conventional yards become treasured resources in yours.
Water containers can be as simple as repurposed dishes or saucers placed at different heights. Whatever you choose, prioritize shallow edges and rough surfaces that give small creatures secure footing. You’ll add water and proper placement details during installation, but having these items ready means you can work through the transformation steps without interruption.
Important Considerations Before You Begin
Before you transform your yard, take a moment to plan for safety and set realistic expectations. This groundwork prevents problems down the road and ensures your wildlife-friendly space works for everyone who uses it.
Check Local Rules First
Some municipalities regulate water features like ponds due to safety concerns or mosquito control. A quick call to your local planning department clarifies what’s allowed. Homeowners’ associations may also have guidelines about natural landscaping or “unmowed” areas, so review your covenants if applicable.
Plant Safety Matters
Many common ornamental plants are toxic to pets, children, or wildlife. Before planting, research each species. Native plants are generally safer choices, but some, like pokeweed berries or certain native mushrooms that appear in mulch, still require caution. Keep toxic varieties away from play areas and spots where pets spend time.
Understand What You’re Inviting
Creating habitat means welcoming all wildlife, not just the pretty butterflies. Expect snakes, spiders, wasps, and possibly raccoons or opossums. Most are beneficial, but place water features and dense plantings away from doorways, patios, and children’s play zones to minimize surprise encounters.
Timeline Reality
Wildlife won’t arrive overnight. Birds may visit new feeders within days, but establishing a functioning ecosystem takes 6-18 months as plants mature and word spreads through the animal community. Some species, like specialized native bees, may take several seasons to discover your yard. Patience pays off.
Step-by-Step: Transforming Your Yard
Step 1: Assess Your Yard’s Wildlife Potential
Walk your yard at different times of day, notebook in hand. Map where sun hits for six-plus hours (full sun), where dappled shade falls, and which spots stay dark. Note existing trees, shrubs, and any native plants already present, these are your foundation. Observe where water pools after rain and where the ground stays dry. Spend a few quiet mornings watching for birds, insects, or animal tracks to understand who already visits. Sketch a rough layout showing these conditions and current wildlife activity. This assessment guides your plant choices and helps you prioritize areas that will have the biggest impact, eventually working toward a certified wildlife oasis that supports diverse species year-round.
Step 2: Remove Invasives and Reduce Lawn
Start by identifying what’s taking up valuable habitat space. Walk your yard with a local invasive plant guide (your county extension office often provides free lists) and mark any invasive species, common culprits include English ivy, honeysuckle, and barberry. Remove them by digging out roots rather than just cutting stems, which often triggers more aggressive growth.
Next, reclaim lawn areas that could support diverse life instead. You don’t need to eliminate all grass, but reducing even 25% creates meaningful change. Replace sections with native groundcovers like wild strawberry or creeping phlox, or seed a meadow mix suited to your region. Research shows wildflowers near lawns significantly boost bee populations, making this conversion one of the highest-impact steps you’ll take.
Step 3: Plant Native Species in Layers
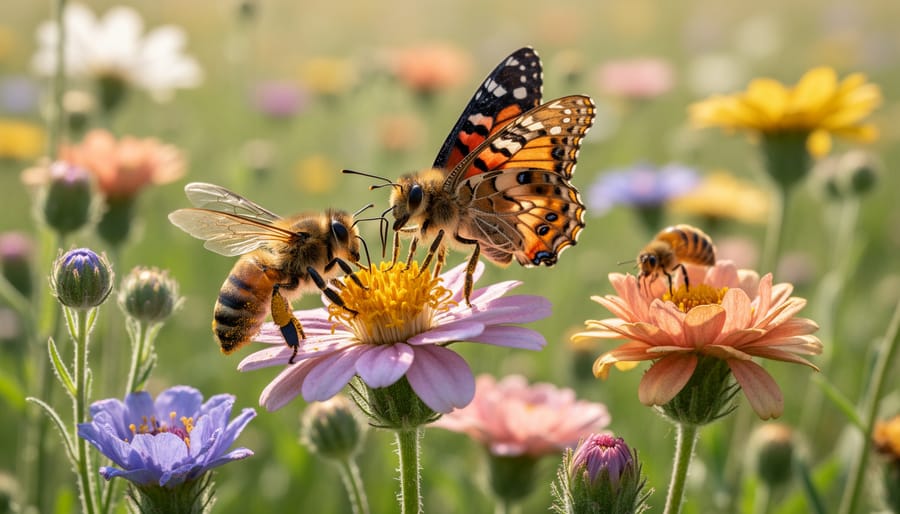
Layering native plants mimics natural ecosystems and maximizes habitat. Start with groundcovers like wild ginger or woodland phlox, add mid-height perennials such as coneflowers and milkweed, then shrubs like serviceberry, and finally canopy trees appropriate for your space. These plant layers provide structure that different wildlife species need for feeding, nesting, and shelter. Space plants slightly farther apart than ornamental gardens, wildlife needs room to forage and move through. Choose species native to your specific region, not just broadly “North American,” since local wildlife evolved alongside local plants. A native plant nursery or your county extension office can identify the best choices for your area and help you create a stunning native garden that supports the full food web from insects to birds.
Step 4: Install Water Sources
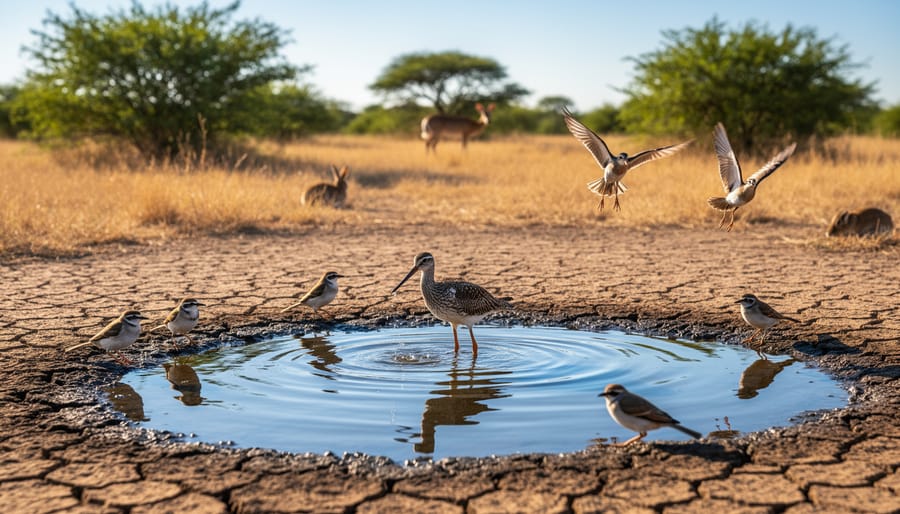
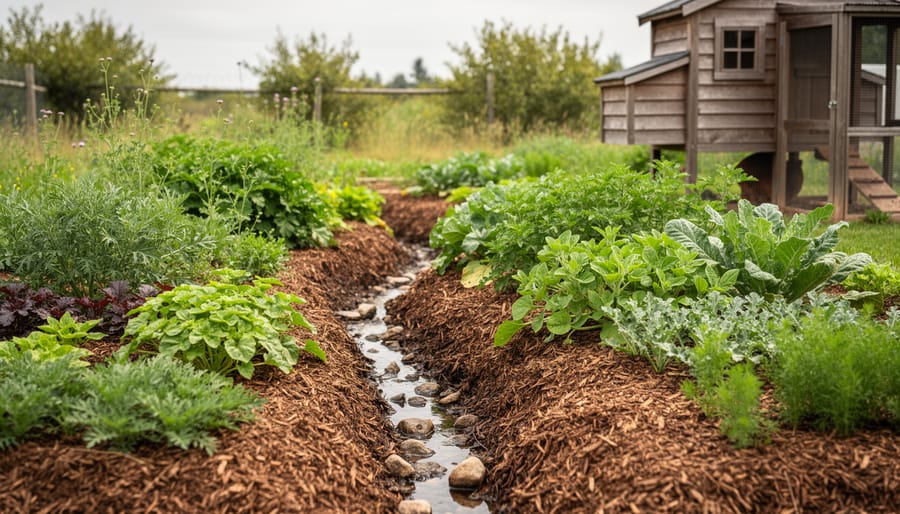
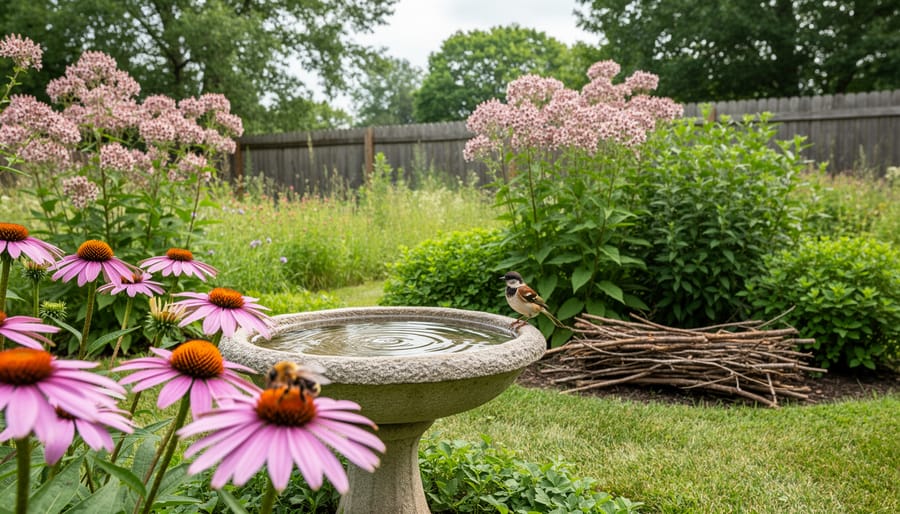
Water is essential for wildlife survival, and adding even a simple water source can dramatically increase yard visitors. A shallow bird bath 1-2 inches deep works perfectly for songbirds and butterflies, while deeper sections (up to 6 inches) in a small pond accommodate frogs and larger birds. Include sloped edges or stacked rocks so animals can safely enter and exit. Position water features for birds in partial shade to slow algae growth, and clean them weekly by scrubbing and refilling with fresh water to prevent mosquito breeding and disease spread.
Step 5: Build Shelter and Nesting Sites
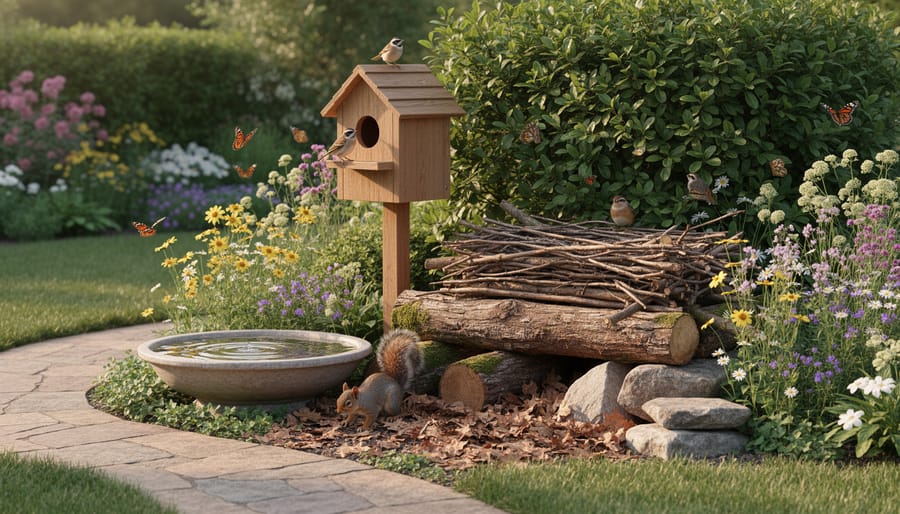
Wildlife needs safe spaces to hide from predators, raise young, and escape harsh weather. Start with a brush pile in a quiet corner: stack branches loosely, layering thick limbs on the bottom and smaller twigs on top to create gaps where birds, rabbits, and beneficial insects can shelter. Leave fallen logs and standing dead trees (snags) if they’re safely positioned, these host cavity-nesting birds and provide homes for beetles, salamanders, and fungi that support the whole food web. Install nest boxes sized for your target species, placing bluebird boxes in open areas and wren houses near shrubs. Plant in groups rather than single specimens to create dense thickets where birds can nest and forage protected from hawks and cats.
Step 6: Ensure Year-Round Food Sources
Wildlife needs food every month, not just during peak growing season. Plan your plantings so something is always blooming from early spring bulbs through fall asters. Choose native plants for butterflies and other pollinators that flower at different times. Leave spent flower heads standing through winter, the seeds feed finches, sparrows, and juncos. Plant shrubs that produce berries in late summer and fall, like serviceberry, elderberry, and winterberry holly. Resist the urge to deadhead everything or cut back perennials in autumn. Supplemental feeders can help during harsh weather, but focus first on creating a landscape that feeds wildlife naturally.
Step 7: Eliminate Harmful Chemicals
Conventional pesticides, herbicides, and synthetic fertilizers harm the very wildlife you’re trying to attract. Switch to organic lawn care and garden maintenance, compost for nutrients, hand-pulling or mulch for weeds, and natural predators for pest control. Healthy soil builds resilience: add compost annually, avoid tilling which disrupts beneficial organisms, and let fallen leaves decompose in place to feed earthworms and ground beetles. When problems arise, identify the pest first and use the least toxic solution, insecticidal soap, neem oil, or simply tolerating minor damage. A truly wildlife-friendly yard accepts that some nibbled leaves mean the ecosystem is working.
Step 8: Add Natural Elements
Place flat rocks in sunny spots for butterflies and reptiles to bask. Position logs and branches in shady areas to shelter ground beetles, salamanders, and beneficial insects. Leave patches of bare soil and leaf litter undisturbed, these wild zones provide essential nesting sites for native bees and overwintering habitat for countless species.
Expert Insight: Learning from a Wildlife Garden Pro
I spoke with Sarah Mitchell, a landscape designer with twenty years of experience creating wildlife habitats across the Pacific Northwest, about what she’s learned from transforming hundreds of yards into thriving ecosystems.
“The biggest mistake I see is people trying to do everything at once,” Sarah told me. “They rip out their entire lawn on a Saturday, plant a bunch of natives on Sunday, and wonder why birds aren’t nesting by Wednesday.” She laughed, but her point was serious. Wildlife needs time to discover new resources, and plants need time to establish before they provide real value.
Her approach focuses on what she calls “productive messiness.” Rather than creating pristine garden beds, Sarah leaves leaf litter under shrubs, allows spent flower stalks to stand through winter, and creates deliberate gaps in fencing for small mammals to move through. “That dead branch you’re tempted to remove? It might become a flicker’s favorite perching spot or shelter a dozen beneficial insects,” she explained.
When I asked about her favorite success story, Sarah described a suburban client who started with a single native serviceberry tree. Within two years, they’d documented forty-three bird species visiting their quarter-acre lot. “The serviceberry berries fed cedar waxwings, the flowers fed early bees, and the branching structure gave robins a perfect nesting site. One tree became an anchor for the whole yard.”
Sarah’s practical advice: start with one thriving native plant instead of ten struggling ones, observe your yard at different times of day to see what’s already visiting, and resist the urge to tidy up every weekend. “Wildlife doesn’t want a showroom,” she said. “They want food, water, shelter, and space to raise their young. Give them that, even in small amounts, and they’ll come.”
How to Know It’s Working
You’ll start seeing results faster than you expect, though a truly thriving wildlife habitat takes patience. Within the first few months, watch for these clear signs that your yard is working:
- Birds visiting more frequently, bathing in water features, and collecting nesting materials
- Native bees and butterflies feeding on flowers, especially in morning and late afternoon
- Beneficial insects like ladybugs, lacewings, and predatory wasps patrolling plants
- Evidence of small mammals such as rabbit droppings, tunnels in tall grass, or nocturnal visitors caught on motion cameras
- Caterpillars on native plants (a sign of successful butterfly reproduction)
- Increased bird song, especially at dawn and dusk
Setting up a simple verification routine helps you track progress. Spend 10 minutes at the same time each week observing from a comfortable spot. Note what you see, hear, and any new evidence like chewed leaves, spider webs, or disturbed mulch. A basic nature journal (even just notes on your phone) lets you compare observations across seasons.
In months one through three, expect curious visitors testing your offerings. Birds discover new water sources quickly, while pollinators need blooming plants to find you. By six to twelve months, you should notice breeding activity: birds nesting, bees emerging from the ground, and butterflies laying eggs. Some species return to the same yards annually once they identify reliable habitat.
The most dramatic changes come after a full year when your native plants establish strong roots and seasonal rhythms align. Integrating sound wildlife management practices means understanding that an active, living yard looks different from a manicured one. Nibbled leaves and busy insects signal success, not failure.
Maintaining Your Wildlife Friendly Yard
Your wildlife friendly yard isn’t a one-time project; it’s a living system that needs seasonal attention while you learn what works best for the creatures visiting your space.
In early spring, resist the urge to tidy everything at once. Leave leaf litter and dead plant stems standing until daytime temperatures consistently stay above 50°F, giving overwintering insects time to emerge. When you do prune, check carefully for active nests first and cut back only about one-third of any plant to preserve shelter. Summer means watching water sources daily during heat waves and deadheading just enough to keep blooms coming without removing all the seed heads that goldfinches and other birds need.
Fall is when your yard truly proves its value to wildlife. Let those Black-eyed Susans and coneflowers stand tall through winter, their seeds feeding birds during lean months. Rake leaves into your garden beds instead of bagging them, creating insulation for ground-nesting bees and hibernating butterflies. Delay major pruning until late winter, after the coldest weather passes.
As you notice which wildlife species become regulars, adjust your approach. If you’re seeing more butterflies, expand your milkweed patches. Regular rabbit visits might mean adding more dense ground-level cover. Track these observations in your nature journal so you can make informed decisions each season.
Consider talking with neighbors about creating connected habitat. Even a gap in fencing or coordinated native plantings can turn isolated yards into genuine wildlife corridors that support larger populations and greater biodiversity across your entire neighborhood.
Common Questions About Wildlife Friendly Yards
What if my wildlife friendly yard attracts pests or animals I don’t want? This concern tops nearly every beginner’s list, and it’s valid. The truth is, a healthy ecosystem includes all kinds of creatures, but a well-designed wildlife garden naturally keeps populations in balance. Predators control prey, and diversity prevents any single species from taking over. If you’re worried about raccoons or deer, focus on plants and features that attract smaller wildlife like birds, butterflies, and beneficial insects rather than leaving pet food outdoors or installing ground-level feeding stations. For rodent concerns, keep brush piles at least 20 feet from structures, maintain a clear zone around your foundation, and avoid dense groundcover right against the house. Most “pest” issues stem from accidental feeding or shelter too close to human spaces, not from the wildlife garden itself.
Will creating a wildlife friendly yard attract pests?
A balanced wildlife garden naturally regulates populations through predator-prey relationships. Keep food sources and dense shelter at least 20 feet from your home to avoid attracting unwanted visitors near structures.
How much does it cost to transform my yard?
You can start for under $100 with a few native plants, a simple water dish, and natural materials you collect. Costs scale with your ambitions, but even elaborate wildlife gardens cost less than traditional landscaping since you’re working with nature rather than against it.
What if I only have a small yard or patio?
Even a balcony or 10×10 space can support wildlife. Container gardens with native plants, a shallow water dish, and vertical plantings attract pollinators and birds effectively.
How do I handle homeowners association restrictions?
Frame your project as pollinator habitat or water conservation, document your plan professionally, and start with the front yard’s edges or back yard where rules are often looser. Many HOAs now have exceptions for ecologically beneficial landscaping.
Is a wildlife yard safe for children and pets?
Yes, with basic planning. Avoid toxic plants like foxglove or oleander, fence off deep water features for toddlers, and create separate play zones. Native plants are typically safer than many ornamental imports.
Won’t my yard look messy and unkempt? Aesthetics worry many gardeners, especially if neighbors value manicured lawns. Here’s the reality: wildlife gardens can be stunningly beautiful and intentionally designed. The key is creating structure. Use defined bed edges, mulched pathways, and deliberate groupings of plants rather than random scattering. A “wild” meadow area looks intentional when bordered by mown paths. Leave seed heads standing in winter, but do it in sweeping drifts that read as a design choice. Incorporate some traditional garden elements, a bench, decorative stones, an arbor, to signal that this is curated space, not neglect. I’ve seen wildlife gardens win neighborhood beautification awards because they combined ecological function with strong visual design. If you’re still concerned, start in the backyard where you have more freedom, then gradually introduce wildlife-friendly elements to front spaces as your confidence and plant knowledge grow.
Creating a wildlife friendly yard isn’t just achievable, it’s one of the most meaningful ways you can contribute to wildlife preservation right where you live. You don’t need acreage, a big budget, or expert knowledge to make a difference. Start with one or two steps, maybe a native plant cluster and a water source, then build from there as your confidence grows and you see the results.
I’ve watched countless gardeners transform their yards gradually, sometimes over several seasons, and their excitement when the first butterflies arrive or a bird builds a nest never gets old. Each wildlife friendly yard, no matter how small, becomes a vital link in a network of urban and suburban habitat that supports struggling species and strengthens local ecosystems.
Your backyard is more powerful than you might think. By choosing native plants, providing water, creating shelter, and skipping the chemicals, you’re joining a growing conservation movement that’s proving we can coexist with and actively support the wildlife that shares our world. The creatures visiting your yard tomorrow are counting on the choices you make today.