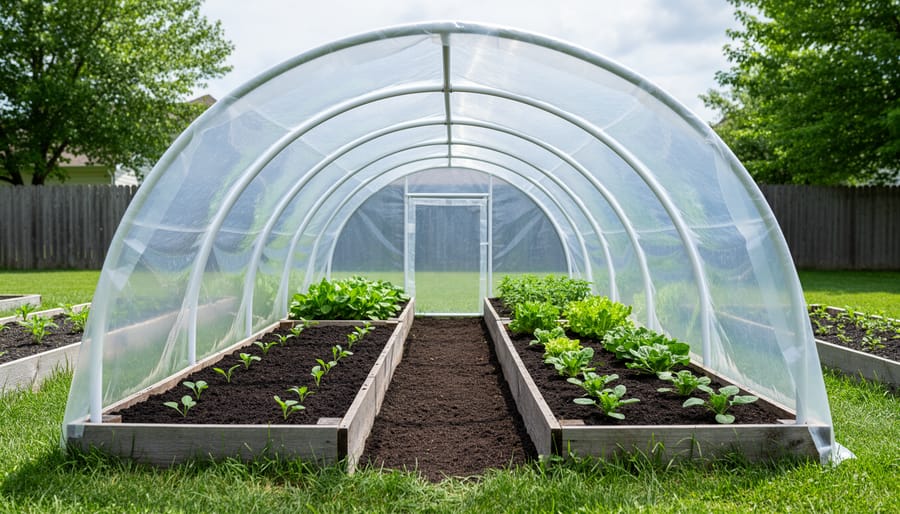
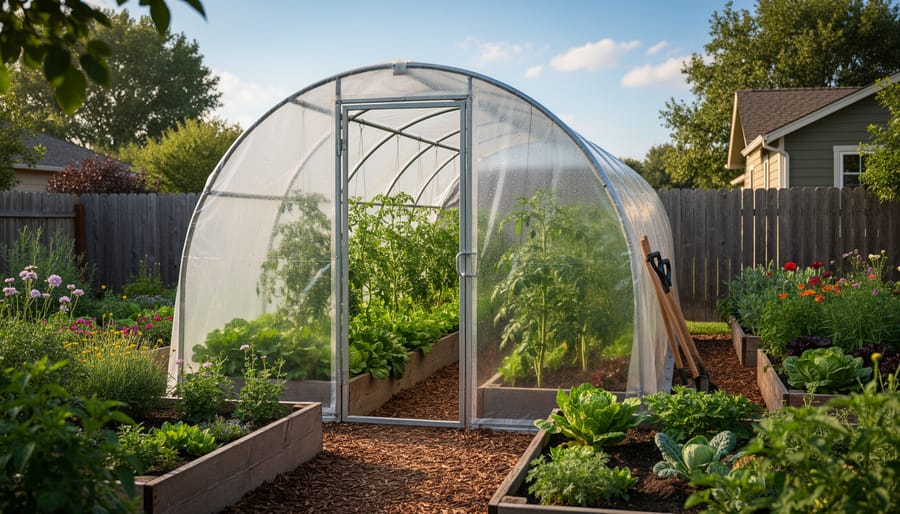
You can build a DIY hoop house in a single weekend for around $150 to $300, depending on size and materials. This simple arched structure extends your growing season by weeks or even months, protecting plants from frost, wind, and pests without requiring electricity or complex carpentry skills.
A hoop house is essentially a tunnel-shaped greenhouse made from bent pipes or PVC covered with greenhouse plastic. The beauty of this season-extension tool lies in its simplicity. You’re creating a protected microclimate that captures solar heat during the day and releases it slowly at night, raising temperatures inside by 10 to 20 degrees compared to the outdoor air. That difference means harvesting lettuce in November or starting tomatoes in March when your neighbors are still waiting for spring.
The construction process involves securing a series of hoops to a raised bed or directly into the ground, connecting them with a ridge pole for stability, and stretching UV-resistant plastic over the frame. Most gardeners complete a 4-foot by 12-foot hoop house in four to six hours. The structure requires no foundation or permits in most areas, making it an ideal first project for beginners.
What makes hoop houses especially practical is their scalability. Start with a single bed-sized tunnel this season, and you’ll likely find yourself building three more next year. The same basic technique works whether you’re covering a 3-foot-wide salad bed or protecting an entire 100-foot row of carrots. This guide walks you through every step, from choosing the right materials to anchoring your structure against spring winds, so you can begin harvesting fresh greens while frost still blankets the ground.
What You’ll Need: Tools and Materials
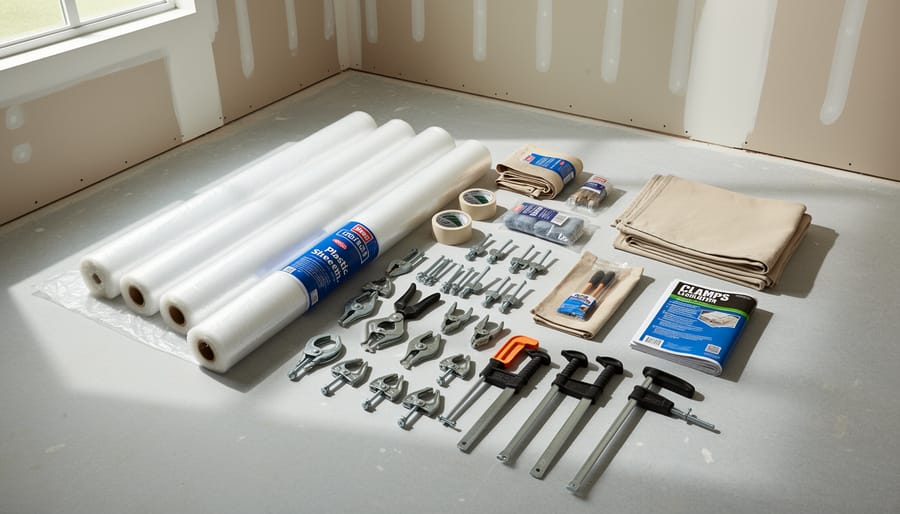
Building a 10×12-foot hoop house requires straightforward materials you can find at most hardware stores or farm supply shops. The total investment typically runs $150-$300 depending on whether you choose PVC or metal hoops and the quality of covering you select. Here’s everything you’ll need, broken down by category so you can gather supplies before starting construction.
- Structural materials: Ten ¾-inch PVC pipes or metal conduit, each 20 feet long (forms the hoops); one 12-foot length of 1-inch PVC or metal for the ridge pole; six 10-foot lengths of rebar (½-inch diameter) for anchoring hoops into the ground
- Covering material: 24-foot by 32-foot sheet of 6-mil greenhouse plastic (provides complete coverage with overlap for securing); wiggle wire and track system or 1×2-inch wood strips for securing the plastic
- End wall framing: Four 10-foot lengths of 2×4 lumber; one pre-hung door (optional but recommended) or materials to frame a simple door opening; hinges and latch if building a custom door
- Tools needed: Tape measure and marking stakes; rubber mallet or hammer for driving rebar; drill with bits; saw (handsaw or circular saw for cutting lumber); utility knife for trimming plastic; level for checking alignment
- Fasteners and hardware: 3-inch deck screws (1-pound box); metal L-brackets or corner braces for end walls; zip ties or plastic clips for temporary holding; ground staples or landscape fabric pins
- Optional upgrades: Automatic vent openers (around $40 each); shade cloth for summer heat protection; roll-up side mechanisms for better ventilation; anti-condensation greenhouse film instead of standard plastic
You can source PVC pipes and lumber from big-box home improvement stores, though farm supply stores like Tractor Supply often stock greenhouse-specific plastic at better prices than general retailers. The rebar comes cheapest when purchased in bulk from concrete supply yards. If you’re near farming communities, check local agricultural co-ops where greenhouse plastic sometimes costs 30-40% less than retail. Don’t skimp on the plastic quality, 6-mil thickness resists tears and UV damage far better than standard painters’ plastic, lasting three to four seasons instead of one.
Planning Your Hoop House Build
Before you start bending pipes or cutting plastic, invest time in thoughtful planning. The location and design choices you make now will determine how well your hoop house performs for years to come.
Choose Your Location Wisely
Pick a spot that receives full sun for at least six hours daily, ideally with a south-facing orientation to maximize winter light. Morning sun is particularly valuable as it warms the structure early in the day. Avoid areas shaded by trees, buildings, or fences, especially on the southern exposure.
Drainage matters more than most first-time builders realize. Walk your site after a heavy rain and avoid any low spots where water pools. A gentle slope is fine, but steep grades require terracing or extra foundation work. The ground should be reasonably level, though you can correct minor variations during site prep.
Size It Right for Your Needs
A 10×12-foot hoop house is manageable for beginners and provides enough space for a family garden. Width typically ranges from 10 to 16 feet, limited by how far you can bend your hoops without creating weak spots. Length is flexible since you’re simply adding more hoops, but keep access in mind, longer structures work harder without cross-ventilation.
Standard spacing places hoops every four feet along the length. Closer spacing adds strength but increases material costs.
Account for Local Climate
Your design must handle the weather it’ll face. In windy areas, orient the structure so prevailing winds hit the curved side rather than the flat ends. This reduces stress on the frame. A low-profile design (7 to 8 feet at peak height) accounts for wind and snow better than taller structures.
Leave at least three feet between your hoop house and other buildings or fences for maintenance access and airflow.
Safety First: Essential Precautions
Building a hoop house is straightforward, but taking a few safety precautions will keep your project running smoothly and injury-free. Most accidents happen when rushing or working alone, so plan for a relaxed pace and recruit a helper if possible.
When bending PVC pipes, wear safety glasses to protect your eyes from potential snapping or splintering. PVC becomes more pliable in warm weather, but cold pipes can crack unexpectedly under pressure. If you’re working with metal hoops or rebar stakes, wear heavy work gloves to prevent cuts and blisters. Metal edges can be surprisingly sharp, especially after cutting.
Ground anchor installation requires attention to your body mechanics. Driving stakes or pounding rebar into hard soil strains your back and shoulders quickly. Bend at your knees, not your waist, and take breaks every few minutes. Use a sledgehammer that’s appropriately sized for your strength rather than the heaviest one available.
Weather timing matters more than you might think. Never attempt to install greenhouse plastic on a windy day, even a light breeze can turn a sheet of plastic into an uncontrollable sail that pulls you off balance or tears the material. Aim for calm, dry conditions when the temperature is above 50°F, which makes the plastic easier to handle and stretch properly.
Keep these essentials in mind throughout your build:
- Clear the work area of tripping hazards before you start
- Stay hydrated and take breaks, especially in direct sun
- Keep a first aid kit nearby for minor cuts or scrapes
- Don’t climb ladders alone when securing the ridge pole
- Store sharp tools safely between tasks to prevent accidental contact
Having a partner isn’t just about extra hands. They can stabilize materials while you fasten them, hand you tools so you don’t need to climb down repeatedly, and spot potential problems you might miss when focused on one task. Even experienced builders benefit from a second set of eyes during construction.
Step-by-Step: Building Your Hoop House

Step 1: Prepare the Site and Mark Your Layout
Start by choosing level ground or use a rake and shovel to smooth out bumps and fill low spots. Remove rocks, weeds, and debris that could puncture your plastic cover or interfere with the frame.
Once the area is clear, mark your hoop house perimeter using stakes and string. For a 10×12-foot structure, place stakes at each corner and run tight string lines to visualize the footprint. Measure diagonals to confirm your rectangle is square, they should match exactly.
Mark hoop positions along both long sides every 4 feet using spray paint or wooden stakes. Accuracy here prevents wobbly hoops later, so double-check your measurements before moving to the next step.
Step 2: Install the Base Frame or Ground Anchors
Your hoop house needs a solid foundation to stay put through wind and weather. You’ve got two main options: a wooden base frame or direct ground anchors.
For a wooden base frame, lay pressure-treated 2×6 or 2×8 lumber around your marked perimeter. Square the corners using the 3-4-5 triangle method, measure 3 feet along one board, 4 feet along the adjacent board, and adjust until the diagonal measures exactly 5 feet. Screw or bolt the corners together, then anchor the frame to the ground with rebar stakes every 3 feet or landscape spikes driven through pre-drilled holes.
If you’re using direct ground anchors, drive 18-24 inch rebar stakes into the soil at each hoop location, leaving 4-6 inches exposed. Slide a short section of PVC pipe over each stake to create a socket for your hoops. Space these anchors according to your plan, typically 4 feet apart for PVC, 6 feet for metal hoops.
Step 3: Shape and Install the Hoops
Now comes the most visually satisfying part of the build: transforming straight pipes into graceful hoops that give your structure its shape. If you’re working with PVC, you’ll find it bends fairly easily, though thicker-wall pipe (Schedule 40) requires more muscle than thin-wall irrigation tubing.
Start by spacing your hoops evenly along the base frame, typically 4 feet apart for a 10×12-foot house, giving you three or four hoops total. Insert one end of your PVC into the ground anchor or base connector on one side, then carefully flex it over and secure the opposite end. This takes two people for pipes longer than 10 feet; one person holds the middle while the other guides the ends into place.
For metal hoops, you may need a pipe bender or pre-bent sections. Check that all hoops reach the same height at center by measuring from ground to peak. Inconsistent arcs create weak spots and make covering difficult. If one hoop sits higher or lower than its neighbors, adjust the insertion depth or trim as needed before moving forward.
Step 4: Add the Ridge Pole and Stabilizing Supports
Once your hoops are in place, it’s time to give them a backbone. The ridge pole runs down the center peak of your structure, connecting all the hoops and preventing them from shifting independently. For a 10×12-foot hoop house, you’ll need a single length of PVC or EMT conduit that spans the entire 12-foot length.
Position the ridge pole along the top center of each hoop, then secure it using zip ties or hose clamps at every connection point. Pull these fastenings snug but not crushing-tight, you want a firm connection that won’t crack the material.
Now add lateral supports: attach horizontal pipes or strips along the sides, connecting each hoop about halfway down from the peak. These cross-braces stop the structure from leaning or twisting in wind. Use at least two per side for a 12-foot structure, securing them the same way you fastened the ridge pole. Your frame should feel noticeably more rigid once these supports are in place.
Step 5: Attach the End Walls
Start by cutting a straight piece of lumber (2×4 works well) to match the width of your hoop house base at each end. Secure these horizontal boards at ground level between the end hoops using deck screws. Next, add vertical studs on either side where you want your door, typically a 3-foot opening in the center. Cut another horizontal piece to serve as the door header at about 6 feet high, connecting your vertical studs.
For the remaining triangular space above the door and on either side, you can either frame additional studs or simply stretch greenhouse plastic over these areas and secure it to the frame. If you’re framing fully, space vertical studs every 2 feet for stability.
Install diagonal bracing from the bottom corners to the top of your door frame to prevent racking. This simple X-pattern dramatically improves structural integrity against wind pressure. Secure everything with 3-inch exterior screws, pre-drilling if necessary to prevent splitting the lumber.
Step 6: Install the Greenhouse Plastic Cover
Wait for a calm, dry day with temperatures above 50°F, plastic becomes brittle in cold and unmanageable in wind. Recruit a helper; covering a hoop house solo invites frustration and torn plastic.
Unroll the greenhouse plastic across the top of your frame, centering it so equal amounts overhang each side. Start at one end and drape it over the hoops, letting it rest loosely across the entire structure. Don’t pull tight yet.
Beginning at the center of one long side, gently pull the plastic down toward the ground, working outward toward the corners in both directions. Your goal is even tension without stretching so hard the plastic tears at connection points. Think “snug” rather than “drum-tight.” Have your helper mirror your movements on the opposite side, maintaining balance.
Once you’ve achieved consistent tension along both sides, temporarily secure the plastic at ground level with a few heavy boards or sandbags. Check for wrinkles running lengthwise over the hoops, these indicate uneven tension. Adjust by releasing one section and redistributing the pull before moving to final securing in the next step.
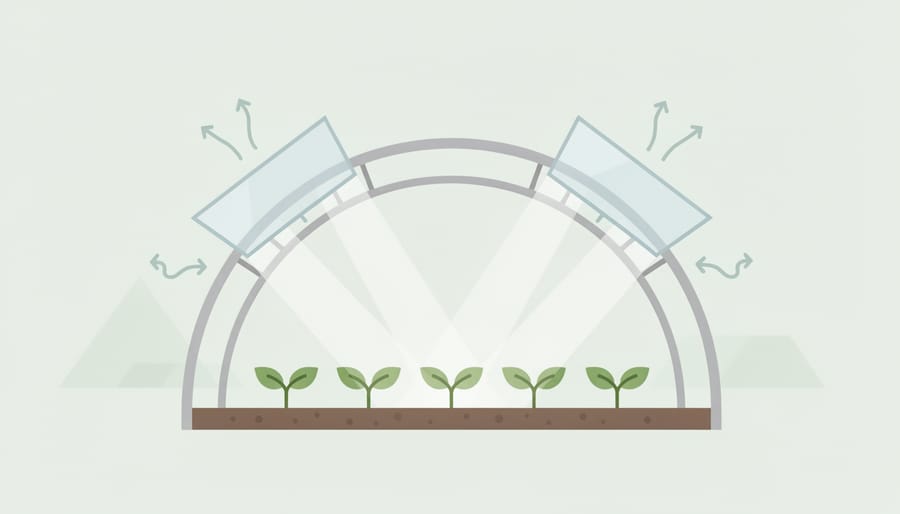
Step 7: Secure the Covering and Add Ventilation
With the plastic draped over your frame, it’s time to lock it down permanently and build in temperature control, two steps that determine whether your hoop house thrives or frustrates you all season.
Start by securing the plastic along the base. The most reliable method is burying the edges: dig a shallow trench about 6 inches deep around the perimeter, pull the plastic into it, and backfill with soil, packing it firmly. This creates a weatherproof seal that anchors the covering against wind while preventing heat loss at ground level.
For the end walls and door frame, wiggle wire channels offer the cleanest attachment, slide the aluminum track along wooden framing, then press the spring wire through the plastic into the channel. If that’s not in your budget, 1×2 wood strips screwed over the plastic work nearly as well. Space fasteners every 12 inches to prevent flapping.
Now address ventilation before your first warm day catches you off guard. Roll-up sides are essential: leave the bottom 3 feet of plastic unsecured on both long sides, attach it to a length of PVC pipe, and roll it up when temperatures climb above 75°F. Secure rolled sections with bungee cords or clips to maintain airflow without losing your covering.
Testing and Verification: Making Sure It’s Build-Ready
Before filling your new hoop house with plants, spend 30 minutes running through these essential checks. A systematic verification now prevents headaches later and ensures your structure can handle weather and daily use.
Start with a structural stability test. Walk around the perimeter and gently push against each hoop from multiple angles. They should feel firm and resist movement. Check that all connection points between hoops and the base frame or ground anchors are secure, with no wobbling or loose fittings. Grab the ridge pole and apply gentle upward pressure to confirm it’s properly fastened at both ends and to each hoop crossing point.
Next, test your ventilation system thoroughly. If you installed roll-up sides, raise and lower them completely several times to ensure the mechanism works smoothly and the plastic doesn’t catch or tear. Check that any vents or doors open and close properly, with no binding or gaps when secured. Stand inside on a sunny afternoon to verify adequate airflow when vents are open.
Inspect the plastic covering inch by inch, looking for any tears, punctures, or areas where the material isn’t properly secured. Pay special attention to corners and attachment points where stress concentrations occur. Run your hand along the bottom edges to confirm they’re buried or weighted adequately against wind infiltration. Look for any gaps where the covering meets the end walls or door frame.
Finally, do a 24-hour trial run. Place a min-max thermometer inside and monitor temperature swings throughout a full day-night cycle. This reveals whether you need additional ventilation or shade cloth before introducing plants. Check inside after a rainstorm to spot any unexpected leaks or pooling water issues.
Cost Breakdown: What to Expect
A basic 10×12-foot PVC hoop house costs between $150 and $300 to build from scratch. PVC pipes and connectors typically run $50-80, greenhouse plastic (6 mil, 4-year) costs $60-100, and lumber for end walls and base adds another $40-70. You’ll spend roughly $20-30 on fasteners, clamps, and anchoring materials.
Upgrading to metal conduit hoops pushes the total to $400-600 because metal tubing costs significantly more than PVC, expect $150-250 just for the hoops. However, metal structures handle snow load better and last 10+ years versus PVC’s 5-7 year lifespan in most climates.
Where to Save Money
Buy PVC and lumber from big-box stores during spring sales. Standard construction-grade materials work fine for most backyard builds. You can trim another $30-50 by reusing lumber from old projects for the base frame or end walls.
Skip expensive automated vent systems initially. Manual roll-up sides using rope and grommets cost under $10 and work reliably.
Where It Pays to Splurge
Invest in quality greenhouse plastic rather than painter’s poly. The $40 difference buys you three extra years of UV protection. Commercial-grade plastic resists tears and maintains light transmission far longer.
Ground anchors matter more than you’d think. Proper rebar stakes or auger anchors ($15-25 total) prevent your investment from becoming a sail during windstorms, cheap stakes pull out.
Expert Insight: Interview with a Season Extension Specialist
Q&A with Sarah Chen, Extension Horticulturist and Season Extension Specialist
Sarah Chen has spent fifteen years helping backyard and market gardeners extend their growing seasons in USDA Zone 5. She’s built over thirty hoop houses of various sizes and taught countless workshops on cold-season production.
What’s the biggest mistake you see first-time hoop house builders make?
They skip proper ventilation planning. People get so excited about trapping heat that they forget plants need air circulation. I’ve seen beautiful structures built without any way to open the ends or roll up the sides. When the first sunny March day hits, the interior temperature spikes to 95 degrees and everything inside cooks. Always design for ventilation from day one.
How much can a hoop house really extend the growing season?
In my climate, a simple unheated hoop house gives me six to eight extra weeks, about a month in spring and a month in fall. With row covers inside the hoop house, I can push that to ten or twelve weeks. I’ve harvested spinach on Christmas Day and planted lettuce in mid-February. The key is learning which crops thrive in these conditions rather than trying to grow tomatoes year-round.
What advice would you give someone building their first hoop house?
Start smaller than you think you need. A 10×12-foot structure is plenty to learn on, and you won’t waste money if you discover this isn’t for you. Also, build it close to your house. The farther you have to walk in February rain, the less likely you’ll maintain it properly. Convenience matters more than people realize.
Common Questions About DIY Hoop Houses
Gardeners considering their first hoop house build often have similar concerns about durability, regulations, and practical use. Here are answers to the most common questions.
How long will a DIY hoop house last?
A well-built PVC hoop house typically lasts 3-5 years before needing significant repairs, while metal-framed structures can serve you for 10-15 years or more. The greenhouse plastic covering will need replacement every 3-4 years regardless of frame type, as UV exposure gradually degrades it.
Do I need a permit to build a hoop house?
Most areas don’t require permits for temporary structures under a certain size (often 200 square feet), but regulations vary widely by municipality. Check with your local building department before starting, especially if you’re planning a permanent foundation or a larger structure.
What’s the difference between a hoop house and a greenhouse?
Hoop houses are simpler, unheated structures designed primarily for season extension, while greenhouses are typically more permanent buildings with heating systems and environmental controls. Hoop houses cost considerably less to build and maintain but offer less precise climate management.
Can I use my hoop house through winter?
Yes, hoop houses excel at winter growing in many climates, protecting cold-hardy crops like kale, spinach, and carrots from harsh winds and extreme temperature swings. You won’t be growing tomatoes in January, but you can harvest fresh greens throughout the cold months in most regions.
Another question that comes up frequently concerns covering materials. While standard 6-mil greenhouse plastic offers the best balance of cost and durability for most builders, some growers prefer UV-resistant films rated for four years or longer. The extra cost makes sense if you’re planning a permanent structure, but basic plastic works fine for your first build while you’re learning what features matter most for your specific climate and crops.
You’ve just learned how to build a functional hoop house that’ll add months to your growing season, and the best part? Most gardeners finish their first build in a single weekend. Even if you’ve never tackled a DIY project before, this structure doesn’t demand specialized skills or expensive tools.
Start simple. A basic 10×12 PVC hoop house teaches you everything you need to know about season extension. Once you’ve grown a few rounds of lettuce in March or kept tomatoes producing into November, you’ll naturally see where you want to improve. Maybe that’s upgrading to metal hoops for better snow handling, or adding automatic vent openers for easier temperature control.
The real magic happens when you plant your first crop inside and watch it thrive while the garden outside struggles with frost. That’s when this project shifts from weekend carpentry to something that fundamentally changes how you garden.
Have questions about your specific setup or yard conditions? Want to share photos of your completed hoop house? Drop a comment below. This community loves seeing what you’ve built and helping troubleshoot challenges along the way. Your experience might be exactly what another gardener needs to hear.