Transform your living space into an indoor garden oasis with a DIY hydroponic system that grows fresh herbs, leafy greens, and vegetables year-round. Build a complete water-based growing system for under $100 using common hardware store materials – PVC pipes, water pumps, and net pots. Master soil-free gardening in any indoor space by creating a simple deep water culture system with a storage tote, air pump, and growing medium like clay pebbles or rock wool. Monitor water pH, nutrients, and temperature to cultivate thriving plants that grow up to 30% faster than traditional soil methods. Whether you’re a curious beginner or seasoned gardener, indoor hydroponics opens up endless possibilities for sustainable, space-efficient food production right in your home. Learn the fundamentals, choose your plants, and start growing your own fresh produce within weeks.
Essential Components for Your DIY Hydroponic System

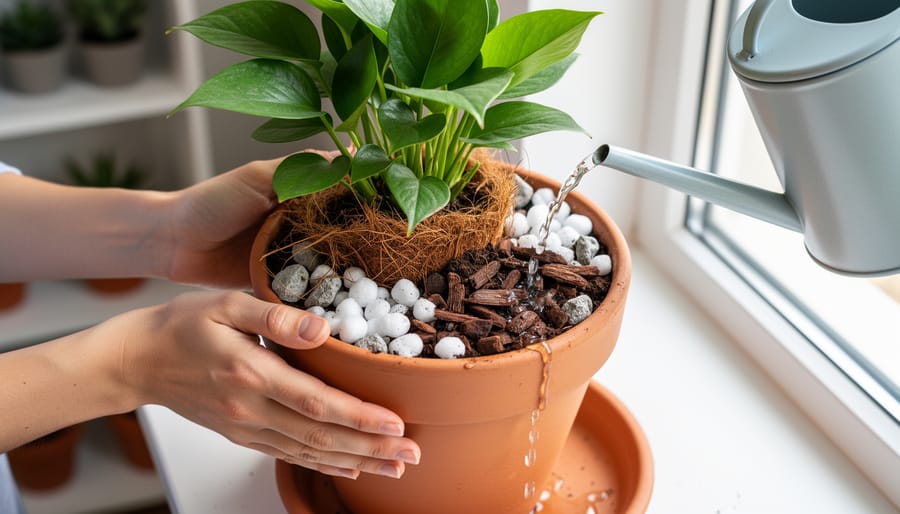
Container and Growing Medium Options
When starting your indoor hydroponic garden, you’ll need to choose suitable containers and growing media. For containers, many beginners find success with repurposed plastic storage bins, 5-gallon buckets, or even mason jars for smaller setups. These are not only cost-effective but also readily available at most hardware stores.
Your growing medium choices can significantly impact your plants’ success. Popular options include:
– Clay pebbles (expanded clay aggregate): Excellent for providing oxygen to roots and reusable after cleaning
– Rockwool cubes: Great for seed starting and maintaining moisture
– Perlite: Lightweight and provides good aeration
– Coconut coir: Sustainable option that retains water well
– Vermiculite: Helps with water retention and nutrient distribution
For beginners, I recommend starting with clay pebbles or coconut coir, as they’re forgiving and easy to work with. Whatever container and medium combination you choose, ensure proper drainage and enough space for root growth. Remember to thoroughly clean any repurposed containers and rinse new growing media before use to remove dust or debris.
Pumps, Pipes, and Water Flow
Water circulation is the heart of any hydroponic system, and getting it right doesn’t have to be complicated. For most DIY setups, you’ll need a submersible water pump, which you can find at any aquarium store or garden center. Choose a pump that can move about 2 gallons per hour for each plant in your system – this ensures proper nutrient delivery without overwhelming your plants.
PVC pipes are perfect for creating your water delivery system. Half-inch pipes work well for most home setups, and they’re easy to cut and connect. When assembling your system, use elbows and T-joints to create a network that reaches all your growing spots. Remember to drill small holes (about 1/8 inch) where you want water to flow to your plants.
To prevent leaks, use Teflon tape on all threaded connections and test your system with plain water before adding any nutrients. A good tip is to include a ball valve in your setup – this lets you control water flow and makes system maintenance much easier. For the return flow, slight downward angles (about 2 degrees) help water flow smoothly back to your reservoir without creating noisy splashing.
Step-by-Step System Assembly
Setting Up Your Growing Container
The heart of your hydroponic system starts with choosing and preparing the right container. A clean 5-gallon bucket or storage tote works perfectly for beginners. If you’re using a bucket, make sure it’s food-grade plastic and hasn’t been used for chemicals or cleaning supplies. Dark-colored containers are ideal as they prevent algae growth by blocking light.
Start by thoroughly cleaning your container with a mixture of mild soap and water, then rinse it well. Dry it completely before moving forward. Next, drill holes in the lid – you’ll need one larger hole (about 2-3 inches) for each plant you plan to grow, plus several smaller holes for air circulation. Space these holes evenly, leaving enough room between plants for growth.
If you’re using net pots, they should fit snugly into the larger holes you’ve drilled. A bit of weather stripping around the rim of each net pot can help create a better seal. For additional support, you can add a layer of landscaping fabric or screening material under the lid to prevent any growing medium from falling through.
Remember to position your container somewhere level and stable, ideally near an electrical outlet for your pump and grow lights. Consider placing a drip tray underneath to catch any potential water overflow.

Installing the Water System
Setting up your hydroponic water system might seem daunting at first, but I’ll break it down into manageable steps. Start by connecting your reservoir to the growing tray using food-grade tubing. Cut two lengths of tubing: one for water delivery and another for return flow. The delivery tube should connect from your pump to the highest point of your growing tray, while the return tube runs from the lowest point back to your reservoir.
Install your submersible pump in the reservoir, making sure it’s fully submerged but elevated slightly off the bottom to prevent debris intake. Secure all tubing connections with appropriate-sized clamps to prevent leaks. If you’re using multiple growing trays, consider installing a manifold to split the water flow evenly.
For nutrient delivery, you’ll want to ensure proper circulation. Position your growing tray at a slight angle (about 1-2 degrees) to encourage water flow back to the reservoir. This natural gradient helps prevent water stagnation and promotes oxygen absorption.
Next, install an air stone in your reservoir, connected to an air pump placed above water level. This crucial component maintains proper oxygen levels for your plants’ roots. Consider adding a timer to your water pump to create feeding cycles – typically 15 minutes on, 45 minutes off works well for most setups.
Before adding nutrients, run your system with plain water for 24 hours to check for leaks and ensure proper flow. Once you’re confident everything is working correctly, add your hydroponic nutrients according to the manufacturer’s instructions. Remember to maintain proper pH levels between 5.5-6.5 for optimal nutrient uptake.
Pro tip: Install a water level indicator in your reservoir to easily monitor when it needs refilling. This simple addition can save you from accidentally running your system dry and potentially damaging your pump or plants.
Plant Selection and Maintenance
Best Plants for Beginners
Starting your hydroponic journey with the right plants can make all the difference in your success. While following basic beginner gardening tips is important, some plants naturally adapt better to hydroponic systems than others.
Leafy greens are your best bet when starting out. Lettuce varieties like Butterhead and Romaine are incredibly forgiving and typically ready for harvest within 30-45 days. Spinach and Swiss chard are equally rewarding choices that thrive in basic hydroponic setups.
Herbs are another excellent option for beginners. Basil, mint, and cilantro grow vigorously in hydroponic systems and can provide fresh flavors for your kitchen year-round. These plants don’t require complex nutrition and adapt well to various lighting conditions.
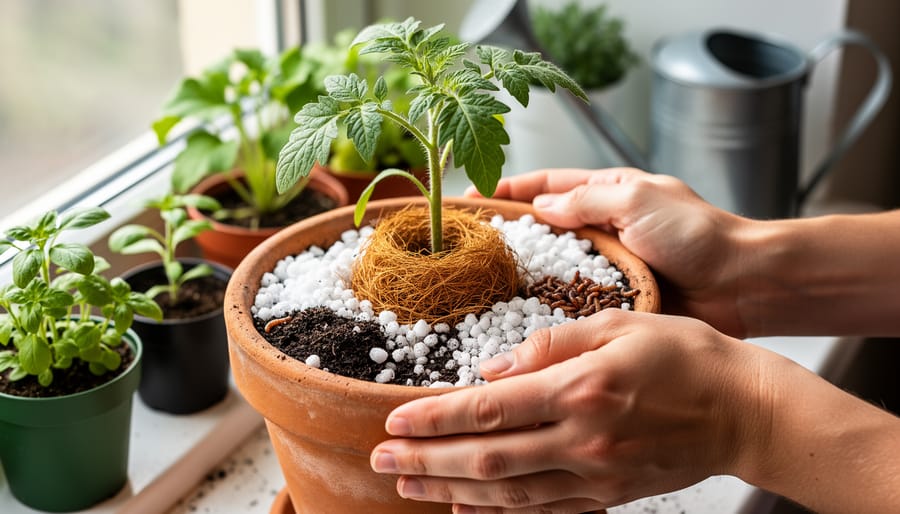
For those feeling a bit more adventurous, cherry tomatoes and compact pepper varieties can be great choices. While they take longer to produce fruit, they’re relatively low-maintenance once established. Just remember to provide adequate support for their stems as they grow.
Start with just two or three plant varieties to avoid feeling overwhelmed. As you gain confidence and experience, you can gradually expand your hydroponic garden with more challenging plants. Remember, success with these starter plants will build your confidence and prepare you for more advanced growing projects.

Daily Care and Monitoring
Successful indoor hydroponics requires consistent daily attention and monitoring to ensure your plants thrive. Start each day by checking your system’s water level and topping it off as needed – plants can quickly deplete their nutrient solution. Test the pH level using a simple testing kit, aiming to maintain it between 5.5 and 6.5 for most plants. If needed, adjust using pH up or down solutions.
Monitor your proper lighting requirements by ensuring grow lights remain at the right distance from your plants – typically 6-12 inches, depending on the light type. Watch for signs of light stress, such as yellowing leaves or stunted growth.
Check the temperature daily, keeping it between 65-75°F (18-24°C) for optimal growth. Humidity should stay between 50-70% – use a small humidifier if needed. Inspect your plants for any signs of nutrient deficiencies, pests, or disease. Look for discolored leaves, spots, or unusual growth patterns.
Clean your system’s filters weekly and change the nutrient solution every 2-3 weeks. Keep a simple log to track these measurements and changes – this will help you spot patterns and prevent problems before they become serious. Remember, consistency is key in hydroponic gardening, and a few minutes of daily care can prevent hours of troubleshooting later.
Troubleshooting Common Issues
Even the most experienced hydroponic gardeners encounter challenges, but don’t worry – most common issues have straightforward solutions. Let’s tackle the most frequent problems you might face and how to resolve them.
Nutrient deficiencies often show up as yellowing leaves or stunted growth. If you notice these signs, first check your pH levels – they should typically be between 5.5 and 6.5. Adjust your nutrient solution accordingly, and ensure you’re using fresh nutrients mixed at the correct ratios. Remember to change your nutrient solution every 2-3 weeks to prevent buildup.
Root rot is another common challenge, usually appearing as brown, slimy roots with an unpleasant smell. To prevent this, maintain proper water temperature (65-75°F), ensure good water circulation, and consider adding beneficial bacteria to your system. Proper light management and air circulation also help prevent algae growth, which can contribute to root problems.
Experiencing power outages? Keep a battery-operated air pump as backup to maintain oxygen levels in your system. For longer outages, consider transferring plants to temporary containers with fresh water until power returns.
If you notice leaves curling or showing brown spots, check your grow lights’ distance from plants. Too close can cause light burn, while too far away results in leggy growth. Maintain proper spacing and adjust as plants grow taller.
Leaks can be frustrating but are usually easy to fix. Keep silicon sealant and spare tubing on hand for quick repairs. When building your system, always pressure-test connections before adding plants.
Remember, white salt deposits around your system are normal – they’re mineral buildup from nutrients. Regular cleaning with a vinegar solution during reservoir changes will keep your system running smoothly. If plants aren’t growing as expected, start a troubleshooting journal to track changes in nutrients, pH, and environmental conditions. This record-keeping makes problem-solving much easier in the long run.
Indoor hydroponics offers an exciting and rewarding way to grow fresh, healthy produce right in your home, regardless of the season or available outdoor space. As we’ve explored throughout this guide, creating your own hydroponic system doesn’t have to be complicated or expensive. With basic materials, a bit of patience, and the knowledge you’ve gained here, you’re well-equipped to start your hydroponic journey.
Remember, whether you choose a simple water culture system or a more advanced NFT setup, the key is to start small and learn as you grow. Don’t be afraid to experiment with different plants and techniques – every gardener’s journey is unique, and learning from both successes and challenges is part of the experience.
The satisfaction of harvesting your first hydroponic lettuce or watching your herbs flourish under grow lights makes all the initial effort worthwhile. Plus, you’ll be joining a growing community of indoor gardeners who are revolutionizing the way we think about home food production.
So gather your supplies, clear some space, and take that first step into the wonderful world of hydroponics. Your indoor garden adventure awaits!