Water-wise landscaping means designing a yard so it thrives on far less water, and you can set up the basics in a weekend or two with beginner-level skills. The method is simple: group plants by how much water they need, build healthy soil, cover the ground with mulch, and water deeply but rarely with a drip line or soaker hose. Do those four things and most yards cut their outdoor watering dramatically without losing the lush look.
Why does it work? Most of the water we spray on a yard never reaches a root. It evaporates from bare soil, runs off hard-packed ground, or lands on plants that never needed it. Water-wise design stops those leaks one by one. Mulch holds moisture in. Compost helps soil act like a sponge. Plants that suit your climate simply ask for less.
In this guide, we’ll walk through the tools and materials you need, what to check before you dig, and a clear step-by-step process for planning and planting your own low-water landscape. You’ll also hear from experienced gardeners who’ve made the switch, plus a way to check your results and keep improving season after season.
No special background required. If you can use a shovel and a garden hose, you’re ready to begin.
What Water-Wise Landscaping Really Means (and Why It’s Worth Doing)
Let’s clear something up right away: water-wise landscaping doesn’t mean a yard full of gravel and prickly cactus. That’s one version, sure, but it’s a small slice of the picture. At its heart, it simply means planting the right plants in the right places and giving them what they need, no more and no less.
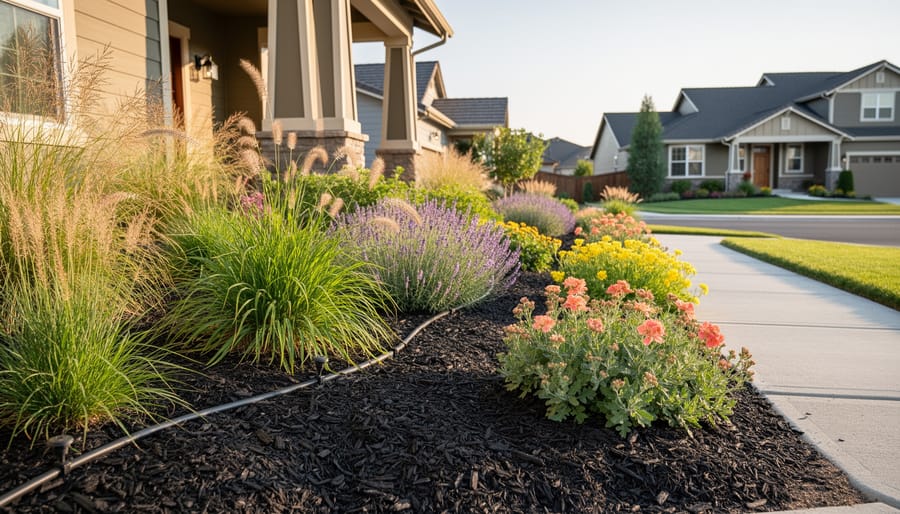
I learned this the hard way. A few summers ago I had a front lawn that guzzled water and still turned crispy by July. I finally tore out a strip along the sidewalk and replaced it with a border of ornamental grasses, coneflowers, and lavender. By the second season it was lush, buzzing with bees, and I was hauling the hose out maybe once a week instead of every other day.
That’s the real payoff, and it goes beyond a lighter water bill. Plants suited to your site tend to be healthier and tougher against pests and heat. You’ll spend fewer weekends mowing, watering, and fussing. And your yard becomes a gentler neighbor to the local environment, which is exactly what eco-friendly landscaping is all about.
The thread that ties it together is what I call Water-Wise Garden Planning: designing before planting. Instead of buying whatever looks pretty at the nursery and hoping for the best, you first look at your sun, soil, and slope, then build a plan around them.
Once you see it this way, the whole project feels a lot less intimidating.
What You’ll Need Before You Start: Tools and Materials
Good news: water-wise landscaping doesn’t demand a shed full of gear. Most of what you need is simple, and plenty of it you may already own. Here’s a quick checklist to gather before you start.
- Graph paper or a free garden-planning app for sketching your yard
- Tape measure to size your beds and zones
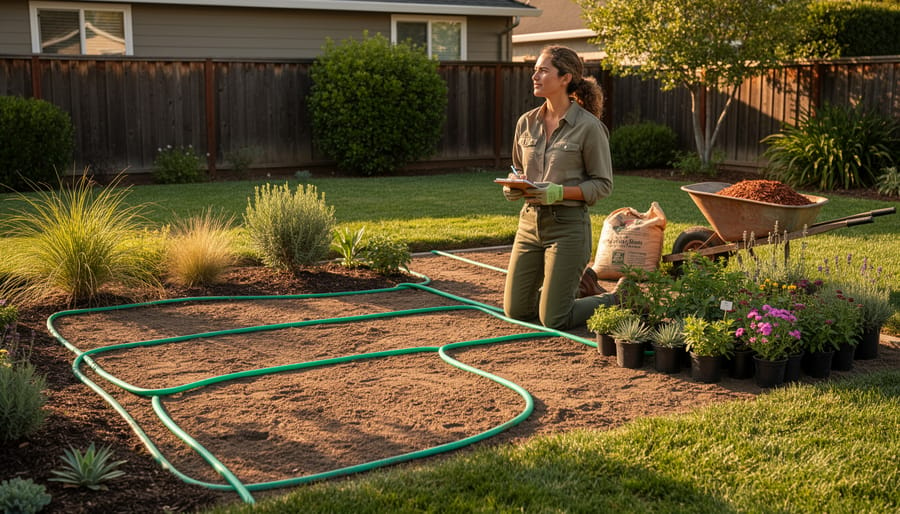
- Garden hose or rope for laying out bed outlines
- Shovel and garden fork for digging and loosening soil
- Hand trowel for planting
- Gloves to protect your hands
- Compost to help your soil hold moisture
- Mulch to lock in moisture around plants
- Drip irrigation kit or soaker hose for efficient watering
- Rain barrel to catch free water
Think of it as two piles. The planning supplies (paper or app, tape measure, hose or rope) cost almost nothing and get used first. The hands-on supplies are for digging, planting, and watering once your design is ready.
If you’re watching your budget, start small. Pencil and scrap paper work just as well as an app, and a neighbor or local tool library may lend you a garden fork. Many towns also offer free or cheap municipal compost and wood-chip mulch, so check before you buy bags.
Beginners can skip the rain barrel and drip system on day one. A watering can and a good soaking will carry your first small bed, and you can add irrigation as you expand.
Before You Dig: Safety Warnings and Stop Conditions
A little prep keeps your project safe and stress-free, and it only takes a few minutes. Before any shovel goes in the ground, call 811 (or your local utility locator) so buried gas, water, and electric lines get marked for free.
While you’re making calls, peek at your local outdoor watering limits and any HOA rules about front-yard plantings. Then keep a few simple habits in mind:
– Skip planting under power lines, where tall shrubs and trees will eventually cause trouble.
– Check plant lists for invasive species, which can crowd out natives and spread past your fence.
– Wear sunscreen, a hat, and sturdy gloves.
– Pause work during extreme heat or when soil is soggy, since digging wet soil compacts it and undoes your soil-building efforts.
Some situations are worth handing to a professional. Stop and call a landscaper or drainage specialist if you have a steep slope, standing water that never drains, or large tree roots you’d have to cut through. Knowing when to ask for help is part of good gardening, and it protects both your yard and your back.
Step-by-Step: Planning and Planting Your Water-Wise Garden
Step 1: Read Your Yard (Sun, Soil, Slope, and Water Flow)
Before you buy a single plant, spend a day or two just watching your yard. It’s the easiest step, and it saves the most money later.
Start with sun. Check the same spots in the morning, at midday, and in late afternoon, and jot down which areas get full sun (six or more hours), part sun, or shade. Next, test your soil. Grab a handful of damp soil and squeeze it. If it crumbles apart, it’s sandy and drains fast. If it forms a sticky ribbon, it’s clay and holds water. A ball that breaks apart with a gentle poke is a happy loam. For a more precise read, fill a jar a third full of soil, top it with water, shake, and let it settle. The layers show your sand, silt, and clay.
After a rain or a watering, notice where puddles linger and where water rushes away. Those spots will shape your plant choices. It also helps to map climate zones and microclimates around your property, like hot walls or windy corners.
Finally, sketch a simple map. Mark sun, soil, slope, and any healthy plants worth keeping. Keep what’s thriving already.
Step 2: Group Plants by Water Needs (Hydrozoning Made Simple)
Hydrozoning just means grouping plants by how thirsty they are, so you’re never overwatering a succulent to keep a hydrangea happy. Think of your yard in three rings.
Put your high-water plants closest to the house or patio, where you’ll see them daily and can hand-water easily. This is the spot for a small vegetable bed, containers, or a lush flower border. Moderate plants go in the middle, where they’ll need a drink only during dry spells. Low-water and native plants take the outer edges and far corners, where they can mostly look after themselves.
To sketch your zones, grab your yard map from Step 1 and shade each area with three colors: dark for high, medium for moderate, light for low. Keep the dark zone small. It’s the one that costs you the most effort.
Lawn is usually the thirstiest part, so shrink it where you can. Start by replacing hard-to-mow strips, slopes, and shady corners with groundcovers or native beds. Many gardeners find that native plants really do save time and water once they settle in.
Step 3: Choose Tough, Beautiful Plants for Your Region
The best plant is one that already wants to live where you do. Start with your climate zone, then look for plants that handle your sun, soil, and rainfall without much coaxing. If you’d like inspiration, these native plant ideas show how good local plants can look.
Your best local resource is free. Call or visit your regional extension office, or check a native plant society’s website, for plant lists matched to your area. Many publish “right plant, right place” guides sorted by sun and water needs.
Here’s a handy starter mix to look for:
– Perennials: coneflower, yarrow, salvia, black-eyed Susan
– Shrubs: lavender, rosemary, native sumac, ninebark
– Grasses: little bluestem, blue fescue, feather reed grass
– Groundcovers: creeping thyme, sedum, wild ginger
Expert tip: One regional gardener I know swears by buying just three plants of a kind. “Start small, watch what thrives through one dry spell, then buy more of the winners,” she says. It saves money and teaches you what your yard really likes.
Step 4: Build Soil That Holds Moisture
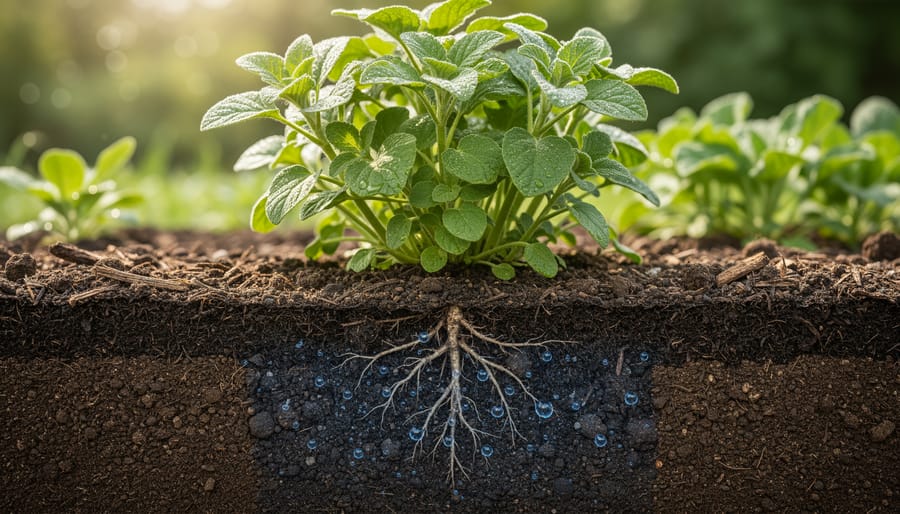
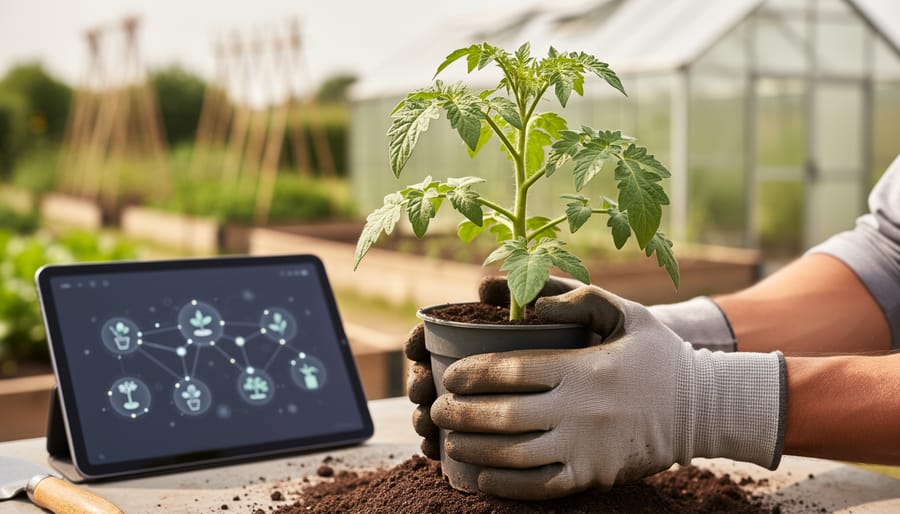
Healthy soil is your secret weapon, because it works like a sponge that holds water right where roots can use it. The easiest upgrade is compost. Spread about two inches over your planting area and gently mix it into the top six inches of soil. Don’t have a compost bin? Bagged compost from a garden center works just as well.
Resist the urge to till deeply or repeatedly. Over-tilling breaks down the natural soil structure and dries things out faster, so a light loosening with a garden fork is plenty.
Your soil type changes the game a little:
– Sandy soil drains fast, so extra compost helps it hang onto moisture longer.
– Clay soil holds water but packs tight, so compost opens it up and improves drainage.
Either way, the fix is the same friendly one: add organic matter and be patient. Soil keeps getting better each season, and your plants will reward you with stronger roots and less thirst.
Step 5: Plant at the Right Time and Water Deeply to Establish
Timing makes a bigger difference than most beginners expect. Aim to plant in fall or early spring, when soil is workable and air temperatures are mild. Roots settle in without the stress of summer heat, so plants spend their energy growing down rather than fighting to survive.
When you dig each hole, make it about twice as wide as the root ball but no deeper. Set the plant so the top of the root ball sits level with, or just above, the surrounding soil. Planting too deep is a common and sneaky mistake.
For the first season, water deeply but less often. Soak the root zone slowly, then wait until the top few inches of soil feel dry before watering again. Start with every few days, then stretch the gap to weekly and beyond as the weeks pass. This habit teaches roots to chase moisture downward, which is what makes your garden tough later.
Step 6: Mulch and Set Up Efficient Watering
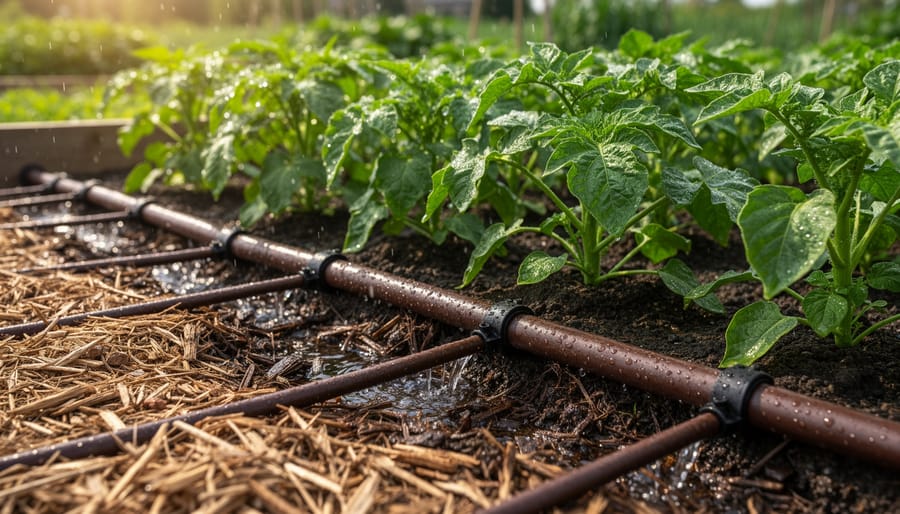
Mulch is your water-wise secret weapon. A layer of two to three inches over bare soil slows evaporation, keeps roots cooler, and smothers thirsty weeds. Keep it a few inches back from stems and trunks so moisture doesn’t linger against the bark and cause rot.
For the material, shredded bark, wood chips, and leaf mold all work well in most beds. Gravel can suit Mediterranean-style plantings, though it holds heat, so use it only where plants enjoy hot, dry conditions. Wood chips from a local tree service are often free, which makes them a great budget pick.
Now for the watering itself. Drip irrigation delivers water right at the root zone, so very little is lost to wind or runoff. If drip lines feel like a big leap, a soaker hose snaked through a bed does a similar job for much less money. Both can sit under your mulch, out of sight.
Rain barrels are a nice bonus. Put one under a downspout and you’ll collect free water for hand-watering during dry spells.
Whatever method you choose, water early in the morning. Cooler air and light wind mean more moisture soaks in and less disappears. Give each plant a slow, deep drink rather than a quick sprinkle, and your roots will reward you by growing deeper.
Meet the Gardener: Lessons from a Water-Wise Pro
We love hearing from gardeners who’ve turned thirsty yards into resilient, beautiful spaces. For this feature, we’re pairing our questions with a regional water-wise pro. Their answers below are a placeholder format until the interview is finalized.
Q: What’s the biggest lesson you’ve learned about low-water gardening?
[Interviewee response to be added. Suggested focus: the value of observing the yard first and letting the site guide plant choices.]
Q: Which reliable plants do you recommend to beginners?
[Interviewee response to be added. Suggested focus: two or three tough, regionally suited plants across perennials, grasses, and groundcovers.]
Q: What’s one mistake you’d steer new gardeners away from?
[Interviewee response to be added. Suggested focus: a common beginner pitfall, such as watering too often or planting at the wrong time.]
Q: Any parting encouragement?
[Interviewee response to be added. Suggested focus: starting small and being patient through the first season.]
Now we’d love to hear from you. Have you swapped out a thirsty lawn, found a plant that thrives on very little water, or learned a lesson the hard way? Share your story and questions with the Bluestem Gardening community. Your experience might be exactly the nudge another gardener needs to start their own water-wise bed.
How to Tell It’s Working: Verification and Next Steps
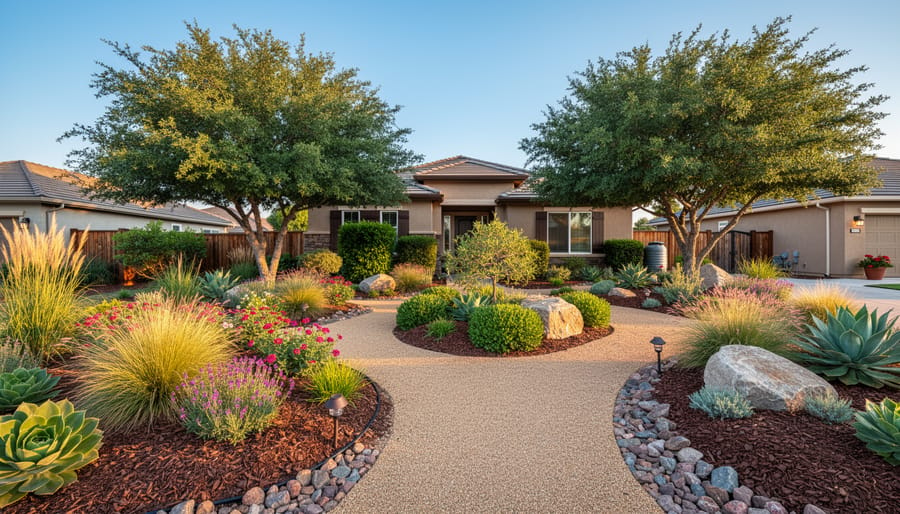
You’ll know your water-wise garden is working when your plants look steady on a lot less water. New growth, firm leaves, and good color after a few weeks all point in the right direction. A little drooping on a hot afternoon that perks up by evening is normal, so don’t rush for the hose.
Next, check the soil itself. Push a finger two or three inches down, or slide in a trowel and peek. If it’s cool and slightly damp, you’re set. If it’s bone dry that deep, water slowly and deeply. If it’s soggy, ease off.
Learn the signs of both extremes. Yellowing leaves, soft stems, and mushy growth at the base usually mean too much water. Crispy edges, curling leaves, and slow growth that doesn’t recover overnight usually mean too little. Don’t worry if you land on one now and then. Every gardener adjusts as they learn their plants.
Keep an eye on your water bill, too. Compare it with the same months from last year, and you’ll often see the savings add up over a season.
Once things look good, here’s where to go next:
– Expand your beds a little at a time, so each new area gets the attention it needs.
– Adjust your watering with the seasons, giving less in cool weather and a bit more during hot spells.
– Add rain capture, such as a rain barrel, to collect free water for dry stretches.
Water-Wise Landscaping FAQs
Do I have to remove my whole lawn?
Not at all. Start by shrinking the parts of the lawn you never use, like side strips or awkward corners, and keep a smaller patch where you actually play or relax.
How long until plants need less water?
Most new plants need regular deep watering for the first season while their roots settle in. After that, many will do well with only occasional help, depending on your climate and plant choices.
Will a water-wise garden look wild?
Only if you want it to. Repeating a few plants, adding tidy edges, and mulching neatly gives a polished, intentional look.
Can I do this on a small lot or in containers?
Absolutely. Containers with tough, drought-tolerant plants work well, and you can pick up more ideas from our guide to small-space gardens.
Cost is the question people ask most. You can begin with one small bed, reuse plants and materials you already have, and add more each season as your budget allows. Over time, lower water use and less upkeep often make up for the upfront effort.
Water-wise landscaping isn’t about giving up a beautiful yard. It’s about planning smarter so your plants do more of the work. Read your site, group plants by their water needs, choose tough varieties suited to your region, build soil that holds moisture, plant at the right time, and finish with mulch and an efficient watering setup. Those habits, repeated bed by bed, add up to a garden that stays lush with far less effort from you.
You don’t have to tackle the whole yard at once. Start with one small bed, maybe a sunny corner that always gets crispy by August, and let it teach you what thrives in your conditions. Every gardener I know who’s built a low-water landscape began just that way, with a single patch and a bit of curiosity.
Give yourself room to learn, too. A plant that struggles isn’t a failure, it’s information, and next season’s choices will be better for it.
We’d love to see how it goes. Share your projects, your wins, and your questions with the Bluestem Gardening community, and let’s keep growing smarter together.