Transform your unused vertical space into a thriving first herb garden using everyday materials. Build a stunning living wall that produces fresh herbs year-round while maximizing limited space in your home, patio, or balcony. Whether you’re working with recycled pallets, pocket planters, or repurposed gutters, vertical herb gardens combine practical functionality with aesthetic appeal, bringing life to blank walls while keeping essential cooking herbs within arm’s reach.
This step-by-step guide reveals proven designs that work in any space, from sunny kitchen windows to shaded outdoor walls. Using simple tools and materials from your local hardware store, you’ll learn how to construct, plant, and maintain a vertical herb garden that fits your specific needs and space constraints. Get ready to elevate your gardening game – literally – and create a sustainable source of fresh herbs that adds both beauty and functionality to your living space.
Planning Your Vertical Herb Garden
Choosing the Perfect Location
Selecting the right location for your vertical herb garden is crucial for its success. While many people assume container herb gardening can work anywhere, most herbs need at least 6 hours of sunlight daily to thrive. Start by identifying a south or southwest-facing wall or fence that receives ample sunshine throughout the day.
Consider accessibility when choosing your spot – you’ll want to easily reach your herbs for regular harvesting and maintenance. A location near your kitchen door is ideal, making it convenient to grab fresh herbs while cooking. Just ensure you can comfortably reach all levels of your vertical garden without straining.
Space-wise, vertical gardens are wonderfully adaptable. Even a narrow wall section of 2-3 feet wide can accommodate a thriving herb collection. Remember to account for the mature size of your plants and ensure there’s enough room for air circulation between them. If you’re working with a balcony or patio, check weight restrictions and ensure your structure won’t interfere with any existing features or block important pathways.
Materials and Tools Checklist
Before you start building your vertical herb garden, gather these essential materials and tools:
Essential Materials:
– Mounting board or pallet (weather-treated wood recommended)
– Mason jars, terra cotta pots, or fabric pocket planters
– Strong mounting brackets and screws
– High-quality potting soil
– Herb seedlings or seeds
– Landscape fabric or weed barrier
– Cable ties or strong wire
– Drainage materials (pebbles or gravel)
– Hardware for wall mounting (anchors, screws)
Basic Tools:
– Power drill with various drill bits
– Screwdriver
– Level
– Measuring tape
– Pencil
– Garden trowel
– Scissors or pruning shears
– Work gloves
– Safety goggles
Optional Accessories:
– Watering can with narrow spout
– Plant labels or markers
– Small garden fork
– Moisture meter
– Spray bottle for misting
– Organic fertilizer
– Growth lights (for indoor gardens)
– Automatic watering system
Pro tip: Consider purchasing extra potting soil and a few additional containers – you’ll be surprised how quickly you’ll want to expand your herb collection once you get started!

DIY Construction Methods
Pallet Garden Design
Transform an old wooden pallet into a stunning vertical herb garden with this eco-friendly design. Before starting, ensure your pallet is heat-treated (marked with “HT”) rather than chemically treated, making it safe for growing edible plants. Give your pallet a thorough cleaning with soap and water, then let it dry completely.
Start by sanding rough edges to prevent splinters and create a smoother finish. For added durability, apply a coat of non-toxic outdoor sealant to protect the wood from moisture, avoiding areas where plants will be placed. Create planting pockets by attaching landscape fabric to the back and bottom of the pallet using a staple gun, leaving the front open for planting.
Position your pallet upright against a sunny wall, ensuring it’s properly secured. For extra stability, add L-brackets to attach it to the wall. Fill each pocket with high-quality potting soil mixed with compost for optimal drainage and nutrition. When planting, consider herb height and growth habits – place taller herbs like rosemary and sage in upper rows, with cascading varieties like thyme and oregano in lower sections.
To maximize space, stagger your plantings between slats. This arrangement allows each herb adequate room to grow while creating a lush, full appearance. Add a drip irrigation system or remember to water regularly, especially during hot weather. The vertical design means water will naturally flow downward, benefiting all plants.
Pro tip: Let your planted pallet lay horizontal for 2-3 weeks before mounting it vertically. This gives roots time to establish, preventing soil from washing away when upright.

PVC Pipe System
A PVC pipe garden system offers a modern, clean look while maximizing your vertical growing space. This budget-friendly solution is perfect for both indoor and outdoor herb gardens, and you can customize it to fit your available space.
To create your PVC herb garden, you’ll need 4-inch diameter PVC pipes, end caps, a saw, drill with a 3-inch hole saw attachment, mounting brackets, potting soil, and your chosen herbs. Start by cutting your main pipe into 4-foot sections, or adjust the length based on your space. Mark spots along the pipe approximately 8 inches apart for your planting holes.
Using your hole saw, carefully cut openings on one side of each pipe section. Sand the edges smooth to prevent any sharp spots. Attach end caps to both sides of your pipe sections, ensuring one end has drainage holes drilled into it. Mount your brackets to a sturdy wall or fence, spacing them about every 2 feet to provide adequate support.
Position your pipes horizontally on the brackets, staggering them to ensure each row of herbs receives sufficient sunlight. Fill each pipe about halfway with potting soil, then plant your herbs through the openings. Add additional soil around the roots, leaving some space at the top for watering.
This system works particularly well for smaller herbs like thyme, oregano, and mint. The PVC pipes provide excellent drainage and help maintain consistent soil moisture. Plus, the white pipes reflect light, maximizing sun exposure for your plants. Remember to position your garden where it will receive at least 6 hours of sunlight daily for optimal growth.
Mason Jar Wall Garden
Transform your kitchen herbs into a stunning wall display with this charming mason jar garden project. Not only does it save counter space, but it also adds a rustic touch to your home decor while keeping fresh herbs within arm’s reach.
To create your mason jar wall garden, you’ll need:
– 5-7 wide-mouth mason jars
– A sturdy wooden board (reclaimed wood works beautifully)
– Pipe clamps or strong metal hose clamps
– Mounting brackets
– Small rocks or pebbles for drainage
– Quality potting soil
– Your favorite herb seedlings
– Basic tools (drill, screwdriver, level)
Start by preparing your mason jars. Place a layer of small rocks at the bottom of each jar for drainage, then add potting soil, leaving about two inches of space at the top. Next, secure the pipe clamps to your wooden board, spacing them evenly. Make sure they’re tight enough to hold the mason jars securely but loose enough to remove jars when needed.
Mount your wooden board to the wall using sturdy brackets, ensuring it’s completely level. Choose a spot that receives adequate sunlight for your herbs – most kitchen herbs need at least 4-6 hours of direct light daily. Once the board is mounted, carefully place your prepared mason jars into the clamps.
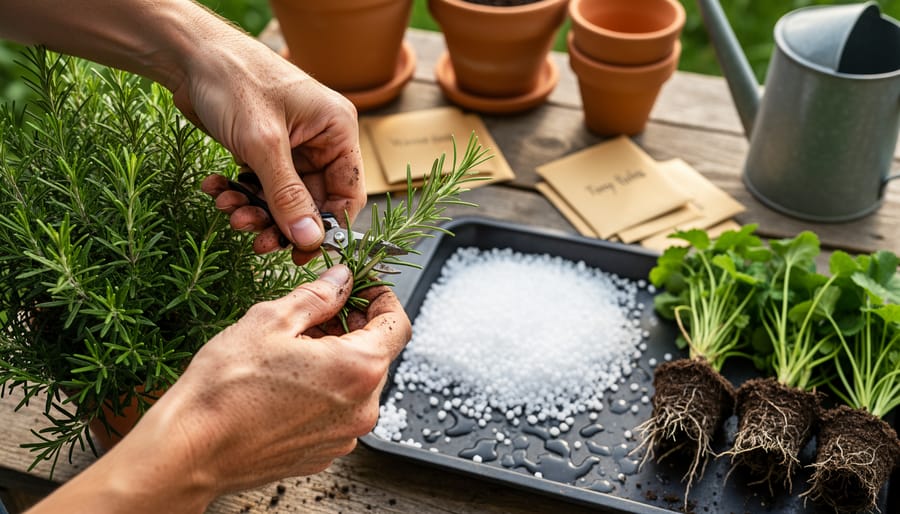
Now comes the fun part – planting your herbs! Some excellent choices for mason jar gardens include basil, mint, thyme, and oregano. Plant one type of herb per jar, gently positioning the seedlings in the soil and adding more potting mix around the roots.
Maintenance is straightforward: water when the top inch of soil feels dry, rotate jars occasionally for even growth, and harvest regularly to encourage bushier plants. Remember that herbs in mason jars may need more frequent watering than traditional pots due to limited soil volume.
This project typically takes about two hours to complete and creates a beautiful, functional addition to your kitchen or dining area.
Plant Selection and Care

Best Herbs for Vertical Gardens
When selecting herbs for your vertical garden, some varieties naturally adapt better to upward growth and container living. Compact and trailing herbs are particularly well-suited for vertical gardens, making them perfect choices for your space-saving setup.
Culinary favorites like basil, thyme, and oregano thrive in vertical gardens and provide fresh flavors right at your fingertips. Basil, with its bushy growth habit, adapts wonderfully to vertical spaces and keeps producing leaves as long as you harvest regularly. Thyme, especially creeping varieties, cascades beautifully over the edges of containers, while oregano’s spreading nature makes it an excellent choice for filling out your vertical spaces.
Mint is another excellent option, though it’s best to give it its own container as it can be quite vigorous. Rosemary and sage, both perennial herbs, add structure and year-round interest to your garden while providing aromatic leaves for cooking.
For vertical gardens in partial shade, consider growing parsley, cilantro, and chives. These herbs are more tolerant of lower light conditions and still produce abundant harvests. Trailing herbs like creeping rosemary and prostrate varieties of thyme create stunning vertical displays while maximizing your growing space.
Remember to group herbs with similar water needs together. For instance, Mediterranean herbs like rosemary, sage, and thyme prefer drier conditions, while basil and parsley thrive with more consistent moisture. This thoughtful arrangement will make maintenance easier and ensure your herbs flourish in their vertical home.
Maintenance Tips
Maintaining your vertical herb garden is key to ensuring a bountiful harvest throughout the growing season. The good news is that herbs are generally low-maintenance plants that will thrive with just a few regular care practices.
Watering is perhaps the most crucial aspect of herb garden maintenance. Check the soil moisture daily by inserting your finger about an inch deep – if it feels dry, it’s time to water. Vertical gardens typically dry out faster than traditional beds, so you might need to water more frequently, especially during hot summer days. Always water at the base of the plants to prevent leaf diseases.
When it comes to fertilizing, herbs prefer a light touch. Apply a balanced, organic fertilizer once every 4-6 weeks during the growing season. Be careful not to over-fertilize, as this can reduce the concentration of essential oils that give herbs their distinctive flavors and aromas.
Regular pruning encourages bushier growth and prevents plants from becoming leggy. Harvest herbs frequently by cutting stems just above a leaf node, removing no more than one-third of the plant at a time. This practice naturally maintains the plant’s shape while providing you with fresh herbs for cooking.
Watch for signs of pest problems or disease, such as yellowing leaves or holes in the foliage. Most herb-loving insects can be removed by hand or deterred with a gentle spray of water. If you spot any diseased leaves, remove them promptly to prevent spread.
Remember to rotate your herbs seasonally, replacing spent plants with new ones to maintain a vibrant and productive garden year-round.
Creating your own vertical herb garden is an exciting journey that combines creativity with the joy of growing your own fresh herbs. Remember, you don’t need to be a master gardener or have extensive DIY experience to get started. The beauty of vertical gardening lies in its flexibility – you can start small with just a few herbs and expand as your confidence grows.
Don’t be afraid to experiment with different designs and containers based on your available space and personal style. If your first attempt isn’t perfect, that’s completely normal! Gardening is a learning experience, and each season brings new insights and opportunities to improve.
Keep these final tips in mind as you begin: Start with hardy herbs like mint, basil, and rosemary that are more forgiving for beginners. Monitor your plants regularly, especially in the first few weeks, to understand their watering needs. Position your garden where you can easily access it for maintenance and harvesting – this will encourage you to use your fresh herbs more often.
Most importantly, enjoy the process! There’s something incredibly satisfying about cooking with herbs you’ve grown yourself. Whether you’re creating a small window garden or transforming an entire wall, your vertical herb garden will bring fresh flavors, wonderful aromas, and a touch of natural beauty to your living space.
Ready to get started? Gather your materials, choose your design, and take that first step toward creating your own vertical herb garden. Happy gardening!