Transform any sunny windowsill into an indoor garden oasis with just a few essential tools and the right know-how. Start with compact, nutrient-rich vegetables like cherry tomatoes, leafy greens, and herbs that thrive in containers and require minimal space. Position plants within 6 inches of south-facing windows to capture maximum sunlight, or supplement with affordable LED grow lights for 12-16 hours daily. Choose high-quality potting soil specifically formulated for vegetables, and ensure proper drainage with containers that have holes at the bottom. Monitor soil moisture by inserting your finger one inch deep—water only when the soil feels dry at this depth. These time-tested techniques have helped countless beginners harvest fresh, homegrown produce year-round, regardless of outdoor growing conditions or available space. Whether you’re working with a small apartment or simply want to extend your growing season, indoor vegetable gardening offers a practical solution for fresh, organic produce at your fingertips.
Setting Up Your Indoor Growing Space
Finding the Perfect Spot
Success with indoor vegetable gardening starts with choosing the right location in your home. Even if you’re working with limited space, there are plenty of small space gardening solutions that can work wonderfully for your indoor garden.
First, assess your available light sources. South-facing windows typically provide the most natural light, offering 6-8 hours of direct sunlight daily – perfect for most vegetables. If you don’t have ideal window exposure, don’t worry! You can supplement with grow lights, which have become increasingly affordable and efficient.
Temperature is equally important for your indoor garden’s success. Most vegetables thrive in temperatures between 65-75°F (18-24°C). Avoid placing plants near drafty windows or heating vents, as sudden temperature changes can stress your plants. Also, ensure your chosen spot has good air circulation to prevent mold and fungal issues.
Consider the practical aspects of your growing space. You’ll need easy access to water, and the surface should be able to handle occasional spills. A spare corner in your kitchen, a bright windowsill, or even a dedicated plant shelf can work beautifully. Just make sure to protect furniture or flooring with waterproof mats or trays.
Remember, you can always start small and expand as you gain confidence. The perfect spot is one that works with your lifestyle and home layout while meeting your plants’ basic needs.
Basic Equipment You’ll Need
Getting started with indoor vegetable gardening doesn’t require a massive investment. Here’s what you’ll need to create your green haven:
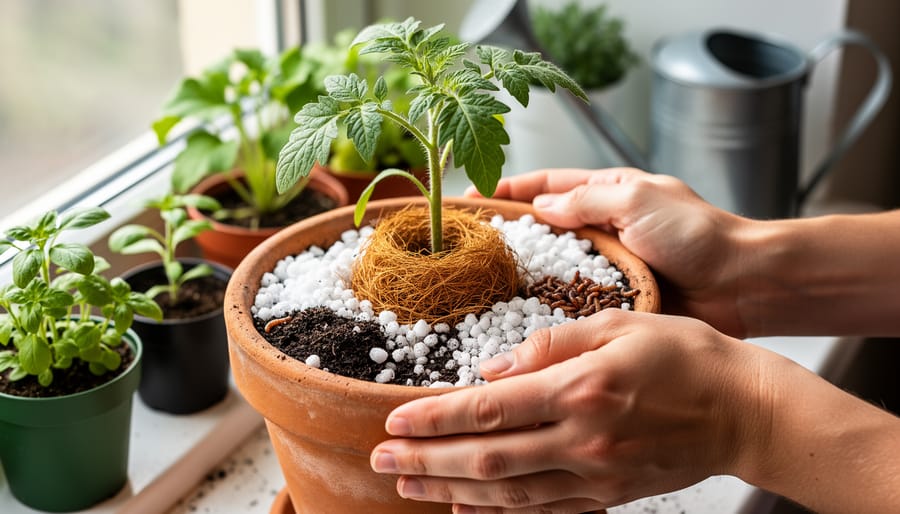
Containers: Choose pots with drainage holes, ranging from 6 to 12 inches deep. You can use traditional clay pots, plastic containers, or even repurposed items like clean milk jugs. For those interested in advanced methods, hydroponic growing systems are also an option.
Growing Medium: High-quality potting soil is essential. Look for mixes specifically formulated for vegetables, which provide good drainage and nutrients. Avoid using garden soil, as it can compact and harbor pests.
Lighting: Most vegetables need 6-8 hours of direct sunlight daily. If you don’t have adequately lit windows, invest in LED grow lights. They’re energy-efficient and provide the right spectrum for plant growth.
Watering Tools: A small watering can with a narrow spout helps control water flow. Consider getting a spray bottle for misting leaves and a moisture meter to avoid overwatering.
Basic Hand Tools: You’ll need a small trowel for transplanting, pruning shears for harvesting, and plant markers to keep track of what you’re growing.
Fertilizer: Choose a balanced, water-soluble fertilizer designed for vegetables. Organic options are available if you prefer chemical-free gardening.
These basics will get you started on your indoor gardening journey without overwhelming you with unnecessary equipment.

Best Vegetables for Indoor Growing
Quick-Growing Options
For beginners eager to see quick results, several vegetables can provide a satisfying harvest in just a few weeks. Microgreens are among the fastest-growing options, ready to harvest in as little as 7-14 days. These nutrient-packed shoots add a delicious punch to salads and sandwiches, and they’re incredibly easy to grow in small containers.
Radishes are another speedy choice, maturing in about 20-30 days. They’re perfect for indoor containers and provide a satisfying crunch with minimal effort. Lettuce varieties, especially loose-leaf types, can be ready for harvest within 30 days, and you can practice “cut-and-come-again” harvesting for continuous yields.
Green onions (scallions) are particularly rewarding for beginners. You can even regrow them from store-bought ones by placing the white roots in water. Within a week, you’ll see new growth, and they’ll be ready for harvesting in about 3-4 weeks.
Baby spinach and arugula are also excellent choices, offering harvestable leaves in just 20-30 days. These leafy greens are perfect for small spaces and can be grown year-round under proper indoor conditions.
For an interesting project, try growing sprouts in a jar. Mung beans, alfalfa, and other sprouting seeds can be ready in 3-5 days, providing fresh, nutritious additions to your meals with minimal space requirements.
Remember to harvest these quick-growing vegetables regularly to encourage continued production and prevent overcrowding. With these fast-growing options, you’ll gain confidence in your gardening abilities while enjoying fresh, homegrown produce in no time.

Year-Round Producers
One of the most rewarding aspects of indoor vegetable gardening is having access to fresh produce throughout the year. Several vegetables are particularly well-suited for continuous harvesting, making them excellent choices for beginners looking to maintain a steady supply of homegrown food.
Leafy greens are stars of year-round production. Lettuce, spinach, and Swiss chard can be harvested leaf by leaf, allowing the plant to continue growing and producing new leaves. Simply pick the outer leaves when they reach a suitable size, and the inner leaves will keep developing. This “cut-and-come-again” method can provide fresh salad ingredients for months.
Herbs are another fantastic option for continuous harvests. Basil, mint, parsley, and cilantro will keep producing new growth as long as you regularly harvest them. Trimming these plants actually encourages bushier growth and prevents them from flowering too quickly, extending their productive life.
Green onions (scallions) are remarkably easy to regrow. After using the green tops, place the white bulb ends in water or soil, and they’ll regenerate multiple times. Many gardeners maintain a rotating collection of green onion starts to ensure a constant supply.
Cherry tomatoes, when properly cared for indoors, can produce fruits for several months. While they require more attention than leafy greens, their long harvest period makes them worth the effort. Choose compact varieties specifically bred for container growing to maximize your success.
Microgreens deserve special mention as they can be planted in succession every few weeks, providing a constant supply of nutrient-rich shoots. These tiny powerhouses are ready to harvest in just 1-3 weeks, making them perfect for impatient gardeners.
Essential Care Tips
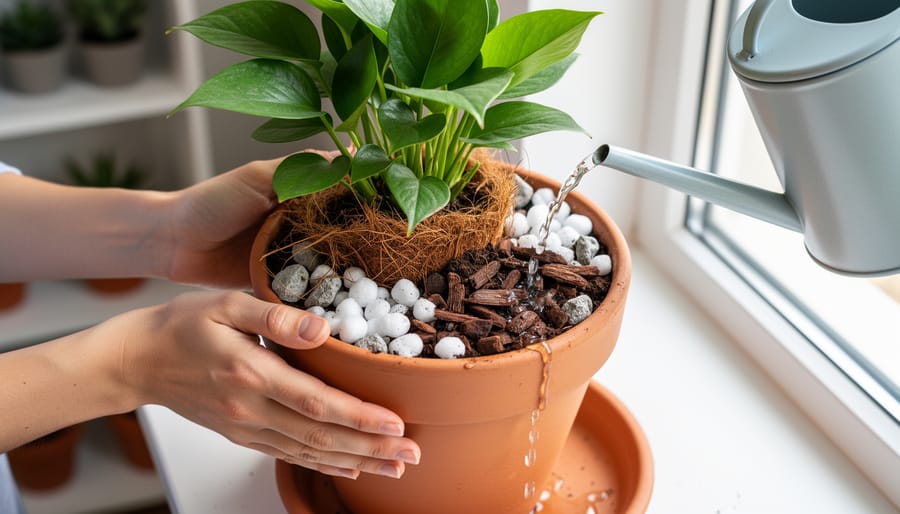
Watering and Humidity
Proper watering is crucial for the success of your indoor vegetable garden, and getting it right takes a bit of practice. The key is to maintain consistent moisture without overwatering, which can lead to root rot and other problems.
Most indoor vegetables prefer soil that’s consistently moist but not waterlogged. To check if your plants need water, stick your finger about an inch into the soil – if it feels dry at that depth, it’s time to water. Water thoroughly until you see it draining from the bottom of the pot, but never let your plants sit in standing water.
Different vegetables have varying water needs. Leafy greens like lettuce and spinach prefer more frequent watering, while herbs like rosemary and thyme can tolerate slightly drier conditions. Consider grouping plants with similar water requirements together to make maintenance easier.
Indoor environments can be quite dry, especially during winter when heating systems are running. Most vegetables prefer humidity levels between 40-60%. To increase humidity, try these simple methods:
– Place a humidity tray filled with pebbles and water beneath your plants
– Group plants together to create a microclimate
– Use a small humidifier near your garden
– Mist your plants occasionally, but avoid wetting the leaves too much as this can encourage fungal growth
The best time to water is in the morning, giving plants plenty of time to absorb moisture before evening. Always use room temperature water, as cold water can shock plant roots. If you notice yellowing leaves or mold growth, you might be overwatering – reduce frequency and ensure good air circulation around your plants.

Lighting Solutions
Proper lighting is crucial for successful indoor vegetable gardening, and you have two main options: natural and artificial light. While natural sunlight is free and ideal, not everyone has access to bright, south-facing windows. Understanding your plants’ optimal lighting requirements is key to helping them thrive.
For natural lighting, place your indoor garden near windows that receive at least 6 hours of direct sunlight daily. South-facing windows typically provide the most light, followed by east and west-facing windows. Keep in mind that winter months offer less natural light, so you might need supplemental lighting during this time.
If natural light is limited, LED grow lights are an excellent solution. They’re energy-efficient, produce minimal heat, and can be adjusted to the perfect height as your plants grow. For beginners, I recommend full-spectrum LED lights, which mimic natural sunlight and work well for all growth stages. Position these lights 6-12 inches above your plants and run them for 12-16 hours daily.
Don’t worry if you need to combine both natural and artificial light – many successful indoor gardeners do! Just remember to observe your plants for signs that they’re getting too much or too little light. Leggy, stretched-out stems indicate insufficient light, while burned or yellowing leaves suggest too much exposure. Adjust accordingly, and you’ll soon find the sweet spot for your indoor garden’s lighting needs.
Remember to rotate your plants regularly to ensure even light distribution, and clean your light sources periodically to maintain their effectiveness.
Feeding Your Plants
Just like humans, your indoor vegetables need proper nutrition to thrive. Most potting soils come with initial nutrients, but these will deplete over time. Start feeding your plants with a balanced, water-soluble fertilizer about 4-6 weeks after planting. Look for labels showing NPK ratios like 10-10-10 or 5-5-5, which work well for most vegetables.
For leafy greens like lettuce and spinach, use a nitrogen-rich fertilizer to promote lush growth. Fruiting plants such as tomatoes and peppers benefit from extra phosphorus when they start flowering. Always dilute fertilizers according to package instructions – remember, it’s better to under-feed than over-feed.
Organic options like compost tea, worm castings, or fish emulsion are excellent alternatives to synthetic fertilizers. These not only feed your plants but also improve soil health. Apply your chosen fertilizer every 2-3 weeks during the growing season, reducing frequency in winter when plant growth naturally slows.
Watch your plants for signs they need feeding: yellowing leaves, slow growth, or pale foliage often indicate nutrient deficiency. If leaves start turning brown at the tips or edges, you might be over-fertilizing – simply reduce the frequency and amount of fertilizer you’re using.
Starting your indoor vegetable garden is an exciting journey that can bring joy, satisfaction, and fresh, homegrown produce right to your kitchen. Remember, every experienced gardener started exactly where you are now – with a desire to grow something beautiful and edible. Don’t let minor setbacks discourage you; they’re valuable learning opportunities that will help you become a better gardener.
Begin with just a few plants that interest you the most, and gradually expand your indoor garden as your confidence grows. Keep a simple gardening journal to track what works and what doesn’t in your specific environment. This personal record will become an invaluable resource as you continue your gardening adventure.
Join local gardening groups or online communities where you can share experiences, ask questions, and learn from others who share your passion. These connections can provide support, inspiration, and practical solutions when you need them most.
Most importantly, celebrate your successes, no matter how small. That first sprouted seed, the initial harvest of fresh herbs, or your first homegrown salad – these moments make indoor gardening truly rewarding. With patience, care, and the knowledge you’ve gained from this guide, you’re well-equipped to create your own thriving indoor vegetable garden.
Now, grab those seeds, prepare your containers, and start growing. Your indoor gardening journey begins today!