Transform depleted garden soil into a thriving ecosystem by layering organic matter, maintaining consistent moisture levels, and practicing no-till cultivation. Building resilient, sustainable soil systems requires a balanced approach that nurtures beneficial microorganisms and protects soil structure. Smart crop rotation, strategic cover cropping, and thoughtful composting work together to restore soil health naturally. These foundational practices create a self-sustaining cycle where each season’s growth contributes to deeper fertility and improved soil structure for years to come.
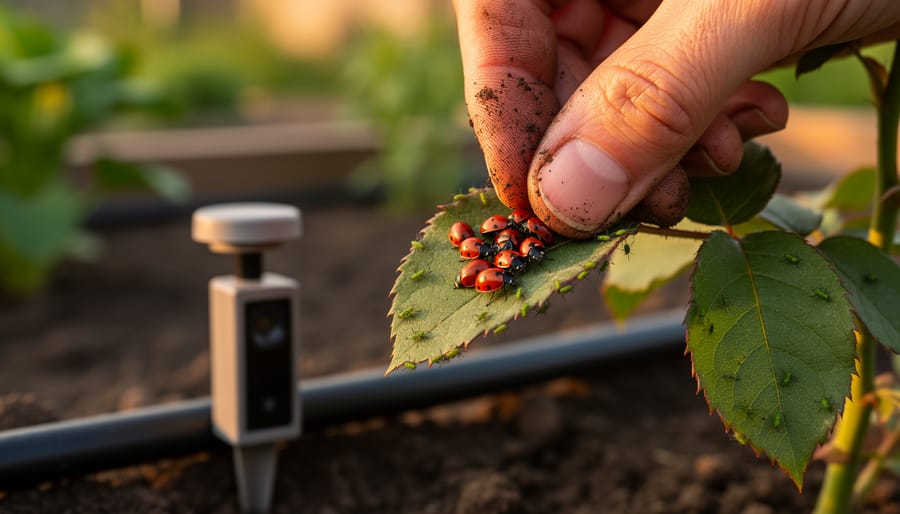
Mindful soil management goes beyond simply adding fertilizers – it’s about creating an environment where plants, beneficial insects, and microorganisms thrive together. By embracing these regenerative techniques, gardeners of all experience levels can build productive, sustainable growing spaces that require fewer inputs while producing healthier, more abundant harvests. The journey to better soil starts with understanding these core principles and implementing them consistently in your garden.
Understanding Your Soil’s Living Ecosystem
The Soil Food Web
Think of your garden soil as a bustling underground city, teeming with life! The soil food web is an incredible network of organisms, from earthworms you can spot with your naked eye to fascinating microscopic soil life working behind the scenes.
Earthworms are like nature’s plows, creating channels for air and water while breaking down organic matter. Beneficial bacteria and fungi form partnerships with plant roots, helping them access nutrients and water more effectively. These tiny heroes transform dead plant material into rich humus, releasing essential nutrients your plants need to thrive.
Nematodes and protozoa might be small, but they’re mighty predators that help control harmful organisms while releasing nutrients through their natural activities. Even arthropods like beetles and springtails play their part, shredding larger organic matter into smaller pieces that other organisms can process.
When these creatures work together in harmony, they create a self-sustaining system that naturally maintains soil fertility, improves structure, and helps your plants resist disease. It’s nature’s perfect partnership, right in your garden!

Key Soil Health Indicators
Assessing your soil’s health doesn’t require complex laboratory tests – there are several simple indicators you can observe right in your garden. Start by examining soil texture by grabbing a handful of moist soil and squeezing it. Healthy soil should form a loose ball that breaks apart easily, indicating good structure and organic matter content.
Look for earthworms and other beneficial organisms – their presence suggests a thriving soil ecosystem. Healthy soil should host at least 5-10 earthworms per square foot when you dig down 6 inches. The soil should also have a pleasant, earthy smell, similar to fresh mushrooms or forest floor.
Plant health offers valuable clues too. Strong, uniform growth and deep root systems indicate good soil conditions. Watch for water infiltration by pouring a cup of water onto the soil surface – it should disappear within 30 seconds to 3 minutes in healthy soil.
For a quick pH test, use an inexpensive soil testing kit from your local garden center. Most plants thrive in soil with a pH between 6.0 and 7.0. The color of your soil can also reveal important information – dark, rich colors usually indicate higher organic matter content.
Natural Nutrient Cycling Techniques
Composting Done Right
Creating nutrient-rich compost is one of the most rewarding earth-friendly farming techniques you can practice in your garden. The key to successful composting lies in maintaining the right balance of materials and creating optimal conditions for decomposition.
Start by layering your compost pile with a mix of “green” and “brown” materials. Green materials include kitchen scraps, fresh grass clippings, and coffee grounds, which provide nitrogen. Brown materials like dry leaves, straw, and shredded paper add carbon to the mix. Aim for a ratio of roughly three parts brown to one part green materials.
Keep your compost pile as moist as a wrung-out sponge and turn it every few weeks to ensure proper aeration. This helps beneficial microorganisms break down the materials efficiently. The pile should feel warm in the center – that’s a sign that decomposition is actively occurring.
Avoid adding meat, dairy, oils, or diseased plants to your pile, as these can attract pests or introduce harmful pathogens. Instead, focus on vegetable scraps, yard waste, and natural materials.
Your compost is ready to use when it’s dark, crumbly, and smells earthy – usually after 3-6 months. Work it into your garden soil, use it as a mulch around plants, or brew it into a nourishing tea for your garden. Remember, good compost is the foundation of healthy soil and thriving plants.

Cover Cropping Strategies
Cover crops are like a cozy blanket for your garden soil, protecting and nourishing it during off-seasons. As experienced gardener Maria Johnson says, “Think of cover crops as your soil’s best friends – they’re always there when needed, working hard behind the scenes.”
The key to successful cover cropping lies in choosing the right plants and timing their growth cycles. For fall and winter protection, consider cold-hardy options like winter rye, which develops deep roots that prevent soil erosion and add valuable organic matter. Clover varieties are excellent choices for spring and summer, fixing nitrogen in the soil while attracting beneficial pollinators to your garden.
Timing is crucial for maximum benefits. Plant your fall cover crops about 4-6 weeks before the first frost, allowing them to establish strong roots before winter. For spring covers, sow as soon as the soil can be worked, typically when soil temperatures reach around 40°F (4°C).
To incorporate cover crops into your soil, cut them down before they go to seed, usually when they’re flowering. Either till them into the soil or use the “chop and drop” method, leaving the plant material on the surface as a natural mulch. Wait about 2-3 weeks before planting your next crop to allow the organic matter to break down.
Remember, different cover crops serve different purposes – some build soil structure, others add nutrients, and many do both. Mix and match to create a cover cropping strategy that works best for your garden’s specific needs.
Soil Structure Protection
No-Till Methods
No-till gardening is one of the most effective ways to preserve and enhance soil health while reducing your workload. Instead of turning or tilling the soil each season, this method involves leaving the soil structure intact and adding organic materials on top. This approach mimics nature’s own processes, where fallen leaves and plant matter naturally decompose to enrich the soil.
To get started with no-till gardening, simply layer organic materials like compost, leaves, and straw directly on your garden bed. When planting, create small holes or furrows for your seeds or seedlings while disturbing as little soil as possible. As these materials break down, they feed beneficial soil organisms, improve water retention, and naturally suppress weeds.
The benefits of no-till methods are impressive: reduced soil erosion, improved soil structure, increased organic matter content, and better water infiltration. You’ll also notice fewer weeds over time, as dormant weed seeds remain buried instead of being brought to the surface through tilling. Best of all, your back will thank you for eliminating the hard work of annual tilling!
Many gardeners report that their soil becomes increasingly fertile and easier to work with each passing season of no-till practices. The key is patience and consistent application of organic mulch materials.
Mulching Systems
Mulching is one of the most rewarding ways to nurture your garden soil while reducing maintenance time. Think of mulch as a cozy blanket for your soil, offering protection and nourishment in one natural package. There are several excellent mulching materials to choose from, each with its own special benefits.
Organic mulches like straw, wood chips, and leaves naturally decompose over time, enriching your soil with valuable nutrients. Straw works wonders in vegetable gardens, keeping fruits clean and soil moisture consistent. Wood chips are perfect for paths and around trees, lasting longer than other materials while gradually improving soil structure.
Grass clippings make an excellent free mulch source – just be sure to use thin layers and avoid any treated grass. Fallen leaves are nature’s gift to gardeners; shred them first for better coverage and faster decomposition. For flower beds, cocoa hulls offer a rich, dark appearance and pleasant chocolate scent, though they’re a bit pricier than other options.
Living mulches, like clover or other ground covers, provide soil protection while adding visual interest to your garden. They also attract beneficial insects and can help suppress weeds naturally.
Apply mulch in a 2-3 inch layer, keeping it away from plant stems to prevent rot. Refresh your mulch annually or as needed to maintain its benefits.
Water Management for Soil Health
Smart Watering Techniques
Water is a precious resource, and smart watering techniques can help you maintain a thriving garden while conserving this vital element. The key is to water deeply but less frequently, encouraging roots to grow deeper into the soil. This creates stronger, more resilient plants that can better withstand dry spells.
Consider installing efficient irrigation systems like drip lines or soaker hoses, which deliver water directly to plant roots while minimizing evaporation. Mulching around your plants with organic materials like straw or wood chips helps retain moisture and reduces water loss through evaporation.
Timing is everything when it comes to watering. Water early in the morning to reduce evaporation and give plants time to dry before evening, which helps prevent fungal diseases. A simple rain gauge can help you track natural rainfall and adjust your watering schedule accordingly.
For container gardens, consider self-watering planters or water-holding crystals that release moisture gradually. Remember to group plants with similar water needs together, making it easier to provide the right amount of water to each area of your garden without waste.
Drainage Solutions
Proper drainage is crucial for maintaining healthy soil while preserving valuable nutrients. Think of drainage as your garden’s natural filtration system – it needs to remove excess water without washing away the good stuff your plants need to thrive.
Start by assessing your soil’s current drainage by doing a simple percolation test: dig a 12-inch hole, fill it with water, and see how long it takes to drain. If water sits for more than 24 hours, you’ll need to implement some drainage solutions.
Create gentle slopes away from planting areas to guide water flow naturally. Adding organic matter like compost helps improve soil structure and water retention while allowing excess moisture to drain. For areas with persistent issues, consider installing French drains or raised beds with good drainage layers.
A clever trick is to use water-loving plants strategically in areas that tend to collect moisture. These natural pumps help manage excess water while adding beauty to your garden. Remember to mulch properly – this helps regulate water flow and prevents soil erosion, keeping those precious nutrients where they belong.
Seasonal Soil Care Calendar
Keeping your soil healthy is a year-round commitment, but don’t worry – we’ve broken it down into manageable seasonal tasks that will help your garden thrive throughout the year.
Spring (March-May):
As the soil warms up, start by testing your soil pH and nutrient levels. Add well-rotted compost to beds and borders, working it gently into the top layer. This is also the perfect time to start your composting system if you haven’t already. Apply a layer of organic mulch around perennials and shrubs, but keep it away from plant stems to prevent rot.
Summer (June-August):
Focus on moisture retention during the warmer months. Apply a thick layer of organic mulch to protect soil from heat and reduce water evaporation. Keep your compost pile active by maintaining proper moisture levels and turning it regularly. Monitor soil moisture with the simple finger test – if it’s dry two inches deep, it’s time to water.
Fall (September-November):
This is nature’s primary soil-building season. Collect fallen leaves to create leaf mold or add to your compost pile. Plant cover crops like clover or rye in empty beds to prevent soil erosion and add nutrients. Work in mature compost before the ground freezes, giving it time to integrate with the soil.
Winter (December-February):
While the garden rests, plan for the coming year. Continue adding kitchen scraps to your compost pile, and protect bare soil with row covers or winter mulch. Use this time to maintain tools and review your soil test results to plan spring amendments. Remember, healthy soil is a long-term investment that pays dividends in garden success.

As we’ve explored throughout this guide, sustainable soil management is not just a trendy gardening practice – it’s a fundamental approach that benefits both your garden and the environment. By implementing these eco-friendly techniques, you’re not only creating healthier, more productive soil but also contributing to a more sustainable future for generations to come.
Remember that healthy soil is the foundation of successful gardening. Whether you choose to start with composting, cover cropping, or minimal tillage, every small step you take towards sustainable soil management makes a difference. The key is to begin with practices that feel manageable for your situation and gradually incorporate more techniques as you become comfortable.
The beauty of sustainable soil management lies in its cyclical nature – as you build healthy soil, you’ll notice improvements in plant health, reduced water needs, and fewer pest problems. This creates a positive feedback loop that makes gardening more enjoyable and rewarding.
I encourage you to start implementing these practices in your garden today. Start small, observe the changes, and adjust your approach based on what works best in your specific environment. Your soil – and your plants – will thank you for it. Together, we can create gardens that not only flourish today but continue to thrive for years to come.