Transform depleted soil into a thriving ecosystem by layering organic matter, introducing beneficial microorganisms, and implementing earth-friendly farming methods. Every handful of healthy soil contains billions of microscopic allies waiting to rebuild your garden’s foundation. Cover bare soil with nutrient-rich mulch, plant diverse cover crops that naturally fix nitrogen, and integrate composted materials to kickstart the regeneration process. Nature’s own recycling system holds the key to soil restoration – dead plants, fallen leaves, and organic kitchen scraps become tomorrow’s black gold. By mimicking these natural processes, even the most lifeless dirt can be reborn into rich, living soil that sustains vibrant plant growth and supports a robust ecosystem of beneficial insects, fungi, and bacteria. Whether you’re working with sandy loam or heavy clay, these time-tested techniques tap into the soil food web’s remarkable ability to heal and regenerate itself.
Understanding Your Soil’s Current State
Simple Home Tests for Soil Health
Testing your soil’s health doesn’t require expensive equipment or a laboratory. These simple gardening techniques can tell you a lot about your soil’s condition. Start with the jar test: fill a clear jar one-third full with soil, add water, shake well, and let it settle. After 24 hours, you’ll see distinct layers showing your soil’s composition of sand, silt, and clay.
For earthworm counting, dig a 1-foot cube of soil and count the worms – finding 5-10 worms indicates healthy soil life. The spade test reveals soil structure: dig up a spade-full of soil and examine how it breaks apart. Crumbly soil with varied-sized aggregates is ideal.
To check drainage, dig a 1-foot hole, fill it with water, and time how long it takes to drain. Healthy soil should empty within 24 hours. Finally, the smell test: healthy soil has a fresh, earthy aroma like mushrooms or forest floor, while sour or chemical smells suggest problems that need addressing.

Reading Your Soil’s Warning Signs
Your soil speaks volumes about its health through visual clues – you just need to know what to look for! Compacted soil that’s hard to dig into often indicates poor structure and drainage issues. If you notice puddles lingering long after rain, this could mean your soil isn’t draining properly.
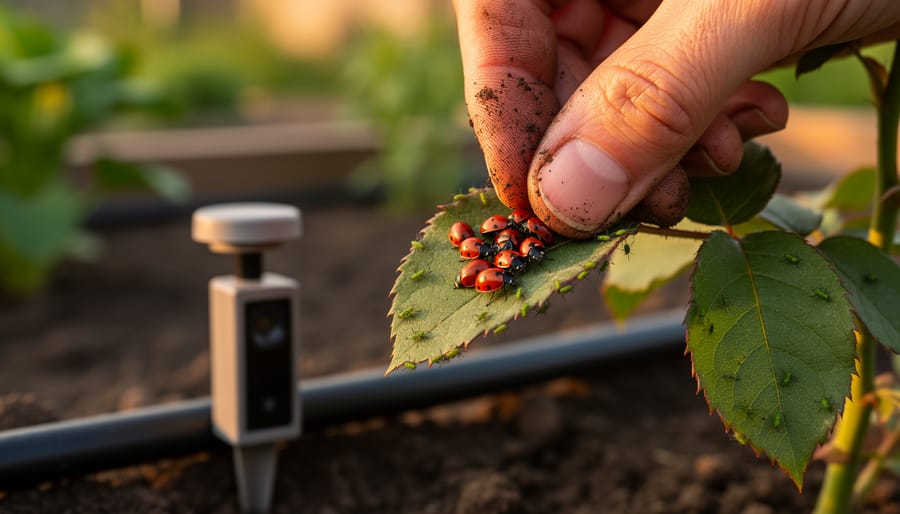
Keep an eye out for bare patches where plants struggle to grow, as this might signal nutrient deficiencies or pH imbalances. A lack of earthworms and beneficial insects is another red flag – these creatures are nature’s soil engineers, and their absence suggests an unhealthy ecosystem.
Discolored or yellowing leaves on your plants often point to specific nutrient deficiencies. For instance, yellowing between leaf veins typically indicates iron deficiency, while purple-tinged leaves might mean phosphorus is lacking.
Crusted soil surfaces and erosion during rainfall are signs that your soil lacks organic matter and stable structure. If you spot any of these warning signs, don’t worry – they’re simply your garden’s way of asking for help, and with the right approach, you can nurse your soil back to health.
Core Soil Regeneration Practices
Building Living Soil with Compost
Composting is the cornerstone of building living soil, and it’s easier than you might think. Think of compost as nature’s way of recycling – it transforms kitchen scraps, yard waste, and other organic materials into black gold for your garden. The best part? You can start right in your backyard!
To create nutrient-rich compost, maintain a balanced mix of “green” and “brown” materials. Green materials include kitchen scraps, grass clippings, and coffee grounds, which provide nitrogen. Brown materials like dried leaves, straw, and cardboard add carbon to the mix. Aim for roughly three parts brown to one part green materials.
Layer your materials in a bin or pile, keeping it about as moist as a wrung-out sponge. Turn the pile every few weeks to add oxygen, which speeds up decomposition and prevents unpleasant odors. In about 3-6 months, you’ll have dark, crumbly compost that smells like fresh earth.
When applying compost to your garden, spread a 2-3 inch layer on top of your existing soil in early spring or fall. For established beds, work it gently into the top few inches of soil. For new beds, mix compost thoroughly into the top 8-12 inches of soil. Remember to add a thin layer of compost as mulch throughout the growing season to continue feeding your soil food web.
To supercharge your compost, try adding diverse materials like seaweed, egg shells, or aged manure. These ingredients introduce additional minerals and beneficial microorganisms that help create a thriving soil ecosystem. Your plants will thank you with vigorous growth and abundant harvests!
Cover Crops: Nature’s Soil Builders
Think of cover crops as nature’s multitasking helpers in your garden. These remarkable plants work tirelessly to improve your soil while it would otherwise sit bare. Popular options like clover, buckwheat, and winter rye act like living mulch, protecting your soil from erosion while adding valuable organic matter.
One of the most exciting benefits of cover crops is their ability to naturally boost soil fertility. Legumes like crimson clover and field peas actually pull nitrogen from the air and store it in special nodules on their roots. When these plants break down, they release this nitrogen, feeding your future garden plants.
But that’s not all – cover crops are also master soil architects. Their roots create natural pathways through the soil, improving drainage and aeration. As these roots grow and die back, they leave behind organic matter that feeds beneficial soil organisms and helps create that perfect crumbly texture gardeners dream about.
Getting started with cover crops is easier than you might think. In fall, after harvesting your summer vegetables, simply broadcast the seeds over your cleared beds and lightly rake them in. Many cover crops are winter-hardy and will continue growing until spring, when you can either till them under or cut them down to create a natural mulch layer.
Pro tip: Try starting with winter rye or crimson clover – they’re both easy to grow and manage, making them perfect for beginners. Remember to cut or till your cover crops about three weeks before planting your next garden crop to give them time to break down and release their nutrients.

No-Till Methods That Work
No-till gardening is a game-changing approach that preserves soil structure while building fertility naturally. Instead of disrupting soil layers through traditional tilling, this method works with nature to create healthy, living soil from the top down.
Start by leaving existing plant matter in place and adding organic materials directly on top. Layer brown materials like fallen leaves, straw, or cardboard as your base, followed by green materials such as grass clippings and kitchen scraps. This layering technique, often called sheet mulching, creates a natural decomposition system that feeds soil organisms while suppressing weeds.
For new garden beds, simply place cardboard directly over grass or weeds, wet it thoroughly, and add your layers of organic matter on top. Within a few months, the materials will break down, creating rich, workable soil. This approach also supports efficient water management by reducing evaporation and maintaining consistent soil moisture.
When planting in a no-till garden, simply pull back the mulch layer, create a small pocket for your seedling or seeds, and replace the mulch around the plant. As plants grow, continue adding organic matter around them, maintaining a protective layer that enriches the soil while deterring weeds.
Remember to keep pathways covered too – wood chips work wonderfully for this purpose. They’ll gradually decompose, adding nutrients to your soil while providing stable footing. Over time, you’ll notice improved soil structure, increased earthworm activity, and better water retention.
For seasonal maintenance, simply add new layers of organic matter as needed, allowing nature’s decomposers to do the heavy lifting. This gentle approach preserves beneficial soil organisms, fungal networks, and natural soil layers, creating a thriving ecosystem that supports healthy plant growth year after year.
Feeding Your Soil’s Ecosystem
Natural Amendments That Really Work
Among the latest gardening trends, natural soil amendments have proven to be game-changers for garden enthusiasts looking to breathe new life into their soil. Let’s explore some of the most effective organic materials that can transform your garden’s health.
Compost is your soil’s best friend, acting like a multivitamin for your garden. Whether you make it yourself or source it locally, good compost introduces beneficial microorganisms and provides a balanced mix of nutrients. Add a 2-3 inch layer and work it into the top 6 inches of soil for best results.
Aged manure from herbivorous animals like horses, cows, or chickens works wonders in improving soil structure. Just ensure it’s well-composted to avoid burning your plants. Mix it in during fall to give it time to integrate before spring planting.
Leaf mold, created from decomposed autumn leaves, adds valuable organic matter and helps retain moisture. Simply collect fallen leaves, shred them, and let them break down for 6-12 months. The resulting dark, crumbly material is pure gold for your soil.
Biochar is gaining popularity as a long-lasting soil amendment. This charcoal-like substance creates a permanent home for beneficial microbes and helps retain nutrients. A little goes a long way – mix just 5-10% biochar into your existing soil.
For quick results, worm castings provide an immediate nutrient boost while improving soil structure. They’re gentle enough to use around seedlings and can be mixed directly into planting holes or used as a top dressing throughout the growing season.

Creating a Soil Food Web
Creating a thriving soil food web is like building a bustling underground city where beneficial organisms work together to maintain healthy soil. Think of it as nature’s own recycling system, where each creature plays a vital role in breaking down organic matter and making nutrients available to your plants.
Start by adding organic matter regularly to feed your soil’s inhabitants. Fallen leaves, grass clippings, and kitchen scraps provide excellent food sources for earthworms, bacteria, and fungi. These helpful decomposers transform raw materials into nutrient-rich humus that plants love.
To encourage beneficial insects, maintain diverse plantings in your garden. Flowering herbs like oregano and thyme attract pollinators and predatory insects that help control pest populations. Leave some areas undisturbed, as many beneficial insects need shelter and overwinter in plant debris.
Minimize soil disturbance by adopting no-till practices when possible. Excessive tilling disrupts fungal networks and earthworm populations that are essential for soil structure and nutrient cycling. Instead, use mulch to suppress weeds and protect soil life.
Keep your soil consistently moist but not waterlogged. A moisture level similar to a wrung-out sponge provides ideal conditions for microorganisms to thrive. Adding a layer of organic mulch helps maintain moisture and provides a steady food source for soil organisms.
Avoid chemical pesticides and fertilizers that can harm beneficial soil life. Instead, opt for organic amendments like compost tea or well-aged manure to support your soil food web. Remember, a healthy soil ecosystem is your best ally in creating a thriving garden.
Regenerating soil is a rewarding journey that benefits not just your garden, but the entire ecosystem. By following the techniques and principles we’ve explored, you can transform depleted earth into rich, living soil teeming with beneficial organisms. Remember that soil regeneration is an ongoing process that requires patience and consistent effort, but the results are well worth it.
Whether you choose to start with cover cropping, implement no-till practices, or begin composting, every step you take brings your soil closer to optimal health. The key is to start small and gradually expand your regenerative practices as you become more comfortable with each technique.
Don’t forget that healthy soil means healthier plants, better harvests, and a more resilient garden that requires less maintenance over time. As you watch your soil transform, you’ll notice improvements in water retention, plant vigor, and even the number of beneficial insects visiting your garden.
Start your soil regeneration journey today by implementing just one of the methods we’ve discussed. Perhaps begin with a simple compost pile or try mulching a small area of your garden. As you gain confidence and see results, you can incorporate more techniques into your gardening routine.
Remember, every garden starts with the soil, and every gardener has the power to make a positive impact on their piece of earth. Your efforts in soil regeneration contribute to a healthier planet and a more sustainable future for generations to come.