Growing plants indoors requires just five core supplies: full-spectrum grow lights, a quality potting mix or growing medium, containers with drainage, temperature and humidity controls, and fertilizer designed for container plants. Whether you’re cultivating herbs on a kitchen windowsill or running a small-space setups in an apartment, these fundamentals determine your success far more than trendy gadgets or expensive systems like the AeroGarden lines from Scotts Miracle-Gro.
The indoor gardening market in 2026 offers more options than ever, which makes choosing supplies feel overwhelming. New growers often spend hundreds on sophisticated hydroponic kits before understanding what their plants actually need. Experienced gardeners, meanwhile, know that matching supplies to specific plants and growing conditions matters more than buying premium everything.
This guide walks you through each supply category, comparing options within your budget and growing goals. You’ll learn which supplies beginners truly need versus nice-to-have upgrades, how to evaluate quality without overspending, and which mistakes cost both money and harvests. By the end, you’ll have a clear shopping list tailored to your space, experience level, and the plants you want to grow, whether that’s fresh basil for weeknight dinners or a full salad garden that produces year-round.
Understanding Indoor Gardening Systems: What You Really Need
All-in-One Systems vs. Custom Setups
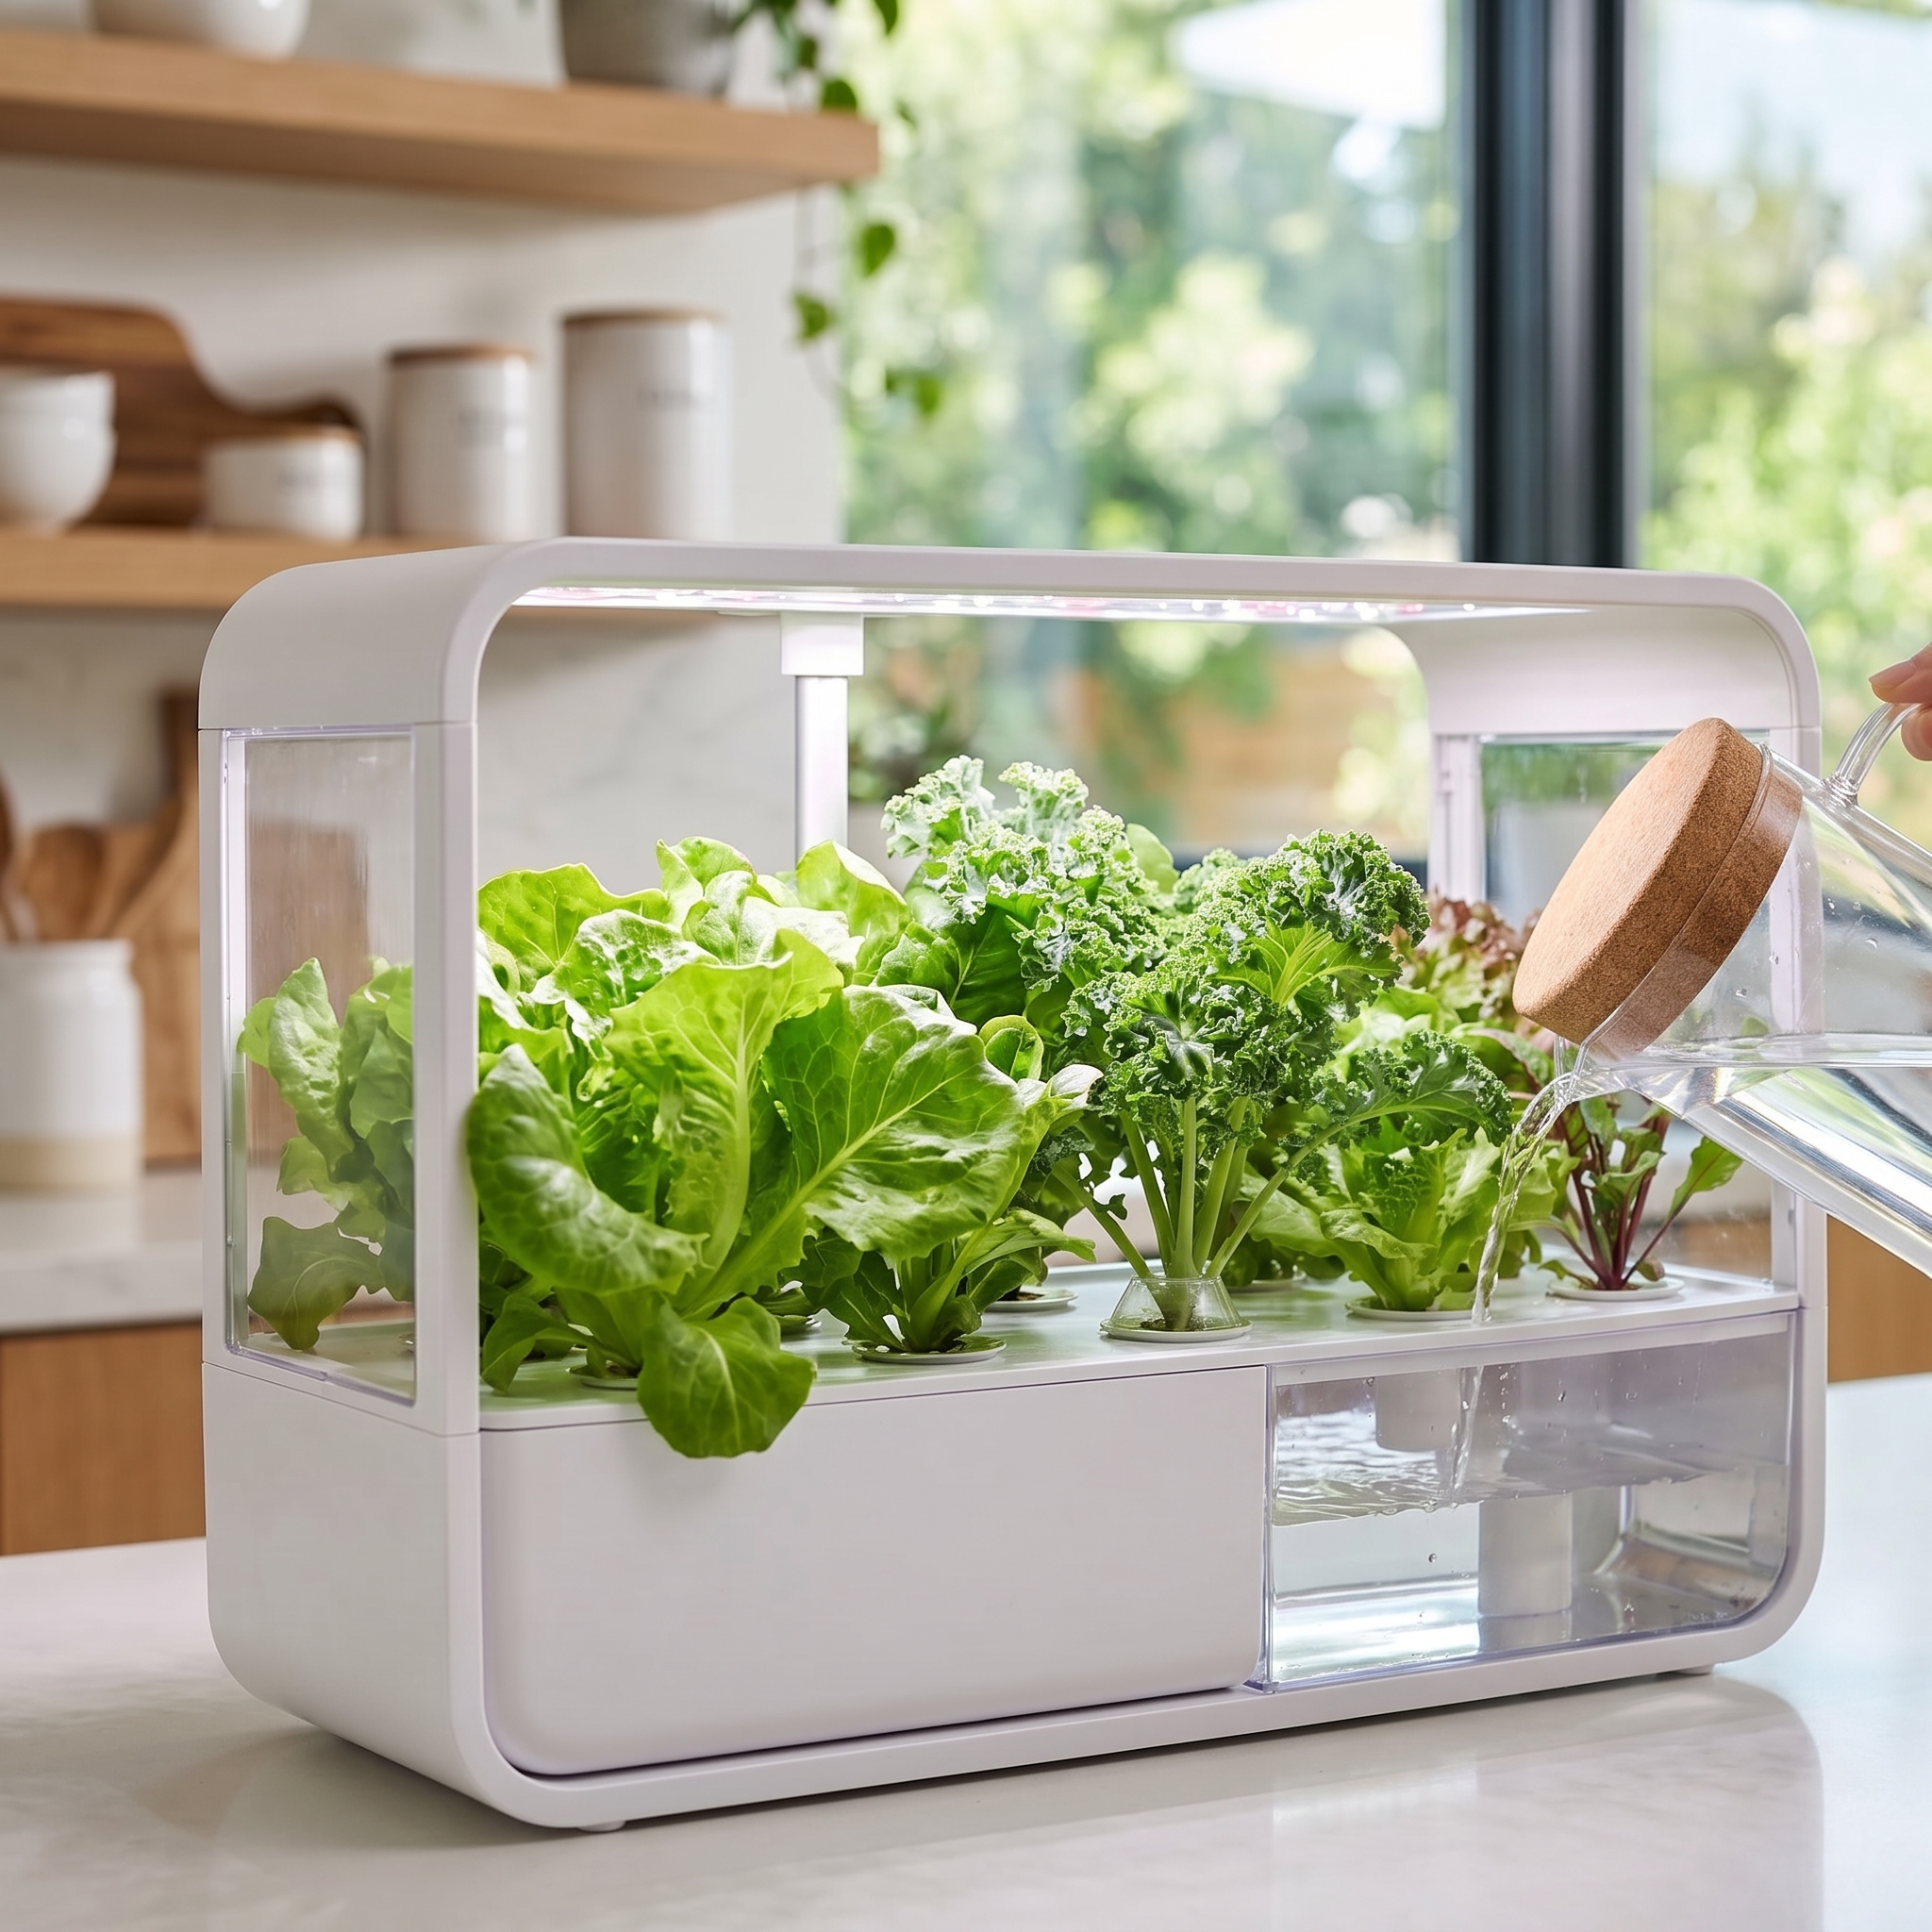
All-in-one systems deliver turnkey convenience for indoor gardeners who want to start growing immediately without researching compatible components. These complete packages, like AeroGarden units, include integrated lighting, automated watering, and nutrient systems in a single device. You plug it in, add water and seeds, and the system handles most of the work. This approach works best for beginners testing their interest in indoor gardening, apartment dwellers with limited space, or anyone growing herbs and small greens who values simplicity over customization.
Custom setups require more planning but offer flexibility that all-in-one systems can’t match. Building piece by piece lets you choose specific grow lights for your plant types, select tent sizes that fit your actual space, and upgrade individual components as your skills develop. You’re not locked into preset growing capacity or proprietary pods. Intermediate and advanced growers typically prefer custom systems because they can optimize each element, brighter lights for fruiting plants, larger reservoirs for extended trips away, or specialized ventilation for odor control.
The trade-off is straightforward: all-in-one systems minimize decisions and setup time but limit what and how much you can grow. Custom builds demand more research upfront yet adapt to your changing goals. Budget matters too. Entry-level all-in-one units cost less initially, but expanding capacity means buying another complete system. Custom setups have higher startup costs but better long-term value through component upgrades rather than full replacements.
What’s Inside a Complete Kit
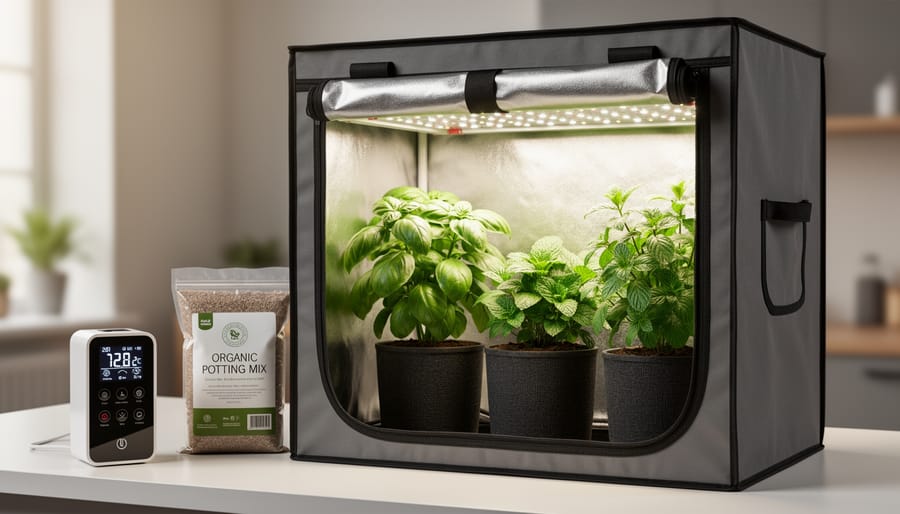
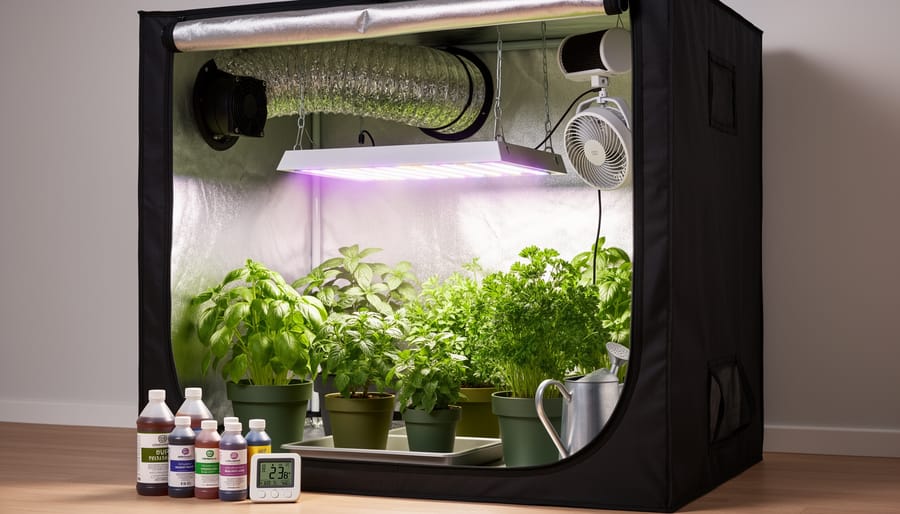
A complete grow tent kit bundles most of what you need into one purchase, but the contents vary widely between manufacturers and price points. At minimum, expect the tent itself, usually constructed from reflective mylar interior and tear-resistant fabric exterior, along with LED grow lights matched to the tent’s footprint. Most kits include an inline exhaust fan and carbon filter to manage odors and control temperature, plus ducting to connect these components. You’ll also find basic accessories like hanging ratchets for the lights, timers for automation, and sometimes a small circulation fan to keep air moving inside.
Here’s what typically comes in a complete kit:
- Grow tent with metal frame and reflective interior lining
- Full-spectrum LED grow light (wattage varies by tent size)
- Inline exhaust fan and carbon filter for ventilation
- Flexible ducting and clamps to connect airflow components
- Light hangers or rope ratchets for height adjustment
- Timer for automated lighting schedules
What’s usually missing: growing containers, soil or hydroponic media, nutrients, pH testing supplies, and sometimes even the circulation fan. Check the product description carefully before buying, and budget an additional 20-30% for the supplies the kit doesn’t include. Some budget kits skimp on light quality or ventilation capacity, forcing upgrades later, so compare component specs rather than just looking at the kit price.
Essential Supply Categories Compared
Grow Lights: LED vs. Traditional Options
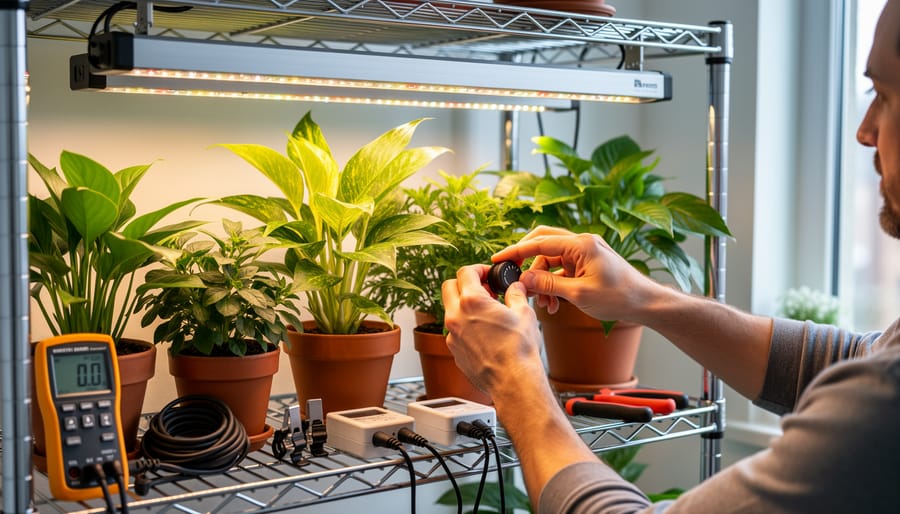
LED grow lights dominate today’s market for good reason: they consume less electricity, generate less heat, and last longer than the fluorescent or HID (high-intensity discharge) options that once ruled indoor gardens. For most home growers, LEDs deliver the best combination of performance and running costs. Still, understanding what separates them from traditional technologies helps you weigh trade-offs and choose equipment that matches your plants’ light requirements.
| Light Type | Typical Wattage | Coverage Area | Best Use |
|---|---|---|---|
| LED Full-Spectrum | 50-600W | 2-16 sq ft | All growth stages, most plant types |
| Fluorescent (T5/CFL) | 24-54W per tube | 1-4 sq ft | Seedlings, herbs, low-light plants |
| HID (MH/HPS) | 250-1000W | 9-25 sq ft | Large-scale grows, high-light plants |
Fluorescent tubes work well for starting seeds or growing herbs on a shelf, but they lack the intensity needed for fruiting plants or dense canopies. HID systems deliver powerful output, but their heat output demands robust ventilation and their energy draw adds up quickly. LEDs bridge the gap: a quality 300-watt LED panel provides intensity comparable to a 600-watt HID while running cooler and pulling half the electricity. Spectrum matters, too. Modern LEDs offer full-spectrum output that supports all growth stages, whereas older HID setups required swapping metal halide bulbs for vegetative growth and high-pressure sodium for flowering.
When matching lights to plants, consider intensity and duration. Leafy greens and herbs thrive under moderate LED wattage, while tomatoes or peppers need higher output. Coverage area scales with wattage: a 100-watt LED typically covers about four square feet effectively, so measure your growing space before buying. If you’re just starting with a few pots on a countertop, a compact LED panel or even a fluorescent fixture handles the job without overspending on professional-grade equipment.
Grow Tents and Enclosures
Grow tents create a controlled microenvironment for your plants, but choosing the right one requires matching size, materials, and features to your space and goals.
Start with dimensions. A 2×2-foot tent suits a single large plant or several herbs, while 4×4 or 5×5 models accommodate multiple plants at different growth stages. Measure your available floor space carefully, tents need several extra inches on all sides for proper airflow and access to zippers. Height matters too. Standard 6-foot tents work for compact plants, but if you plan to grow taller varieties or hang multiple lights, consider 7- or 8-foot models.
Interior lining quality directly impacts light efficiency. Look for thick, tear-resistant Mylar or similar reflective material rated at 95% reflectivity or higher. Cheap tents use thin, easily damaged liners that create hot spots and reduce light distribution. Check stitching around seams, double-stitched corners and reinforced zipper tracks indicate better durability.
Ventilation ports determine how easily you integrate fans and filters. Count the number and placement of ducting holes, typically ranging from two basic openings on budget tents to six or more on premium models. Multiple ports let you position intake fans low and exhaust high for optimal air circulation. Drawstring closures should cinch tightly around ducting to prevent light leaks.
Frame sturdiness separates reliable tents from flimsy ones. Metal poles should feel rigid when assembled, not wobbly. Plastic corner connectors often crack under weight, so metal connectors justify a higher price. Plan to hang lights, filters, and occasionally wet gear inside, frames rated for 50-100 pounds offer peace of mind.
Hydroponic Systems and Growing Media
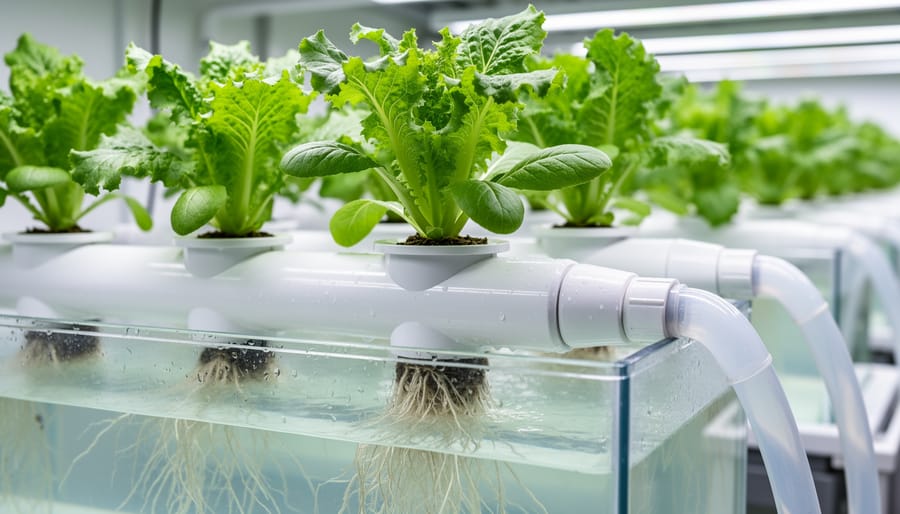
Hydroponic systems eliminate soil entirely, circulating nutrient-rich water directly to plant roots. This approach accelerates growth rates and sidesteps soil-borne diseases, but requires closer monitoring than traditional potting mixes. For beginners testing the waters, simple deep water culture (DWC) setups immerse roots in oxygenated nutrient solution, straightforward to assemble, though you’ll check water levels and pH several times weekly. Wick systems offer even simpler passive feeding, ideal for herbs and lettuce, while drip irrigation and ebb-and-flow systems suit intermediate growers who want precise control over feeding cycles.
If hydroponics feels too hands-on, soil-based systems provide a gentler learning curve. Quality potting mixes designed for containers drain well and retain moisture, forgiving occasional watering lapses. Coco coir strikes a middle ground: this fibrous substrate drains faster than soil yet holds nutrients like hydroponics, requiring regular feeding but offering more flexibility than full water culture. Perlite and vermiculite blended into any medium improve aeration and drainage, critical when plants can’t send roots deeper for air.
Maintenance intensity varies sharply. Hydroponic growers monitor pH, electrical conductivity, and reservoir cleanliness weekly, replacing nutrient solutions every two weeks. Soil growers water less frequently and adjust nutrients more gradually. Choose based on your schedule: hydroponics rewards consistent attention with faster harvests, while soil tolerates a more relaxed routine without immediate consequences.
Nutrients and Supplements
Indoor plants need a steady supply of nutrients they can’t naturally pull from rain or organic soil decomposition. Most hydroponic and soilless growers rely on liquid nutrient concentrates designed specifically for indoor cultivation, these typically follow a “grow-bloom-micro” framework, where separate formulas support vegetative growth, flowering, and provide trace minerals. Product lines like Advanced Nutrients and General Hydroponics offer complete multi-part systems that you dilute in water, adjusting the ratio as your plants mature. Look for pH-balanced formulas that stabilize around 5.5-6.5 for hydroponics or 6.0-7.0 for soil, since pH drift locks out nutrients even when they’re present.
Specialty supplements can boost specific outcomes, CalMag addresses calcium and magnesium deficiencies common in filtered water, while enzymes and beneficial bacteria support root health in recirculating systems. Beginners often do well with all-in-one powder blends that simplify mixing, though serious growers eventually graduate to multi-part liquids for finer control over nutrient ratios during different growth phases.
Environmental Control Equipment
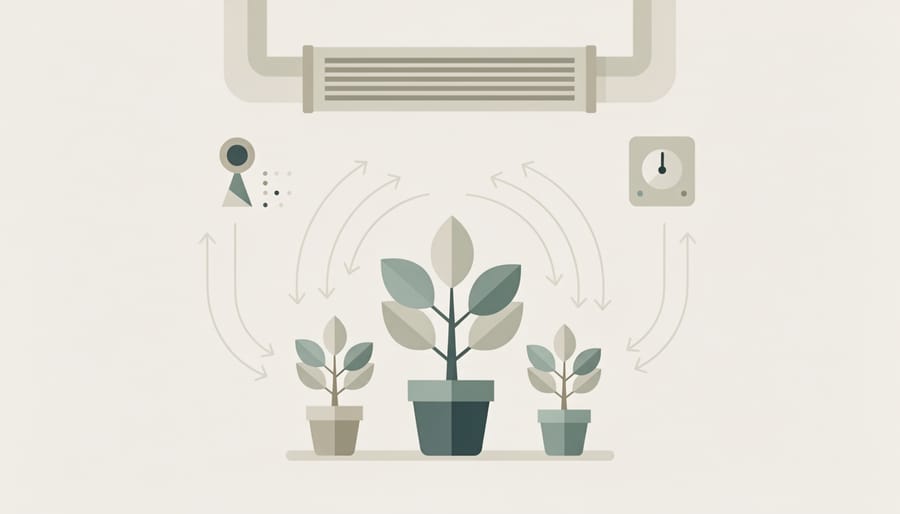
Indoor plants thrive within specific temperature and humidity ranges, and environmental control equipment maintains those conditions regardless of your home’s climate. Circulation fans prevent stagnant air pockets that encourage mold and pests while strengthening plant stems through gentle movement. Oscillating models work best for most setups, creating airflow patterns that reach all plants without blasting them directly.
Carbon filters paired with inline exhaust fans manage odor and refresh the growing environment, pulling out humid, stale air and drawing in fresh oxygen. Size your exhaust system to exchange your tent’s full air volume every three to five minutes for adequate ventilation. Humidity control matters more than many beginners expect, too high invites fungal problems, too low causes crispy leaf edges. Affordable hygrometers let you monitor conditions, while small humidifiers or dehumidifiers adjust levels as needed.
Temperature swings stress plants, so consider space heaters for cold basements or portable AC units for hot attics. Digital thermostats automate temperature regulation, preventing the damage that occurs when you’re away and conditions drift outside the ideal range.
Key Factors When Buying Indoor Gardening Supplies
Price vs. Value: Getting What You Pay For
The cheapest grow light isn’t always the bargain it appears to be. I’ve watched newcomers replace a $40 LED panel three times in a year, spending more than a quality $120 fixture would have cost upfront. Premium supplies typically justify their price through better materials, longer warranties, and superior performance, think grow lights with proven PAR output versus generic models with vague specs.
That said, you don’t need top-tier everything. Budget growing media and basic timers work perfectly fine. Focus your spending on items that directly affect plant health: lights, ventilation fans, and nutrient systems deserve investment. Save on containers, trays, and hand tools.
Watch for genuine value signals: detailed specifications rather than marketing fluff, established brand reputation, and warranties longer than 90 days. A mid-priced grow tent with reinforced stitching and sturdy zippers will outlast the cheapest option by years.
Seasonal deals matter most for big-ticket items like complete systems. Black Friday and post-harvest season (late fall) often bring real discounts on grow tents and lighting systems, not just inflated “sale” prices. Compare the discounted price against multiple retailers and historical pricing to confirm you’re getting actual savings, not clever marketing.
Quality Indicators and Durability
Quality equipment announces itself through tangible details you can inspect before buying. Start with the physical construction: robust housings on ballasts and fans, thick-gauge metal tent poles that don’t flex under pressure, and reflective tent material that feels substantial rather than flimsy. Examine connection points, zippers, and ports, these wear first on cheap gear. Premium grow lights include proper heat sinks and certified electrical components, while budget versions often skimp on thermal management and use lower-bin LED chips that lose intensity faster.
Material choices reveal longevity. Aluminum frames resist corrosion better than uncoated steel. Quality hydroponic reservoirs use food-grade plastics that won’t leach chemicals or crack. Canvas tent fabric with higher denier ratings (600D or above) outlasts thinner material and blocks light more effectively. Check if moving parts like fan blades and timer mechanisms feel solid during operation.
Warranties signal manufacturer confidence. Reputable brands offer three to five years on LED fixtures and at least one year on complete systems like AeroGarden units. Read what the warranty actually covers, some exclude normal wear while others protect against defects and performance degradation. Research brand longevity through grower forums and reviews focusing on equipment still functioning after multiple growing cycles, not just initial impressions.
Availability and Shipping Considerations
Availability varies widely depending on where you shop. Specialty hydroponic retailers typically stock a broader range of equipment but may have longer lead times for niche items like specific LED spectrum panels or premium nutrients. General garden centers carry basics like grow lights and potting media year-round, though selection narrows outside spring planting season. Online marketplaces offer the widest selection but check seller ratings carefully, shipping heavy items like grow tents and ballasts adds significant cost.
Canadian gardeners face additional considerations. Cross-border shipping often incurs duties and extended delivery times, making domestic retailers more practical despite potentially higher prices. Some U.S. brands don’t ship north, and certain hydroponic equipment may require voltage adapters. Check product specifications and return policies before ordering, especially for electrical components. Planning ahead prevents frustration when a critical piece arrives late or proves incompatible with your setup.
Scalability and Future Expansion
Choose supplies that won’t limit your options down the road. Modular systems and standard-sized equipment make expansion straightforward, you can add another tent, upgrade to more powerful LED panels, or stack hydroponic units without replacing your entire setup. Look for grow lights with daisy-chain capability, tents with multiple ventilation ports for future fans or filters, and nutrient systems that offer advanced formulas when you’re ready. Starting with quality fundamentals means adding to your garden rather than starting over.
Recommended Approaches for Different Gardener Types
Complete Beginner: Start Simple
If you’ve never grown plants indoors before, resist the urge to assemble a complex custom system. Start with an all-in-one unit that handles lighting, watering, and nutrient delivery automatically. The AeroGarden line exemplifies this approach, these countertop systems come completely equipped with LED grow lights, a built-in reservoir, and pre-seeded pods for herbs like basil, parsley, and cilantro. You plug it in, add water and nutrients on schedule, and watch your plants grow without fussing over light distances or pH levels.
These starter systems limit your choices, but that’s exactly why they work for beginners. You learn the fundamentals, how quickly plants grow under optimal light, when they need nutrients, how often to refill water, without juggling multiple pieces of equipment. Once you’ve successfully grown a few harvests and understand the rhythm of indoor gardening, you’ll know whether you want to expand to a larger tent setup or stick with the simplicity of self-contained systems.
Intermediate Grower: Building Custom Systems
Once you’ve outgrown all-in-one units, a grow tent kit gives you the framework to customize while avoiding decision paralysis. Quality 4×4 or 5×5 tents with reflective interiors, paired with a full-spectrum LED panel, let you control light cycles and grow everything from peppers to tomatoes. Look for kits that include ventilation basics, an inline fan and carbon filter, but expect to add pieces over time.
The real advantage at this level is modularity. You can swap a basic LED for a quantum board if yields plateau, add trellis netting when plants get tall, or upgrade nutrients from general-purpose formulas to targeted bloom boosters. Buy components that work together but aren’t locked into one ecosystem. This flexibility lets you experiment with different plant varieties and growing techniques without starting from scratch each time. Focus your budget on lighting first since it drives growth, then improve airflow and environmental controls as your confidence builds.
Advanced: Optimizing Performance
Experienced growers ready to maximize their yields should prioritize premium full-spectrum LED systems that offer programmable intensity and spectrum control, allowing precise adjustments throughout each growth stage. Look for fixtures from brands with proven PAR output ratings and commercial-grade construction that withstand continuous operation. Invest in sophisticated nutrient delivery through automated dosing systems or concentrated professional formulas that let you fine-tune nitrogen, phosphorus, and potassium ratios based on plant response rather than following generic schedules. Environmental automation becomes critical at this level: programmable controllers that integrate temperature, humidity, and CO2 enrichment create optimal conditions without constant manual intervention. Carbon filtration upgrades to higher CFM ratings and activated carbon depth improve air quality in larger setups. The performance gains from these investments compound over time, turning your indoor garden into a precision growing environment that consistently produces robust, healthy plants.
Common Mistakes to Avoid When Shopping
Undersizing Your Lighting
Insufficient lighting is the single most common equipment mistake among new indoor gardeners. Beginners often choose lights based on price rather than wattage, then wonder why their tomatoes stretch tall and spindly or their lettuce grows pale and thin. The math matters: a 2×4-foot growing area typically needs at least 200-300 actual watts of LED power, not the inflated “equivalent” ratings some manufacturers advertise. When you halve the wattage, you don’t just dim the light, you fundamentally limit photosynthesis, forcing plants to reach desperately upward searching for energy they can’t find. Before you buy any grow light, measure your tent or shelf dimensions and confirm the fixture provides adequate coverage at the recommended hanging height. Verify actual power draw in the specifications, and avoid lighting mistakes by choosing fixtures rated for your specific growing area rather than settling for whatever fits your initial budget.
Buying Incomplete Kits
Many starter kits advertise themselves as “complete” when they’re anything but. A grow tent kit might include the tent itself and a light fixture, but leave out crucial items like ducting, fan speed controllers, timer plugs, or even basic hanging hardware. Some hydroponic systems ship without pH testing supplies or the nutrients you’ll need from day one. Before clicking “buy,” read the detailed product description and customer reviews carefully. Look for phrases like “light not included” or “requires separate purchase of…” buried in the fine print. The most frustrating scenario is getting your kit delivered, opening the box excited to start growing, and realizing you can’t actually begin without another trip to the store, or worse, waiting for additional parts to ship.
Ignoring Ventilation and Airflow
Many new indoor gardeners focus their entire budget on lights and growing systems while treating ventilation as an afterthought. This oversight creates a cascade of problems. Without proper airflow, humidity builds up around your plants, inviting mold, mildew, and fungal diseases that can destroy an entire crop. Stagnant air also weakens stems, plants need gentle movement to develop strong structure. Beyond circulation, you need extraction to manage heat from grow lights and odors from certain plants. A basic inline fan with carbon filter prevents these issues for less than the cost of replacing diseased plants. Don’t assume ambient room air is enough; enclosed growing spaces require dedicated ventilation from day one, not added later when problems appear.
Expert Perspective: What Professional Growers Prioritize
I’ve been growing indoors for twelve years, and I’ve watched plenty of newcomers burn through money on gear they don’t need while skimping on what actually matters. When I started, I bought the cheapest grow light I could find and splurged on an expensive pH testing kit. Big mistake. The light barely produced enough output to keep lettuce alive, and I could have managed pH perfectly well with litmus strips for a tenth of the cost.
Here’s what I’ve learned: invest heavily in lighting and ventilation, because those two factors determine whether your plants thrive or limp along. A quality LED system pays for itself in energy savings and plant performance within months. I upgraded to a full-spectrum panel five years ago, and the difference was immediate, fuller foliage, faster growth, and plants that actually flourished instead of just surviving. Airflow deserves equal priority. Poor circulation invites mold and pests faster than anything else, which is why proper indoor pest control starts with fresh air moving through your space.
Where can you save? Containers, trays, and basic tools. You don’t need designer pots. I’ve used everything from repurposed buckets to cheap nursery containers, and plants don’t care what their roots sit in as long as drainage works. Same goes for tents, mid-range models do the job just fine if you’re not running a commercial operation.
One last lesson: start smaller than you think you need. I crammed my first tent with far too many plants, and they all suffered from crowding. Give yourself room to work and your garden room to breathe.
Frequently Asked Questions
How much should I budget to start indoor gardening?
Expect to spend $100, $300 for a basic beginner setup with a simple system like an AeroGarden or a small grow light and containers. Custom tent setups with quality lighting and ventilation typically run $400, $800, while advanced systems with premium lights and environmental controls can exceed $1,000.
How much space do I need for indoor gardening?
You can start with as little as two square feet of counter space for a compact all-in-one system growing herbs or microgreens. A small 2×2-foot grow tent fits in a closet or spare corner, while serious growers often use 4×4-foot or larger tents that require dedicated floor space and clearance for ventilation.
Do I really need a grow tent, or can I use open shelving?
Open shelving works fine for low-light plants and herbs if you add supplemental lighting, but grow tents give you better light containment, environmental control, and reflective surfaces that boost efficiency. Tents become essential when growing light-hungry plants or managing odor and humidity precisely.
How often do grow lights need replacing?
Quality LED grow lights last 50,000 hours or more before noticeable output decline, which translates to 5-10 years of typical use. Older fluorescent or HID bulbs need replacement every 12-18 months as their spectrum degrades, making LEDs more cost-effective long-term despite higher upfront prices.
These questions come up constantly in gardening forums and retail conversations, and getting clear answers upfront saves new growers from costly trial-and-error. Budget expectations vary wildly depending on ambition, someone growing basil on a windowsill has different needs than someone cultivating tomatoes year-round, so realistic cost ranges help you plan accordingly.
The space question trips up apartment dwellers who assume indoor gardening requires a spare room. In reality, vertical growing and compact systems let you garden almost anywhere with power access. I’ve seen productive setups tucked into bathroom corners and kitchen nooks, proving you don’t need square footage to grow fresh produce.
Grow tent necessity depends entirely on your plants and environment. If you’re growing lettuce in a climate-controlled room with decent ambient light, skip the tent and invest in better lighting instead. But if you’re managing temperature swings, need light isolation to control photoperiods, or want reflective walls maximizing every photon, tents pay for themselves in improved results and convenience.
The replacement timeline for lights matters because it affects your true cost of ownership. Cheap LED panels that fail after two years aren’t bargains compared to quality fixtures running strong after a decade. Factor in longevity when comparing prices, and don’t assume all LEDs perform equally, build quality and heat management separate premium lights from budget models that burn out prematurely.
Building a thriving indoor garden starts with understanding your needs and choosing supplies that match your experience level. You don’t need every piece of equipment on day one. Begin with the essentials, a reliable light source, appropriate growing medium, and basic environmental control, then expand as you gain confidence and discover what works in your space.
The beauty of indoor gardening is that it’s genuinely accessible year-round, regardless of climate or season. With the right supplies, you can grow fresh herbs on a kitchen counter or cultivate a full vegetable garden in a spare room. Each successful harvest teaches you something new about what your plants need and how different equipment performs.
As your skills develop and your goals evolve, return to this guide. The factors that matter when you’re starting out shift as you become more ambitious with plant selection and yield expectations. Remember that even experienced growers started with simple setups and learned through hands-on practice. Visit Bluestem Gardening for more detailed growing guides, seasonal tips, and interviews with gardeners who’ve built impressive indoor gardens from humble beginnings.