Transform your backyard into a thriving garden oasis without breaking ground or battling weeds through lasagna gardening, a revolutionary sustainable gardening method that mimics nature’s own layering process. By strategically stacking organic materials like cardboard, fallen leaves, grass clippings, and compost, this no-dig technique creates rich, fertile soil that nurtures plants from the ground up. Imagine building a garden that practically maintains itself, where layers of green and brown materials decompose naturally to feed your plants throughout the growing season. Whether you’re dealing with poor soil, persistent weeds, or simply want to garden more efficiently, lasagna gardening offers a practical solution that works with nature rather than against it. The best part? You can start right now, using materials you likely already have around your home, and be planting in your new garden bed within months.
What Makes Lasagna Gardening So Special?
No Digging Required
One of the most appealing aspects of lasagna gardening is that you can skip the backbreaking work of digging and tilling. Instead of wrestling with tough soil or removing existing grass, you simply build your garden bed right on top of your existing lawn or soil. The layers of organic materials naturally break down over time, creating rich, loose soil underneath. As earthworms and beneficial organisms move through the layers, they do all the heavy lifting for you, aerating the soil and incorporating the decomposed materials. This gentle, nature-based approach not only saves your back but also preserves the delicate soil ecosystem and natural soil structure. Even better, you can start a lasagna garden in any season, and by the time spring arrives, you’ll have perfect planting conditions without ever lifting a shovel.
Natural Soil Enhancement
One of the most remarkable aspects of lasagna gardening is its ability to create rich, fertile soil through the natural decomposition process. As organic materials break down layer by layer, they transform into a nutrient-dense growing medium that plants absolutely love. The alternating layers of green and brown materials create the perfect environment for beneficial microorganisms and earthworms to thrive.
This natural soil-building process mimics what happens on the forest floor, where leaves, plant matter, and organic debris decompose over time. Each layer contributes different nutrients: grass clippings and kitchen scraps provide nitrogen, while cardboard and fallen leaves add carbon. The moisture trapped between layers helps speed up decomposition, while also creating air pockets that ensure proper soil structure.
Over several months, these materials break down into dark, crumbly soil that’s teeming with life. The result is a garden bed with excellent water retention, balanced pH levels, and a continuous supply of nutrients that are slowly released to your plants throughout the growing season. It’s nature’s way of recycling, turned into a brilliant gardening technique!
Building Your Lasagna Garden

Choosing Your Location
Selecting the right location for your lasagna garden is crucial for its success. Choose a spot that receives at least 6-8 hours of direct sunlight daily, as most vegetables and herbs thrive in full sun. If you’re working with partial shade, you can still create a successful garden, but you’ll need to focus on shade-tolerant plants. Consider integrating shade-tolerant options like hostas if needed.
Consider accessibility when choosing your spot – you’ll want to easily reach your garden for maintenance and harvesting. Ensure the area has good drainage; avoid low-lying spots where water tends to pool. If possible, pick a relatively level area, though a slight slope is acceptable and can actually help with drainage.
Before starting, check for underground utilities by calling your local utility company. Remove any existing vegetation, but don’t worry about digging it up – simply cut it as close to the ground as possible. You can also build your lasagna garden directly on top of grass or even concrete, making it perfect for urban settings.
For the best results, measure and mark your intended garden space. A manageable size for beginners is about 4×8 feet, though you can adjust this based on your available space and gardening goals.
Essential Materials
To create your lasagna garden, you’ll need several layers of organic materials, each serving a specific purpose. Let’s break down the essential ingredients:
Brown Materials (Carbon-Rich):
– Cardboard or newspaper (base layer)
– Dry leaves
– Straw or hay
– Pine needles
– Shredded paper
– Wood chips or sawdust
Green Materials (Nitrogen-Rich):
– Fresh grass clippings
– Kitchen scraps (fruit and vegetable waste)
– Coffee grounds
– Fresh plant trimmings
– Green yard waste
– Manure (cow, horse, or chicken)
Additional Materials:
– Topsoil
– Finished compost
– Water
– Garden tools (wheelbarrow, pitchfork, rake)
The key to success is maintaining a proper balance between brown and green materials, typically using a ratio of 3:1 (brown to green). You don’t need all these materials to start – work with what you have available locally. Each layer should be 2-3 inches thick, except for the cardboard base, which should be a single layer.
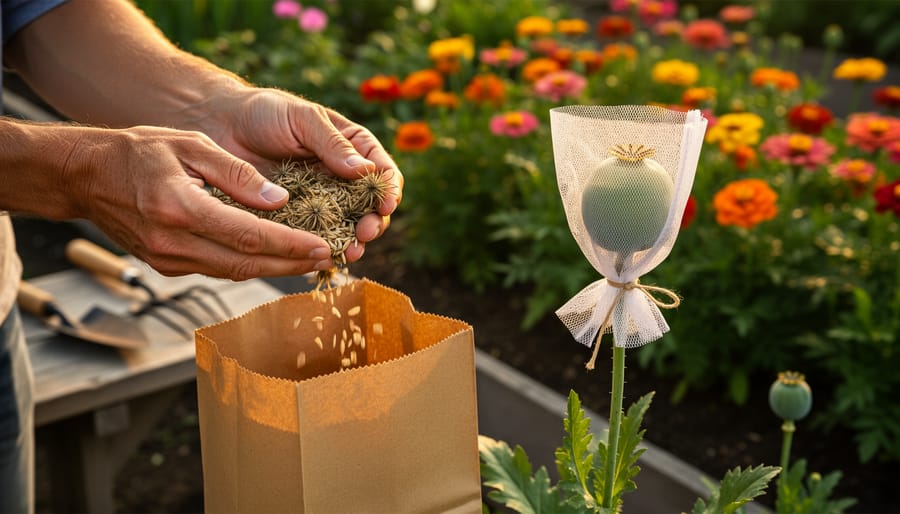
Pro tip: Save newspapers and cardboard throughout the year, and collect fallen leaves in autumn to ensure you have enough brown materials when needed. For green materials, partner with local coffee shops for grounds or neighbors who maintain lawns for grass clippings.


Layer by Layer Guide
Creating a successful lasagna garden is all about layering materials correctly. Start with your first layer by laying down cardboard or several sheets of newspaper directly on your chosen spot – this will smother existing grass or weeds. Make sure to thoroughly wet this layer to help it break down and stay in place.
For your second layer, add 2-3 inches of “brown” materials like dried leaves, straw, or wood chips. These carbon-rich materials provide structure and help with drainage. Follow this with a 2-inch layer of “green” materials such as grass clippings, vegetable scraps, or coffee grounds – these nitrogen-rich materials fuel decomposition.
Continue alternating brown and green layers, making each about 2-3 inches thick. Think of it like building a compost sandwich: browns, greens, browns, greens. After every couple of layers, lightly water to keep materials moist but not soggy. A good rule of thumb is maintaining a 2:1 ratio of browns to greens throughout your layers.
For the final layers, add about 3 inches of finished compost, followed by a thick layer of straw or leaves for mulch. The total height of your lasagna garden should be between 18-24 inches when first built – don’t worry, it will settle significantly as materials decompose.
Pro tip: If you’re planning to plant immediately, create a small pocket of compost within the top layer for each plant. This gives them a healthy start while the layers below continue breaking down into rich, fertile soil.
Maintaining Your Lasagna Garden
Watering and Moisture Control
Managing moisture in a lasagna garden requires a different approach compared to traditional gardens. Since the layered organic materials naturally retain moisture, you’ll typically need less frequent watering. However, mastering proper watering techniques is still essential for success.
When first building your lasagna garden, thoroughly water each layer as you add it. This initial moisture helps kick-start decomposition and creates the perfect environment for beneficial microorganisms. Once established, check moisture levels by inserting your finger about 2-3 inches into the soil. If it feels dry at this depth, it’s time to water.
During hot summer months, mulch the surface with straw or dried grass clippings to help retain moisture. Water deeply but less frequently to encourage deep root growth. A soaker hose works wonderfully for lasagna gardens, allowing water to seep slowly into the layers without disturbing them.
Keep in mind that newer lasagna gardens might need more frequent watering until the layers settle and decompose. As your garden matures, you’ll notice it becomes increasingly self-regulating in terms of moisture retention.
Adding New Layers
Just like maintaining your garden throughout the seasons, your lasagna garden will need periodic refreshing to keep it thriving. The beauty of this method is that you can add new layers any time, making it a living, growing system that gets better with age.
When you notice your soil level dropping or plants showing signs of reduced vigor, it’s time to add fresh layers. Start by clearing any spent plants and leaving the roots in place to decompose naturally. Add a new brown layer of cardboard or newspaper, followed by a generous helping of grass clippings or fresh kitchen scraps for your green layer.
For the best results, aim to add new layers in early spring or fall when organic materials are plentiful. During spring cleanup, take advantage of fallen leaves and yard waste. In fall, gather those colorful autumn leaves – they’re garden gold! Layer them with green materials like vegetable scraps or coffee grounds.
Remember to keep your layers relatively thin, about 2-3 inches each, and always alternate between brown and green materials. Water each layer lightly as you build to help jumpstart decomposition. If you’re adding layers during the growing season, work carefully around existing plants, tucking the new materials gently between them.
Over time, you’ll develop an intuitive sense of when your garden needs refreshing. Many gardeners find that adding a few new layers once or twice a year keeps their lasagna garden healthy and productive.
Common Mistakes to Avoid
While lasagna gardening is a forgiving method, there are some common pitfalls you’ll want to avoid for the best results. One frequent mistake is using fresh grass clippings or green materials without balancing them with enough brown layers. This can lead to a soggy, smelly mess as the materials decompose. Instead, make sure to alternate your green and brown materials evenly.
Another error gardeners make is not properly wetting each layer as they build. Dry materials won’t break down effectively, so remember to moisten each layer like you’re watering a houseplant – damp but not soaking wet.
Some people rush to plant before the layers have had time to settle and decompose. Give your lasagna garden at least a few weeks to break down before planting, or better yet, build it in fall for spring planting. This patience will reward you with rich, fertile soil.
Watch out for using materials that might contain herbicides or pesticides. These chemicals can persist in yard waste and affect your garden’s health. Always source your materials from trusted, chemical-free sources.
Lastly, don’t forget to consider the height of your layers. New gardeners often underestimate how much the materials will compress. Start with a higher pile than you think you need – it will settle to about half its original height.
Lasagna gardening offers a sustainable, efficient, and rewarding way to create a thriving garden without the back-breaking work of traditional tilling. By layering organic materials in a thoughtful sequence, you’re not just building a garden bed – you’re creating a rich, living ecosystem that will nourish your plants for seasons to come. The beauty of this method lies in its simplicity and accessibility; whether you have a sprawling backyard or a modest urban space, lasagna gardening can work for you.
Remember, patience is key as your layers decompose and settle. While it may take a few months for the bed to be ready, the wait is worth it. You’ll be rewarded with incredibly fertile soil, fewer weeds, and healthier plants that require less maintenance over time. Plus, you’ll be doing your part for the environment by recycling organic materials and reducing waste.
Don’t be afraid to experiment with different organic materials and layer combinations. Start small if you’re unsure, and expand as you gain confidence. Your garden will be a testament to the power of working with nature rather than against it. Why not give lasagna gardening a try? Your future plants – and your back – will thank you!