Transform your garden’s productivity by rotating crops strategically through each growing season. Nature’s most successful farmers – from ancient civilizations to modern organic growers – have long understood that maintaining healthy garden soil depends on smart plant placement. By shifting tomatoes, leafy greens, legumes, and root vegetables to new locations each season, gardens naturally replenish nutrients, break pest cycles, and maximize yields without chemical interventions.
This time-tested practice prevents soil depletion while naturally controlling disease and insect problems that plague single-crop plantings. Plant families have distinct nutritional needs and contribute different benefits – legumes fix nitrogen, deep-rooted plants break up compaction, and heavy feeders give way to light feeders in a carefully orchestrated dance that keeps your soil vibrant season after season.
Whether you’re tending raised beds or managing acres, implementing a thoughtful rotation plan this growing season will set your garden up for years of abundant harvests. The key is starting with a simple system that works for your space and gradually refining it as you observe what thrives in your unique conditions.
Why Your Garden Needs Crop Rotation
Soil Health Benefits
Rotating your crops is like giving your soil a well-deserved vacation! As different plants take varying nutrients from the soil, switching them around helps prevent the depletion of specific elements. For instance, leafy greens are heavy nitrogen feeders, while root vegetables often need more phosphorus. By changing what you grow in each area, you maintain a natural balance of nutrients.
This practice also helps break pest and disease cycles that can build up when the same crop is grown repeatedly in one spot. The diversity of root systems from different plants improves soil structure, with some roots growing deep while others spread wider, creating natural pathways for water and air.
One of the most beautiful aspects of crop rotation is how some plants actually give back to the soil. Legumes, like peas and beans, work with beneficial bacteria to fix nitrogen from the air into the soil, naturally fertilizing it for future crops. Meanwhile, deep-rooted plants help bring nutrients up from lower soil layers, making them available for their shallow-rooted neighbors.
Remember, healthy soil means healthy plants, and crop rotation is one of the most effective ways to maintain that vital soil ecosystem.

Natural Pest Control
One of the most remarkable benefits of crop rotation is its ability to naturally disrupt pest and disease cycles. When you grow the same crops in the same spot year after year, you’re essentially setting up an all-you-can-eat buffet for garden pests and pathogens. By moving crops to different locations each season, you create confusion for these unwanted visitors.
Think of it this way: potato beetles that overwinter in the soil will emerge in spring expecting to find potato plants but instead discover tomatoes or beans. Without their preferred food source, these pests can’t complete their life cycle, naturally reducing their population over time.
Rotation is particularly effective against soil-borne diseases that target specific plant families. For example, moving brassicas (like cabbage and broccoli) to a new bed each year helps prevent clubroot disease from building up in the soil. Similarly, rotating nightshades (tomatoes, peppers) breaks the cycle of devastating diseases like early blight.
This natural pest control method reduces the need for chemical interventions, making your garden more environmentally friendly and sustainable.
Creating Your Seasonal Rotation Plan
Four-Season Rotation Basics
A four-season rotation cycle helps maximize your garden’s potential while maintaining healthy soil throughout the year. Think of it as a garden dance where each plant family takes turns leading! Start in spring with leafy greens and brassicas like lettuce, kale, and cabbage. These crops are perfect for the cooler temperatures and help prepare the soil for summer plants.
As temperatures warm up, transition to fruiting vegetables in summer. Tomatoes, peppers, and eggplants thrive in this slot and benefit from the nutrients left by spring crops. Like many companion planting strategies, this sequence helps naturally manage pests and diseases.
Fall belongs to root vegetables such as carrots, beets, and potatoes. These plants help break up the soil while utilizing nutrients at different depths. They’re also excellent at clearing the way for the next season’s crops.
Winter is the perfect time for legumes like peas and beans, which fix nitrogen in the soil. In colder regions, you can use cover crops during this season to protect and enrich the soil. Some gardeners also use this time for soil amendments and composting.
Remember to keep a garden journal to track your rotations. Each season builds upon the success of the previous one, creating a sustainable cycle that improves your soil year after year. By following this basic rotation, you’ll create a thriving garden ecosystem that practically takes care of itself!

Plant Family Groups
Understanding common plant families is key to successful crop rotation. Plants within the same family often share similar nutrient needs and are vulnerable to the same pests and diseases, making family grouping essential for effective rotation planning.
Start by organizing your crops into these main family groups:
Nightshades (Solanaceae): Tomatoes, peppers, potatoes, and eggplants
Brassicas (Cruciferae): Cabbage, broccoli, kale, and cauliflower
Legumes (Fabaceae): Peas, beans, and other nitrogen-fixing plants
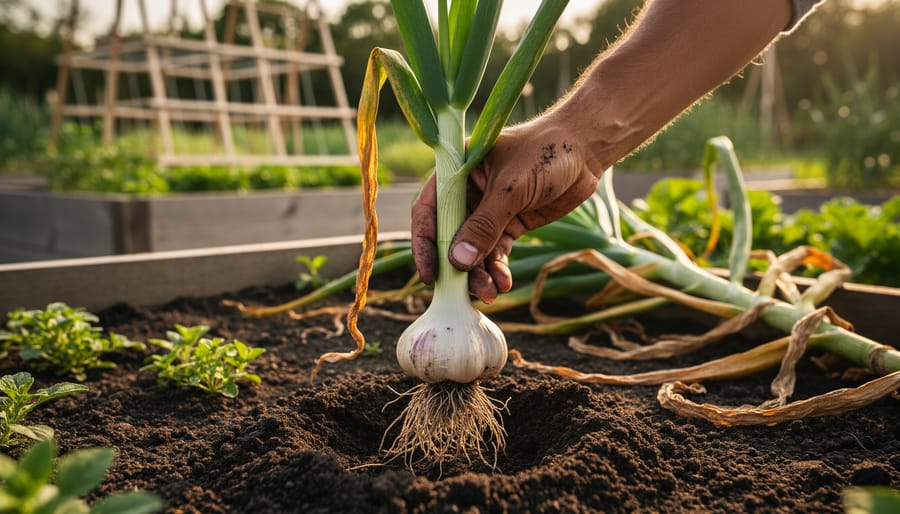
Alliums: Onions, garlic, leeks, and chives
Cucurbits: Cucumbers, squash, melons, and pumpkins
Root vegetables (Umbelliferae): Carrots, parsnips, and celery
When planning your rotation, treat each family as a unit and avoid planting members of the same family in the same spot for at least three years. This practice helps prevent soil depletion and breaks pest cycles. For example, if you grew tomatoes in one bed this year, wait three seasons before planting any nightshade family crops in that location.
Remember that some families, like legumes, actually improve soil quality by fixing nitrogen, making them excellent predecessors for heavy feeders like brassicas. Keep a garden journal to track where each family group has been planted to make rotation planning easier in subsequent seasons.
Mapping Your Garden
Keeping track of your garden’s rotation plan doesn’t have to be complicated. Start by drawing a simple map of your garden beds on paper or using a digital garden planning tool. Divide your space into distinct growing areas, and label them clearly with numbers or letters for easy reference.
Create a garden journal or spreadsheet to record what you plant in each area throughout the seasons. Include the planting date, crop family, and any notable observations about soil conditions or plant health. This information becomes invaluable when planning future rotations and helps you spot patterns in your garden’s performance.
Take photos of your garden throughout the growing season to complement your written records. These visual references can help you remember exactly how you arranged your plants and which combinations worked well together. Consider laminating your garden map so you can use dry-erase markers to update it as you make changes.
Color-coding your plan by plant family makes it easier to track rotation patterns. For example, use green for brassicas, red for nightshades, and yellow for legumes. Make notes about which crops thrived in specific locations and any challenges you encountered.
Keep your records in a dedicated garden folder or digital file where you can easily access them during planning sessions. Update your map at the end of each growing season while the information is still fresh in your mind. This systematic approach ensures you’ll have reliable data to guide your rotation decisions for years to come.

Season-by-Season Planting Guide
Spring to Summer Transition
As spring’s cool weather begins to fade, it’s the perfect time to transition your garden into summer-ready crops. Start by harvesting any remaining spring vegetables like peas, lettuce, and radishes. These early-season crops typically finish their cycle just as summer approaches, leaving prime garden space for heat-loving plants.
Before planting your summer crops, replenish the soil with fresh compost. Plants from the brassica family (like broccoli and cabbage) are heavy feeders, so areas where they grew will particularly benefit from added nutrients. Consider following spring brassicas with nitrogen-fixing beans or peas to help restore soil balance.
Warm-season crops like tomatoes, peppers, and eggplants thrive in areas where legumes grew during spring. These nightshade family plants appreciate the nitrogen left behind by pea and bean roots. For areas that hosted spring root crops like carrots or beets, consider planting summer squash or cucumbers, as they have different nutritional needs and will help maintain soil health.
When making the transition, remember to practice companion planting. Marigolds planted alongside your summer vegetables help deter pests, while basil can enhance the flavor of nearby tomatoes. Keep a garden journal to track which crops grew where – this will help you plan next year’s rotation and ensure continued soil fertility.
Fall to Winter Planning
As autumn’s crisp air signals the end of the main growing season, it’s time to think strategically about preparing gardens for winter while planning for the following spring. Start by removing spent summer crops and adding them to your compost pile, keeping disease-free plant material only. This is the perfect time to plant cold-hardy vegetables like garlic, onions, and winter greens in beds that previously hosted heavy feeders like tomatoes or squash.
Consider planting cover crops like winter rye or crimson clover in empty beds. These “green manures” protect your soil from erosion, suppress winter weeds, and add valuable organic matter when turned under in spring. If you grew legumes during summer, follow with brassicas or root vegetables to maximize the nitrogen left in the soil.
Don’t forget to collect soil samples for testing before the ground freezes. This gives you time to make any necessary amendments before spring planting. Make detailed notes about which crops grew where this season – these records are invaluable for planning next year’s rotation schedule.
For areas that won’t see winter crops, add a thick layer of organic mulch or straw. This protects beneficial soil organisms and prevents nutrient leaching during winter rains, ensuring your garden beds are ready for their next rotation when spring arrives.
Common Rotation Challenges and Solutions
Small Garden Solutions
Even with a small garden, you can still enjoy the benefits of crop rotation by learning to maximize limited garden space. The key is to think vertically and divide your available area into smaller sections. Try creating four mini-plots, each about 2×2 feet, and rotate your crops through these spaces seasonally.
Consider using container gardens, which are perfect for small-space rotation. You can easily move pots around and switch crops between different containers. Square-foot gardening techniques work wonderfully here – divide your small bed into square-foot sections and plant different crop families in each square.
Make the most of vertical space by installing trellises or wall-mounted planters. Growing climbing plants like peas and beans vertically frees up ground space for root vegetables or leafy greens. You can also use stackable containers or tiered raised beds to create multiple growing levels.
Don’t feel pressured to grow everything at once. Focus on two or three crop families each season, rotating them through your available space. For instance, grow tomatoes and basil in summer, followed by leafy greens in fall, then garlic and onions in winter. This approach ensures you’re still practicing good rotation principles while working within your space constraints.
Remember, even a minimal rotation schedule is better than none at all. The goal is to maintain soil health and prevent pest problems, which is just as important in small gardens as in larger ones.
Dealing with Crop Failures
Even the most carefully planned crop rotations can face unexpected challenges. When crops fail due to pests, diseases, or extreme weather conditions, it’s important to stay flexible and adapt your rotation plan accordingly. The key is to act quickly while maintaining the basic principles of crop rotation.
If you experience a crop failure early in the season, you can often replant with a different crop from the same family, which will maintain your rotation schedule. For instance, if your tomatoes succumb to blight, you might replace them with peppers or eggplants, which are in the same nightshade family but may have better resistance to the specific problem.
Sometimes, switching to a cover crop can be the best solution. Cover crops like clover or buckwheat can help restore soil health while keeping your rotation plan intact for the following season. They’re particularly useful when crop failure occurs too late in the season to start another food crop.
Keep detailed records of what went wrong and where. This information is invaluable for future planning and can help you identify patterns or problematic areas in your garden. Remember that occasional crop failures are a normal part of gardening – they’re opportunities to learn and improve your rotation strategy.
Consider maintaining a small backup nursery with extra seedlings of your main crops. This provides insurance against early-season failures and allows for quick replacements when needed. If a complete change of plans is necessary, focus on maintaining soil health first, and adjust your rotation schedule for the following season.
As we’ve explored throughout this guide, seasonal crop rotation is more than just a gardening technique – it’s a sustainable practice that can transform your garden’s health and productivity. By following the simple principles we’ve discussed, you’ll be well on your way to creating a thriving, balanced garden ecosystem that produces abundant harvests year after year.
Remember that successful crop rotation doesn’t require complex calculations or perfect execution. Start with the basic family groups we’ve covered, keep good garden records, and adjust your plan as you learn what works best in your space. Even a simple four-bed rotation can significantly improve soil health, reduce pest problems, and increase your yields.
Don’t be afraid to experiment and make mistakes – they’re valuable learning opportunities. Begin by mapping out your garden space and deciding which crops you want to grow in each season. Take notes about what succeeds and what challenges you face, and use this information to refine your rotation plan over time.
The rewards of implementing crop rotation extend far beyond better harvests. You’ll be contributing to soil conservation, reducing the need for chemical interventions, and creating a more sustainable garden for future generations. So grab your garden journal, sketch out your beds, and take that first step toward a more productive and environmentally friendly growing space. Your garden – and the planet – will thank you for it.