Regenerative soil practices transform tired, depleted garden beds into thriving ecosystems by building organic matter, encouraging beneficial microbes, and eliminating tillage. The core method involves layering organic materials directly on your soil surface, keeping the ground covered year-round, and introducing diverse plantings that work together to restore soil structure and fertility. Most gardeners see noticeable improvements in soil texture and plant health within a single growing season, though the deepest benefits accumulate over three to five years.
Unlike conventional gardening that treats soil as an inert growing medium requiring constant fertilizer inputs, regenerative practices recognize soil as a living community. Every teaspoon of healthy soil contains billions of bacteria, fungi, and other organisms that break down organic matter, store carbon, and make nutrients available to plant roots. When you stop disturbing this underground world through tilling and start feeding it with compost, mulch, and cover crops, the soil rebuilds itself.
The practical appeal is straightforward. You’ll spend less time fighting weeds, watering, and applying amendments once your soil biology takes over these functions. The process doesn’t require expensive equipment or specialized knowledge, just a shift in how you approach everyday gardening tasks. Whether you’re starting fresh beds or rehabilitating an existing garden, these techniques build on sustainable garden basics you may already practice.
This guide walks you through the specific steps to implement regenerative methods in your own space, with clear verification points so you’ll know your efforts are working.
What You’ll Need: Tools and Materials for Regenerative Soil Building
Getting started with regenerative soil practices doesn’t require an expensive toolshed. Most items fall into categories you’ll return to repeatedly as your soil improves, and many have budget-friendly alternatives that work just as well for beginners.
Testing and Assessment Tools
Before adding anything to your soil, you need to understand what you’re working with. A basic soil testing kit (around $15-30) measures pH and major nutrients, giving you a baseline. For a more detailed picture, send samples to your local extension service lab for $10-20 per test. You’ll also want a simple soil thermometer to track when soil is warm enough for planting cover crops, and a garden spade for digging inspection holes to check soil structure and root depth.
Core Materials for Building Soil Health
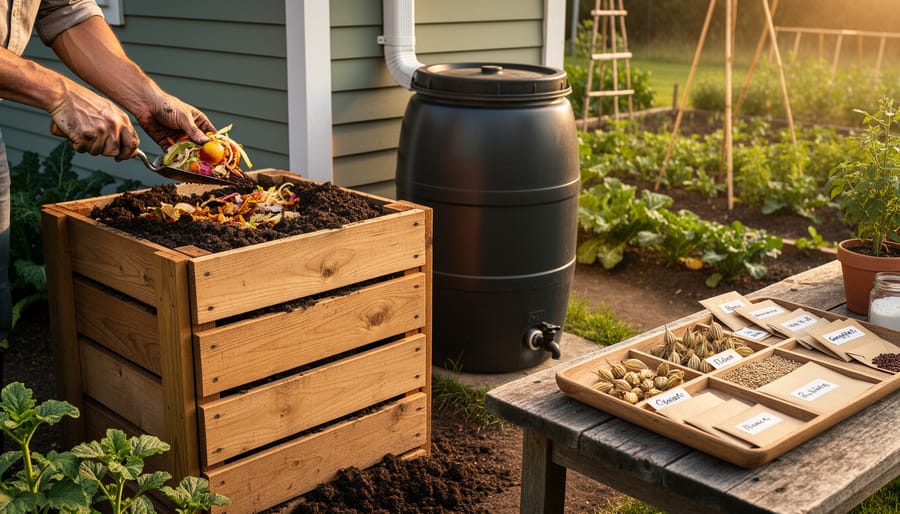
- Finished compost (homemade or purchased by the cubic yard) – feeds soil biology and adds organic matter
- Organic mulch such as wood chips, straw, or shredded leaves – protects soil surface and feeds decomposers
- Cover crop seeds suited to your climate and season – keeps living roots in soil year-round
- Compost tea or liquid fish fertilizer – introduces beneficial microorganisms quickly
- Worm castings or aged manure – concentrated sources of nutrients and biology
Don’t feel pressured to buy everything at once. Start with compost and mulch, which form the foundation of regenerative practices. Many gardeners source free wood chips from local tree services or make their own leaf mulch each autumn.
Specialized Tools Worth Considering
A broadfork (around $150-200, or $50 for a basic model) loosens compacted soil without flipping layers and destroying beneficial organisms the way a rototiller does. If that feels like a stretch, a standard garden fork works for smaller areas, though it requires more effort. For maintaining paths and spreading materials, a sturdy garden rake and wheelbarrow are essential workhorses you probably already own.
The beauty of regenerative soil building is that nature does most of the heavy lifting once you provide the right conditions.
Before You Begin: Important Safety and Soil Health Warnings
Before jumping into regenerative soil practices, let’s talk about a few important warnings that’ll save you from setbacks, and keep you safe while you work.
First, protect your back. Bags of compost and mulch are deceptively heavy, often 40 pounds or more. When lifting amendments, bend at your knees and keep the load close to your body. Better yet, break larger bags into smaller portions using buckets, or ask for help. Spreading materials is a marathon, not a sprint, so pace yourself and take breaks. I’ve seen too many enthusiastic gardeners sidelined for weeks because they overdid it on day one.
Urban and suburban soils deserve extra caution. If your garden is near old buildings, roads, or industrial areas, test for lead, arsenic, and other heavy metals before you begin. Local university extension offices often provide affordable testing. Contaminated soil shouldn’t stop you from gardening, but you need to know what you’re working with so you can either remediate properly or build raised beds with clean soil instead.
Timing matters for soil health too. That wet soil warning above isn’t just about compaction, working soggy ground tears apart soil aggregates and suffocates the beneficial organisms you’re trying to support. Wait until soil crumbles easily in your hand before digging or adding amendments.
Finally, resist the urge to test your amendments on just a hunch. Adding lime to soil that’s already alkaline, or sulfur to acidic soil, can harm plants and microbes alike. A simple soil test tells you what your soil actually needs, not what you think it needs. This small step prevents expensive mistakes and sets you up for genuine success.
Step-by-Step: Implementing Regenerative Soil Practices in Your Garden
Assess Your Current Soil Condition
Before you can improve your soil, you need to understand what you’re working with. Think of this as a health checkup for your garden, you wouldn’t start a treatment plan without a diagnosis.
Start with the squeeze test. Grab a handful of moist soil and squeeze it firmly, then open your hand. Sandy soil falls apart immediately. Clay forms a tight ball that holds its shape. Loam, the ideal, holds together but crumbles when you poke it. This quick test reveals your soil’s basic texture.
Next, check for compaction by pushing a screwdriver or soil probe into the ground. It should slide in fairly easily to at least six inches. If you hit resistance after an inch or two, you’ve got compaction problems that are choking root growth and blocking water infiltration.
The drainage test is equally simple. Dig a hole about six inches deep, fill it with water, and time how long it takes to drain. One to three inches per hour indicates good drainage. Slower means you have heavy clay; faster suggests sandy soil that won’t hold moisture or nutrients.
For a baseline understanding of nutrients and pH, invest in a professional soil test through your local extension office. It costs around twenty dollars and reveals deficiencies you can’t see. You’ll want pH levels between 6.0 and 7.0 for most garden plants, plus readings on nitrogen, phosphorus, and potassium.
Walk your garden and observe where puddles form, where plants struggle, and where weeds thrive, these clues tell the soil’s story.
Minimize Soil Disturbance and Restore Structure
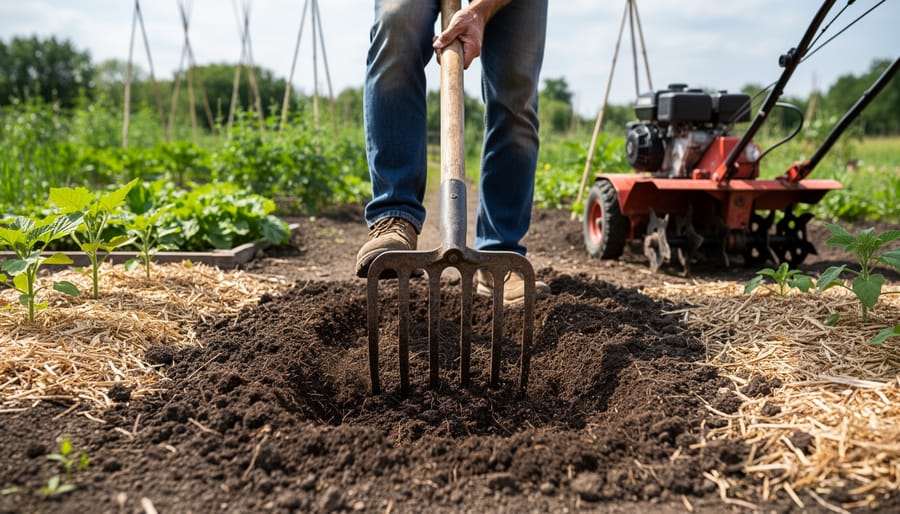
The golden rule here is simple: disturb only what’s necessary, and never when the soil is wet. Compacted soil needs loosening, but traditional tilling destroys the fungal networks and earthworm tunnels you’re trying to build. Think of it as soil surgery, precise interventions beat scorched-earth approaches every time.
Start with a broadfork, which looks like a giant pitchfork with multiple tines. Push it into the soil about 8-10 inches deep, then rock it back gently to create air pockets without inverting layers. Work backward across your bed in rows spaced 6-8 inches apart. This opens pathways for roots and water while leaving beneficial organisms mostly intact. Your arms will feel it, but the soil structure stays whole.
If you’re dealing with seriously compacted clay or hardpan, one-time use of a tiller isn’t the end of the world, but make it your last time. Till once to break the worst compaction, then immediately add 3-4 inches of compost and plant a cover crop. From that point forward, let plant roots and soil life do the tilling.
Timing matters enormously. Squeeze a handful of soil, if water drips out or it forms a tight ball that doesn’t crumble, it’s too wet to work. Walking on or digging wet soil creates compaction that takes years to reverse. Wait until it’s moist but not saturated, when a squeezed handful barely holds together before breaking apart.
Add Organic Matter and Build Soil Biology
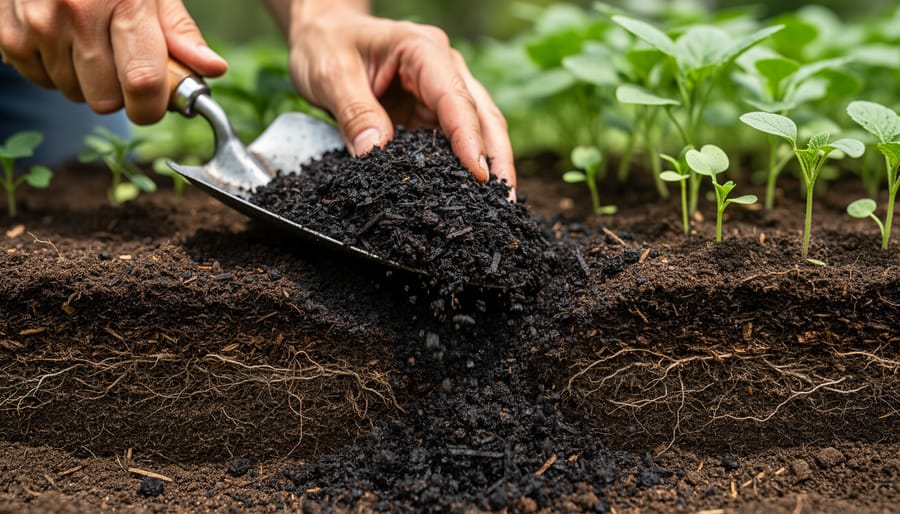
Now that you’ve prepared your soil structure, it’s time to feed the underground ecosystem. Think of this step as setting out a feast for billions of microscopic workers who’ll transform raw materials into plant-available nutrients.
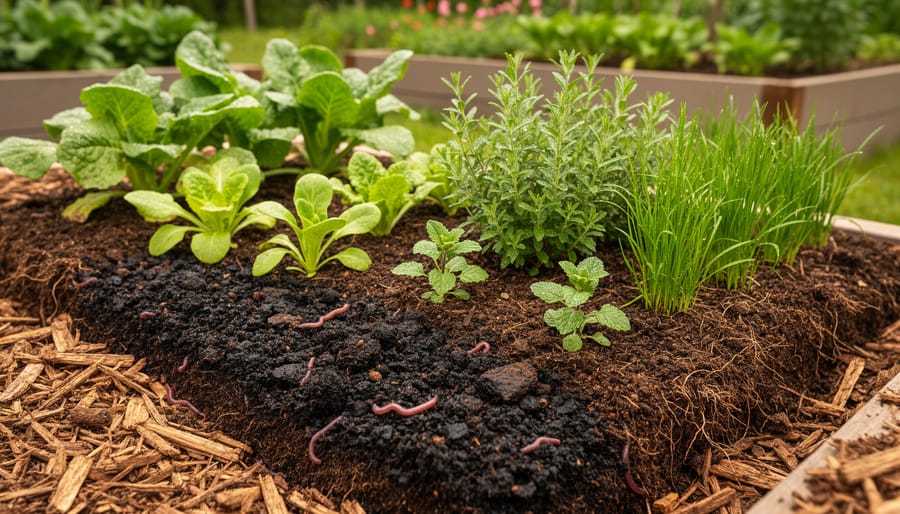
Start with compost as your foundation layer. Spread 2-3 inches across your garden beds, but don’t dig it in, simply lay it on the surface where worms and microbes can gradually incorporate it. For vegetable gardens, aim for finished compost that’s dark and crumbly. Ornamental beds can handle partially decomposed material, which continues feeding soil life over months.
Next, add your mulch layer. Apply 3-4 inches of organic mulch like wood chips, straw, or shredded leaves directly over the compost. This protects soil biology from temperature extremes and gradually breaks down into more organic matter. Keep mulch pulled back a few inches from plant stems to prevent rot.
Want to supercharge the process? Water in a microbial inoculant or compost tea within 24 hours of adding amendments. These liquid solutions introduce millions of beneficial bacteria and fungi that jumpstart decomposition. Mix according to package directions and apply with a watering can or sprayer.
In clay-heavy soils, increase your compost layer to 4 inches. Sandy soils benefit from more mulch (up to 6 inches) to retain moisture. The goal isn’t perfection, you’re initiating a living process that improves with each season.
Plant Cover Crops and Diverse Species
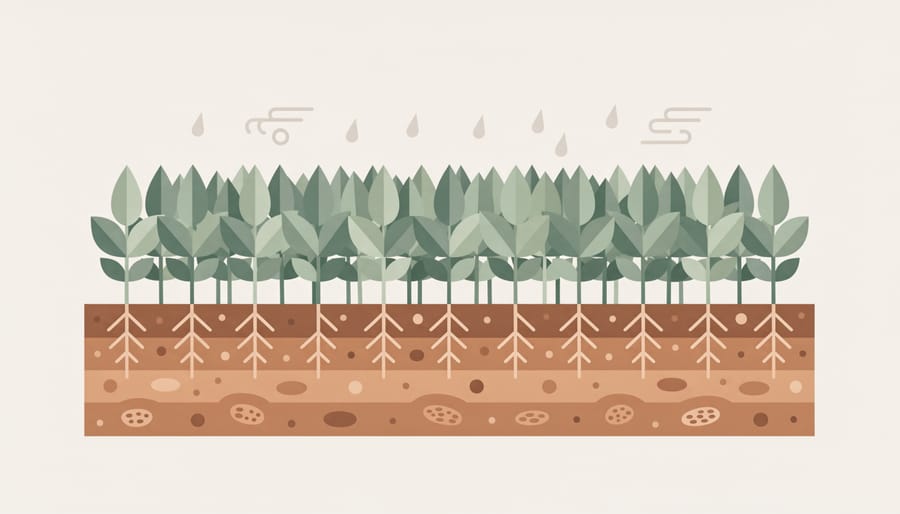
Cover crops are workhorses that protect bare soil, suppress weeds, and feed beneficial microbes while your garden rests. Think of them as a living mulch that actively improves soil rather than just covering it.
Timing matters: sow cover crops in late summer or early fall after harvesting vegetables, giving them time to establish before winter. For spring plantings, choose fast-growing varieties like buckwheat or mustard greens that you can turn into mulch before transplanting summer crops.
Match species to your climate and needs. Cool-season covers like crimson clover, hairy vetch, and winter rye thrive in zones where frost occurs, fixing nitrogen and preventing erosion through cold months. In warmer regions, cowpeas, sorghum-sudangrass, and sunn hemp excel during summer fallow periods. Legumes add nitrogen; grasses build organic matter and suppress weeds. Plant diverse mixes rather than single species, pairing a legume with a grass creates complementary benefits and feeds different soil organisms.
Incorporate cover crops into your garden design by rotating them through beds between main crops. This strategy helps climate-proof your garden while maintaining continuous living roots. Terminate covers by cutting them at soil level before they set seed, leaving roots intact to decompose and feed soil life.
Establish Continuous Living Roots
Bare soil is like a missed meal for your underground community. Keeping something growing at all times, even during winter, ensures soil microbes have a steady food source from living root exudates while protecting against erosion and compaction.
In ornamental gardens, overlap perennials with different dormancy periods. Plant spring bulbs beneath summer bloomers, and tuck evergreen groundcovers between deciduous shrubs. This layering creates continuous root activity. Cool-season ornamentals like pansies or kale can fill gaps when warm-season plants retreat, maintaining that crucial resilient soil care through temperature shifts.
For edible spaces, succession planting becomes your best tool. As you harvest lettuce, immediately transplant brassicas into the same bed. Follow tomatoes with fall garlic. Winter rye or crimson clover can occupy beds between spring and summer crops, providing biomass you’ll chop-and-drop before the next planting.
Companion planting amplifies this strategy beautifully in edible paradise design. Interplant radishes with carrots so something occupies the space throughout the season. Tuck parsley and chives around pepper plants. These combinations keep roots actively feeding soil life while you’re harvesting above.
The goal isn’t maximum production from every square inch, it’s maximum living coverage. Even weeds between plantings serve this purpose better than bare earth, though you’ll obviously prefer intentional choices.
How to Know It’s Working: Verification and Next Steps
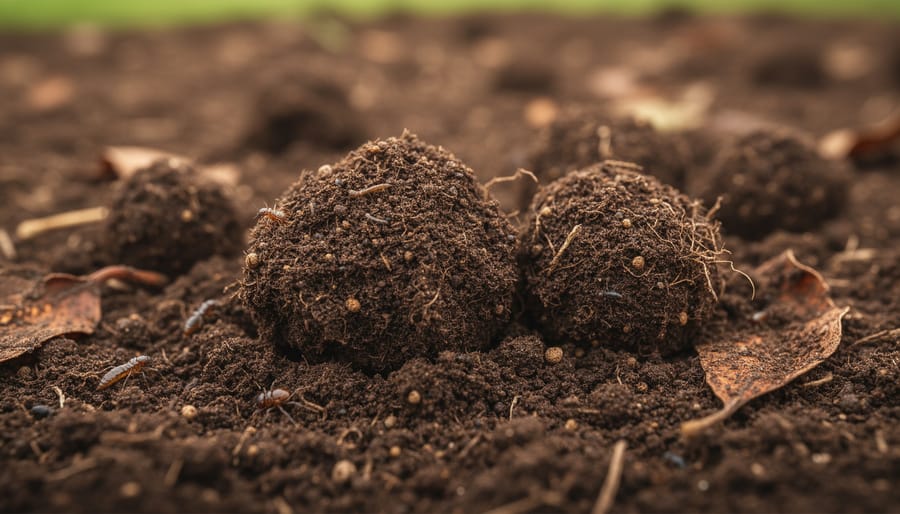
You’ll start seeing tangible results from your regenerative practices within the first few weeks, though the most dramatic improvements typically emerge over several months. The earliest sign is often better water absorption, if you notice puddles draining faster after rain or irrigation water soaking in rather than running off, your soil structure is already improving. Within four to eight weeks, you should spot increased earthworm activity. Turn over a spade of soil and count how many earthworms you find; healthy regenerative soil typically contains ten or more worms per square foot.
Around the three-month mark, the soil itself will feel different in your hands. Squeeze a handful, it should crumble easily rather than forming a hard clod, and you’ll notice a pleasant, earthy smell instead of something sour or chemically sharp. This crumbly texture indicates developing aggregates, the soil clumps that create air pockets and allow roots to penetrate deeply. Your plants will tell their own story too. Look for deeper green foliage, sturdier stems, and fewer pest problems as your crops access better nutrition through thriving soil biology.
By six months, water retention becomes obvious during dry spells. Gardens built on regenerative principles need less frequent watering because organic matter acts like a sponge, holding moisture where roots can access it. If you’re irrigating half as often as neighboring gardens and your plants still look vibrant, you’re succeeding. The one-year anniversary brings the most rewarding verification, pull up a spent plant and examine its roots. You should see dense, white, branching root systems surrounded by dark, crumbly soil rather than pale, stunted roots in hard clay or dusty earth.
As results confirm your soil is healing, shift from establishment mode to maintenance. You’ve done the heavy lifting of adding initial organic matter and establishing cover crops. Now focus on protecting what you’ve built. Continue adding two to three inches of compost or mulch annually, keep living roots in the ground year-round, and resist the urge to till or overwork soil. This maintenance phase is lighter work with bigger rewards, your soil biology does most of the labor once you’ve created the right conditions. If progress stalls, revisit your practices. Soil staying compacted might mean you need deeper-rooted cover crops. Persistent dryness could indicate insufficient mulch. Let observations guide adjustments rather than sticking rigidly to a plan that isn’t delivering results.
Expert Insight: Interview with a Regenerative Garden Designer
I spoke with Maya Chen, a landscape designer who has spent the past decade transforming conventional gardens into regenerative ecosystems across the Pacific Northwest. She shared insights that will save you time, money, and frustration.
What’s the biggest mistake you see beginners make?
“They try to do everything at once,” Maya says. “Someone reads about regenerative practices and immediately wants to implement cover crops, compost tea, companion planting, and no-till methods simultaneously. They get overwhelmed and quit. I tell clients to start with one thing, usually adding compost and mulch, and let that success build confidence.”
How do you make regenerative practices work in tiny urban spaces?
“Small gardens are actually ideal for this approach. You can focus on vertical growing, choose backyard plants to grow that fix nitrogen and feed soil microbes, and use containers with living mulch groundcovers. I have clients with balcony gardens who’ve built incredible soil life in raised beds just eighteen inches deep. The principles scale beautifully, you’re still feeding soil biology, maintaining living roots, and minimizing disturbance.”
What about neighbors who think unmulched soil looks messy or cover crops look weedy?
Maya laughs. “This comes up constantly. I suggest framing it as water conservation first, mulch reduces watering needs by half, which resonates in drought-prone areas. For cover crops, I recommend clover or vetch, which look intentional and pretty. Plant them in defined beds, edge them cleanly, and suddenly it looks like sophisticated garden design rather than neglect. Sometimes I install small signs explaining the purpose, which transforms ‘that weird messy yard’ into ‘that innovative eco-garden.’ People are curious when they understand the why.”
Any final encouragement for someone just starting?
“Your soil will forgive your mistakes. That’s the beauty of regenerative practices, you’re working with natural processes, not against them. Even imperfect implementation helps. Just start somewhere, observe what happens, and adjust. The earthworms will show up to tell you you’re doing it right.”
Common Questions About Regenerative Soil Practices
Shifting to regenerative soil practices often raises practical questions, especially when you’re starting out and want to make sure your effort will pay off. Here are answers to the concerns most gardeners have when they first consider making the change.
How much will regenerative soil practices cost to implement?
You can start for almost nothing by composting kitchen scraps, using grass clippings as mulch, and letting some areas go unmowed as cover crops. Even if you purchase amendments like compost and cover crop seeds, most gardeners spend less than $50 to transform a typical 100-square-foot bed.
Will this take significantly more time than my current gardening routine?
Initially, you’ll invest time learning new techniques and establishing systems, but regenerative practices actually reduce long-term maintenance. No-till methods eliminate digging, mulch suppresses weeds, and healthier soil means less watering and fewer pest problems.
Can I use regenerative practices in containers or very small gardens?
Absolutely. Container gardens benefit tremendously from quality compost, avoiding soil disturbance, and planting densely to keep roots active year-round. Even a balcony garden can support thriving soil biology with the right practices.
How long before I see real results from regenerative soil practices?
You’ll notice surface improvements like better water absorption and increased earthworm activity within weeks. Significant structural changes and nutrient cycling improvements typically develop over one to two growing seasons, with continued benefits accumulating for years.
Many gardeners worry that switching approaches mid-season will harm their existing plants. The truth is, you can transition gradually without disrupting what’s already growing. Start by top-dressing beds with compost after harvest, adding mulch around perennials, or planting cover crops in one section while leaving others as-is. There’s no requirement to overhaul everything at once.
If you’re renting or might move soon, regenerative practices still make sense. Every month of improved soil biology benefits your plants immediately, and you’ll gain valuable skills to take with you. Container gardens, which you can transport, respond especially well to these methods since the soil ecosystem remains intact when you relocate.
You don’t need to overhaul your entire garden overnight. Pick just one practice that resonates with you, maybe it’s adding a thick layer of mulch this weekend or planting a quick cover crop in that empty bed. That single step will start shifting your soil in the right direction.
Regenerative gardening isn’t about perfection. It’s about progress, observation, and working with nature’s timeline rather than against it. Your soil didn’t lose its vitality in a season, and it won’t fully restore itself in one either. But every handful of compost you add, every living root you keep in the ground, and every time you resist the urge to turn the soil, you’re rebuilding something vital.
What makes this approach so rewarding is that you’ll see changes, earthworms appearing where there were none, water soaking in instead of running off, plants growing more resilient. These small victories accumulate into genuine transformation.
You’re also part of something bigger. Gardeners everywhere are discovering that the path to healthier plants and more beautiful spaces runs straight through the soil. By choosing regenerative practices, you’re not just improving your own patch of earth. You’re joining a movement of people who understand that real change starts right where we plant.