Multiply your geranium collection without spending a dime by mastering three reliable propagation techniques that transform a single plant into dozens. Take 4-inch stem cuttings just below a leaf node, remove lower leaves, and stick them directly into moist potting mix for roots within three weeks. Divide mature plants during spring repotting by gently separating root clumps into sections with at least three stems each. Start geraniums from seed indoors 10-12 weeks before your last frost date, pressing seeds lightly into soil without covering them since they need light to germinate.
The beauty of geranium propagation lies in its simplicity and high success rate, making it perfect whether you’re a complete beginner or an experienced gardener looking to expand your collection. Each method offers distinct advantages depending on your timeline, resources, and the specific geranium varieties you’re growing. Stem cuttings provide the fastest route to flowering plants that are genetically identical to your favorites, while division rejuvenates older plants that have outgrown their pots. Seed propagation, though slower, opens doors to experimenting with new varieties and colors you might not find at local nurseries.
Throughout this guide, you’ll discover detailed instructions for each technique, learn the optimal timing for propagation success, and troubleshoot common challenges like cuttings that refuse to root or seedlings that damp off. With just basic supplies and a little patience, you’ll soon have geraniums to share with friends, fill every corner of your garden, or bring vibrant color indoors year-round.
Why Propagate Geraniums Instead of Buying New Plants
If you’re wondering whether it’s worth the effort to propagate geraniums rather than simply heading to the garden center, let me share why this rewarding practice has captured the hearts of gardeners everywhere. The benefits extend far beyond just adding more plants to your collection.
First and foremost, propagating geraniums saves you significant money. A single healthy geranium plant can produce dozens of cuttings over its lifetime. Consider this: if you buy six new plants each spring at typical retail prices, you could easily spend $50 to $100. By propagating from just one or two mother plants, you can create an entire perennial garden display for practically nothing beyond the cost of potting mix.
Beyond economics, propagation allows you to preserve your absolute favorite varieties. Have you ever fallen in love with a particular shade of pink or a uniquely scented leaf? When you propagate, you’re creating exact genetic copies of that beloved plant, ensuring those special characteristics continue year after year. This becomes especially valuable for heirloom varieties or plants given to you by friends and family members.
Speaking of relationships, sharing propagated geraniums strengthens community bonds. Giving rooted cuttings to neighbors and fellow gardening enthusiasts creates meaningful connections. As experienced gardener Margaret Chen told me, “I’ve made more friends through sharing my geranium cuttings than through any other gardening activity.”
Now, let’s address the elephant in the room. Many gardeners assume propagation requires advanced skills or special equipment. This simply isn’t true. Geranium propagation ranks among the easiest techniques you’ll learn. The plants practically want to grow for you. With basic supplies and simple steps, even absolute beginners achieve success rates above 80 percent. The satisfaction of nurturing new life from a simple cutting creates a deeper connection with your garden that buying never quite replicates.
Understanding Your Geranium: True vs. Pelargonium
Before we dive into the wonderful world of multiplying your geraniums, let’s clear up a common mix-up that trips up many gardeners. When you think of “geraniums,” you’re probably picturing those cheerful plants with bright red, pink, or white blooms spilling from window boxes and containers. Here’s the surprise: those are actually pelargoniums, not true geraniums at all!
True geraniums, also called hardy geraniums or cranesbills, are low-growing perennial ground covers that thrive in garden beds and can handle colder temperatures. They produce delicate, five-petaled flowers and are excellent for maintaining perennials in your landscape. These hardy souls come back year after year in most climates.
Pelargoniums, on the other hand, are the showy stars we typically grow in pots and treat as annuals in cooler regions. They’re tender perennials native to South Africa, featuring bold flower clusters and sometimes beautifully patterned or scented leaves.
Why does this matter for propagation? Both can be propagated successfully, but they respond differently to various methods. Pelargoniums excel at rooting from stem cuttings, making them incredibly easy to multiply. True geraniums propagate well through division and can also grow from seed, though cuttings work too.
The good news is that this article covers techniques that work for both types. Whether you’re working with hardy garden geraniums or tender pelargoniums, you’ll find methods here to expand your collection and share these lovely plants with friends and neighbors.

Stem Cutting Propagation: The Most Popular Method
When to Take Cuttings for Best Results
Timing can make all the difference when taking geranium cuttings. While you can technically propagate geraniums throughout the growing season, you’ll have the best success in spring (April through June) and late summer (August through September). Spring is my favorite time because the plants are in active growth mode, producing soft, flexible stems that root quickly and enthusiastically. Those new shoots are just bursting with energy!
Late summer offers a second prime opportunity, especially if you want to bring plants indoors for winter. The temperatures are still warm enough to encourage rooting, but the intense heat of midsummer has passed. I always take a few cuttings in September to ensure I have healthy young plants ready for the next season.
Try to avoid the hottest part of summer when plants are stressed, as cuttings taken during this period often struggle to establish roots. Similarly, winter cuttings can be challenging unless you have ideal indoor conditions with supplemental lighting and warmth. For best results, choose a cloudy day or take cuttings in the morning when plants are well-hydrated and full of vigor.
Step-by-Step: Taking and Preparing Your Cuttings
Taking geranium cuttings is easier than you might think, and I’m always amazed at how quickly these resilient plants respond! Let’s walk through this together.
Start by selecting your cuttings in the morning when plants are well-hydrated. Look for healthy, non-flowering stems that are about 4-6 inches long. I like to choose stems that look vigorous with nice green color and no signs of disease or damage. If your stem has flowers or buds, don’t worry—we’ll address those in a moment.
Using clean, sharp scissors or pruning shears (I keep mine wiped down with rubbing alcohol between cuts), make your cut just below a leaf node. That’s the little bump on the stem where leaves emerge. This spot contains lots of growth hormones that’ll help your cutting develop roots faster.
Now comes the prep work. Gently remove the lower leaves, leaving just 2-3 sets of leaves at the top. This reduces moisture loss and prevents leaves from rotting when you plant them. If there are any flowers or flower buds, pinch those off too—your cutting needs to focus its energy on root development, not blooming.
Here’s a tip from my friend Margaret, a master gardener with 30 years of experience: let your cuttings sit out for about an hour before planting. This allows the cut end to form a slight callus, which can reduce the risk of rot. Some gardeners skip this step, and that’s fine too, but I’ve had great success with it. Your prepared cuttings are now ready for the next exciting phase!
Rooting in Water vs. Soil: Which Works Better?
Both water and soil propagation work beautifully for geraniums, and honestly, I’ve had success with each method depending on the situation. Let me share what I’ve learned through plenty of trial and error in my own garden.
Water rooting wins points for visibility—you can watch those exciting white roots develop right before your eyes, which is incredibly satisfying, especially for beginners. It typically shows results within two to three weeks, and there’s virtually no risk of root rot from overwatering. The downside? Plants rooted in water sometimes experience transplant shock when moved to soil, and you’ll need to monitor water levels regularly.
Soil propagation, on the other hand, eliminates that transition phase entirely. Your cuttings develop stronger, more adaptable roots from the start, and once they’ve rooted, they’re already home. The success rate is similar to water rooting, around 80-90 percent with healthy cuttings. However, you won’t see what’s happening underground, which can feel nerve-wracking initially.
My recommendation? If you’re new to propagation, start with water rooting to build confidence and understand the process. Once you’re comfortable, transition to soil propagation for larger batches or when you want sturdier plants. For impatient gardeners like me who love instant gratification, water rooting satisfies that need to see progress. Experienced gardeners often prefer soil propagation for its efficiency and stronger root development.

Caring for Cuttings Until They’re Ready to Plant
Once your geranium cuttings are sitting in their rooting medium, they need a bit of tender care to develop strong, healthy roots. Think of this stage as the nursery phase—your cuttings are vulnerable but full of potential!
Place your cuttings in bright, indirect light. A spot near an east-facing window works beautifully, or you can position them a few feet back from a south-facing window. Direct sunlight can be too intense and may cause wilting or scorching before roots have a chance to form.
Temperature matters more than you might think. Aim for a consistent range between 65-75°F. Avoid placing cuttings near heating vents, air conditioners, or drafty windows. I learned this lesson the hard way when a cold draft near my back door caused an entire batch to fail!
Humidity is your friend during rooting. If you covered your cuttings with a plastic bag or dome, check daily for excess condensation and provide brief airings to prevent mold. Remove the cover for 10-15 minutes if water droplets are excessive.
After two to three weeks, gently tug on a cutting. Resistance means roots have developed! You can also check for new leaf growth, which signals successful rooting. Once roots are about an inch long, your cuttings are ready for transplanting into individual pots with quality potting mix. Start feeding perennials with diluted fertilizer after they’re established in their new homes.
Division: Multiplying Established Plants
Best Time to Divide Geraniums
Timing is everything when it comes to dividing geraniums! The good news is you have two wonderful windows of opportunity each year, and both work beautifully depending on where you garden.
Spring is my personal favorite time for division, particularly in early spring just as your geraniums are waking up from their winter rest. You’ll notice new growth starting to emerge, which signals the plant is ready to put energy into establishing roots. This gives your divided plants the entire growing season ahead to settle in and flourish. I always aim for when nighttime temperatures consistently stay above 50°F.
Fall division works equally well, especially if you garden in warmer climates. Divide your geraniums about six to eight weeks before your first expected frost. This timing allows the roots to establish before winter arrives without triggering too much top growth that cold weather might damage.
Here’s a helpful tip from master gardener Susan Chen, who I interviewed last season: “Think of division like moving house—you want to do it when the plant isn’t stressed by extreme heat or cold.” Avoid dividing during the peak of summer or the dead of winter, when plants are either dormant or struggling with temperature extremes.

How to Divide Without Damaging the Plant
Dividing geraniums is surprisingly straightforward once you know the technique! I remember the first time I divided one of my overgrown geraniums—I was nervous about hurting it, but the plant bounced back beautifully and I ended up with three healthy specimens.
Start by watering your geranium thoroughly the day before you plan to divide it. This helps reduce transplant shock and makes the root ball easier to work with. When you’re ready, gently lift the entire plant from the ground or pot using a garden fork or spade, working carefully around the root zone to avoid damaging too many roots.
Once lifted, examine the plant closely. You’ll notice natural divisions where stems emerge from the root mass. These are your guide points. Using your hands or a clean, sharp knife, gently tease apart or cut through these sections. Don’t worry if you need to be a bit firm—geraniums are tougher than they look! Each division should have at least three to four healthy shoots and a good portion of roots attached.
Shake off excess soil so you can see what you’re working with, but avoid leaving roots exposed to air for too long. If the root ball is particularly tangled, rinse it lightly with water to help you see the natural separation points more clearly.
Immediately after dividing, plant each section at the same depth it was growing before. Water thoroughly and place in a slightly shaded spot for a few days while they recover. You’ll notice new growth within a couple of weeks, signaling that your divisions have successfully established themselves!
Replanting and Establishing Divisions
Once you’ve successfully divided your geraniums, it’s time to get them back in the ground and thriving. Plant each division at the same depth it was growing previously—you should be able to see the soil line on the stems as a guide. Setting them too deep can lead to crown rot, while too shallow planting exposes roots to drying out.
Space your divisions about 12 to 18 inches apart, depending on the variety. This gives them room to fill out without competing for nutrients and air circulation. If you’re potting them up instead, choose containers with drainage holes and use fresh, well-draining potting mix.
Water thoroughly immediately after planting to settle the soil around the roots and eliminate air pockets. For the first week, keep the soil consistently moist but not waterlogged—think of a wrung-out sponge. After that initial period, you can gradually transition to a normal watering schedule, allowing the top inch of soil to dry between waterings.
Don’t be alarmed if your divisions look a bit droopy for the first few days. This is normal transplant shock. Within a week to ten days, you should see them perk up and start showing new growth. Hold off on fertilizing for at least three to four weeks—let those roots establish first. Master gardener Susan Clarke always says, “Patience with new divisions pays off with stronger, healthier plants come blooming season.”
Seed Propagation: Starting from Scratch
Collecting and Storing Geranium Seeds
Collecting geranium seeds is a rewarding way to expand your garden, though I’ll be honest—it requires patience! Wait until your geranium flowers have completely dried on the plant and the seed pods have turned brown and papery. You’ll notice the pods start to curl upward when they’re ready, typically 4-6 weeks after flowering.
Harvest on a dry day by snipping the entire seed head into a paper bag. The seeds will naturally release as they dry further. Here’s a tip from master gardener Ellen Rodriguez: “Gently shake the bag after a few days—you’ll hear those little seeds rattling around like tiny treasures.”
Spread the seeds on a paper towel in a cool, dry spot away from direct sunlight for about a week. Once completely dry, store them in labeled paper envelopes inside an airtight container. Pop them in your refrigerator’s vegetable drawer, where they’ll stay viable for up to two years. Remember, proper storage makes all the difference—moisture is your enemy here!
Starting Seeds Indoors
Growing geraniums from seed requires patience, but it’s wonderfully rewarding when those first green shoots emerge! Start your seeds indoors 10-12 weeks before your last expected frost date, giving them plenty of time to develop into sturdy transplants.
Choose a well-draining seed-starting mix rather than garden soil, which can compact and harbor diseases. Fill your containers, leaving about half an inch from the top, and moisten the mix thoroughly before sowing. Geranium seeds are relatively small, so handle them gently and plant them about 1/4 inch deep. You can place 2-3 seeds per cell if you’re using seed trays, thinning to the strongest seedling later.
The key to successful germination is maintaining consistent warmth and moisture. Keep your seed trays at 70-75°F—a heat mat works wonderfully if your home runs cool. Cover the containers with plastic wrap or a humidity dome to retain moisture, checking daily to ensure the soil doesn’t dry out.
Germination typically takes 7-14 days, though some varieties may take up to three weeks, so don’t lose heart! Once seedlings emerge, remove the covering and move them to a bright location or under grow lights. Water from the bottom when the soil surface feels dry, and feed with diluted liquid fertilizer every two weeks.
When seedlings develop their second set of true leaves and outdoor temperatures warm reliably above 50°F at night, begin hardening them off gradually over 7-10 days before transplanting.
Why Seed-Grown Geraniums May Look Different
Here’s something fascinating about plant genetics that might surprise you: when you grow geraniums from seed, you’re essentially creating new individuals with their own unique traits. Think of it like children inheriting different combinations of characteristics from their parents. Seeds produced by a beautiful pink geranium might yield plants with slightly different flower colors, growth habits, or leaf patterns.
This happens because seeds result from sexual reproduction, where genetic material mixes and creates variation. It’s nature’s way of ensuring diversity! While this can be exciting if you enjoy surprises, it also means you can’t guarantee an exact replica of your favorite plant.
Cuttings, on the other hand, are clones. When you propagate geraniums through cuttings, you’re creating an identical genetic copy of the parent plant. Every flower, leaf shape, and growth characteristic will match perfectly. This is why cuttings are the go-to method for preserving specific varieties you love.
Master gardener Sarah Chen, whom I interviewed last spring, puts it beautifully: “If you fall in love with a particular geranium’s exact shade or bloom size, take cuttings. If you’re feeling adventurous and want to see what nature creates, try seeds.” This principle applies to geraniums just as it does to other perennials in your garden.
Overwintering Geraniums for Next Year’s Propagation
Overwintering your geraniums is like tucking them in for a long winter’s nap—you’re essentially preserving healthy mother plants that will become your propagation powerhouses come spring. I learned this trick from my neighbor years ago when she showed me her basement filled with what looked like sleeping sticks. Fast forward four months, and those same “sticks” produced dozens of new plants!
You have two main approaches to choose from, and both work beautifully depending on your space and commitment level.
The bare-root storage method is perfect if you’re short on indoor space. Before the first frost hits, dig up your geraniums and gently shake off the soil from their roots. Don’t worry about getting every bit—this isn’t surgery! Inspect each plant and remove any dead or yellowing leaves, then hang them upside down in a cool, dark place like a basement or garage where temperatures stay between 45-50 degrees Fahrenheit. I bundle mine together with twine and hang them from exposed joists. Check on them monthly and give the roots a light misting if they seem bone-dry. They’ll look rather pathetic by February, but trust the process.
The indoor keeping method requires more attention but feels more rewarding because you get to enjoy blooms all winter. Pot up your best geraniums before frost, cutting them back by about one-third. Place them near a sunny window—south-facing is ideal—and water sparingly. Think of it as keeping them in maintenance mode rather than full growth. They won’t flourish like summer, but they’ll stay alive and healthy.
Come late winter or early spring, both methods yield excellent cutting material. The bare-root plants will start showing new green shoots, signaling they’re ready to wake up. Pot them up, give them good light, and within weeks you’ll have vigorous new growth perfect for taking cuttings. Your overwintered geraniums become incredibly generous donors, often producing 10-15 cuttings per plant without batting an eye.
Common Propagation Problems and How to Fix Them
Even the most experienced gardeners hit a few bumps along the propagation road, and I’ll be honest—I’ve had my share of mushy cuttings and stubbornly rootless stems over the years! The good news is that most problems have simple fixes, and once you know what to look for, you’ll be troubleshooting like a pro.
If your cuttings are rotting instead of rooting, you’re definitely not alone. This is the number one complaint I hear from fellow gardeners. The culprit is usually too much moisture combined with poor air circulation. Think of it this way: your cutting needs to breathe just like you do. Check that your propagation medium isn’t waterlogged—it should be moist but never soggy. I like to describe the ideal texture as a wrung-out sponge. Also, make sure you’ve removed all leaves that might sit below the soil line, as these become breeding grounds for bacteria. If you’re using the water propagation method, change the water every few days to keep it fresh and oxygenated.
On the flip side, if your cuttings refuse to root after several weeks, the environment might be too dry or cool. Geraniums root best in temperatures between 65-75°F. A simple heating mat underneath your propagation tray can work wonders during cooler months. Also double-check that you made a clean cut with sharp, sterilized scissors or pruners—ragged cuts struggle to develop roots. Some gardeners swear by rooting hormone, which can give reluctant cuttings the boost they need.
Weak, leggy growth after rooting often indicates insufficient light. Young geraniums need bright, indirect light to develop sturdy stems. If they’re reaching and stretching toward a window, they’re telling you they need to be closer to the light source or would benefit from a grow light.
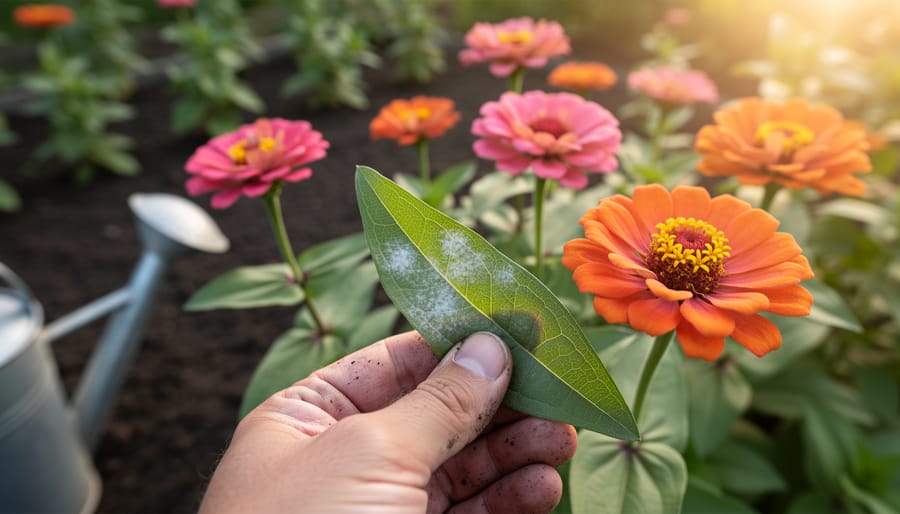
Watch for aphids and whiteflies, which love tender new growth. I inspect my propagation area weekly and deal with any pests immediately using a gentle spray of water or insecticidal soap. Prevention is easier than cure—keep your propagation area clean, remove any dead leaves promptly, and ensure good air circulation.
Remember, not every cutting will succeed, and that’s perfectly normal. Professional nurseries expect about a 70-80% success rate, so don’t be discouraged if a few don’t make it. Learn from each attempt, adjust your approach, and celebrate your successes!
Tools and Supplies You’ll Actually Need
The good news? You probably already have most of what you need to start propagating geraniums. I remember my first attempt at taking cuttings—I raided my kitchen drawer and used an old coffee mug as my propagation container. It worked beautifully! Let me walk you through what’s truly essential and what you can safely skip.
For cutting tools, you’ll need clean, sharp scissors or pruning shears. Kitchen scissors work just fine if they’re sharp enough to make clean cuts without crushing the stem. Whatever you choose, give them a quick wipe with rubbing alcohol before you start. This simple step prevents spreading any diseases between plants, and it takes about ten seconds.
When it comes to rooting hormone, here’s my honest take: it’s helpful but not essential. I’ve successfully propagated dozens of geraniums without it, relying on the plant’s natural ability to root. However, if you want faster results or you’re working with harder-to-root varieties, a small jar of rooting hormone powder costs around five dollars and lasts for years. It’s worth having in your gardening toolkit, but don’t let the lack of it stop you from trying.
For containers, anything with drainage holes works. Small plastic pots, yogurt containers with holes poked in the bottom, or even glass jars for water propagation will do the job. I’ve seen gardeners use everything from fancy propagation stations to repurposed deli containers. The key is having somewhere for excess water to escape if you’re using soil.
Your growing medium matters more than the container. For soil propagation, use a light, well-draining mix. A combination of perlite and peat moss or seed-starting mix works wonderfully. Avoid heavy garden soil, which stays too wet and can lead to rot. If you’re trying water propagation, tap water that’s been sitting out overnight is perfectly adequate.
Skip the expensive propagation mats, humidity domes, and specialized equipment when you’re starting out. Geraniums are forgiving plants that root happily on a sunny windowsill.

Propagating geraniums is truly one of the most rewarding projects you can undertake in your garden. There’s something almost magical about watching a single stem cutting transform into a thriving plant, knowing you’ve created new life from something that already brings you joy. And the best part? You’ll soon have enough geraniums to fill every corner of your garden, share with friends, or experiment with different growing locations.
If you’re feeling inspired but not quite sure where to begin, start with stem cuttings. This method consistently delivers the best results with the least fuss, making it perfect for first-timers. You don’t need fancy equipment or a green thumb—just a healthy parent plant, some basic supplies, and a bit of patience. Within weeks, you’ll see roots developing, and that first successful propagation will give you the confidence to try again and again.
Like propagating perennials in other parts of your garden, multiplying geraniums becomes easier with practice. Each season, you’ll develop your own rhythm and discover what works best in your specific conditions. Don’t be discouraged if a few cuttings don’t make it—even experienced gardeners expect some losses along the way.
We’d love to hear about your geranium propagation journey! What methods have you tried? Do you have any tips or tricks to share with fellow gardeners?
Remember, every magnificent geranium collection started with just one or two plants and someone willing to give propagation a try. Your flourishing garden is just a few cuttings away.