Turn a simple 5-gallon bucket into a remarkably efficient watering system that delivers moisture directly to your plants’ roots while you’re away at work or on vacation. This gravity-powered setup requires no electricity, costs less than $15 to build, and solves the age-old problem of inconsistent watering that leads to stressed plants and wasted water. Unlike traditional drip systems that demand complex installations and expensive timers, your bucket system works with basic household tools and materials you can find at any hardware store.
Picture this: your tomatoes receiving steady, measured hydration throughout hot summer days while your water bill stays remarkably low. The beauty of gravity drip irrigation lies in its elegant simplicity. Elevate your bucket above your garden beds, add water, and let physics do the work. The slow, steady drip penetrates deep into the soil rather than evaporating from the surface, giving your plants exactly what they need without the waste of sprinklers or hand watering.
Whether you’re growing vegetables in raised beds, nurturing a small herb garden, or maintaining container plants on your patio, this weekend project transforms how you care for your garden. Connect it to a rainwater collection barrel for truly sustainable growing that reduces your environmental footprint while producing healthier, more resilient plants.
Why Gravity-Fed Bucket Irrigation Just Makes Sense
Let me tell you why I absolutely love gravity-fed bucket irrigation, and why you will too! First and foremost, there’s zero electricity required. No timers to program, no batteries to replace, and nothing to plug in. Gravity does all the work while you sit back and enjoy your coffee.
The cost factor is honestly unbeatable. You probably already have most of what you need lying around, and even if you need to purchase everything new, you’re looking at less than twenty dollars for the entire setup. Compare that to commercial drip systems that easily run into hundreds of dollars, especially for multiple garden beds.
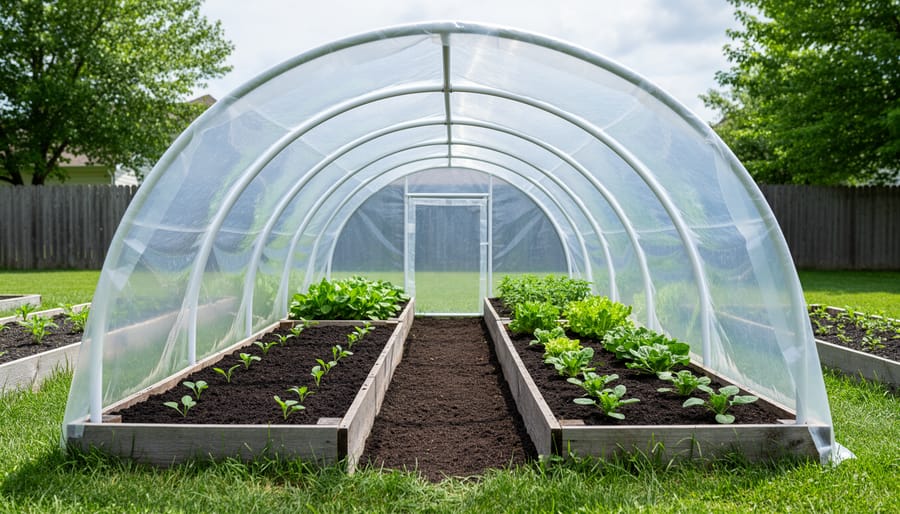
This system shines brightest in small gardens and raised beds. Whether you’re growing tomatoes on your patio or maintaining a modest vegetable patch, one five-gallon bucket can water a surprisingly large area for several days. I’ve found it particularly helpful for those awkward corner gardens where running hoses becomes a tangled nightmare.
If you’re collecting rainwater, this is the perfect partner system. That free water your rain barrel catches works beautifully with gravity irrigation. You’re maximizing a sustainable resource without any additional equipment.
The best part? Your plants receive consistent, steady moisture exactly where they need it at the roots. No wasteful overspray, no missed spots, and no more wondering if you watered enough yesterday. The soil stays evenly moist, which means happier plants and better harvests. Plus, setup takes less than an hour, even for complete beginners.

What You’ll Need (And Where to Find It)
Good news – you probably won’t need to make a special trip to the hardware store for most of these materials! Here’s everything you’ll need to create your gravity drip irrigation system, and the best part is the entire project typically costs under $20.
First, you’ll need a 5-gallon bucket with a lid. If you’ve purchased drywall compound, paint, or food products in bulk, you might already have one sitting in your garage. Otherwise, home improvement stores sell new buckets for about $5-7. Restaurant bakeries and delis often give away food-grade buckets for free – just give them a good scrub first.
For the irrigation component, pick up 25-50 feet of drip irrigation tubing or a soaker hose, depending on your garden size. Quarter-inch drip tubing costs around $8-12 and gives you precise control over water placement. You’ll also need a few basic connector fittings: a hose adapter or spigot valve for the bucket (about $3-5) and possibly some T-connectors if you’re watering multiple rows.
Drilling the holes requires a drill bit sized appropriately for your fittings – usually 1/4 inch to 1/2 inch. Most gardeners already have these on hand.
An optional but helpful addition is a stand or cinder blocks to elevate your bucket 2-3 feet off the ground. This height creates better water pressure for more consistent dripping. Cinder blocks work perfectly and cost just a couple dollars each.
Don’t forget waterproof sealant or plumber’s tape to prevent leaks around your connections – you’ll spend less than $5 here. With everything gathered, you’re ready to build your system and start conserving water while keeping your plants happy!

Building Your Bucket Drip System: Step-by-Step
Preparing Your Bucket
Before you start assembling your gravity drip system, let’s get that bucket ready. First things first: give your bucket a thorough cleaning with warm, soapy water, even if it’s brand new. This removes any manufacturing residues or dust that could clog your drip lines later. Rinse it well and let it dry completely.
Now for the exciting part – creating your water outlet. Here’s where height really matters. You’ll want to drill your hole about 2-3 inches from the bottom of the bucket. This positioning is crucial because it maintains good water pressure throughout most of your bucket’s capacity while leaving a small reservoir at the bottom to prevent air from entering your system. Drilling too low makes installation tricky and increases leak risk, while drilling too high means you’ll waste precious water that sits below the outlet.
Mark your spot clearly with a permanent marker. Use a drill bit that matches your bulkhead fitting or spigot size – typically 1/2 inch or 3/4 inch. Drill slowly and steadily to create a clean hole without cracking the plastic. A little tip from experience: place a scrap piece of wood behind where you’re drilling to prevent the plastic from bowing.
When installing your bulkhead fitting, make sure both the interior and exterior washers are properly seated. Hand-tighten firmly, then give it just a quarter turn more with pliers – overtightening can crack the bucket. If you notice any drips during your first test fill, try adjusting the tightness slightly or add plumber’s tape to the threads for an extra seal.

Setting Up the Drip Lines
Now comes the fun part—connecting your system and getting water exactly where your plants need it! Start by attaching your tubing to the spigot or valve you installed at the bottom of your bucket. Quarter-inch tubing works beautifully for most garden beds, though you can use half-inch if you’re covering a larger area. Simply push the tubing firmly onto the outlet fitting until it seats securely.
Walk your drip line through your garden bed, following the rows where your plants are growing or will be planted. There’s no need to rush this step. Take your time laying the tubing in gentle curves rather than sharp bends, which can restrict water flow. I like to place my main line down the center of the bed, then branch off to individual plants as needed.
Secure the tubing every two to three feet using landscape staples or U-shaped stakes. This keeps everything tidy and prevents the line from shifting when you’re weeding or working around your plants. You can find these stakes at any garden center, or get creative and fashion your own from sturdy wire.
Here’s where customization really shines. For individual plants like tomatoes or peppers, insert drip emitters every 12 to 18 inches along your tubing. Simply punch a small hole using a specialized punch tool, then press the emitter in place. These little devices control water flow beautifully, delivering consistent moisture right to the root zone.
If you’re working with closely spaced plants like lettuce or herbs, consider using a soaker hose instead, or create your own by carefully poking pin holes every few inches along quarter-inch tubing using a needle or small nail. Space holes closer together for thirsty plants, farther apart for drought-tolerant varieties. Test your system before mulching over the lines to ensure even coverage.
Testing and Adjusting Water Flow
Now comes the exciting part – testing your gravity drip system! Fill your 5-gallon bucket with water, making sure to leave a couple of inches at the top to prevent spills. If you’re connecting to a rainwater collection system later, this is a great time to check that everything’s working properly before you commit to the full setup.
Once filled, open your valve or unclamp your tubing and watch the magic happen. You’ll want to see a steady, gentle drip from each outlet – think of it like a slow, peaceful rain rather than a gushing stream. The ideal flow rate is typically 1-2 gallons per hour for most vegetable gardens, though this varies depending on your plants’ needs and soil type.
If water’s rushing out too quickly, simply adjust your valve to slow the flow. For systems using tubing clamps, tighten them gradually until you achieve that perfect drip. Too slow? Open the valve a bit more or loosen the clamps. Remember, gravity systems are wonderfully forgiving – you can tweak them anytime.
Check each drip point to ensure water’s reaching all your plants evenly. Sometimes one line might drip faster than others, especially if there are differences in tubing length or elevation. This is completely normal and easily fixed by adjusting individual outlets.
Common issues to watch for include air bubbles blocking the flow (usually works itself out within minutes), clogged emitters from debris (easily cleared with a quick rinse), or leaks at connection points (tighten those fittings!). I’ve found that placing a small rock or mulch around each drip point helps prevent soil erosion and directs water right to the root zone where it’s needed most.
Connecting Your System to Rainwater Collection
Connecting your bucket system to a rainwater source transforms your gravity drip irrigation into an even more sustainable setup. The good news? It’s surprisingly simple, even if you’ve never tried rainwater harvesting before.
Start by positioning your 5-gallon bucket near a downspout or beside an existing rain barrel. If you’re working with a downspout, you can either fill buckets manually during rain events or create a diverter system. A basic diverter redirects water from your downspout into your bucket when it rains, then returns to normal drainage once the bucket fills.
For those with larger rain barrels, creating a gravity-fed chain works beautifully. Position your rain barrel on a higher platform, then use a spigot and short length of hose to transfer water to your irrigation bucket as needed. The beauty of this system is that gravity does all the work—no pumps required.
Filtering debris is essential for keeping your drip lines clear. A simple mesh screen placed over your bucket opening catches leaves and twigs before they enter your system. You can use an old piece of window screen, landscaping fabric, or purchase inexpensive mesh filters designed for rain barrels. Secure the screen with a bungee cord or large rubber band for easy removal during cleaning.
An overflow system prevents your bucket from spilling during heavy rains. Drill a hole near the top of your bucket and insert a short piece of PVC pipe or flexible tubing. Direct this overflow toward your garden beds or another collection container. This way, excess water still benefits your landscape rather than creating puddles or erosion around your bucket.
I’ve found that checking and cleaning filters weekly during rainy seasons keeps everything flowing smoothly and prevents frustrating clogs.
Getting the Most From Your Bucket System
How Often to Refill
Your refill schedule depends on several factors, but here’s a practical starting point. A 5-gallon bucket typically drains over 1-3 days, depending on your drip hole size and how many plants you’re watering. During hot summer months, you’ll likely need to refill every 2-3 days, while cooler spring or fall weather might stretch that to 4-5 days.
The best approach is to check your bucket daily for the first week to understand its drainage pattern. Look at your plants too—they’ll tell you if they need more water through drooping leaves or dry soil. I learned this the hard way when my tomatoes looked a bit sad after I assumed a weekly refill would suffice during a heat wave!
Weather matters tremendously. If you’re expecting rain, hold off on refilling. During extended dry spells or windy conditions that speed evaporation, increase your frequency. Container plants and vegetables need more frequent refills than established perennials. Keep a simple garden journal noting when you refill—you’ll quickly discover your garden’s rhythm and can adjust accordingly.
Seasonal Maintenance
Keeping your gravity drip system running smoothly requires just a few simple maintenance tasks throughout the year. Every few weeks during the growing season, flush your drip lines by removing the end caps and letting water run through to clear any sediment buildup. Check each emitter for clogs by observing the drip rate – if water slows to a trickle, gently twist or tap the emitter, or soak it in vinegar overnight to dissolve mineral deposits.
To prevent algae growth in your bucket, keep the lid on tight and consider painting the outside with dark paint to block sunlight. You can also add a small piece of mosquito netting over the spigot opening for extra protection. In cold climates, winterizing is essential before the first freeze. Drain all water from the bucket and lines, disconnect the system, and store components indoors or in a protected shed. This prevents cracking and extends the life of your materials. Come spring, simply reassemble everything, run fresh water through to flush the lines, and you’re ready for another successful growing season.
Real Gardens, Real Results
I’ve been using this bucket system in my raised beds for three seasons now, and I’m honestly amazed at how well my tomatoes and peppers respond to it. The steady moisture means no more blossom end rot, which used to plague my tomato harvest every summer. My neighbor Maria tried it last year with her zucchini and cucumber plants, and she told me she’d never seen such consistent production. She was picking cucumbers well into September!
One unexpected benefit several community gardeners have mentioned is how much healthier their plant leaves look. Without overhead watering, fungal diseases like powdery mildew practically disappeared from their gardens. Tom, who grows herbs in his community plot, swears his basil plants doubled in size compared to previous years. He thinks it’s because the roots go deeper searching for that slow, steady water source.
The system really proved itself during last summer’s heat wave. While neighbors were hand-watering twice daily, our bucket systems kept everything thriving with just weekly refills. It’s become our secret weapon for growing heat-loving crops like eggplants and okra without the constant worry.
Ready to give gravity drip irrigation a try? There’s no need to convert your entire garden overnight. Start with just one 5-gallon bucket serving a single raised bed or container grouping. You’ll quickly discover how this straightforward setup embodies sustainable gardening principles while giving you back precious time you’d otherwise spend watering. Your plants will thank you with stronger root systems and healthier growth, responding beautifully to the consistent moisture they crave. The beauty of this system lies in its simplicity—no fancy equipment, no electrical connections, just gravity doing what it does best. This growing season, take that first small step. Set up one bucket, watch how your plants thrive, and enjoy the satisfaction of nurturing your garden smarter, not harder.