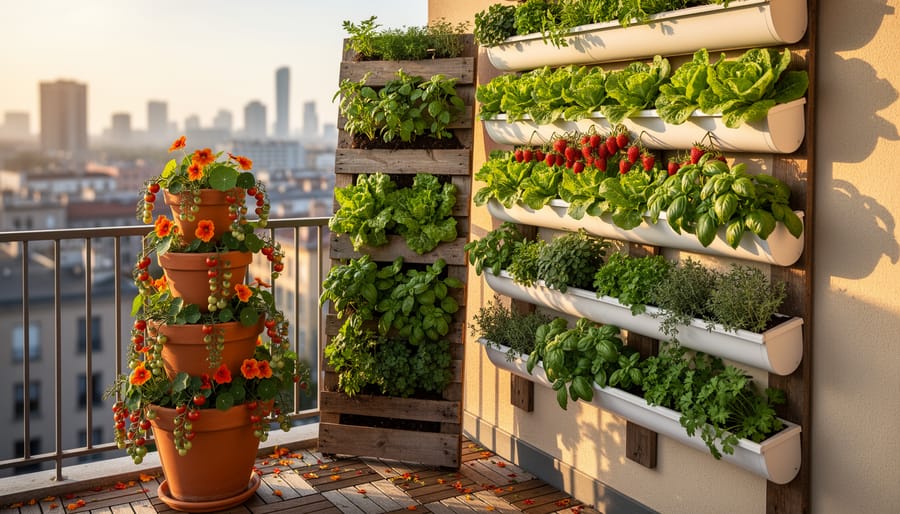
Transform bare walls into productive growing spaces by mounting gutters horizontally with drainage holes drilled every six inches—perfect for lettuce, herbs, and strawberries that need only 4-6 inches of soil depth. Repurpose wooden pallets by standing them upright, stapling landscape fabric to the back, filling the slats with potting mix, and planting directly into the gaps for an instant living wall that costs under $20. Stack terracotta pots at angles using threaded rods through drainage holes to create a tower that maximizes space while providing excellent drainage for trailing plants like cherry tomatoes and nasturtiums.
Vertical gardening solves the challenge every gardener faces: too many plants, not enough ground. Whether you’re working with a tiny apartment balcony or simply want to make better use of your yard’s vertical real estate, growing upward rather than outward multiplies your planting area without requiring more square footage. The beauty of DIY vertical gardens lies in their accessibility—you don’t need carpentry expertise or expensive materials to get started.
This guide walks you through projects ranging from simple hanging systems you can complete in an afternoon to more ambitious structures that transform entire walls into productive gardens. You’ll discover which plants thrive in vertical setups, learn techniques for proper irrigation and soil management, and troubleshoot common challenges before they derail your growing success. Every project includes clear material lists and step-by-step instructions designed to build your confidence, whether you’re picking up your first drill or you’ve built raised beds for years.
Why Vertical Gardening Changes Everything
If you’ve ever felt frustrated by a small growing area or bent over weeding until your back ached, vertical gardening might just be the game-changer you’ve been looking for. I remember the first time I installed a simple trellis system—it wasn’t just about reclaiming square footage, though that was certainly a welcome bonus. What surprised me most was how many other problems it solved that I hadn’t even anticipated.
Let’s start with the obvious: space. Whether you’re working with a compact balcony or a suburban backyard, growing upward instead of outward can triple or even quadruple your planting capacity. But here’s what really makes vertical gardening special—the benefits go far beyond just fitting more plants into your garden.
Improved air circulation is one of those hidden advantages that makes a real difference. When plants climb vertically instead of sprawling across the ground, air flows freely around leaves and stems. This simple change dramatically reduces fungal diseases and pest problems that thrive in damp, crowded conditions. Your tomatoes and cucumbers will thank you.
Then there’s maintenance. Working at eye level or chest height instead of ground level transforms garden care from a chore into a pleasure. No more kneeling on damp soil or struggling to reach plants at the back of beds. Harvesting, pruning, and spotting problems becomes genuinely easy—something any gardener with knee issues or back pain will appreciate deeply.
The aesthetic transformation shouldn’t be underestimated either. Vertical gardens create living walls that turn blank fences and bare walls into stunning focal points. They add dimension and visual interest that flat gardens simply can’t match, making even the smallest spaces feel lush and intentional.
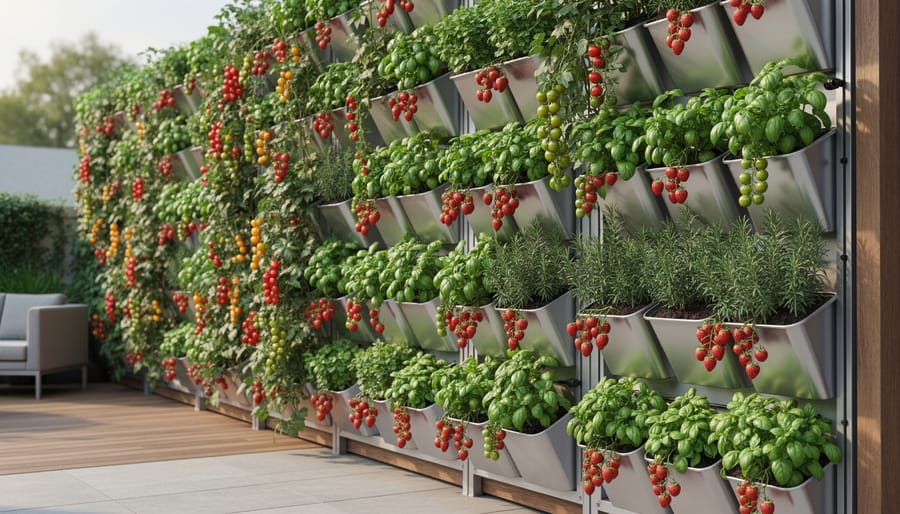
Simple Vertical Gardening Projects for Beginners
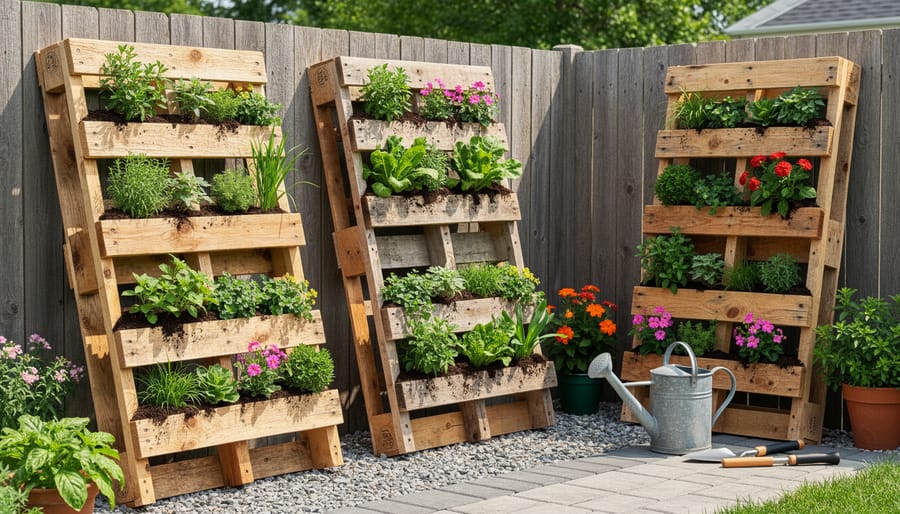
Pallet Planter Walls
Wooden pallets are absolute gems for vertical gardening, and I love how accessible they are! Many businesses give them away for free, making this one of the most budget-friendly projects you can tackle. Before you dive in, inspect your pallet carefully and only use heat-treated pallets marked with “HT” – avoid those stamped with “MB” as they’ve been chemically treated.
Here’s how to create your pallet planter from start to finish:
- Source a sturdy pallet in good condition and clean it thoroughly with a stiff brush and water.
- Sand rough edges to prevent splinters, paying special attention to areas you’ll handle frequently.
- Flip the pallet so the bottom faces you, then staple landscape fabric across the back, bottom, and sides to create pockets.
- Position the pallet flat and fill the gaps between slats with potting soil, packing it firmly.
- Plant your selections between the slats, working from bottom to top – herbs, succulents, and shallow-rooted flowers work beautifully.
- Keep the pallet flat for two to three weeks, watering gently to let roots establish.
- Gradually prop it upright over several days, then mount it securely to a wall or fence using heavy-duty brackets.
I recommend starting with hardy herbs like oregano, thyme, and sage, which tolerate the limited soil depth. Lettuce and strawberries are also fantastic choices! Once mounted, water from the top and let gravity do the work, ensuring all plants receive moisture. This project transforms boring wall space into a productive, eye-catching garden that never fails to impress visitors.
Hanging Gutter Gardens
Rain gutters aren’t just for roofs anymore! I discovered this clever trick from my neighbor who transformed old vinyl gutters into thriving herb gardens, and I haven’t looked back since. These cascading planters are perfect for lettuce, spinach, strawberries, and herbs that don’t need deep roots.
Start by selecting vinyl or aluminum gutters (10-foot sections work beautifully) and cut them to your desired length. The key to success lies in proper drainage—drill quarter-inch holes every 6 to 8 inches along the bottom to prevent waterlogging. Cap the ends with gutter end caps, sealing one side completely and drilling drainage holes in the other.
For mounting, use sturdy brackets spaced 2 feet apart, angled slightly downward to encourage drainage. Stack multiple rows 8 to 10 inches apart vertically, creating that lovely cascading effect. You can attach them to fences, walls, or even build a simple wooden frame.
Fill with lightweight potting mix rather than garden soil—it drains better and won’t overburden your mounting system. Pro tip: line the bottom with landscape fabric to keep soil from washing through drainage holes while still allowing water to escape. This setup works wonderfully on sunny balconies or along bland fence lines that need some green personality!
Shoe Organizer Planters
Here’s one of my favorite budget-friendly vertical gardening hacks: grab an over-the-door shoe organizer from the dollar store, and you’ve got yourself an instant vertical planter! I discovered this trick when I ran out of pots one spring, and now it’s become my go-to solution for small-space growing.
The beauty of shoe organizers is their perfect pocket size for shallow-rooted plants. Strawberries absolutely thrive in these setups – I’ve harvested nearly 10 pounds from a single organizer hanging on my sunny fence. Herbs like basil, cilantro, and parsley also love these conditions, giving you a living herb wall right outside your kitchen door.
Here’s how to set it up: Choose a fabric organizer rather than vinyl for better drainage. Poke a few small holes in each pocket’s bottom if they’re not already perforated. Fill pockets with quality potting mix, plant your seedlings or seeds, and hang on a sturdy door, fence, or wall bracket that gets at least 6 hours of sunlight.
For vegetables, stick with lettuce, spinach, and compact pepper varieties. Water from the top and let it cascade down – you’ll need to water more frequently than traditional containers since the pockets hold less soil. Within weeks, you’ll have a productive vertical garden for under ten dollars!
Intermediate DIY Vertical Garden Structures
A-Frame Trellis Systems
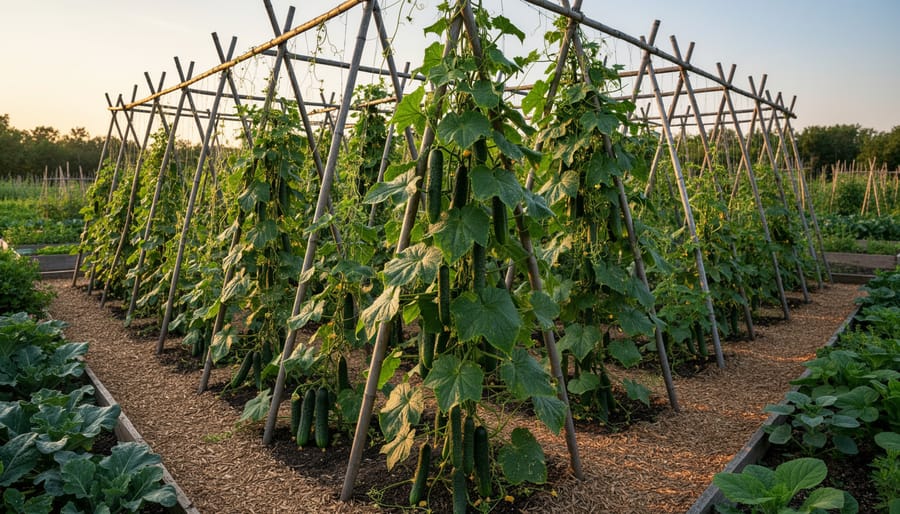
The A-frame trellis is a gardening workhorse that’s surprisingly simple to build, even if you’ve never tackled a DIY project before. I love how versatile these structures are—they provide double the growing space in a compact footprint, making them ideal for smaller gardens or when you’re integrating vegetables into your food garden design.
To get started, you’ll need some basic materials. Here’s what I typically recommend:
| Material | Budget Option | Standard Option | Premium Option |
|---|---|---|---|
| Frame | Bamboo poles (8 pieces, 6-7 ft) | 2×2 lumber (16 ft total) | Cedar 2x2s (weather-resistant) |
| Netting/Support | Twine grid | Plastic garden netting | Wire mesh or cattle panel section |
| Fasteners | Rope and zip ties | Outdoor screws | Galvanized screws and hinges |
| Approximate Cost | Under $15 | $30-40 | $60-80 |
The construction is straightforward: create two triangular frames by joining three poles or boards at the top, then connect them with a horizontal crossbar. The angle should be about 45-60 degrees for stability. Space the frames 4-6 feet apart depending on your garden’s length, then attach your climbing surface between them.
Pro tip: Make your A-frame portable by adding hinges at the peak—this allows you to fold it flat for winter storage and adjust the angle for different plants. Beans and peas thrive on these structures, while heavier cucumbers appreciate the sturdier mesh options.
Vertical Tower Gardens
Tower gardens are one of my favorite vertical growing solutions because they’re incredibly space-efficient and surprisingly simple to build. Whether you’re growing strawberries that cascade beautifully down the sides or packing in lettuces and herbs, these stackable systems can transform even the smallest patio into a productive garden.
For a PVC pipe tower, start with a 4-6 inch diameter pipe, about 4-5 feet tall. Drill 2-3 inch holes in a spiral pattern up the pipe, spacing them about 8 inches apart. Cap the bottom, fill with quality potting mix, and insert your plants through the holes as you fill. The key is to place a smaller perforated pipe down the center filled with gravel—this creates a watering column that distributes moisture evenly throughout your tower. I learned this trick from a community gardener who was tired of her plants at the top thriving while those below stayed too wet.
Stacked pot towers are even easier for beginners. Simply thread several progressively smaller pots onto a sturdy pole or rebar, offsetting each pot slightly as you stack. Fill each tier with soil and plant around the edges. This method works beautifully for strawberries, which naturally send out runners that’ll fill any gaps.
Both systems need consistent watering since they dry out faster than traditional gardens. Water from the top and let gravity do the work, checking daily during hot weather.
Living Wall Pocket Systems
Living wall pocket systems transform bare vertical spaces into lush, cascading gardens that rival professional installations. I discovered these felt or fabric pockets at a community garden, and they’ve become one of my favorite DIY projects—surprisingly simple yet incredibly effective.
Start by selecting heavy-duty landscape fabric or felt material, which naturally wicks moisture and drains well. Cut rectangular pieces approximately 8-10 inches wide and 12 inches tall, then fold the bottom third up to create pockets. Use weather-resistant thread to stitch the sides, leaving the top open for planting. Mount these pockets onto a wooden frame or directly onto a sturdy backing board using staples or screws.
For the frame, use treated lumber or cedar to prevent rot. Space your pockets 6-8 inches apart to allow plants room to spread. Many gardeners attach the entire system to a wall using heavy-duty brackets, ensuring it can support the weight when wet—and trust me, it gets heavy!
The beauty of pocket systems lies in their versatility. Each pocket becomes its own microenvironment, perfect for herbs, succulents, lettuce, or flowering annuals. Mix shallow-rooted plants for best results, and consider adding a drip irrigation line along the top for easier watering. These living walls create stunning focal points while maximizing your growing space beautifully.
Advanced Vertical Gardening Innovations
Self-Watering Vertical Systems
Let me tell you about one of my favorite vertical gardening innovations—self-watering systems that practically take care of your plants for you! If you’ve ever returned from vacation to find wilted plants, this solution will change your gardening life.
The beauty of self-watering vertical gardens lies in their built-in reservoirs. These clever designs store water at the bottom of your structure, allowing plants to draw moisture as needed through capillary action. I’ve seen gardeners reduce their watering schedule from daily to once or twice weekly, which is a game-changer during hot summers.
To build your own, start with stackable planters that feature water chambers, or create a DIY version using food-grade buckets. Drill holes in the bottom of upper containers, insert wicking material like cotton rope or felt strips, and connect them to a lower reservoir. The wicks draw water upward, keeping soil consistently moist without overwatering.
For a more advanced option, consider adding drip irrigation tubing to your vertical structure. Connect a timer to your outdoor spigot, and your garden waters itself automatically. Position drip emitters near each plant’s root zone for optimal efficiency.
These systems work wonderfully for thirsty vegetables like tomatoes and cucumbers, giving them steady hydration while preventing the stress of drought cycles. Your plants will thank you with healthier growth and better yields!
Modular Wall Grid Systems
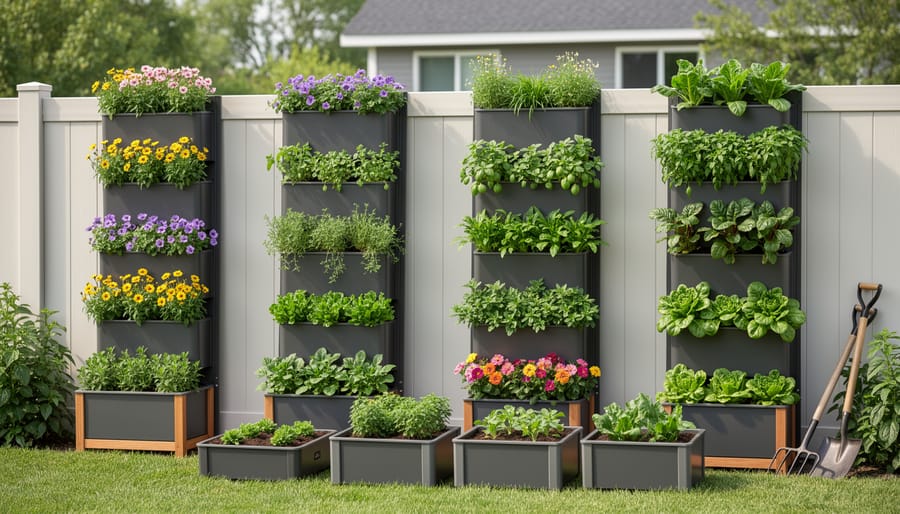
Modular wall grid systems are game-changers for vertical gardening because they give you complete flexibility to rearrange your garden as often as you like. Think of it as the pegboard of the plant world—simple, practical, and endlessly customizable.
Start by mounting metal wire grids, wooden lattice panels, or even repurposed wire fencing to a sturdy wall or fence. The key is choosing a grid size that accommodates various hook and container types. I typically recommend 4-inch squares, which work beautifully with S-hooks and small basket planters.
The beauty of this system lies in its adaptability. In spring, you might hang shallow containers brimming with lettuce and herbs on the lower sections where they’re easy to harvest. Come summer, swap those out for heavier tomato planters on reinforced hooks. When fall arrives, simply move everything around to catch the best sunlight as it shifts.
For containers, lightweight options work best—fabric grow bags, plastic pots with drainage holes, or small metal buckets. Attach them using S-hooks, zip ties, or purpose-made grid clips. I spoke with gardener Maria Chen, who’s been using grid systems for five years: “I change my layout monthly based on what’s thriving. It’s like redecorating, but with vegetables!”
Vertical Hydroponic Walls
Ready to take your vertical garden to the next level? Hydroponic walls let you grow without soil, making them perfect for indoor spaces or areas with poor soil quality. Don’t worry—building a simple system is easier than you might think!
Start with an NFT (nutrient film technique) setup, where a thin stream of nutrient-rich water flows over plant roots in slightly tilted channels. You’ll need PVC pipes or gutters, a small water pump, and a reservoir. Drill holes for net pots, angle your pipes for gentle water flow, and you’re set. The beauty here is that plants grow faster with direct access to nutrients.
Prefer something even simpler? Try a drip system using a vertical frame with grow bags or pockets. A timer-controlled pump drips nutrient solution from the top, trickling down to each plant. Leafy greens like lettuce and herbs thrive in both systems and are forgiving for beginners. I’ve found that monitoring pH levels weekly and changing the nutrient solution every two weeks keeps everything flourishing beautifully.
Choosing the Right Plants for Vertical Success
Choosing the right plants can make or break your vertical garden, and I’ve learned this lesson the hard way after watching a beautiful cucumber vine topple an inadequately supported trellis! Let’s talk about matching your plants to your vertical structures so you can avoid my mistakes and enjoy vertical success from the start.
Light conditions are your first consideration. Observe your space throughout the day—does it get full sun (six-plus hours), partial sun (three to six hours), or shade? Sun-loving plants like tomatoes and peppers need those full rays, while lettuce and herbs often appreciate some afternoon shade. I always tell beginners to watch their space for at least a week before making plant selections, and trust me, it’s time well spent.
Weight matters more than you might think when gardening vertically. A mature squash plant loaded with fruit weighs considerably more than a delicate pea vine. Match heavy producers to sturdy structures like cattle panel arches or reinforced wooden frames, and save lighter trellises for beans, peas, and flowering vines.
Here’s a quick guide to help you match plants with methods:
| Plant Type | Best Vertical Method | Sunlight Needs | Weight Level |
|---|---|---|---|
| Tomatoes | Stakes, cages, strings | Full sun | Medium-heavy |
| Peas & Beans | Netting, twine, lattice | Full to partial sun | Light |
| Cucumbers | A-frame trellis, wire panels | Full sun | Medium |
| Lettuce & Herbs | Pockets, towers, shelves | Partial sun to shade | Light |
Root depth is another crucial factor. Plants in vertical containers or pockets need adequate soil depth—tomatoes require at least 12 inches, while shallow-rooted herbs thrive in just 6 inches. When landscaping with edible plants vertically, always check mature root requirements before selecting your growing method.
Growth habits reveal everything. Look for varieties described as vining, climbing, or compact. Indeterminate tomatoes keep growing and producing, perfect for tall structures, while determinate varieties stay compact. Pole beans climb enthusiastically, but bush beans won’t cooperate with your trellis dreams.
Essential Design Considerations Before You Build
Before diving into your vertical gardening adventure, let’s take a moment to assess a few crucial factors that will set you up for success. Trust me, spending a little time planning now will save you headaches later!
First, let’s talk about structural support. Vertical gardens can get surprisingly heavy, especially once soil is wet and plants are mature. If you’re mounting anything on a wall, make sure you’re anchoring into studs or using appropriate masonry anchors. Freestanding structures should have a stable base that won’t tip over in wind or when top-heavy with growth. I learned this the hard way when my first pallet garden decided to take a tumble during a summer storm!
Sun exposure is your next big consideration. Observe your chosen spot throughout the day to understand how much direct sunlight it receives. Most vegetables need at least six hours of sun, while shade-loving plants like ferns and hostas thrive with less. Remember, vertical structures can cast shadows on plants below them, so consider the sun’s path when positioning your garden.
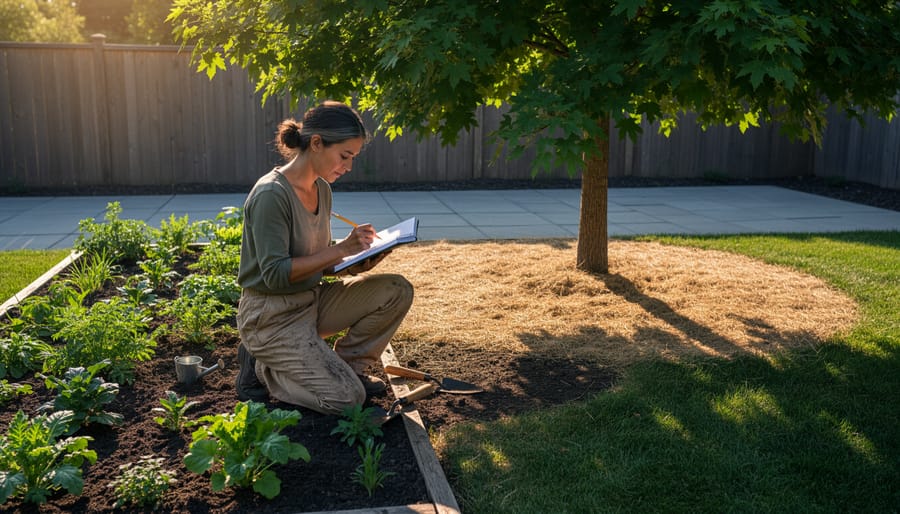
Water access is often overlooked but absolutely essential. You’ll be watering more frequently with vertical gardens since containers dry out quickly. Position your garden near a water source or plan for a drip irrigation system. Recording these observations in a garden planning journal helps you track what works and what needs adjustment.
Finally, think about aesthetic integration. Your vertical garden should enhance your space, not clash with it. Consider colors, materials, and styles that complement your existing outdoor decor. A rustic wooden trellis might look perfect against a brick home, while sleek metal planters suit modern spaces beautifully.
Troubleshooting Common Vertical Garden Challenges
Even the most enthusiastic vertical gardeners encounter hiccups along the way, but don’t worry—most challenges have straightforward solutions that’ll get your garden thriving again.
Uneven watering is perhaps the most common issue I hear about from fellow gardeners. Plants at the top of vertical structures often receive more water while bottom dwellers sit thirsty. The fix? Install a drip irrigation system with individual emitters for each planter, or hand-water from bottom to top, ensuring lower plants get extra attention. I like to add water-retaining crystals to soil in upper containers to help maintain consistent moisture levels throughout your structure.
Top-heavy vertical gardens can become wobbly or even topple over, especially on windy days. Always anchor freestanding structures to walls or secure them with sturdy bases. For pallet gardens or ladder systems, use L-brackets to attach them firmly to exterior walls. If you’re working with tower gardens, consider placing heavier plants near the bottom and lighter herbs or trailing varieties up top.
Pest access becomes trickier when you can’t easily inspect every plant. The good news is that elevation actually deters some ground-dwelling pests like slugs and certain beetles. However, aphids and spider mites still find their way up. Regular inspections are key—walk around your vertical garden weekly, checking leaf undersides and stems. Companion planting with pest-deterring herbs like basil or marigolds helps tremendously.
How do I fix drainage problems in stacked planters?
Ensure each container has adequate drainage holes and add a layer of gravel or pebbles at the bottom. Consider placing catch trays between levels to prevent waterlogging lower plants.
How often should vertical gardens be watered?
This depends on your climate and plant selection, but vertical gardens typically need watering every 1-2 days during summer. Touch the soil daily until you establish a routine that keeps it consistently moist but not soggy.
What seasonal maintenance do vertical gardens require?
Clean and inspect mounting hardware each spring, replace worn fabric pockets annually, and check irrigation lines for clogs. In fall, remove spent plants and add fresh soil to depleted containers.
Overheating is particularly troublesome for wall-mounted gardens on south-facing surfaces. Dark walls absorb heat and can literally cook plant roots. Paint walls white or light colors to reflect heat, or install your garden a few inches away from the surface using spacers to allow air circulation. Choose heat-tolerant plants like succulents or Mediterranean herbs for these challenging spots, saving lettuce and delicate greens for shadier locations.
You’ve got everything you need to transform that bare wall or cramped patio into a thriving vertical garden. The beauty of vertical gardening is that you don’t need to tackle an elaborate project right away. Start with something simple—maybe a pallet planter or a few hanging pots—and watch your confidence grow alongside your plants.
Remember, every vertical gardener started somewhere, and there’s no wrong way to begin your journey. The space-saving benefits alone make it worthwhile, but you’ll quickly discover that vertical gardens offer endless creative possibilities. Mix and match different structures, experiment with unusual containers, and don’t be afraid to let your personality shine through your design choices.
As you dive into your first project, know that you’re joining a vibrant community of gardeners who love sharing what works (and what doesn’t!). We’d love to hear about your vertical gardening adventures at Bluestem Gardening. Share your innovations, ask questions, and inspire fellow gardeners with your successes. After all, the best gardens grow from shared knowledge and a willingness to try something new. Happy planting!