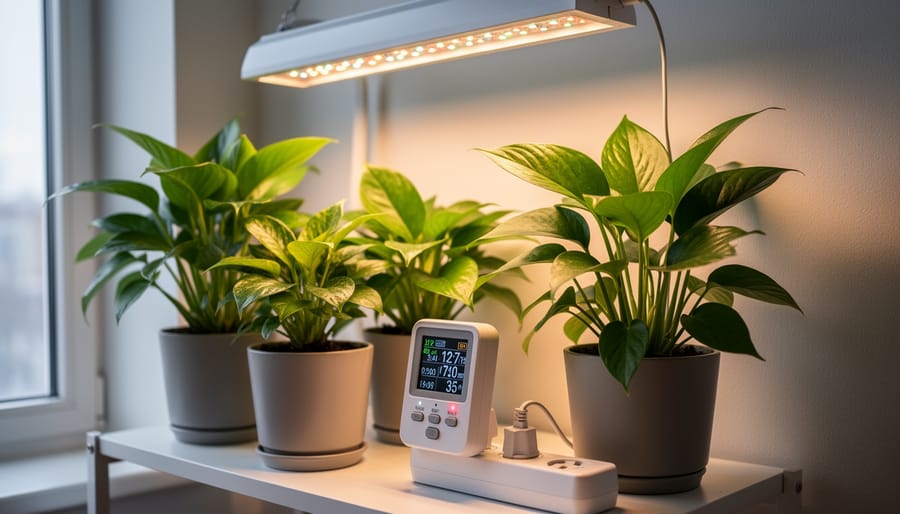
Position your grow lights 12-24 inches above plant canopies and adjust weekly as plants grow, measuring the distance from the brightest point of the bulb to the top leaves. Place sun-loving plants like tomatoes and peppers directly under full-spectrum LEDs running 14-16 hours daily, while shade-tolerant pothos and ferns thrive with 10-12 hours of indirect light positioned 3 feet away.
Match your light spectrum to your gardening goals: blue wavelengths (400-500nm) promote compact, bushy growth perfect for herbs and leafy greens, while red wavelengths (600-700nm) trigger flowering and fruiting in vegetables. Full-spectrum white LEDs simplify starting your indoor garden by mimicking natural sunlight across all growth stages.
Install an automatic timer to maintain consistent photoperiods, as even one missed day disrupts plants’ internal clocks and can delay flowering by weeks. Set your timer based on plant type: long-day plants like spinach need 14+ hours of light to prevent premature bolting, while short-day plants like chrysanthemums require 12 hours or less to form buds.
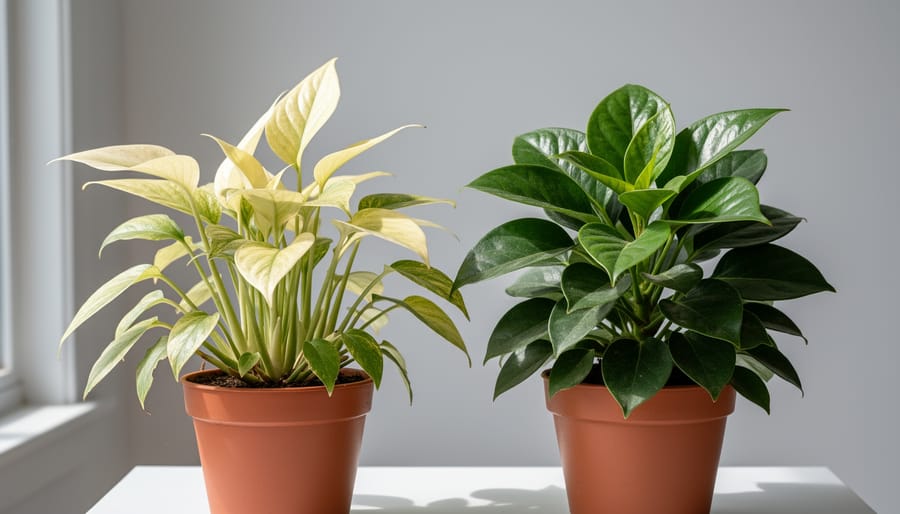
Monitor your plants for light stress signals. Leaves bleaching white or curling upward indicate too much intensity, requiring you to raise fixtures or reduce daily hours. Leggy, stretched stems reaching toward the light mean insufficient brightness, calling for closer placement or higher-wattage bulbs. These adjustments transform struggling seedlings into thriving indoor harvests.
What Your Indoor Plants Really Need from Light
The Light Spectrum Decoded
Think of light as food for your plants, but not all light serves the same dish! Understanding the basics of the light spectrum will help you choose the right setup for your indoor garden.
Blue light is your plant’s morning coffee. It promotes compact, bushy growth and helps seedlings and young plants develop strong stems and leaves. You’ll find blue light particularly helpful during the vegetative stage when your plants are building their structure. It’s like giving them the energy to stand tall and proud.
Red light, on the other hand, is all about flowering and fruiting. This wavelength encourages your plants to bloom and produce those delicious tomatoes or vibrant flowers you’re hoping for. Think of it as the signal that tells your plants it’s time to reproduce and create their bounty.
Full-spectrum light mimics natural sunlight, containing all wavelengths plants need throughout their lifecycle. It’s the Swiss Army knife of grow lights, perfect if you’re growing different plants at various growth stages under the same setup. Many gardeners prefer full-spectrum because it simplifies things and works beautifully for most indoor plants.
The good news? You don’t need to become a physicist to succeed. Start with full-spectrum lights if you’re new to indoor gardening, and you’ll cover most bases right from the beginning.
Measuring Light Intensity Without Getting Technical
Understanding light measurements doesn’t require a physics degree, I promise! Think of it this way: when you’re shopping for indoor lights, you’ll encounter three main terms, and each tells you something slightly different about the light your plants receive.
Lumens measure the total amount of visible light a bulb produces. Imagine it like the overall brightness of a room. A standard 60-watt incandescent bulb produces about 800 lumens. While lumens give you a general sense of brightness, they don’t tell the whole story for plants since they measure light as humans perceive it, not plants.
Foot-candles are lumens measured at a specific distance. Picture holding a candle one foot away from a surface – that’s roughly one foot-candle. Most houseplants thrive between 100-500 foot-candles, while high-light plants like tomatoes need 1,000 or more. Here’s a helpful comparison: a bright office typically has about 400 foot-candles, while direct sunlight outdoors delivers around 10,000.
PAR, or Photosynthetically Active Radiation, measures the specific light wavelengths plants actually use for photosynthesis. Think of it as the nutritional value of light rather than just its brightness. It’s the most plant-specific measurement, though slightly harder to measure without specialized meters.
For practical indoor gardening, don’t worry about having perfect measurements. Most grow light packages provide these numbers, and observing your plants’ response – compact growth and vibrant color indicate good light – remains your best guide.
Choosing the Right Grow Light for Your Space

LED Grow Lights: The Modern Standard
LED grow lights have revolutionized indoor gardening, and honestly, it’s easy to see why they’ve become the go-to choice for most of us. Unlike the bulky fluorescent tubes or heat-generating HID lights of the past, LEDs offer incredible energy efficiency, often using 40-70% less electricity while producing the same or better light quality. That translates to real savings on your energy bill, especially if you’re running lights for 12-16 hours daily.
What really sold me on LEDs was their lifespan. Quality units can last 50,000 hours or more, which means years of reliable service without bulb replacements. They also run cool, reducing the risk of burning your plants and making temperature management much simpler in smaller spaces.
When shopping for LED grow lights, focus on a few key factors. First, look for full-spectrum models that provide both blue light for vegetative growth and red light for flowering. The wattage should match your growing area, with most manufacturers recommending around 30-50 watts per square foot for light-hungry plants. Pay attention to actual wattage draw rather than equivalency claims, as these can be misleading.
Real product reviews from fellow gardeners are invaluable. Check that the manufacturer provides a PAR or PPFD rating, which tells you the actual usable light your plants receive. A decent warranty, typically 2-5 years, indicates quality construction. While budget options exist, investing in a reputable brand usually pays off in reliability and plant performance.
Fluorescent Lights: Budget-Friendly and Effective
If you’re just starting your indoor gardening journey or focusing on growing herbs and vegetables indoors, fluorescent lights are your reliable, wallet-friendly companion. These tried-and-true fixtures have been helping gardeners for decades, and they’re still incredibly relevant today.
T5 and T8 fluorescent tubes work beautifully for seedlings, leafy greens, and herbs that don’t need intense light. They run cool, so you can place them close to your plants without worrying about heat damage. Compact fluorescent lights (CFLs) are perfect for lighting a small shelf garden or supplementing natural light in a windowsill setup.
The best part? Fluorescent lights are forgiving. They’re energy-efficient, affordable to replace, and give you room to learn without a significant investment. I’ve seen countless gardeners start their lettuce and basil under simple shop lights with fantastic results.
While they might not pack enough punch for fruiting plants like tomatoes or peppers, fluorescents shine when you’re nurturing young seedlings or maintaining a modest herb collection through winter months.

Other Options Worth Considering
While LED and fluorescent lights dominate indoor gardening today, you might encounter other options worth understanding. HID (High Intensity Discharge) lights, including metal halide and high-pressure sodium bulbs, were once the gold standard for serious indoor growers. They produce excellent light intensity and coverage, making them suitable for larger setups or commercial operations. However, they generate significant heat, consume more electricity, and require specialized fixtures with ballasts. Unless you’re managing a substantial growing space, the newer LED technology typically offers better value and convenience.
One type to definitively avoid is traditional incandescent bulbs. Despite being inexpensive upfront, they waste energy by producing far more heat than usable light for plants. They’ll quickly drive up your electricity bill while potentially burning your plant’s leaves.
For specialty situations, consider options like sulphur plasma lamps for exceptionally large spaces or ceramic metal halide bulbs if you already own compatible fixtures. Some gardeners also swear by T5 fluorescent tubes for seedlings and propagation, though LED alternatives now match their performance.
The best choice ultimately depends on your specific needs, budget, and growing space. Start with what fits your situation today, and remember that you can always upgrade as your indoor garden evolves.
Photoperiod Management: Giving Your Plants the Right Day and Night Cycle
Short-Day, Long-Day, and Day-Neutral Plants
Understanding how your plants respond to daylight hours is like discovering their internal clock—and it makes all the difference when you’re growing indoors! Plants actually fall into three main categories based on their lighting needs, and knowing which group your favorites belong to will help you set up the perfect lighting schedule.
Short-day plants are a bit misleadingly named—they actually need long, uninterrupted periods of darkness to trigger flowering or fruiting. Think of poinsettias, chrysanthemums, and many holiday cacti. These plants typically bloom in fall or winter when nights naturally lengthen. If you’re growing them indoors, you’ll want to provide 12-14 hours of darkness daily during their blooming period.
Long-day plants work the opposite way. They flower when days are longer and nights are shorter, mimicking spring and early summer conditions. Popular indoor varieties include many herbs like dill and spinach, plus some flowering houseplants. These beauties need around 14-16 hours of light to really thrive and produce blooms.
Then we have day-neutral plants—the easy-going members of the plant world! These don’t base their flowering on day length at all. Tomatoes, peppers, African violets, and most foliage houseplants fall into this category. They’ll grow and flower based on maturity and overall growing conditions rather than light duration, making them wonderfully forgiving for indoor gardeners.
Most common houseplants you’ll find at garden centers are either day-neutral or can adapt to typical indoor lighting schedules, which is great news for beginners!
Setting Up Your Light Timer for Success
Here’s the truth I learned after accidentally frying my first batch of seedlings: investing in a reliable timer is just as important as choosing the right grow lights. Without one, you’re either enslaving yourself to a twice-daily ritual of flipping switches or risking inconsistent light schedules that confuse your plants. Trust me, the $15 investment in a digital timer will save you countless headaches.
Most houseplants and herbs thrive on 12-16 hours of daily light, mimicking a typical spring or summer day. I recommend starting with 14 hours for foliage plants like pothos and philodendrons, while flowering plants such as African violets appreciate 12-14 hours. Seedlings and vegetable starts are the overachievers of the plant world, often benefiting from 16-18 hours of light during their early growth stages.
When setting your timer, choose consistent on and off times rather than randomly adjusting them. Plants appreciate routine just like we do. I set mine to turn on at 7 AM and off at 9 PM, which also lets me enjoy my little indoor jungle during my morning coffee and evening wind-down.
Here’s where it gets exciting: you can manipulate photoperiods to encourage specific growth stages. During the vegetative stage, most plants flourish under longer light periods (16-18 hours). When you’re ready for flowering plants to bloom, reducing light to 12 hours often triggers the transition. This technique works beautifully with tomatoes, peppers, and ornamental flowers.
One tip from my friend Maria, a commercial greenhouse manager: she marks her timers with colored tape to indicate which plants they’re controlling. Simple, but brilliant for managing multiple growing stations with different schedules.
Setting Up Your Indoor Garden Lighting System
Positioning Your Lights at the Perfect Height
Getting the height right can feel like a bit of a puzzle at first, but your plants will give you clear signals once you know what to watch for. The perfect distance depends on both your light type and what stage your plants are in.
For LED grow lights, I recommend starting with 18-24 inches above seedlings and young plants. As they mature, you can lower LEDs to 12-18 inches for most leafy greens and herbs. Fruiting plants like tomatoes or peppers appreciate lights positioned 12-16 inches away during flowering. The beauty of LEDs is they run cooler, so you have more flexibility.
Fluorescent lights need to be closer since they’re less intense. Position them 6-12 inches above your plants, keeping them on the closer end for seedlings. High-intensity discharge lights (HID) pack serious power and generate more heat, so maintain 24-36 inches of distance to prevent scorching.
Here’s what I’ve learned to watch for: If leaves look pale, stretched, or your plants are getting leggy and reaching upward, that’s your cue to lower the lights. On the flip side, if you notice leaf edges curling, brown spots, or bleached-looking patches on the foliage closest to the light, raise those fixtures immediately.
A simple trick I use is the hand test. Hold your hand at plant-top level for 30 seconds. If it feels uncomfortably warm, your plants feel it too. Remember, you can always adjust as you go. Most growers find themselves tweaking heights weekly during rapid growth phases, and that’s completely normal.
Creating Even Coverage for Multiple Plants
Getting light to multiple plants evenly can feel like a puzzle, but with a few smart strategies, everyone gets their fair share. The key is thinking about light distribution from above and considering how shadows form.
For uniform coverage, position your grow lights centrally above your plant collection, keeping them 12-18 inches from foliage tops. If you’re working with fluorescent tubes or LED bars, arrange them in parallel rows to eliminate dark spots between fixtures. Think of it like painting a room—you want overlapping coverage without gaps.
Here’s a trick I learned from fellow indoor gardeners: rotate your plants by a quarter turn every few days. Those on the edges naturally receive less intense light, so rotation ensures each plant spends time in the prime center position. Mark your pots with a small dot to track which side faced the light last.
For oddly-shaped spaces like corners or narrow shelving units, consider using adjustable hanging lights or clip-on fixtures that can angle toward specific areas. Vertical gardens benefit from side-mounted LED strips that illuminate plants from multiple angles. You’ll find creative solutions for small spaces often involve thinking three-dimensionally rather than just overhead lighting.
Reflective surfaces work wonders too. Positioning aluminum foil, white boards, or mirrors behind your plants bounces light back, effectively doubling coverage without additional fixtures. This simple addition can boost light availability by 20-30 percent, making a noticeable difference for plants positioned at the periphery of your setup.
Reading Your Plants: Signs You’re Getting It Right (or Wrong)
Warning Signs of Light Problems
Your plants are excellent communicators—you just need to know their language! When lighting isn’t quite right, they’ll show you specific signs that help pinpoint the problem.
Leaf burn appears as brown, crispy edges or bleached white spots, usually on leaves closest to your grow light. This happens when lights are too intense or positioned too close. The fix? Simply move your lights 6-12 inches higher and monitor for improvement over the next few days.
Stretching, or leggy growth, tells you plants are desperately reaching for more light. You’ll notice unusually long stems with large gaps between leaves. Increase your light intensity or move fixtures closer to encourage compact, healthy growth.
Pale or yellowing leaves often signal insufficient light, especially when new growth looks washed out. Before adding fertilizer, try extending your daily light period by 2-4 hours or upgrading to a more powerful fixture.
Stunted growth with small leaves suggests your plants aren’t getting enough energy from photosynthesis. This commonly occurs when lights are too weak for the plant type you’re growing.
Remember, these adjustments take time to show results—give your plants at least a week to respond before making additional changes. Trust your observations, and don’t be afraid to experiment a little!
When Your Plants Are Thriving
You’ll know you’ve got your lighting just right when your indoor plants start showing off their best growth! Healthy foliage is your first clue—leaves should display rich, vibrant colors that match what you’d expect from that particular variety. When plants receive proper light, they develop strong, sturdy stems that stand upright rather than leaning or reaching desperately toward the nearest window.
Another wonderful sign is consistent, balanced growth all around the plant. You shouldn’t see one side growing more vigorously than the other, which often happens when lighting is uneven. New leaves will emerge at a healthy pace, not too slowly (which suggests insufficient light) but not so rapidly that the plant looks stretched and weak.
Flowering plants are particularly telling indicators. When photoperiods are managed correctly, they’ll bloom right on schedule, producing abundant, colorful flowers. I remember chatting with indoor gardener Maria Chen, who told me the moment her African violets started blooming consistently under her new setup, she knew she’d finally cracked the code.
Watch for compact, proportional growth patterns too. Plants getting adequate light maintain their natural shape beautifully, with appropriate spacing between leaf nodes. This confident, thriving appearance is your reward for dialing in those lighting conditions perfectly!
Expert Insights: Interview with an Indoor Gardening Specialist
We sat down with Maria Chen, a horticulturist with over fifteen years of experience helping home gardeners succeed with indoor growing, to discuss the most common lighting challenges she encounters.
What’s your top lighting tip for someone just starting with indoor gardening?
Start simple and observe your plants closely. Many beginners overthink it and buy expensive equipment right away. I always recommend starting with one good quality LED grow light positioned about 12 to 18 inches above your plants. Watch how they respond over a week or two. Are the leaves reaching upward? That’s good. Are they pale or stretching awkwardly toward the light? Adjust accordingly. Plants are excellent teachers if we pay attention.
What’s your favorite type of grow light for home use?
Hands down, full-spectrum LEDs. They’ve come so far in recent years and are now affordable for everyone. They run cool, last for years, and provide everything most houseplants and vegetables need. I use them in my own home and recommend them for hydroponic setups too. The energy savings alone pay for themselves within a year.
What encouragement would you give someone struggling with indoor plant lighting?
Remember that lighting problems are usually the easiest to fix in indoor gardening. Unlike outdoor conditions, you have complete control. If something isn’t working, you can simply move the light closer, add another fixture, or adjust the timer. I’ve seen countless gardeners transform struggling plants into thriving specimens just by making small lighting adjustments. Don’t get discouraged by initial setbacks. Every experienced indoor gardener has killed plants while learning. The key is observing, adjusting, and trying again. You’ll figure out what works in your specific space, and before long, you’ll be the one giving advice to others.
You’ve now got everything you need to transform your indoor space into a thriving garden, no matter the season or how much natural light filters through your windows. Remember, finding the perfect lighting setup is rarely about getting it right on the first try. It’s about observation, adjustment, and learning what your specific plants are telling you through their leaves, stems, and growth patterns.
Start simple. Choose one type of light that fits your budget and space, set a basic photoperiod schedule, and pay attention to how your plants respond over the next few weeks. Notice a plant stretching toward the light? Move it closer. Seeing compact, vibrant growth? You’re on the right track. Every experienced indoor gardener started exactly where you are now, making small tweaks and celebrating each success along the way.
The beauty of indoor gardening is that it’s forgiving. Plants are remarkably adaptable, and most lighting mistakes are easily corrected once you spot them. Don’t be afraid to experiment with different bulb positions, adjust your timers by an hour or two, or try supplemental lighting in that darker corner you’ve been eyeing.
Your indoor gardening journey is uniquely yours, and we’d love to be part of it. Share your lighting setups, your victories, and even your “oops” moments with our community. Your experience might be exactly what another gardener needs to hear. Happy growing, and remember that every light you switch on is helping something beautiful flourish.