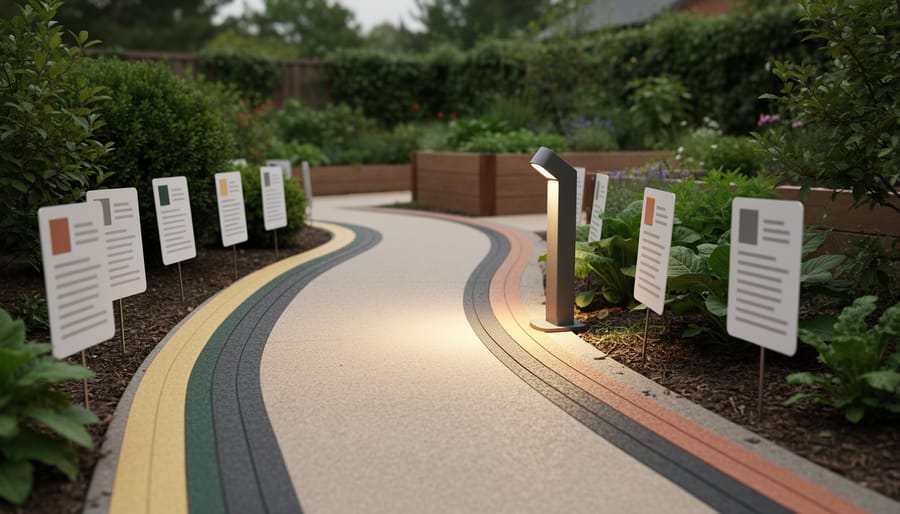
Creating a safe, independently navigable garden for someone with low vision starts with the right adaptive equipment: high-contrast tactile path markers, large-print plant labels, color-differentiated edging, and motion-sensor lighting that together transform a standard outdoor space into an accessible sanctuary. Installing these wayfinding tools takes about a weekend and requires no specialized construction skills, just careful planning and attention to how visual cues work for people with varying degrees of sight loss.
Whether you’re an occupational therapist designing therapeutic gardens, a family member adapting a loved one’s favorite outdoor retreat, or someone with low vision reclaiming your own gardening independence, the equipment landscape has expanded dramatically. What once meant expensive custom solutions now includes affordable, weather-resistant options that blend seamlessly into garden design while delivering the sensory contrast needed for confident navigation.
The real breakthrough isn’t just having adaptive equipment available. It’s understanding which combinations work for specific vision conditions and mobility patterns, then installing them in a sequence that builds a complete wayfinding system rather than scattering random helpful items around the yard. A tactile border means little without consistent lighting. Color contrast loses value if pathways don’t follow logical sight lines.
This guide walks you through the entire process, from assessing your garden’s specific challenges to testing your finished installation with the person who’ll actually use it. Similar to how thoughtful tool selection makes gardening for seniors more enjoyable and sustainable, the right adaptive equipment doesn’t just solve problems. It opens up the profound pleasure of spending time among plants, soil, and growing things.
Understanding Low-Vision Wayfinding Needs in Garden Spaces
Wayfinding in a garden means orienting yourself, recognizing where paths lead, and moving safely from one spot to another without getting lost or encountering unexpected obstacles. For someone with low vision, this straightforward task becomes genuinely challenging outdoors because gardens lack the predictable structure of indoor spaces. Inside, you can count doorways, follow a wall, or rely on consistent lighting. Gardens shift constantly. Sunlight moves across paths, creating deep shadows one moment and blinding glare the next. Trees sway, changing the pattern of light on the ground. What looks like solid earth might be a shallow step down, and a gravel path can disappear visually into a similarly colored flower bed.
Depth perception becomes unreliable when contrast fades in midday sun or twilight, making it hard to judge whether that dark patch ahead is a shadow, a hole, or simply wet pavement. Uneven terrain compounds the problem. A gentle slope that’s obvious to someone with full vision can be invisible to someone relying on limited contrast sensitivity, yet it’s enough to throw off balance. Edges between lawn and path blur together when both are similar tones, and without clear boundaries, stepping off a walkway happens without warning.
Indoor low-vision aids like high-contrast tape on stair edges or tactile floor markers work because the environment stays controlled. Gardens demand equipment that withstands weather, functions in variable light, and provides cues strong enough to compete with visual noise from plants, mulch, and moving shadows. That’s why adaptive garden wayfinding requires purpose-built solutions rather than repurposed indoor tools.
Essential Tools and Materials for Low-Vision Garden Wayfinding
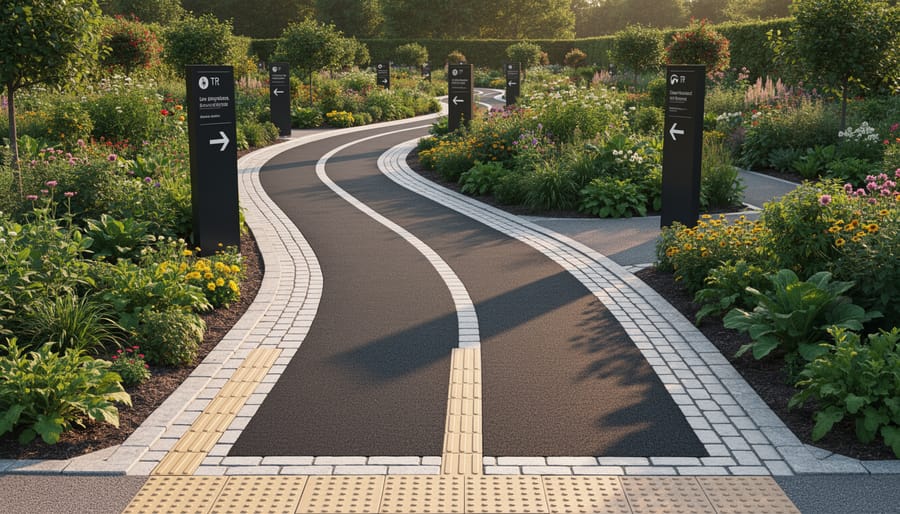
Creating an effective wayfinding system requires specific equipment beyond your essential gardening tools. The right combination of tactile, visual, and sensory materials transforms garden pathways into navigable routes that build confidence and independence.
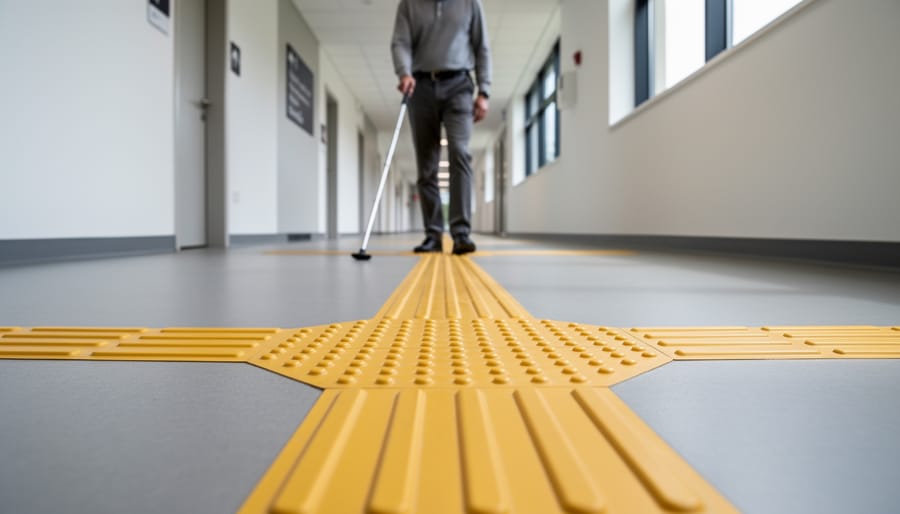
- Tactile path markers: Textured pavers, outdoor tactile tiles, rope edging, or carved wood strips that define pathway boundaries through touch and contrast
- High-contrast materials: White limestone chips against dark mulch, yellow rope lighting, black edging against light gravel, or painted borders in bold color combinations
- Lighting components: Solar pathway lights with diffused covers, low-voltage LED strips, motion-activated fixtures, and waterproof junction boxes for even illumination without glare
- Sensory markers: Wind chimes, fragrant herb plantings at decision points, textured handrails, outdoor audio markers, or small water features that provide auditory cues
- Signage supplies: Weather-resistant boards, outdoor paint in high-contrast colors, vinyl letters at least 2-3 inches tall, tactile adhesive dots, and optional Braille label makers
- Installation materials: Outdoor adhesive, concrete for securing posts, mounting hardware, weatherproof electrical connectors, and leveling sand for pavers
Budget-conscious gardeners can adapt many household items effectively. Painted wooden stakes, textured rope from marine supply stores, reflective tape designed for outdoor use, and solar lights from home improvement centers provide excellent starting points. White rocks collected from landscaping projects create high-contrast edging against dark soil at no cost.
For purchased specialty items, focus first on the highest-traffic routes. Outdoor tactile tiles designed for public spaces offer durability but cost more than DIY textured concrete pavers you can create using rubber mats as molds. Similarly, professional-grade rope lighting provides consistent illumination, while strategically placed solar stakes offer a simpler entry point.
Keep installation tools simple: a rubber mallet for setting pavers, a level for ensuring even surfaces, wire cutters and connectors for lighting, and a drill with masonry bits for mounting signage. A measuring tape and chalk line help maintain consistent spacing between markers, which matters more than perfection in individual placements.
Safety Considerations Before Installation
Before you begin installing any wayfinding equipment, take time to address several critical safety factors that could inadvertently create new hazards while trying to solve navigation challenges. The goal is to enhance accessibility without introducing risks that undermine independence.
Trip Hazards During Installation
Keep all tools, materials, and equipment well clear of pathways while you work. Partially installed markers, loose cables, and temporary edging can create serious trip risks for anyone with low vision who continues using the garden during the installation process. Complete one section fully before moving to the next, and mark off work areas with barriers that extend at least three feet beyond the actual installation zone.
Electrical Safety for Lighting Systems
If you’re installing low-voltage or solar lighting, always use outdoor-rated components with proper waterproof connections. Bury cables at least six inches deep and route them away from areas where gardeners will be digging. For any 120-volt systems, hire a licensed electrician, outdoor electrical work requires GFCI protection and proper grounding to prevent shock hazards in wet conditions.
Material Selection
Choose materials carefully to avoid unintended consequences. Shiny metal edging or glossy pavers can create blinding glare in direct sunlight, while dark surfaces like black rubber or metal absorb heat and may become uncomfortably hot. Select matte-finish materials in moderate tones that provide contrast without extremes. Test textured surfaces to ensure they’re distinct enough to be useful but not so rough they could cause abrasions during a stumble.
When to Consult Specialists
Bring in an occupational therapist or certified orientation and mobility specialist before finalizing your design if the garden user has complex needs, uses a white cane, or has conditions affecting balance alongside vision loss. These professionals can identify spacing requirements, appropriate contrast levels, and potential hazards you might overlook.
Step-by-Step Process for Installing Low-Vision Wayfinding Systems
Step 1: Assess Your Garden Layout and User Needs
Start by walking every path in your garden with a notebook or smartphone camera, documenting the routes as they actually get used rather than how they were originally designed. Many gardens develop informal shortcuts or preferred pathways that differ from the initial layout, and these well-worn routes should receive priority attention.
Mark decision points where paths intersect or split, entrances to different garden areas, and spots where direction changes occur. These junctions confuse orientation most often, especially when lighting changes or shadows obscure visual cues. Note the surface type at each point, gravel transitions to concrete, for example, since consistent surfaces help with navigation while abrupt changes can disorient.
Identify genuine hazards: steps without warning strips, low-hanging branches at head height, protruding roots, hose connections crossing paths, and areas where tree canopies create sudden darkness. Photograph each concern from a standing position at the approach angle.
Prioritize routes by asking which paths lead to essential destinations like seating areas, tool sheds, or frequently tended beds, and which get used multiple times per day. A pathway to the compost bin used twice daily needs clearer marking than an occasional route to ornamental beds. Consider complexity too, straight paths with consistent surfaces need less intervention than winding routes through dense plantings.
Step 2: Create High-Contrast Pathway Edges
Start by defining your path edges with materials that create both visual and physical boundaries. The goal is a continuous line of contrast that remains visible across different lighting conditions and seasons.
For visual contrast, choose edging materials at least three shades darker or lighter than your pathway surface. White limestone blocks against dark gravel paths work well, as do black rubber borders alongside concrete. Install these markers flush with the ground on one side and slightly raised (1-2 inches) on the other to create a tactile edge gardeners can detect with a cane or foot.
Rope lighting offers excellent nighttime guidance. Run waterproof LED rope lights along one consistent side of your paths, mounting them in shallow channels or clips just above ground level. Position lights to illuminate the path edge without creating glare, spacing them every 6-8 feet for continuous coverage.
Textured edging strips provide physical cues without relying on vision. Commercial outdoor tactile strips or DIY solutions like half-buried rope, corrugated metal edging, or rough-cut timber create detectable boundaries. Install these on the outer path edge where feet or canes will naturally encounter them first, securing firmly to prevent shifting that could create trip hazards.
Step 3: Install Tactile Navigation Markers at Key Points
Once pathway edges are defined, the next priority is marking critical decision points where gardeners need to pause and orient themselves. Tactile markers act as touch-readable landmarks that communicate “you are here” through texture changes underfoot or at hand level.
Start at your garden entrance. Install a textured welcome mat or a row of three deeply grooved pavers perpendicular to the path direction. This creates an unmistakable threshold that signals the beginning of the garden navigation system. At pathway intersections, place distinct textured tiles in contrasting patterns, raised dots for left turns, parallel grooves for straight ahead, diagonal ridges for right turns. Consistency matters more than the specific pattern you choose.
Mark seating areas and rest spots with circular or square textured zones that extend twelve inches beyond the furniture edge. Carved wood rounds, stamped concrete, or commercial rubber tactile tiles all work well. Install these flush with the ground surface to prevent tripping, securing them with outdoor adhesive or setting them in sand base.
Test each marker by walking routes blindfolded. If you cannot confidently identify locations through touch alone, the markers need stronger definition or clearer placement.
Step 4: Add Multi-Sensory Orientation Cues
Multi-sensory cues transform your garden from merely visible into genuinely navigable. These elements provide wayfinding information through sound, scent, and touch, channels that remain reliable when vision limitations make visual markers difficult to interpret.
Start by positioning audio cues at major decision points. Solar-powered wind chimes work beautifully at pathway intersections, with different tones marking different routes (brass chimes for the herb garden path, bamboo for the seating area). Mount them 6-7 feet high where breezes activate them consistently. Small recirculating water features create steady orientation sounds, the bubble of a corner fountain signals “turn here” more reliably than any sign.
Create scent stations every 15-20 feet along primary routes. Plant strongly aromatic varieties like lavender, rosemary, or lemon balm in raised beds at waist height, positioned on the same side throughout your garden for consistency. The fragrance provides both location confirmation and directional guidance.
Install smooth wooden handrails along your longest pathways, even where slopes seem minimal. Rails offer continuous tactile guidance and boost confidence dramatically. Attach textured wraps or carved notches at transition points, three grooves might signal “approaching seating area” while two indicate “pathway junction ahead.”
Position these cues intentionally. They shouldn’t overwhelm, but should occur frequently enough that users never feel lost between markers.
Step 5: Set Up Adaptive Lighting Solutions
Good lighting transforms a garden from off-limits after dusk to safely navigable throughout the day. Start by installing solar or low-voltage LED path lights every 6-8 feet along main routes, positioning fixtures low (12-18 inches) to illuminate the ground without casting confusing shadows or creating glare. Aim light downward at pathway edges rather than into users’ eyes.
At intersections and transitions between surfaces, add brighter marker lights to signal decision points. Avoid dramatic contrasts between lit and dark areas, even, consistent illumination prevents disorientation. If using battery-powered systems, consider battery compatibility challenges when purchasing multiple fixtures, or choose compatible batteries from the start to simplify maintenance.
Place uplights behind seating areas to define boundaries without shining directly into faces. Test your system at twilight and full darkness, walking routes yourself with partially closed eyes to identify harsh spots or confusing shadows that need adjustment.
Step 6: Create Large-Print, High-Contrast Signage
Effective garden signage for low vision starts with letter size: aim for 2 to 3 inches tall, using simple sans-serif fonts like Arial or Helvetica that maintain clarity at a distance. Choose high-contrast color combinations, yellow text on black backgrounds, white on dark blue, or black on bright yellow all work well. Mount signs at consistent heights (48 to 60 inches) with matte finishes to prevent glare.
For enhanced accessibility, add raised lettering or Braille labels below visual text. Outdoor-grade acrylic or weather-resistant aluminum withstands moisture and sun exposure better than wood. Position signs at decision points where pathways split, near garden entrances, and beside seating areas. Test readability by viewing signs from the typical approach distance in varying light conditions, then adjust placement or contrast as needed.
Verification and Testing Your Wayfinding System
Once you’ve installed your adaptive equipment, rigorous testing ensures it actually works for users with low vision. Don’t skip this step, what seems obvious to fully sighted installers can present invisible barriers to someone navigating with limited vision.
Begin testing your wayfinding system systematically using this verification checklist:
- Walk each complete route from start to finish during bright sunlight, noting where glare obscures markers or lighting becomes redundant.
- Repeat the same routes at dusk and after dark to verify lighting coverage, checking for shadowed gaps between fixtures.
- Test every intersection and decision point to confirm tactile markers appear before the junction, giving users advance warning.
- Verify pathway edges remain detectable throughout their length, with no breaks in contrast or texture longer than two feet.
- Confirm directional cues appear at regular intervals (typically every 15-20 feet on long paths) so users can self-correct orientation.
The most valuable testing comes from people who’ll actually use the system. If possible, invite someone with low vision to navigate your garden while you observe quietly. Watch where they hesitate, slow down, or reach out to steady themselves, these moments reveal gaps in your wayfinding coverage. Ask them to verbalize what they’re noticing: “I can feel the edge here” or “I’m not sure which way to turn” tells you what’s working and what needs adjustment.
Successful wayfinding looks like confident, steady movement without frequent pauses to reorient. Users should move fluidly from one marker to the next, maintaining their trajectory without veering off-path or backtracking. If someone completes a route independently on their second attempt, your system is likely effective.
Document problem areas with photos and notes, then make targeted adjustments, adding an extra tactile marker, boosting lighting at a confusing turn, or increasing contrast on a sign. Retest after each change until navigation becomes genuinely intuitive.
Expert Insight: Designing for Independence and Joy
We spoke with Maria Chen, an occupational therapist and certified landscape designer who has spent fifteen years creating adaptive gardens across North America. Her approach challenges the assumption that safety must look clinical.
“The biggest mistake I see is treating adaptive equipment like medical devices bolted onto a garden,” Maria explains. “When someone with low vision walks a path lined with beautiful fragrant lavender that also serves as a textural guide, or follows a curving border of smooth river rocks that contrast visually with decomposed granite, they’re experiencing a garden, not navigating an obstacle course.”
Maria emphasizes that the same tools that make life easier in adaptive gardens work universally. “High-contrast edges help everyone see paths clearly in twilight. Textured markers at intersections prevent anyone from taking a wrong turn. When we design for people with low vision, we create spaces that are more intuitive and enjoyable for all visitors.”
Her key advice: involve users from the beginning. “I’ve watched gardeners with low vision identify solutions I never would have considered, like placing aromatic herbs at decision points or using solar lights that hum slightly when charging. Their lived experience creates gardens that truly support independence, and independence creates joy.”
Common Questions About Low-Vision Garden Navigation
Gardeners often have practical questions when planning adaptive wayfinding systems. Here are answers to the most common concerns we hear from families, occupational therapists, and garden designers working to create inclusive outdoor spaces.
How much does a basic low-vision wayfinding system cost?
A starter system for a small garden typically runs between $200 and $600, depending on whether you choose solar lighting or low-voltage wired options, and whether you’re installing DIY tactile markers or purchasing commercial adaptive equipment. You can phase installation over several seasons to spread costs.
Will the equipment hold up through winter and rain?
Most outdoor-rated tactile markers, contrast edging, and lighting systems are designed for year-round exposure, but you’ll want to verify IP65 or higher weatherproofing ratings on electronic components. Textured pavers and raised borders require minimal maintenance beyond occasional cleaning to prevent debris buildup that might obscure tactile information.
Can I add wayfinding to my existing garden without major renovation?
Absolutely. Retrofitting is often simpler than starting from scratch because pathways already exist. Focus on adding high-contrast rope lighting along current edges, installing tactile markers at existing intersections, and upgrading signage rather than rebuilding hardscaping.
Should I involve the person with low vision in planning the system?
Yes, their input is essential. They can identify which routes they use most, which transitions feel confusing, and what sensory cues work best for their specific vision condition. Walk the garden together at different times of day to understand their experience firsthand.
Maintenance requirements vary by equipment type. Tactile pavers and textured surfaces need periodic sweeping to remove leaves and debris that could mask the navigational information. Solar pathway lights require occasional cleaning of panels and battery replacement every two to three years. High-contrast paint on signage or edging may need refreshing every few seasons, especially in areas with intense sun exposure. Budget about an hour monthly for upkeep checks and minor adjustments.
The most successful installations start small and expand based on real-world use. Many families begin with wayfinding equipment along one heavily-used route, such as the path from the house to a favorite seating area, then gradually extend the system as they observe how well different solutions work and what gaps remain.
Creating a garden that welcomes people with low vision isn’t just about safety, it’s about restoring independence and reconnecting someone with the joy of being outdoors. When you install thoughtful wayfinding equipment, you’re giving a friend, family member, or client the freedom to explore, relax, and garden confidently without constant assistance or anxiety.
You don’t need to transform your entire landscape at once. Start with the pathway from the door to a favorite seating area or the route to the vegetable beds. Install high-contrast edging, add a few tactile markers at the gate and bench, and see the difference it makes. These small changes create immediate impact.
Remember that your wayfinding system will need seasonal adjustments. Overgrown plants can obscure markers, autumn leaves may cover tactile cues, and winter snow changes everything. Plan to walk your routes quarterly, checking that lighting still works, signs remain legible, and pathways stay clearly defined.
An accessible garden enriches everyone who visits. Clear pathways help elderly relatives, bright signage guides young children, and thoughtful design simply makes the space more pleasant for all. When you create independence for one person, you’ve made your garden better for everyone.