Transform your backyard into a thriving ecosystem by layering companion plants to maximize vertical space and create natural pest barriers. Build healthy soil through continuous sheet mulching with fallen leaves, grass clippings, and kitchen scraps, establishing a self-sustaining nutrient cycle that eliminates the need for chemical fertilizers. Design strategic water-catchment zones using swales and rain gardens that capture rainfall and gradually release moisture to surrounding plants. Integrate perennial food forests with nitrogen-fixing plants like clover and beans alongside fruit trees and berry bushes, creating a regenerative system that improves soil health year after year.
This living laboratory approach to gardening doesn’t just grow food—it rebuilds soil, supports local wildlife, and captures carbon while producing abundant harvests in spaces as small as a typical suburban yard. By mimicking natural forest systems, even modest backyard gardens can become powerful tools for environmental restoration while providing fresh, nutrient-dense produce steps from your kitchen door.
Let’s explore how to transform your outdoor space into a regenerative oasis that works with nature, not against it.
Building Living Soil: The Foundation of Regenerative Gardening
No-Till Methods for Small Spaces
No-till gardening in small spaces is easier than you might think, and it’s a fantastic way to nurture healthy soil while growing abundant produce. Instead of disturbing the soil through traditional tilling, focus on building layers from the top down, much like nature does in a forest.
Start by laying cardboard directly over your existing soil or grass, ensuring the pieces overlap to prevent weeds from sneaking through. Next, add a layer of compost about 2-3 inches deep, followed by a layer of organic mulch like straw, leaves, or wood chips. This layering technique, often called “lasagna gardening,” creates a perfect environment for beneficial soil organisms.
For planting, simply pull back the mulch layer and create small pockets in the compost for your seeds or transplants. As the seasons progress, continue adding organic matter to the top of your garden beds through mulching and composting. This mimics the natural soil-building process and encourages earthworms and beneficial microorganisms to do the tilling for you.
In tight spaces, use vertical elements like trellises to maximize growing area while maintaining the no-till approach. Container gardens can also follow no-till principles – simply add new compost to the top of pots each season rather than emptying and refilling them completely.
Remember to keep your garden soil covered at all times, either with growing plants or mulch, to protect the living soil ecosystem you’re creating.
Creating Your Own Compost System
Creating a thriving compost system is easier than you might think, and it’s the cornerstone of any regenerative garden. Whether you’re working with a spacious yard or interested in small-scale composting, you can start building your soil fertility today.
Begin by choosing a sunny to partially shaded spot in your yard for your compost bin. You can purchase a ready-made bin or build a simple three-bin system using wooden pallets. The ideal setup includes a “collecting” bin for fresh materials, an “active” bin for decomposing matter, and a “finished” bin for ready-to-use compost.
Layer your materials using the 3:1 ratio – three parts “browns” (dried leaves, straw, or cardboard) to one part “greens” (kitchen scraps, fresh grass clippings, or coffee grounds). Keep your pile as moist as a wrung-out sponge and turn it every few weeks to accelerate decomposition.
Remember to avoid meat, dairy, or oily foods in your pile, as these can attract pests. Instead, focus on vegetable scraps, eggshells, and yard waste. Your compost is ready when it’s dark, crumbly, and smells earthy – typically in 3-6 months.
For best results, collect fallen leaves in autumn and store them to balance your green materials throughout the year. Soon you’ll have a continuous supply of nutrient-rich compost to feed your garden naturally.
Plant Diversity and Companion Planting
Vertical Layering Techniques
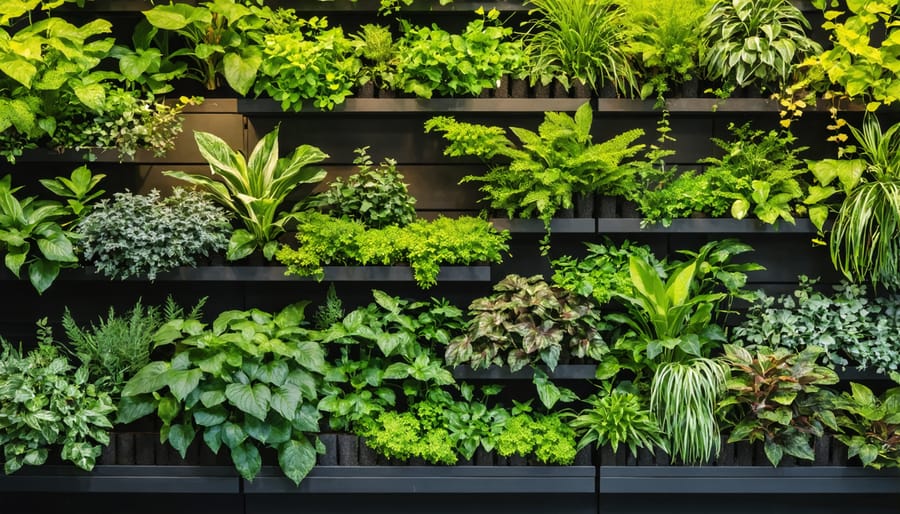
Vertical layering is one of the most effective ways to maximize your garden’s productivity while maintaining healthy soil and biodiversity. By thinking in terms of layers – from ground cover to tall trees – you can create a thriving ecosystem in even the smallest backyard space.
Start with the tallest layer: consider adding dwarf fruit trees or tall perennials like sunflowers as your canopy layer. Below these, incorporate medium-height plants like tomatoes, peppers, or berry bushes. The middle layer creates partial shade for lower-growing plants while utilizing vertical space efficiently.
The next layer down should include bush beans, herbs, and leafy greens that thrive in dappled sunlight. At ground level, plant low-growing vegetables like lettuce, strawberries, and root crops. Finally, don’t forget about ground cover plants like creeping thyme or mint (in contained areas) that protect soil moisture and prevent erosion.
Climbing plants add another dimension to your vertical garden. Try growing pole beans or cucumbers up trellises placed behind shorter plants. This approach not only saves space but also creates beneficial microclimates throughout your garden.
Remember to consider the sun’s path when planning your layers. Taller plants should typically be positioned on the north side of your garden to prevent excessive shading of shorter plants. This thoughtful arrangement ensures all plants receive appropriate sunlight while working together as a cohesive system.
Creating Plant Guilds
Creating plant guilds is like arranging a harmonious neighborhood where every plant supports its neighbors. Think of it as nature’s version of a successful community garden, where different species work together to create a thriving ecosystem.
Start by selecting a central plant, typically a fruit tree or large perennial, which will act as your guild’s anchor. Around this, arrange companion plants in concentric circles based on their functions. Include nitrogen-fixers like clover or beans to enrich the soil, dynamic accumulators such as comfrey to mine nutrients from deep underground, and aromatic herbs like lavender or thyme to attract pollinators and deter pests.
Consider the vertical space too – tall plants can provide shade for shade-loving species below. For example, a classic guild might include an apple tree surrounded by comfrey, daffodils for pest control, strawberries as ground cover, and nitrogen-fixing lupines.
Layer your guild with:
– Tall plants for structure and shade
– Medium-height plants for food production
– Ground covers to protect soil
– Root crops to utilize different soil depths
– Climbing plants to maximize space
Remember to observe how your plants interact and adjust accordingly. Successful guilds often mimic natural forest edges, where different species coexist in mutually beneficial relationships. Start small with three to five complementary plants, and expand your guild as you gain confidence in managing these plant communities.
Water Management and Conservation
Rainwater Harvesting Systems
Harvesting rainwater is one of the smartest ways to make your garden more sustainable while reducing your water bills. Start with a basic setup by connecting your downspouts to rain barrels – these can be purchased or made from food-grade containers. A single inch of rain on a 1,000-square-foot roof can yield an impressive 600 gallons of water!
Position your collection barrels on elevated platforms to create natural water pressure for irrigation. Install overflow valves and mosquito screens to prevent issues during heavy rains and warm seasons. Consider linking multiple barrels together with simple PVC piping to increase your storage capacity.
For more advanced systems, incorporate a first-flush diverter to filter out initial roof debris, ensuring cleaner water for your plants. Direct overflow into rain gardens or swales to maximize water retention in your landscape. During dry spells, this stored rainwater becomes invaluable for maintaining your garden without relying on municipal water.
Remember to check local regulations regarding rainwater collection, as requirements vary by region. Many areas offer incentives for installing these systems, making them even more cost-effective.
Mulching Strategies
Mulching is a game-changer for regenerative gardens, helping retain precious moisture while building healthy soil. The key is layering different organic materials to create a protective blanket over your soil. Start with a thin layer of nitrogen-rich materials like fresh grass clippings or spent coffee grounds, then add carbon-rich materials like fallen leaves or straw on top.
For vegetable beds, aim for a 2-3 inch layer of mulch, keeping it slightly away from plant stems to prevent rot. Wood chips work wonderfully for pathways and around perennial plants, breaking down slowly to feed the soil over time. In autumn, try sheet mulching by laying down cardboard covered with compost and fallen leaves – this smothers weeds while enriching your soil for spring planting.
Living mulches, like clover or creeping thyme between garden rows, offer multiple benefits: they retain moisture, suppress weeds, and add nutrients to the soil as they grow. For small spaces, even kitchen scraps like shredded newspaper or cardboard can be effective mulch when covered with compost. Remember to replenish your mulch layer as it breaks down, maintaining that crucial soil protection year-round.
Creating Closed-Loop Systems
Seed Saving
Saving seeds from your garden is like capturing a piece of nature’s magic while ensuring next season’s bounty. Start by selecting the healthiest, most vigorous plants for seed collection. For beginners, tomatoes, peppers, beans, and peas are excellent choices as they’re self-pollinating and typically produce reliable offspring.
To collect seeds, wait until they’re fully mature. For most vegetables, this means leaving them on the plant longer than you would for eating. Tomato seeds need fermenting – simply scoop them out with the pulp into a jar, add water, and let them sit for a few days until a film forms on top. Rinse the seeds thoroughly and dry them on a paper towel.
For flowers and herbs, wait until seed heads turn brown and feel dry. Collect them on a sunny day after morning dew has evaporated. Place small seeds in paper envelopes and larger seeds in glass jars. Always label containers with the plant variety and collection date.
Store your seeds in a cool, dark, and dry place. A dedicated drawer in your refrigerator works well, but ensure seeds are completely dry before storage to prevent mold. Most seeds remain viable for 2-5 years when properly stored, though germination rates may decrease over time.
Remember to save seeds from open-pollinated varieties rather than hybrids for the most reliable results. Start small, and gradually expand your seed-saving practice as you gain confidence.
Garden Waste Recycling
Every garden produces waste, but in regenerative gardening, we view these materials as valuable resources waiting to be transformed. Your garden trimmings, fallen leaves, and even kitchen scraps can be repurposed in creative ways that benefit your garden ecosystem.
Start by creating multiple compost piles for different materials. Woody prunings can be chipped or broken down to create mulch for pathways or moisture-retaining ground cover. Soft green materials like grass clippings and young weeds make excellent nitrogen-rich additions to your compost heap. Even diseased plants can be useful – just ensure they go through a hot composting process to neutralize any pathogens.
Fallen leaves are garden gold! Create leaf mold by collecting leaves in autumn and storing them in wire bins or large bags with holes for airflow. After a year, you’ll have rich, crumbly material perfect for soil amendment. Dead plant stalks can become natural trellises for climbing plants or habitat for beneficial insects during winter.
Consider setting up a vermiculture system using kitchen scraps to create nutrient-rich worm castings. Coffee grounds can be used as a slug deterrent or mixed into compost. Even eggshells can be crushed and added directly to garden beds as a calcium supplement.
Remember, the key to successful garden waste recycling is viewing every “waste” product as an opportunity to close the nutrient loop in your garden ecosystem.
Starting your regenerative backyard garden is more than just a hobby – it’s a meaningful step toward a more sustainable future. By implementing the practices we’ve discussed, from building healthy soil to creating biodiversity, you’re not just growing food; you’re nurturing an entire ecosystem in your backyard. Remember, every small action counts, whether it’s starting a compost pile, planting native species, or reducing water waste. Don’t feel pressured to transform your entire garden overnight. Begin with one area, learn from your experiences, and gradually expand your regenerative practices. Your garden will evolve into a thriving, self-sustaining space that benefits not only your household but also the broader environment. Take that first step today – your future self and the planet will thank you for it.