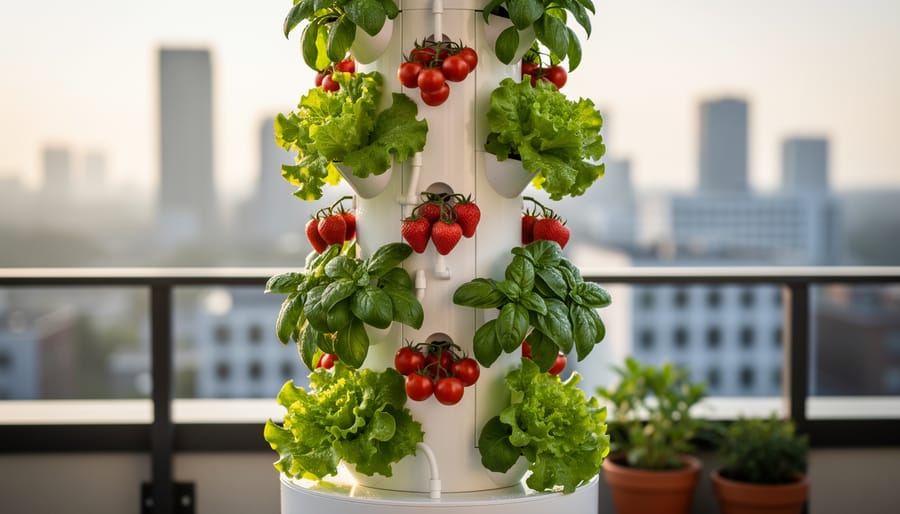
Picture a garden that climbs walls instead of sprawling across precious ground space, one that needs no soil and uses 90% less water than traditional gardening. That’s the promise of vertical gardening hydroponics, and it’s transforming how people grow food in apartments, patios, and even indoor spaces where conventional gardening simply won’t work.
If you’ve been eyeing those vertical gardening solutions but wondered how to make them more productive, combining them with hydroponics might be your answer. This approach stacks plants upward using nutrient-rich water instead of soil, letting you harvest lettuce, herbs, strawberries, and even tomatoes from a footprint smaller than a bookshelf.
The beauty of this method lies in its efficiency. Plants grow faster because their roots get direct access to oxygen and perfectly balanced nutrients. You’ll skip the weeding, reduce pest problems, and say goodbye to back-breaking bending and kneeling.
But here’s what most beginners want to know: is it complicated? Does it require expensive equipment? Can you really grow enough food to make it worthwhile?
The answers might surprise you. While vertical hydroponic systems range from simple DIY projects using PVC pipes to sophisticated commercial setups, you can start small and expand as you learn. We’ll walk you through everything from choosing the right system for your space to building your first tower garden, plus you’ll hear from growers who’ve made this technique work in real-world conditions.
What Makes Vertical Hydroponics Different from Traditional Growing
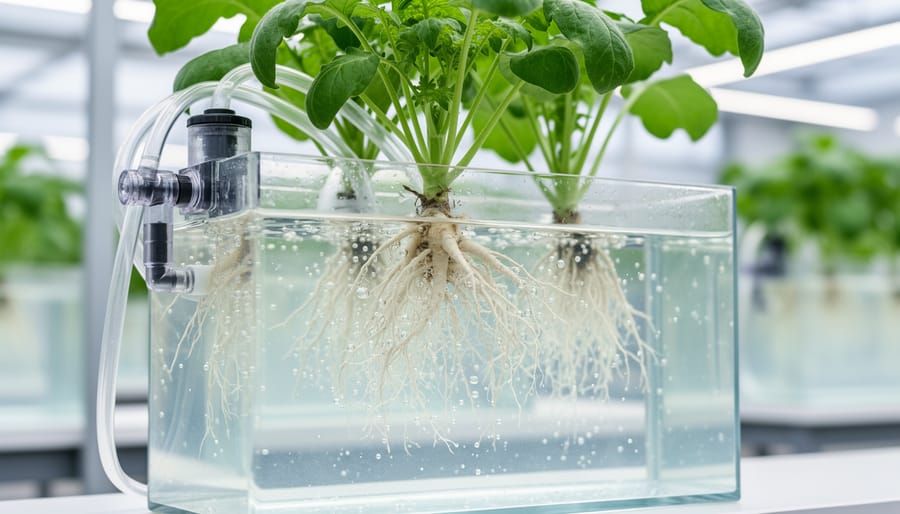
Vertical hydroponics blends two powerful growing methods into something greater than either alone. Instead of plants spreading across horizontal beds or sitting in individual containers, vertical hydroponics stacks multiple growing sites upward while delivering nutrients through water rather than soil. Think of it as building up instead of out, feeding plants through their roots with a precisely controlled liquid diet.
This approach differs fundamentally from regular vertical gardening, where you might train vines up trellises or mount soil-filled planters on a wall. Those methods still rely on soil or potting mix and traditional watering. Vertical hydroponics eliminates the soil entirely, replacing it with inert growing media and a nutrient-rich water solution that circulates through the system.
It also diverges from standard horizontal hydroponic setups. Traditional basic hydroponics principles apply here, plants grow in water-based nutrient solutions rather than soil, but conventional systems spread plants across tables or benches, consuming valuable floor space. Vertical hydroponics takes those same principles and rotates them 90 degrees, creating towers, walls, or tiered structures that multiply your growing area within the same footprint.
To understand what sets this method apart, a few core terms matter:
- Hydroponics
- A soil-free growing method where plant roots receive nutrients directly from water rather than extracting them from dirt. The controlled nutrient delivery typically accelerates growth compared to traditional gardening.
- Vertical Gardening
- Any technique that grows plants upward on structures like trellises, walls, or stacked containers to maximize space. When combined with hydroponics, it becomes exceptionally space-efficient.
- Growing Medium
- The inert material that anchors plant roots in hydroponic systems, such as clay pebbles, coconut coir, or rockwool. Unlike soil, it provides physical support without contributing nutrients.
- Nutrient Solution
- Water mixed with dissolved minerals that feeds hydroponic plants everything they need to thrive. You control the exact formula rather than relying on whatever nutrients happen to be in your garden soil.
The practical result? You can grow 20 lettuce plants in the floor space that would traditionally hold four. Your bedroom closet becomes a viable growing location. A small balcony supports a productive vegetable garden. That’s the core promise of vertical hydroponics, radical efficiency that makes serious food production possible almost anywhere.
The Real Benefits You’ll Experience
I switched from traditional raised beds to a vertical hydroponic setup last spring, and the difference shocked me. My 8×4 foot space now produces three times the harvest it did before, with less daily maintenance and virtually no weeding. Those aren’t theoretical benefits, they’re what you’ll actually notice within your first growing season.
The space savings alone will change how you think about growing food. A single six-foot tower can replace a 4×8 foot garden bed while producing comparable yields of lettuce, basil, or strawberries. If you’re working with a balcony, patio, or small yard, this transforms what’s possible. Many container gardening techniques struggle with vertical space, but hydroponic towers let you stack plants upward instead of spreading them out across precious square footage.
Your plants will grow noticeably faster than soil-grown counterparts. Lettuce that takes 60 days in a garden bed matures in 35 to 40 days hydroponically because roots access nutrients directly without searching through soil. I harvest baby greens three weeks earlier than my neighbor who gardens traditionally, and his plants are in full sun while mine are on a partially shaded deck.
Water conservation surprises most people. Vertical hydroponic systems use significantly less water than traditional gardens because they recirculate nutrients rather than letting water drain away or evaporate. I refill my 10-gallon reservoir once a week versus dragging out the hose daily for raised beds. In drought-prone areas, this matters.
Pest and disease issues drop dramatically. Soil-borne diseases disappear since there’s no soil. Slugs can’t climb smooth towers. Aphids still show up occasionally, but they’re easier to spot and rinse off when plants are at eye level instead of hidden in dense foliage.
The year-round potential changes everything if you bring systems indoors or into a greenhouse. Fresh basil in January isn’t a luxury, it’s Tuesday. You control temperature, light, and nutrients completely, eliminating the “growing season” concept altogether.
Types of Vertical Hydroponic Systems That Actually Work at Home
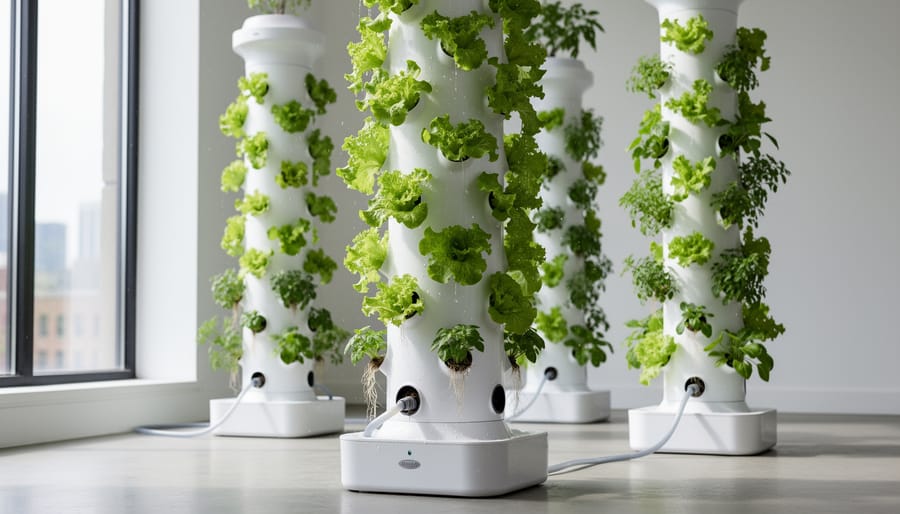
Tower Systems
Tower systems stack multiple growing sites vertically around a central column, creating a cylindrical structure that can hold 20 to 50 plants in just a few square feet of floor space. Water and nutrients flow from the top down through the tower, bathing each plant’s roots before recirculating back to a reservoir at the base.
These systems shine for herbs, lettuce, spinach, and other greens with compact root systems. You’ll typically see grows pods or pockets arranged in a spiral pattern up the tower, giving each plant adequate light exposure without shading its neighbors below.
Commercial options like the Tower Garden or Lettuce Grow automate much of the process with built-in timers and pumps, making them genuinely beginner-friendly if you don’t mind the $300 to $600 price tag. They’re plug-and-play, which matters when you’re still learning the basics.
DIY tower builds using PVC pipe and net cups cost $50 to $100 in materials and work surprisingly well once you dial in the pump timing. The trade-off is spending a weekend building rather than unboxing a finished product.
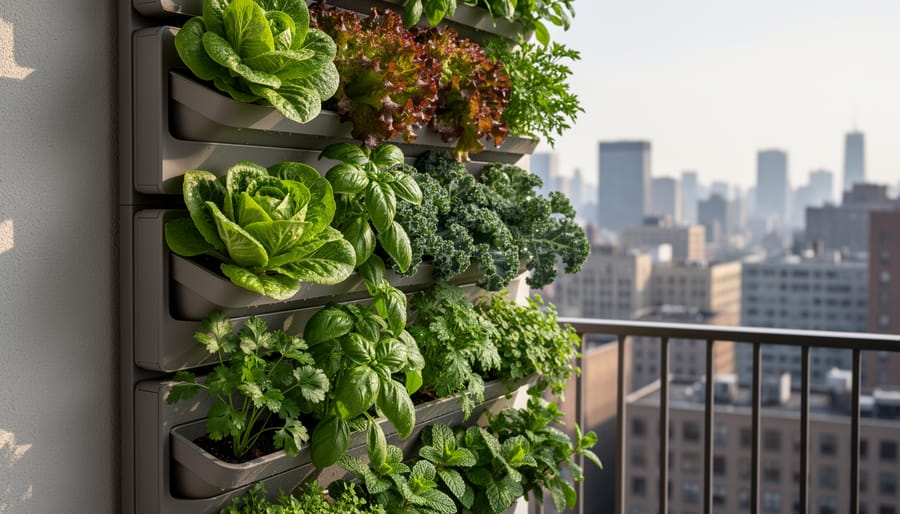
Wall-Mounted Panels
Wall-mounted panels are where vertical hydroponics truly shines for tight indoor environments. The Nutrient Film Technique system dominates this category, circulating a thin film of nutrient solution through slightly tilted channels where plant roots dangle. Picture a living wall of lettuce or herbs in your kitchen, using barely six inches of floor space.
These panels work beautifully because gravity does most of the work. The nutrient solution flows down the channels, bathing roots continuously before draining back to a reservoir below. No growing medium means lighter weight, so you can safely mount them on interior walls. Most commercial panel systems accommodate 20 to 50 plants in a 4×4 foot footprint.
The catch is that NFT demands attention to flow rates and pump reliability. If the pump fails for even a few hours, exposed roots dry out fast. But for leafy greens and herbs in climate-controlled spaces, these panels deliver impressive harvests with minimal footprint. They are particularly popular for apartment balconies and kitchen walls where aesthetics matter as much as function.
A-Frame and Ladder Systems
A-frame and ladder systems are the gateway vertical hydroponics setups for anyone intimidated by pumps and complex plumbing. Think of them as stepped shelves that hold multiple gutters or channels, each one catching nutrient solution that drips down from the level above. The sloped structure naturally creates gravity flow, which means fewer mechanical parts to manage and troubleshoot.
You can build a basic A-frame using 2×4 lumber and PVC gutter sections in an afternoon. The angled design gives each level adequate light exposure while maximizing your vertical footprint. Most gardeners start with three to five tiers, spacing them about 12 inches apart. Ladder-style systems work similarly but lean against a wall rather than standing freely, making them perfect for balconies or tight spaces.
These setups shine for leafy greens, herbs, and strawberries. The beauty lies in their flexibility: you can start with two tiers and expand upward as you gain confidence. Many of these DIY vertical gardening projects require only basic tools and readily available materials from hardware stores, keeping costs low while you learn the fundamentals of nutrient delivery and pH management without overwhelming complexity.
Vertical Drip Systems
Vertical drip systems use stacked containers arranged in tiers, with each pot receiving nutrient solution through individual drip lines from a reservoir below. A pump pushes the solution up to the top containers, which then drip down through successive levels before returning to the reservoir. This gravity-assisted design makes them surprisingly energy-efficient once the initial lift is complete.
What sets drip systems apart is their versatility with plant sizes. While tower gardens excel at leafy greens, vertical drip setups handle everything from basil to full-sized tomato plants. The individual containers give each plant its own root space, so you’re not limited to shallow-rooted crops.
These systems work particularly well for gardeners who want variety. You can mix peppers on one tier, strawberries on another, and herbs on the third without worrying about different root structures competing for space. The containers also make troubleshooting easier, if one plant develops issues, you can remove just that pot without disturbing the others.
Most home gardeners find drip systems forgiving because the containers retain some moisture between watering cycles, unlike NFT systems where pump failure means immediate stress.
What You’ll Need to Get Started
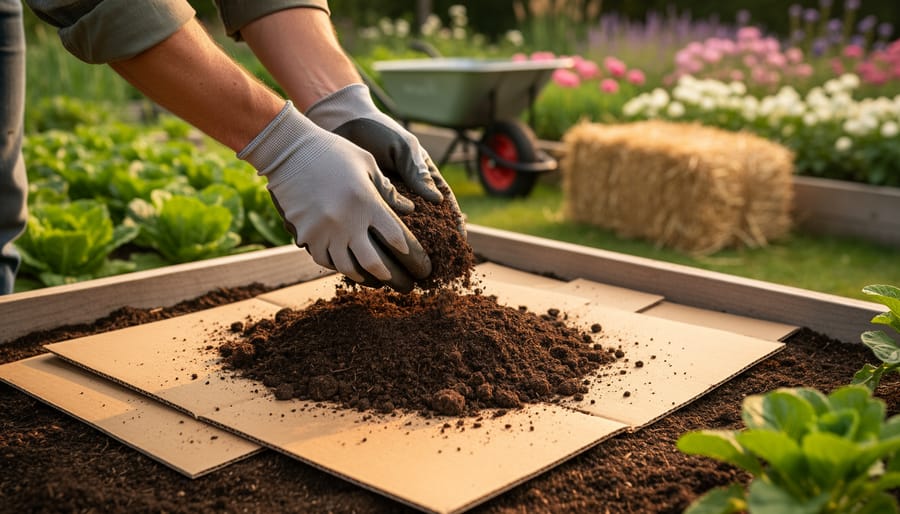
Starting a vertical hydroponic garden doesn’t require breaking the bank or filling your garage with equipment. Let’s break down what you actually need into categories that make sense.
**The Growing Structure**
First, you need something vertical to grow on. This could be a purchased tower system, wall-mounted panels, or a DIY frame built from PVC pipes or wood. Your choice depends on your space and budget. A simple 5-foot tower costs between $80-200 commercially, while DIY versions using PVC run about $30-50 in materials.
**Water and Nutrient Delivery**
You’ll need a reservoir to hold your nutrient solution, anything from a 5-gallon bucket to a 20-gallon storage tote works fine. The size depends on your system scale and how often you want to refill. A submersible water pump moves the solution from reservoir to plants. For most home setups, a 160-400 GPH (gallons per hour) pump handles the job perfectly and costs $15-35.
Add tubing to connect everything. Quarter-inch vinyl tubing works for most systems. Buy 25-50 feet to start, you’ll use more than you think, and extras prevent frustration mid-build.
**Nutrients and pH Management**
Hydroponic nutrients aren’t optional; plants can’t pull nutrition from water alone. Buy a two-part or three-part hydroponic nutrient solution designed for the plants you’re growing. Expect to spend $20-40 on nutrients that’ll last several months.
You’ll also need a pH test kit or digital pH meter. Water pH dramatically affects nutrient absorption, so this isn’t where to skimp. Liquid test kits run $10-15, while reliable digital meters cost $30-50. Grab pH up and pH down solutions too.
**Growing Medium**
Even soilless systems need something to support plant roots. Clay pebbles (hydroton), rockwool cubes, or coconut coir work well. A 10-liter bag of clay pebbles costs around $20 and lasts for years with proper cleaning between crops.
**Lighting (for Indoor Systems)**
If you’re growing indoors, invest in proper grow lights. LED grow lights designed for vegetables run $40-150 depending on coverage area. Don’t try growing fruiting plants with regular household bulbs, you’ll be disappointed.
**Nice-to-Have Additions**
Consider a timer for your pump ($10-15), net cups to hold plants in tower holes ($10 for 25), and an EC/TDS meter to measure nutrient strength ($15-30). These aren’t strictly essential on day one but quickly become invaluable.
Total startup cost ranges from $150 for a basic DIY system to $400 for a more comprehensive setup. Start simple, then expand as you learn what works in your space.
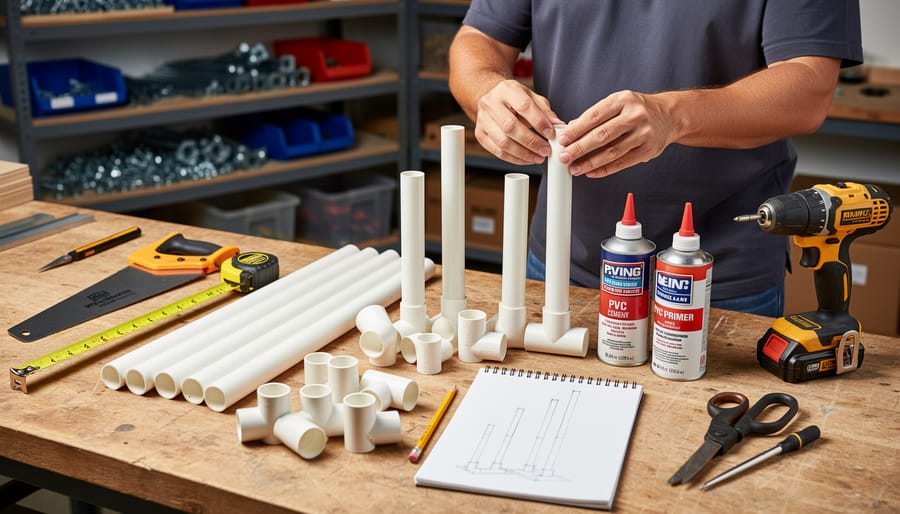
Building Your First Vertical Hydroponic System: A Simple Tower Garden
You don’t need a workshop or engineering degree to build your first vertical hydroponic tower. This project uses basic materials from any hardware store and takes about two hours from start to finish.
**Materials You’ll Need**
Grab a 4-inch diameter PVC pipe (6 feet tall works well for most spaces), a PVC end cap, an aquarium pump rated for at least 200 gallons per hour, flexible tubing to fit your pump, net pots (2-inch size), a 5-gallon bucket for the reservoir, and a basic drill with a 2-inch hole saw attachment. You’ll also need growing medium like clay pellets and hydroponic nutrients. The total cost runs around $60-80 if you’re starting with hydroponics from scratch.
**Step 1: Prepare Your Tower**
Mark holes in a spiral pattern up your PVC pipe, spacing them 8 inches apart vertically and rotating 120 degrees around the pipe between each level. This gives you roughly 9 growing sites on a 6-foot tower. Use your hole saw to cut clean openings that will hold the net pots snugly. Sand any rough edges so they won’t damage plant roots later.
**Step 2: Cap and Position**
Attach the end cap to the bottom of your pipe with PVC cement. Stand the tower in your 5-gallon bucket, making sure it’s stable and centered. You can drill a small hole in the cap if you want drainage to flow back into the reservoir, though many gardeners prefer a closed system where water cascades down the outside.
**Step 3: Set Up Your Water System**
Drop your aquarium pump into the bucket and run the tubing up through the inside of the tower. The tubing should extend just past the top of the pipe. Fill your bucket with water and test the pump, you want a steady flow that trickles down from the top, wetting all the growing sites as it descends. Adjust the flow rate if your pump has that option.
**Step 4: Add Growing Medium and Plants**
Insert net pots into each hole you cut. Fill them with clay pellets or another lightweight medium that drains well. For your first tower, start with lettuce seedlings or herb transplants rather than seeds. Gently position each plant so roots can reach through the pot into the flowing water.
**Step 5: Mix and Monitor Nutrients**
Follow the instructions on your hydroponic nutrient solution to mix the proper concentration. Most beginners start at half-strength and increase gradually. Check the water level daily for the first week until you understand how much your plants consume.
The tower needs consistent light (a south-facing spot outdoors or grow lights indoors) and you’ll want to check pH weekly once things are established. That’s genuinely it. You’ve built a functioning vertical hydroponic system that can produce fresh greens for months.
Best Plants for Vertical Hydroponics (And Which Ones to Avoid)
The plants you choose for your first vertical hydroponic garden can make the difference between early success and frustration. Some crops practically grow themselves in vertical systems, while others demand expertise you’ll develop over time.
Start with leafy greens and herbs if you’re new to vertical hydroponics. Lettuce varieties grow fast, you’ll harvest in just four to six weeks, and they thrive in most vertical systems without much fuss. Basil, mint, cilantro, and parsley flourish in towers and wall panels, giving you fresh herbs within three weeks. Spinach and arugula handle slightly lower light conditions, making them forgiving choices for indoor setups. These plants have shallow root systems and low nutrient demands, perfect for learning how hydroponic feeding works without constant adjustments.
Strawberries occupy a sweet spot between beginner and intermediate difficulty. They produce fruit reliably in vertical systems and don’t grow too large, though you’ll need to hand-pollinate indoors and manage runners to prevent overcrowding.
- Lettuce and leafy greens harvest in 4-6 weeks with minimal care.
- Herbs like basil and cilantro tolerate beginner mistakes and lower light.
- Spinach and arugula have shallow roots that fit any vertical system.
- Strawberries produce fruit reliably without excessive vertical space.
- Tomatoes need strong support structures and precise nutrient management.
- Cucumbers grow aggressively and quickly outgrow small vertical systems.
- Melons require extensive space, heavy-duty support, and advanced feeding schedules.
- Fruiting crops demand higher light intensity than most beginners provide.
Save tomatoes, cucumbers, and melons for your second or third system. These heavy feeders need larger reservoirs, stronger structural support for their weight, and precise nutrient balancing. Tomatoes particularly demand sturdy stakes or cages and consistent pruning to prevent your tower from becoming a tangled mess. Cucumbers vine aggressively and will quickly dominate a small system meant for multiple plant types. Melons combine all these challenges with the added difficulty of supporting heavy fruit on vertical structures.
The common mistake? Planting what you love rather than what suits your setup. A beginner starting with beefsteak tomatoes in a modest tower garden will likely struggle, while that same person growing three types of lettuce and fresh basil will harvest abundantly and build confidence for future challenges.
Interview: Sarah Chen’s Urban Vertical Hydroponic Garden
I spoke with Sarah Chen, a software developer in Seattle who’s been growing food vertically in her apartment balcony for three years. What started as a single tower system now produces enough lettuce, herbs, and cherry tomatoes to supply her weekly meals from just 24 square feet of floor space.
“The first tower I built leaked everywhere within two days,” Sarah laughs. “I’d followed a YouTube tutorial but used the wrong sealant. My downstairs neighbor wasn’t thrilled.” That early failure taught her the importance of testing systems thoroughly before adding plants and nutrients. Now she runs new setups with plain water for 48 hours to catch problems early.
Her current garden consists of three modified tower systems and two wall-mounted NFT channels. The modification she swears by? Adding individual ball valves to each tower level. “It lets me adjust flow rates for different plants without affecting the whole system. My basil gets more water than the lettuce, and I can shut off a level completely for maintenance.”
Sarah’s biggest lesson came during her first summer when afternoon sun heated her nutrient solution above 75°F, causing root rot in half her plants. She now uses frozen water bottles rotated from her freezer to cool the reservoir during heat waves, a low-tech solution that costs nothing. “I also painted my towers white. The original black PVC was absorbing too much heat.”
For newcomers, she emphasizes starting small. “Don’t buy five towers because you’re excited. Build one, grow some lettuce for a month, and learn how your specific space works. My balcony has weird wind patterns that took weeks to figure out.” She also recommends keeping detailed notes, especially about nutrient strength and pH adjustments. “You think you’ll remember what worked, but three months later when something’s growing beautifully, you won’t have a clue what you did differently.”
Her practical advice extends to plant selection. She avoids fruiting plants in her towers now, having learned that tomatoes and peppers need more root space than the limited pockets provide. Instead, she focuses on cut-and-come-again crops like lettuce, chard, and herbs. “I harvest from the same basil plants every week. That’s where vertical hydroponics really shines compared to my old container garden.”
Sarah’s final tip? Join online communities before problems hit. “Someone’s already made your mistake and figured out the fix.”
Troubleshooting Common Problems Before They Derail Your Garden
Most problems you’ll encounter aren’t disasters, they’re learning moments that make you a better grower. The key is catching issues early, before a small hiccup becomes a crop failure.
**pH swings** are probably the most common frustration. Your water’s pH directly affects nutrient absorption, and in a recirculating system, it can drift over time. Invest in a reliable pH meter (not the cheap strips) and check your system twice weekly. For most plants, aim for 5.5-6.5. When pH creeps up, add a few drops of pH Down solution. When it drops too low, use pH Up. Keep a log for the first month so you understand your system’s patterns, mine drifts upward every four days like clockwork, so I now adjust proactively.
Yellowing leaves usually signal nutrient deficiencies, though diagnosing which one takes practice. If older, lower leaves turn yellow, you’re likely short on nitrogen. Purple-tinged leaves suggest phosphorus deficiency. Start by checking if you’re mixing nutrients at the correct concentration, beginners often go too weak. Follow your nutrient brand’s feeding schedule, and remember that plants in rapid growth need more frequent top-ups.
What do I do if my water pump stops working?
First, check that it’s plugged in and the outlet works, sounds obvious, but it happens. If the pump hums but doesn’t move water, debris may be blocking the intake. Always keep a backup pump on hand, since roots can dry out in just a few hours without circulation.
How do I prevent algae from taking over my system?
Block light from your nutrient solution. Use opaque containers, cover exposed tubing with foam insulation, and ensure your growing medium isn’t constantly wet on the surface. A bit of algae won’t harm plants, but heavy growth competes for oxygen and nutrients.
My plants are wilting even though the system is running, why?
Check water temperature. Above 75°F, dissolved oxygen drops and roots struggle. Add frozen water bottles to your reservoir, improve air circulation around it, or invest in a small aquarium chiller if you’re in a hot climate.
**Clogged emitters or drip lines** happen when mineral buildup or root fragments block water flow. Flush your system with clean water between crops, and consider adding a filter before your pump intake. If specific drippers aren’t working, remove and soak them in white vinegar overnight.
Root rot shows up as brown, slimy roots with an unpleasant smell. It’s caused by low oxygen in warm water or stagnant conditions. Increase aeration with an air stone, lower water temperature, and if caught early, trim affected roots and reduce your water level so roots aren’t fully submerged. Healthy roots should be white or light tan.
The most important habit? Daily visual checks. Spend two minutes each morning looking at your plants. You’ll spot drooping, discoloration, or equipment issues before they escalate. Most problems give you warning signs if you’re paying attention.
You’ve now got everything you need to start your vertical hydroponic journey. Remember, you don’t need to build an elaborate system right away. Start with a simple tower or a small wall panel, grow a few herbs or lettuce varieties, and learn as you go. Every successful gardener has dealt with pH swings, nutrient imbalances, and the occasional crop failure, it’s how you develop real expertise.
What makes vertical hydroponics truly special isn’t just the impressive yields or the space you’ll save. It’s watching plants thrive in a system you built yourself, harvesting fresh greens steps from your kitchen, and discovering that growing your own food year-round is completely achievable. Once you see those first seedlings establishing in your tower, you’ll understand why so many home gardeners never look back.
Ready to explore more space-saving growing methods? Browse our other guides to find the perfect setup for your space and goals.