
Squeeze a handful of your garden soil and watch what happens when you open your fist. Quality soil should hold together briefly, then crumble apart when you gently poke it—not form a tight ball or slip through your fingers like dust. This simple test reveals whether you have the balanced texture that gives plant roots everything they need: oxygen, water retention, and easy pathways for growth.
The secret to thriving plants lies beneath the surface, in soil that teems with life and offers the perfect blend of minerals, organic matter, air pockets, and moisture. Most gardening disappointments trace back to poor soil conditions, yet transforming struggling dirt into nutrient-rich growing medium is entirely within your reach. Whether you’re facing clay that bakes hard as concrete, sand that drains too quickly, or depleted soil that produces lackluster harvests, understanding what makes soil truly high-quality changes everything.
Great soil doesn’t happen by accident. It develops through deliberate attention to texture, drainage, nutrient content, pH balance, and biological activity. The good news? You can assess each of these factors yourself using straightforward methods that require no fancy equipment. Even better, you can improve nearly any soil type with proven techniques that work with nature rather than against it.
This guide walks you through identifying quality soil characteristics, testing what you currently have, and implementing practical improvements that deliver visible results within a single growing season.
What Makes Soil ‘Quality’ Soil?

The Three Pillars of Healthy Soil
Think of healthy soil as having three essential ingredients that work together like a well-balanced recipe. Understanding these pillars will help you diagnose problems and create the perfect foundation for your garden.
The first pillar is structure, which refers to how soil particles stick together and the spaces between them. Good structure means your soil has a crumbly texture, almost like chocolate cake. When you squeeze a handful, it should hold together briefly but break apart easily. This texture allows water to drain through without pooling while still retaining enough moisture for plant roots. Clay soils tend to pack too tightly, while sandy soils let water rush through too quickly. The sweet spot is somewhere in between.
Next comes chemistry, and don’t worry, you won’t need a lab coat! This mainly involves pH levels and nutrients. pH measures whether your soil is acidic or alkaline on a scale from 0 to 14, with 7 being neutral. Most vegetables and flowers prefer slightly acidic soil around 6.0 to 7.0. Your soil also needs key nutrients like nitrogen for leafy growth, phosphorus for strong roots and flowers, and potassium for overall plant health. Testing your soil annually helps you understand what you’re working with.
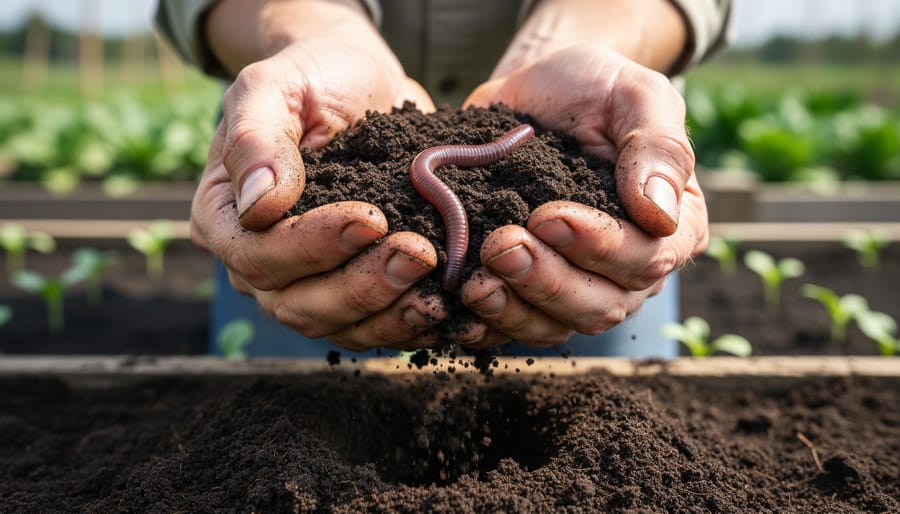
The third pillar is biology, the hidden world beneath your feet. Healthy soil teems with beneficial microorganisms like bacteria and fungi that break down organic matter into nutrients plants can absorb. Earthworms are the superstars here, creating tunnels that improve drainage and aeration while leaving behind nutrient-rich castings. A single tablespoon of healthy soil contains more organisms than there are people on Earth! When these three pillars work in harmony, your plants will thrive with less effort from you.
How to Tell If Your Soil Is Working For You
You don’t need fancy equipment to assess your soil’s health. Start with the squeeze test: grab a handful of moist soil and squeeze it firmly. When you open your hand, healthy soil should hold together but crumble easily when poked. If it stays in a tight ball, you’ve got too much clay. If it won’t hold shape at all, it’s too sandy.
Next, count the earthworms. Dig up a shovel’s worth of soil and look for these garden helpers. Finding five or more earthworms in a single spadeful indicates thriving soil life.
Check water drainage by digging a small hole, filling it with water, and watching how quickly it disappears. Ideal soil drains within a few hours but doesn’t vanish instantly.
Finally, pull a few weeds and examine their roots. Healthy soil produces weeds with well-developed, branching root systems rather than stunted, shallow roots. These simple observations tell you volumes about what’s happening beneath the surface.

The Texture Test: Finding Your Soil’s Personality
Sandy, Clay, or Loamy: What You’ve Got and What It Needs
Getting to know your soil type is like understanding your garden’s personality—each one has its quirks and gifts! Let’s break down the big three so you can work with what you’ve got.
Sandy soil feels gritty between your fingers, almost like sugar. It drains beautifully, which sounds great until you realize it also drains away nutrients and water faster than most plants can grab them. Your plants might look thirsty even after watering. The good news? Sandy soil warms up quickly in spring and is easy to dig. To help it hold onto moisture and nutrients, you’ll want to add organic matter like compost regularly.
Clay soil is the opposite character—smooth and sticky when wet, rock-hard when dry. It holds nutrients like a champion and stays moist longer, but it can suffocate plant roots if it gets too compacted. Working with clay takes patience, but it’s incredibly fertile once improved. The secret is incorporating compost and avoiding working it when wet, which makes compaction worse.
Loamy soil is the Goldilocks option—just right! It crumbles nicely in your hand, forming a loose ball that breaks apart with a gentle poke. This balanced blend of sand, clay, and organic matter drains well while holding enough moisture and nutrients. Even loamy soil benefits from regular compost additions to maintain its structure.
Whatever type you’re starting with, remember that soil can always be improved with time and care.
The Living Layer: Why Microbes Matter More Than You Think
Think of your soil as a bustling underground city, teeming with billions of tiny workers you can’t see but absolutely can’t garden without. We’re talking about microbes—bacteria, fungi, protozoa, and countless other microscopic organisms that make up what I like to call the living layer of your soil.
Here’s what amazes me: a single teaspoon of healthy soil contains more microorganisms than there are people on Earth. These tiny helpers are constantly working, breaking down dead leaves, old roots, and organic matter into nutrients your plants can actually use. Without them, your compost pile would just sit there, and those expensive fertilizers wouldn’t do much good.
Beneficial bacteria are like the delivery service of the soil world, converting nitrogen and other nutrients into forms plant roots can absorb. Meanwhile, mycorrhizal fungi form incredible partnerships with plant roots, extending thread-like networks that act like a secondary root system, helping plants access water and nutrients from farther away. Some microbes even act as bodyguards, protecting your plants against harmful diseases and pests.
So how do you know if your soil is biologically buzzing? Look for these encouraging signs: earthworms (the more, the better), a pleasant earthy smell rather than a sour or ammonia-like odor, and organic matter that gradually disappears as it’s broken down. When you dig, the soil should feel crumbly and alive in your hands, not compacted or lifeless.
The beautiful thing is, once you understand this hidden world beneath your feet, improving your soil becomes less about adding chemicals and more about feeding and nurturing these hardworking microbes.
Building Quality Soil From What You Have
Organic Matter: Your Soil’s Best Friend
Think of organic matter as the ultimate multitasker in your garden—it feeds your soil, improves structure, and keeps your plants thriving. Let me walk you through the best options and how to use them effectively.
Compost is the gold standard of healthy soil organics. It’s already broken down and ready to work, making nutrients immediately available to plants. Spread a 2-3 inch layer over your beds each spring and fall, working it into the top 6 inches of soil. New gardens benefit from even more—up to 4 inches mixed thoroughly into existing soil.
Aged manure brings powerful nitrogen to the party, perfect for heavy feeders like tomatoes and squash. The key word here is aged—fresh manure can burn plants. Apply it in fall so it has winter to mellow, using about 40 pounds per 100 square feet.
Leaf mold, made from decomposed leaves, is wonderful for moisture retention and works beautifully in woodland gardens. It takes a year or two to break down, but the wait is worth it. Add a 2-3 inch layer annually.
Cover crops like clover or winter rye are living organic matter that you grow and then turn under. Plant them in fall, let them grow through winter, and till them in about three weeks before spring planting. They prevent erosion while adding nutrients and organic material.
The beauty of all these amendments? You can mix and match based on what’s available and what your garden needs most.

Fixing Common Soil Problems Naturally
Even the best gardens encounter soil challenges, but the good news is that nature provides wonderful solutions for common problems. Let’s tackle these issues together with straightforward, organic approaches.
If your soil feels hard as concrete, you’re dealing with compaction. This happens when soil particles squeeze together too tightly, leaving no room for air or water. The natural fix? Work in plenty of organic matter like compost or aged manure, which acts like tiny sponges creating space between soil particles. For seriously compacted areas, consider planting a cover crop of daikon radishes, whose deep taproots naturally break up hardpan without you lifting a shovel.
Poor drainage often goes hand-in-hand with compaction. If water puddles on your soil surface for hours after rain, mix in coarse materials like perlite, coconut coir, or composted bark. These amendments improve soil structure while feeding beneficial microbes. For clay-heavy soils, adding gypsum can help particles clump together properly without changing pH levels.
Speaking of pH, extreme readings need gentle correction. Acidic soil benefits from ground limestone or wood ash applied gradually over several seasons. For alkaline soil, work in sulfur, pine needles, or peat moss. Test annually and adjust slowly since dramatic pH swings stress plants and soil life alike.
Nutrient deficiencies show up as yellowing leaves, stunted growth, or poor flowering. Before reaching for fertilizers, build your soil’s organic matter content. Compost delivers a balanced nutrient package while improving soil structure. For specific deficiencies, try targeted amendments like bone meal for phosphorus, kelp meal for potassium, or blood meal for nitrogen. Remember, healthy soil biology makes nutrients more available to plants naturally.
The pH Factor: Getting Your Soil’s Chemistry Right
Adjusting pH Without the Science Degree
Let me be honest with you—pH adjustment doesn’t require a chemistry lab or complex calculations. Once you’ve reviewed your soil test results, you can make simple tweaks that really work.
To raise acidic soil (below 6.0), garden lime is your go-to friend. Apply 5 pounds per 100 square feet to raise pH by about one point, working it into the top 6 inches. Wood ash works faster but use it sparingly—just 2 pounds per 100 square feet yearly. I learned this the hard way when I enthusiastically dumped too much ash and sent my pH skyrocketing!
For lowering alkaline soil (above 7.5), elemental sulfur is most reliable. Use 1 pound per 100 square feet to drop pH by half a point. Pine needles make excellent acidic mulch for gradual, gentle reduction around blueberries and azaleas.
Timing matters tremendously. Apply amendments in fall so they work over winter, giving you balanced soil by spring planting. Retest yearly until you hit your target range, then check every two to three years for maintenance.
Maintaining Soil Quality Season After Season
Think of your soil as a living savings account—you can’t keep withdrawing without making deposits! The secret to long-term garden success is working with nature’s rhythms rather than against them.
Let me share what’s worked beautifully in my own garden. The crop rotation basics are simpler than you might think: just avoid planting the same family of vegetables in the same spot year after year. Heavy feeders like tomatoes one year, followed by nitrogen-fixing beans the next, then lighter feeders like carrots. This natural cycle prevents nutrient depletion and breaks pest and disease cycles before they become problems.
Mulching is your soil’s best friend. A 2-3 inch layer of organic mulch—whether wood chips, straw, or shredded leaves—keeps moisture in, weeds out, and slowly breaks down to feed soil organisms. It’s like giving your soil a protective blanket that doubles as breakfast!
The minimal tillage approach might feel counterintuitive at first, but disturbing soil less means preserving those beneficial fungal networks and keeping carbon where it belongs. Layer compost on top and let earthworms do the mixing for you.
Remember: feed the soil, not just the plants. Instead of relying solely on synthetic fertilizers that provide quick fixes, focus on adding organic matter regularly. Compost, aged manure, and cover crops build soil structure and support the microbial community that makes nutrients available to plants naturally.
Here’s your simple seasonal checklist:
Spring: Add compost before planting and apply mulch around established plants.
Summer: Top up mulch as it decomposes and keep soil consistently moist.
Fall: Plant cover crops in empty beds and spread leaves as natural mulch.
Winter: Plan next year’s crop rotation and add aged manure to resting beds.
With these gentle, consistent practices, your soil will actually improve year after year rather than becoming depleted.
Common Mistakes That Sabotage Your Soil
Even experienced gardeners sometimes fall into habits that actually harm their soil without realizing it. Let’s talk about the most common culprits so you can avoid them.
Over-tilling is probably the biggest offender. While it might feel productive to run that rototiller through your garden every spring, excessive tilling destroys soil structure, kills beneficial organisms, and brings weed seeds to the surface. Once your soil is initially prepared, limit tilling to shallow cultivation or better yet, try no-till methods with mulch layers.
Fresh manure sounds like a great soil amendment, but it’s too hot for plants and can burn roots or introduce harmful pathogens. Always use well-composted manure that’s aged at least six months. Your plants and your family will thank you.
Ignoring drainage is another silent soil killer. If water pools after rain, your soil lacks proper structure and your plant roots are drowning. Add compost, create slight mounds for planting, or consider raised bed gardens to improve drainage naturally.
Synthetic fertilizer dependence creates a vicious cycle. These quick-fix products feed plants but starve the soil biology that actually builds long-term fertility. Transition gradually to organic amendments that nourish both plants and soil life.
Finally, walking on planting beds compacts soil, squeezing out air pockets that roots need. Create permanent pathways and keep beds narrow enough to reach the center without stepping in. Your soil will stay fluffy and workable, and your plants will grow more vigorously.
The good news? These mistakes are all reversible with patience and better practices.
Building quality soil isn’t a destination—it’s an ongoing journey that evolves with every season. And here’s the beautiful part: you don’t need to do everything at once. Start with one technique that resonates with you. Maybe it’s adding compost this spring, or perhaps testing your soil pH for the first time. Each small improvement builds on the last, gradually transforming your garden’s foundation.
Remember, even experienced gardeners are constantly learning and adjusting their soil practices. I’ve found that some of my best gardening breakthroughs came from simply paying attention to what my soil was telling me and responding thoughtfully.
The time and effort you invest in nurturing your soil will reward you season after season. Healthier soil means stronger plants, better yields, fewer pest problems, and more resilient gardens. Every handful of rich, crumbly earth you create is an investment that keeps paying dividends—not just in this year’s harvest, but in every harvest to come. Your garden’s future starts beneath your feet, and that future is yours to shape.

