Transform your outdoor space into a thriving garden sanctuary by starting with a precise layout plan drawn to scale on graph paper. Map existing features like trees, structures, and utility lines first, then overlay your design vision using clear zones for vegetables, flowers, and relaxation areas. Consider your garden’s unique microclimate – tracking sunlight patterns, wind exposure, and water drainage across different sections throughout the day and seasons.
Create distinct garden rooms by establishing clear pathways that naturally guide movement while maximizing growing space. Position tall plants and structures along the north side to prevent unwanted shade, arrange mid-height plants through the middle sections, and border edges with ground covers and low-growing specimens. This thoughtful layering approach not only looks visually appealing but also ensures every plant receives optimal growing conditions.
Remember, a well-designed garden balances both beauty and function. Incorporate practical elements like easily accessible water sources, storage areas for tools, and comfortable maintenance paths between planting beds. Whether you’re planning a compact urban oasis or sprawling country garden, these foundational design principles will help you create an outdoor space that flourishes year after year.
Assessing Your Garden Space
Measuring and Mapping Your Space
Before diving into design ideas, let’s get accurate measurements of your space. Start by grabbing a measuring tape, some graph paper, and a pencil – or consider using a garden planning journal to keep everything organized.
Begin by measuring the perimeter of your garden space, noting down the length and width. Don’t forget to measure any existing features like paths, trees, or structures. For irregular shapes, break the area into smaller rectangles or triangles to ensure accuracy.
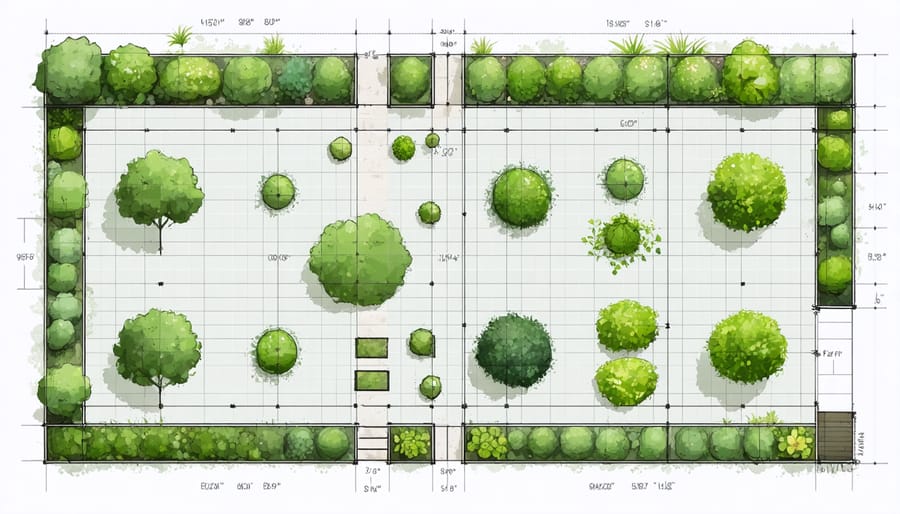
Now, transfer these measurements to your graph paper, using a consistent scale (for example, 1 square = 1 foot). Mark permanent features like buildings, fences, and mature trees first. Include symbols for important elements such as water sources, utility lines, and drainage patterns.
Remember to note the direction of sunlight by marking which way is north on your plan. This will help you later when deciding where to place sun-loving and shade-tolerant plants. Take photos from different angles to complement your measurements – they’ll come in handy when you’re brainstorming design ideas later.
Understanding Sun Patterns
Understanding how sunlight moves across your garden is crucial for successful plant placement. Start by observing your garden space at different times throughout the day – morning (around 8 AM), noon, and late afternoon (around 4 PM). Make simple notes or take photos to track where shadows fall and which areas receive direct sunlight.
Remember that sun patterns change with the seasons. A spot that’s sunny in summer might be shaded in winter due to the sun’s lower position in the sky. An easy way to track this is to make seasonal observations on the solstices and equinoxes, giving you a complete picture of your garden’s light conditions throughout the year.
Consider creating a simple sun map by sketching your garden and marking areas as full sun (6+ hours of direct sunlight), partial sun (4-6 hours), partial shade (2-4 hours), or full shade (less than 2 hours). Don’t forget to account for shadows cast by buildings, fences, and mature trees. This information will be invaluable when deciding where to place sun-loving vegetables and flowers versus shade-tolerant plants.
For more accurate tracking, you can use a sun calculator app or simply stick a pole in the ground and observe its shadow movement throughout the day.
Essential Garden Design Principles
Creating Focal Points
Every garden needs a star attraction – a focal point that draws the eye and creates visual interest. Think of it as creating a garden story, where each element leads to the next in a harmonious flow. Start by identifying natural focal points, like a mature tree or an interesting rock formation, that can serve as anchors for your design.
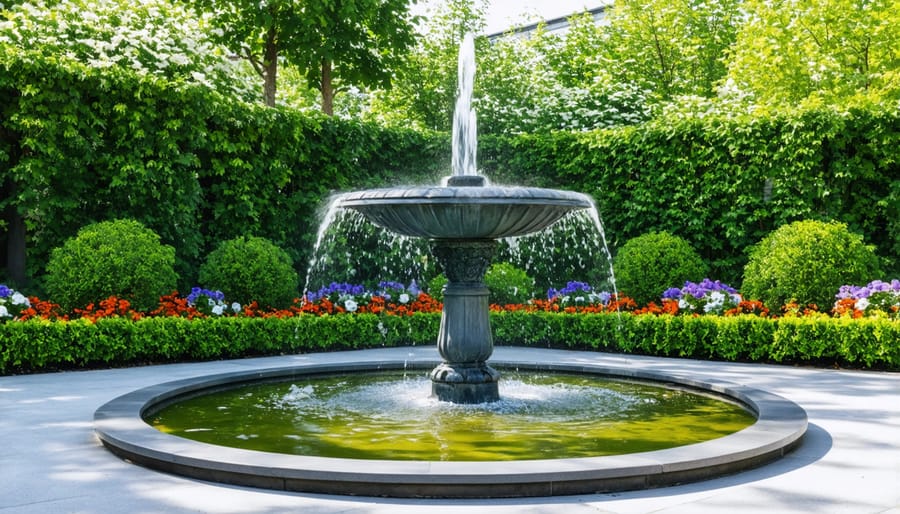
For artificial focal points, consider adding elements like a charming birdbath, a decorative arbor, or a collection of colorful container plants. Position these features where they’ll be most visible, such as at the end of a pathway or at the intersection of garden beds. Remember, focal points work best when they’re proportional to your garden’s size – a small space might be overwhelmed by a large fountain, while a tiny sculpture could get lost in a sprawling yard.
Create layers of interest by varying heights and textures around your focal points. Plant taller specimens behind shorter ones, and use contrasting foliage to frame your featured elements. Consider seasonal changes too – what looks stunning in summer should still hold visual appeal in winter.
Don’t overdo it, though. A good rule of thumb is to limit yourself to one major focal point per distinct garden area. This prevents visual competition and helps maintain a sense of balance and harmony throughout your outdoor space. Let each focal point breathe by giving it enough empty space to stand out naturally.
Balance and Proportion
Creating visual harmony in your garden starts with understanding the principles of balance and proportion. Whether you’re working with small space garden solutions or a sprawling landscape, these elements are key to achieving a pleasing design.
Think of your garden as a painting, where each element needs to complement the others. Symmetrical balance creates a formal look by mirroring elements on either side of a central point – perfect for traditional gardens. For a more relaxed feel, asymmetrical balance uses different elements that carry equal visual weight, like balancing a large tree on one side with a cluster of smaller shrubs on the other.
Scale and proportion are equally important. Tall trees shouldn’t overwhelm smaller plants, and garden features should match your space’s size. A good rule of thumb is to follow the third rule: divide your garden into thirds both horizontally and vertically when planning your layout. This creates natural focal points and helps distribute elements evenly.
Remember to consider the mature size of plants when planning. What looks perfectly proportioned today might become overcrowded in a few years. Leave adequate spacing between plants and structures, and think about how your garden will evolve through the seasons. Layer your plantings with tall elements at the back, medium-height plants in the middle, and shorter varieties in front to create depth and visual interest.
Plant Height and Layering
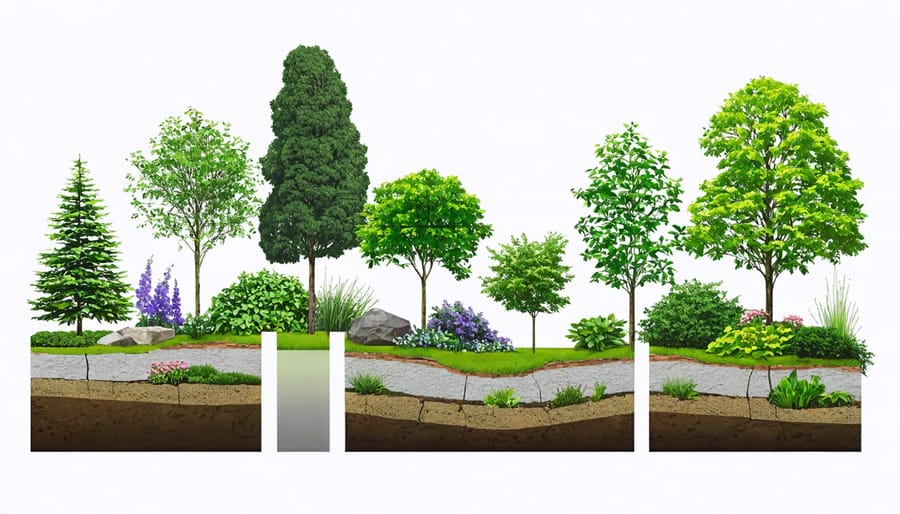
Creating visual interest in your garden starts with understanding how to arrange plants by height. Think of your garden as a theater stage, where every plant deserves its moment in the spotlight. Using natural plant layering techniques, you can create a stunning display that draws the eye through your garden space.
Start by positioning taller plants like ornamental grasses, climbing roses, or sturdy perennials at the back of borders or in the center of island beds. These create a beautiful backdrop and add vertical interest. Medium-height plants, such as lavender, salvias, or compact shrubs, form your middle layer, filling out the garden’s main viewing area.
For the front of your borders, choose low-growing plants and ground covers that spill gracefully onto pathways. Think creeping thyme, sedums, or compact flowering plants that won’t block the view of taller specimens behind them.
Remember to consider each plant’s mature size when planning your layout. Leave enough space between plants to accommodate their full growth, preventing overcrowding later. Also, mix plants with different textures and forms within each height layer to create visual interest throughout the seasons.
Don’t feel constrained by strict rules – occasionally breaking the height pattern with an architectural plant or allowing a medium-height specimen to peek through at the front can create delightful surprises in your garden design.
Practical Layout Considerations
Access and Pathways
Well-planned pathways are the backbone of any successful garden layout, making maintenance easier and the garden more enjoyable. Start by identifying your main traffic patterns – how you’ll move between different areas like your back door, shed, compost bin, and seating areas. These primary paths should be at least 4 feet wide to accommodate wheelbarrows and allow two people to walk side by side comfortably.
Secondary paths that lead to less frequently visited areas can be narrower, typically 2-3 feet wide. Consider using stepping stones or gravel for these paths to maintain a natural feel while providing stable footing. Remember to factor in turning spaces near corners and garden features – a good rule of thumb is to add an extra foot of width at these points.
Materials for your paths should complement your garden style and home architecture. Popular options include:
– Gravel or crushed stone for informal gardens
– Brick or pavers for traditional designs
– Concrete for modern landscapes
– Wood chips or mulch for natural settings
Don’t forget to plan for maintenance access to all planted areas. You should be able to reach every part of your garden beds without stepping on soil or plants. A helpful tip is to ensure no point in a bed is more than an arm’s length (about 2 feet) from an access point. This makes tasks like weeding, pruning, and harvesting much more manageable.
Consider installing subtle lighting along main pathways for safety and evening garden enjoyment. Solar-powered options are both eco-friendly and easy to install.
Water Sources and Drainage
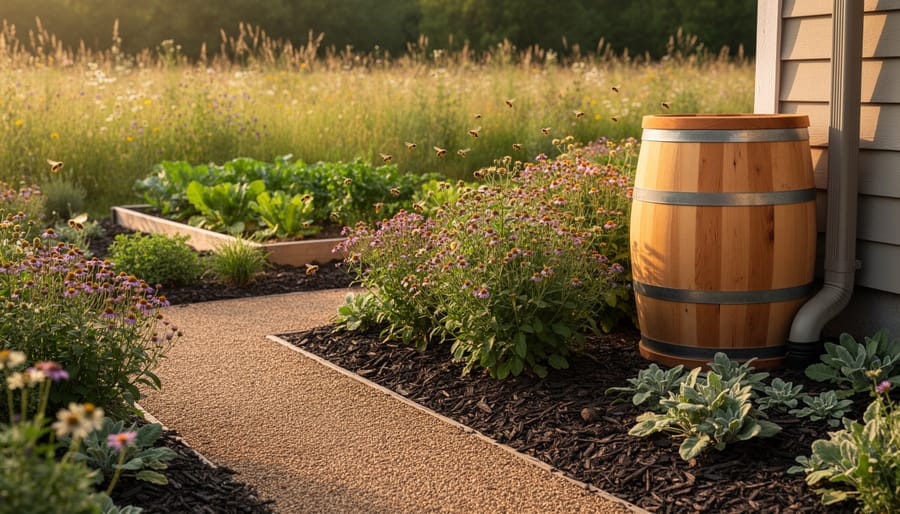
Proper water management is essential for a thriving garden, and it starts with smart design. Consider installing a drip irrigation system, which delivers water directly to plant roots while conserving water. Position your water sources, like outdoor taps or rain barrels, strategically throughout the garden to ensure easy access for watering all areas.
When planning your garden’s drainage, remember that water always flows downhill. Grade your garden slightly away from buildings, creating a gentle slope that helps prevent waterlogging. In areas prone to poor drainage, consider raising beds or installing French drains – gravel-filled trenches that channel excess water away from your growing spaces.
Rain gardens are an eco-friendly solution for managing runoff. These shallow depressions filled with water-loving plants can capture and filter rainwater while adding beauty to your landscape. Position them in natural low points or where downspouts release water.
Don’t forget to incorporate rainwater harvesting into your design. Place rain barrels or cisterns near buildings to collect roof runoff. This stored water is perfect for irrigation during dry spells and helps reduce your water bill. Position them slightly elevated to use gravity for water distribution.
Consider the natural rainfall patterns in your area and group plants with similar water needs together. This practice, known as hydrozoning, makes irrigation more efficient and ensures all plants get the right amount of water.
Maintenance Zones
Organizing your garden into maintenance zones is a game-changer for efficient garden management. Think of it as creating different “neighborhoods” for plants with similar care needs. This smart approach is particularly valuable for creating low-maintenance garden designs that work with your schedule, not against it.
Start by grouping plants based on their watering needs. Place water-loving plants like hostas and astilbe together in areas that naturally retain moisture, while drought-resistant plants like lavender and sage can thrive in drier spots. This thoughtful arrangement means you won’t need to zigzag across the garden with your watering can.
Consider sunlight requirements next. Create distinct zones for sun-loving plants versus shade-dwellers. This not only ensures your plants get the light they need but also streamlines your maintenance routine. For instance, you might designate a “high-maintenance zone” near your house for plants needing frequent attention, like vegetables and delicate flowers, while positioning hardier perennials and shrubs in areas you visit less often.
Don’t forget to factor in pruning and fertilizing schedules. Group plants with similar feeding needs together, and keep those requiring regular pruning within easy reach. This zoning approach helps you work smarter, not harder, making garden maintenance more manageable and enjoyable throughout the growing season.
Bringing Your Design to Life
Starting with Hardscaping
When planning your garden layout, it’s essential to start with hardscaping elements – the permanent features that form the backbone of your outdoor space. Think of hardscaping as creating the “bones” of your garden before adding the “flesh” with plants and flowers.
Begin by marking out pathways, which will define how you move through your garden. Use stakes and string to visualize the paths, ensuring they’re wide enough for comfortable walking and garden maintenance (typically 3-4 feet wide). Consider materials like gravel, stepping stones, or brick that complement your home’s architecture.
Next, plan any structural elements such as retaining walls, raised beds, or seating areas. These features not only add functionality but also create visual interest and define different garden zones. When installing these elements, ensure proper drainage and foundation work to prevent future issues.
Water features, pergolas, and garden sheds should also be positioned early in the design process. These larger elements are challenging to add later and often require utility connections or specific foundation work. Remember to leave enough space around these features for maintenance access.
Don’t forget to consider practical elements like irrigation systems and lighting. Installing these before planting will prevent damage to your garden beds later. Take time to properly grade the soil away from your home’s foundation and ensure any hardscaping elements won’t interfere with natural water flow.
By completing your hardscaping first, you’ll create a strong framework that makes subsequent planting much easier and more organized.
Plant Selection and Placement
Selecting and positioning plants is like arranging the pieces of a living puzzle. Start by considering each plant’s mature size, growth habits, and seasonal changes to create a harmonious composition that works year-round. Group plants with similar water and sunlight needs together to make maintenance easier and ensure they thrive.
Consider the “thriller, filler, spiller” approach when designing beds and containers. Tall, eye-catching plants serve as thrillers, medium-height plants fill the middle ground, and trailing varieties spill over edges to create depth and interest. For borders, position taller plants at the back, medium-height plants in the middle, and shorter ones in front to ensure all plants remain visible.
Pay attention to bloom times and colors. Create continuous visual interest by combining early, mid-season, and late-blooming plants. Choose a color scheme that complements your home’s exterior and reflects your personal style. Remember that foliage is just as important as flowers – mix different leaf shapes, textures, and colors for year-round appeal.
Don’t forget about spacing! While it’s tempting to pack plants closely for instant impact, proper spacing allows them to reach their full potential without competing for resources. Consider incorporating native plants, which are typically well-adapted to local conditions and support local wildlife. Finally, remember that plants grow and change – leave room for your garden to evolve over time.
Phasing Your Implementation
Creating your dream garden doesn’t have to happen all at once. Breaking down your garden implementation into manageable phases helps you maintain enthusiasm while staying within your budget-friendly garden design goals. Start with a three-phase approach that spans multiple growing seasons.
Begin with Phase One: the foundation. Focus on essential infrastructure like pathways, irrigation systems, and soil preparation. This phase typically takes 2-3 months and sets the stage for success. Don’t rush this crucial groundwork – proper soil preparation will reward you with healthier plants later.
Move into Phase Two once your foundation is solid. This is where you’ll install larger elements like trees, shrubs, and permanent structures. These establish the garden’s bones and create instant impact. Plan this phase for optimal planting seasons – typically spring or fall – to give plants the best start.
Finally, Phase Three brings in the finishing touches. Add perennials, annual beds, and decorative elements. This is where your garden’s personality really shines through. Since these elements are more flexible, you can experiment and adjust as you go.
Remember to leave room for evolution – gardens are living spaces that change over time. Keep some areas flexible for future additions or changes as you discover what works best in your space. This phased approach helps prevent overwhelm and allows you to learn from each stage of the process.
Designing your garden layout is an exciting journey that combines creativity with practical planning. By following the principles we’ve discussed – from analyzing your space and considering sunlight patterns to selecting plants and creating functional zones – you’re well-equipped to create a garden that brings joy and purpose to your outdoor space.
Remember that garden design is a flexible process that can evolve with your needs and preferences. Don’t be afraid to experiment and make adjustments as you go along. Start with a solid plan, but allow room for inspiration and spontaneity as your garden takes shape.
Whether you’re creating a cozy herb garden, a vibrant flower bed, or a productive vegetable patch, the key is to work with your space’s natural characteristics while incorporating elements that reflect your personality and lifestyle. Take time to observe your garden through different seasons, and don’t rush the process – the best gardens grow and develop organically over time.
As you begin your garden design journey, stay open to learning from both successes and challenges. Each season brings new opportunities to refine your layout and try different approaches. Start small if you’re feeling overwhelmed, and gradually expand your garden as your confidence grows.
Now it’s time to take that first step. Grab your paper and pencil, head outside, and start bringing your garden dreams to life. Happy designing!