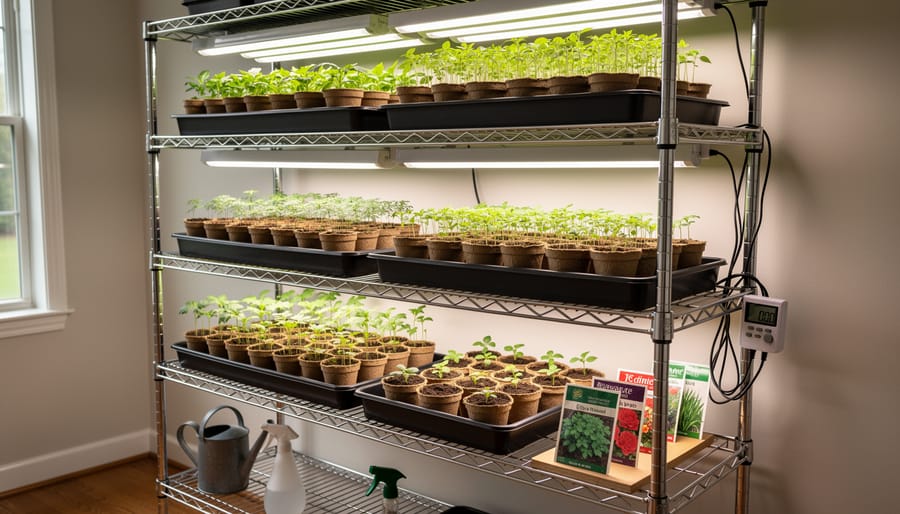
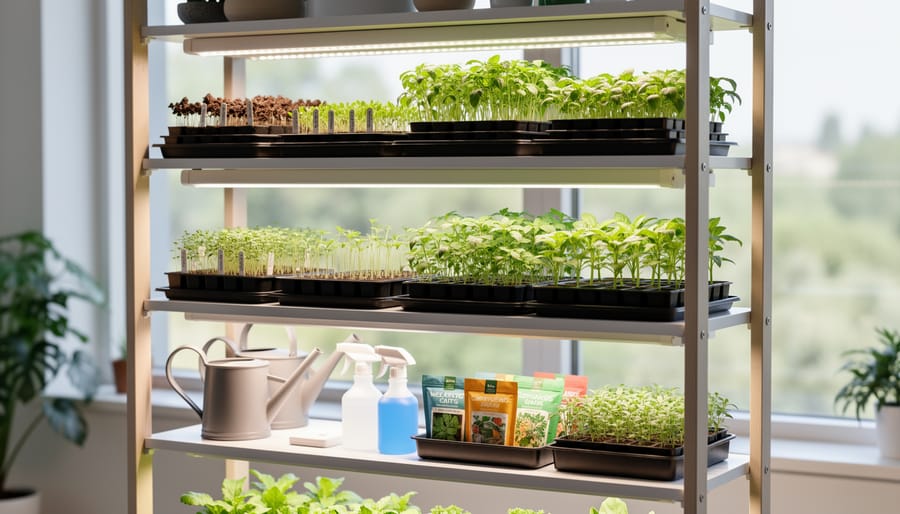
Build your seed starting rack with basic materials you already own: PVC pipes, wire shelving units, or simple wooden frames all support grow lights while maximizing vertical space in basements, garages, or spare rooms. A four-tier system measuring 48 inches wide accommodates up to 200 seedlings, transforming cramped windowsills into efficient growing stations that produce stronger, stockier transplants ready for your garden weeks earlier than store-bought alternatives.
Position full-spectrum LED grow lights 2-4 inches above seed trays using adjustable chains or rope ratchets, raising them as seedlings grow to prevent leggy, weak stems. The adjustability matters more than fancy features—seedlings need consistent light proximity, not expensive fixtures. Most gardeners succeed with basic shop lights fitted with 6500K bulbs, spending under $100 for a complete two-shelf setup.
Choose your rack style based on available space and carpentry confidence. Wire shelving units from home improvement stores require zero construction skills and start producing seedlings within an hour of setup. PVC pipe frames cost less and weigh almost nothing, making them perfect for temporary installations or apartment gardening. Wooden racks offer superior stability for permanent growing stations, supporting heavier soil loads and lasting decades with minimal maintenance.
The real advantage emerges during that critical six-week window between late winter and last frost. While neighbors scramble for picked-over seedlings at garden centers, your rack system produces exactly the tomato varieties, pepper types, and flower species you planned last winter, already hardened off and ready to thrive.
Why Seed Starting Racks Change Everything for Indoor Gardening
If you’ve ever tried starting seeds on a sunny windowsill, you know the struggle. Seedlings stretch toward the light, become leggy and weak, and half of them never make it to transplant day. That’s where a dedicated seed starting rack transforms your indoor gardening game completely.
The most obvious advantage is space efficiency. Instead of covering every horizontal surface in your home with seed trays, a multi-tiered rack lets you grow vertically. You can start hundreds of seedlings in the footprint of a small closet or corner of your basement. I’ve seen gardeners go from starting two dozen tomato plants on their kitchen counter to growing enough vegetables to supply their entire neighborhood, all because they maximized their vertical space.
But the real magic happens with light control. Unlike natural sunlight that changes throughout the day and season, grow lights on a rack provide consistent, optimal lighting for exactly as long as your seedlings need it. Position the lights just inches above your trays, and you’ll see sturdy, compact seedlings with thick stems and vibrant leaves. It’s the difference between scraggly disappointments and transplant-ready champions.
Temperature and humidity control become much easier too. Most seed starting racks concentrate your plants in one area, making it simple to monitor conditions and make adjustments. Add a heat mat underneath, and you’ve created a perfect germination zone. This controlled environment means higher germination rates and faster, healthier growth.
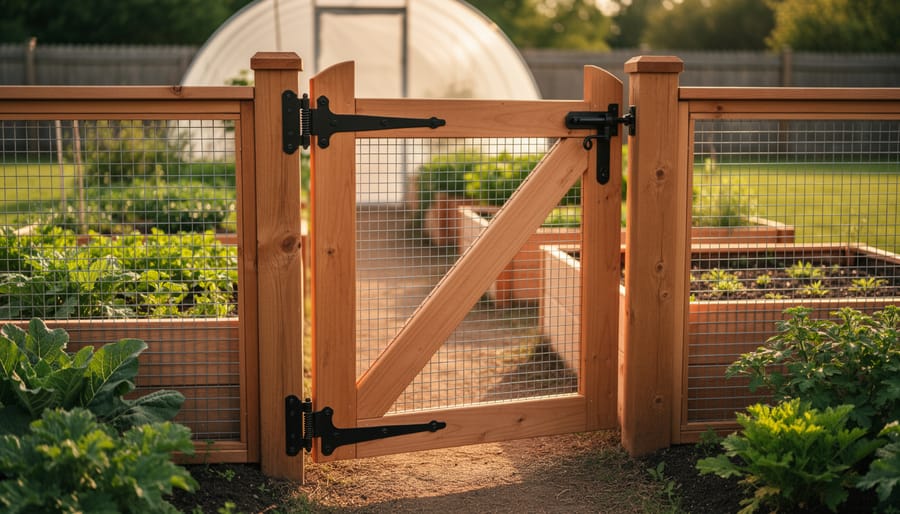
The upfront cost might give you pause, but consider this: buying healthy transplants from a nursery costs several dollars each. With a seed starting rack, you’re growing those same plants for pennies. After just one or two seasons, your rack pays for itself, especially if you’re already investing in projects like a DIY hoop house to extend your growing season.
Most importantly, a dedicated setup means you’ll actually use it year after year, building your skills and confidence with each growing season.
What You’ll Need: Materials and Tools Breakdown
Essential Materials
Building your own seed starting rack doesn’t require fancy materials or a hefty budget. Let’s walk through what you’ll actually need to get those seeds thriving.
Your foundation starts with a sturdy shelving unit. I’ve found that simple wire rack shelves work beautifully because they allow air circulation and can handle moisture. Look for units with adjustable shelves so you can customize spacing as your seedlings grow. Metal shelving typically holds up better than plastic in humid environments.
Next comes lighting, the heart of your setup. Full-spectrum LED grow lights are my top recommendation. They’re energy-efficient, run cool, and provide the light spectrum seedlings crave. You’ll need lights that can hang from each shelf, positioned 2-4 inches above your plants. Shop lights with built-in hanging chains make adjustments simple.
Don’t skip the timer! This inexpensive device ensures your seedlings receive consistent 14-16 hours of daily light without you remembering to flip switches. Digital timers offer more flexibility than mechanical ones.
Finally, gather waterproof trays to catch drainage and protect your shelves. Standard 10×20 inch seed trays fit most setups perfectly. Consider adding humidity domes for the germination phase, though clear plastic wrap works in a pinch.
With these basics, you’re ready to create a productive growing station.
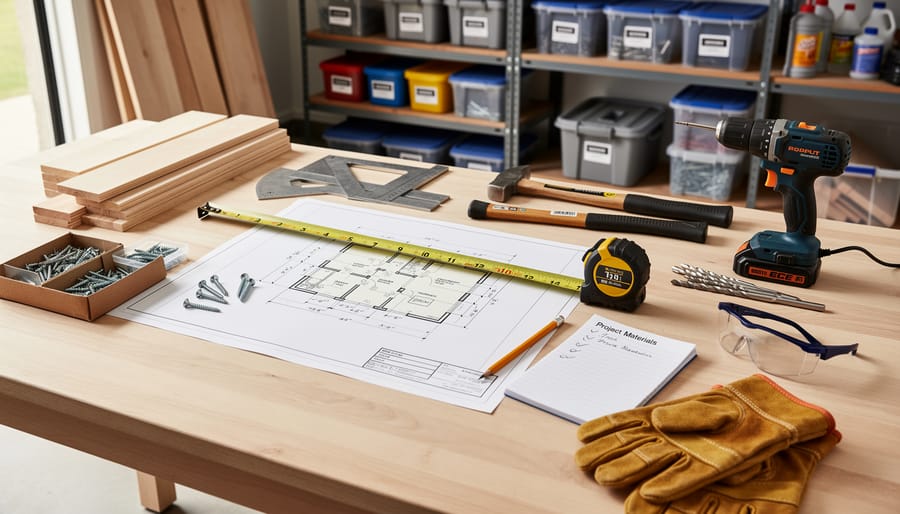
Tools You Probably Already Have
Good news—you won’t need to make a special trip to the hardware store for fancy equipment! Most seed starting rack projects require just a handful of basic tools you likely already have in your garage or utility drawer. A simple screwdriver or drill with appropriate bits will handle most assembly work, whether you’re working with metal shelving units or wooden frames. You’ll also want a tape measure for ensuring proper spacing between shelves (critical for those growing plants!), and a level to keep everything straight and stable. If you’re cutting wood or PVC pipe, a hand saw or power saw will do the trick. Wire cutters come in handy for securing grow lights and managing cords safely. Finally, keep a pencil nearby for marking measurements. The beauty of these DIY projects is their simplicity—if you’ve ever assembled furniture or tackled basic home repairs, you’re already equipped to build your own seed starting station!
Optional Upgrades Worth Considering
Once you’ve got your basic seed starting rack up and running, a few strategic upgrades can really boost your success rate. Heat mats are game-changers for temperature-sensitive seeds like tomatoes and peppers, warming the soil from below to speed up germination. I’ve found they cut germination time nearly in half! Humidity domes help maintain that perfect moisture level for newly sprouted seedlings, though you can improvise with clear plastic wrap until you’re ready to invest.
Adjustable shelving gives you flexibility as your seedlings grow taller, letting you maintain the ideal 2-4 inch distance between plants and lights. Some gardeners swear by small oscillating fans to strengthen stems and prevent damping-off disease. Timer switches take the guesswork out of light schedules, automatically giving your seedlings consistent 14-16 hour days. Start simple and add upgrades as you discover what works best for your growing style.
Three DIY Seed Starting Rack Designs (From Beginner to Advanced)
The Quick Setup: Wire Shelving Unit Conversion
If you’re new to building projects or renting your space, converting a standard wire shelving unit into a seed starting rack is your best friend. I love recommending this approach because you can set it up in under an hour, and it’s completely reversible if you need to move or repurpose the shelves later.
Start with a basic wire shelving unit from any home improvement store. Look for one that’s at least 48 inches wide and has adjustable shelves, which gives you flexibility as your seedlings grow. The standard four-tier units work beautifully, giving you space for multiple trays at different growth stages.
Here’s how to set it up: Assemble your shelving unit according to the manufacturer’s instructions, positioning shelves about 18 to 24 inches apart. This spacing accommodates both your seed trays and the grow lights above them. Once assembled, attach clip-on or hanging grow lights to the underside of each shelf. I prefer the chain-hanging style because you can easily adjust the height as your seedlings stretch upward.
Position your lights so they hang 2 to 4 inches above your seed trays initially. As seedlings emerge and grow, raise the lights to maintain this distance, preventing leggy, weak stems. Connect your lights to a simple timer set for 14 to 16 hours of daily light.
The beauty of this setup is its modularity. Need more space? Add another shelving unit beside the first one. Want to adjust shelf height for taller plants? Simply move the clips. When seed starting season ends, remove the lights and use your shelves for regular storage. It’s practical, affordable, and perfect for testing whether seed starting is your gardening passion before investing in more permanent solutions.
The Weekend Builder: Custom Wood Frame Rack
Ready to roll up your sleeves? This weekend project creates a sturdy, customizable rack that’ll serve you for years to come. I built my first wood frame rack six years ago, and it’s still holding strong through dozens of seed starting seasons.
You’ll need basic tools: a drill, circular saw or hand saw, measuring tape, and wood screws. For materials, grab eight 2×4 boards (8 feet long), four 1×4 boards (4 feet long for shelves), and a box of 3-inch wood screws. This creates a three-tier rack approximately 4 feet wide and 5 feet tall.
Start by cutting your 2x4s into four 60-inch vertical posts and eight 45-inch horizontal pieces. The vertical posts form your frame’s legs. For each tier, you’ll attach two horizontal pieces as crossbars—one at the front and one at the back. Space your shelves 18-20 inches apart vertically, giving seedlings room to grow before you move them to the next level.
Assembly is straightforward. Lay two vertical posts parallel on the ground, 45 inches apart. Attach horizontal crossbars at your marked heights using two screws per joint. Flip it over and repeat for the back frame. Once both sides are complete, connect them with the remaining horizontal pieces to create depth. Your rack should measure roughly 16 inches front to back.
The 1×4 boards become shelf slats. Cut them to 45 inches and space them across the horizontal supports, leaving small gaps between boards for drainage and air circulation. Secure with one screw at each end.
The beauty here is customization. Need it narrower for a tight space? Adjust those horizontal pieces. Want four shelves instead of three? Simply add more crossbars. This flexibility makes the extra effort worthwhile for serious seed starters.
The Garden Pro: Multi-Tier Station with Advanced Features
Ready to take your seed starting to the next level? This professional-grade station features three or more adjustable tiers, allowing you to accommodate seedlings at different growth stages. The real game-changer here is the integrated watering system, which you can create using drip irrigation tubing connected to a reservoir with a timer pump. No more hand-watering hundreds of seed trays!
For lighting, install full-spectrum LED shop lights on adjustable chains above each tier, positioning them 2-4 inches from seedling tops. You can raise them as plants grow. A simple timer manages your light schedule automatically, typically 14-16 hours daily for most vegetables.
The frame works best with heavy-duty metal shelving units rated for at least 200 pounds per shelf. Add waterproof trays beneath each tier to catch drips and protect surfaces. While this build requires a bigger investment in time and materials, serious gardeners who start dozens or hundreds of plants annually will find it transforms their spring routine. I’ve spoken with several master gardeners who say their production doubled once they upgraded to this system.
Choosing and Installing the Right Grow Lights
LED vs. Fluorescent: What Seedlings Actually Need
When I built my first seed starting rack, I agonized over the light choice for weeks. Let me save you that headache by breaking down what actually matters.
LED lights have become the gold standard for good reason. They’re incredibly energy-efficient, lasting 50,000 hours or more, which means years of seedling seasons without replacement. They run cool, so you can position them close to seedlings without scorching tender leaves. Most importantly, modern full-spectrum LEDs provide the blue and red wavelengths seedlings crave. The downside? Higher upfront cost, typically $30-80 per fixture for quality options. But here’s the thing—that investment pays off quickly through energy savings.
Fluorescent lights, particularly T5 and T8 tubes, still have their place. They’re budget-friendly, widely available, and work perfectly well for seed starting. I’ve grown thousands of healthy seedlings under basic shop lights. The catch is they’re less energy-efficient, generate more heat, and you’ll replace bulbs every year or two. They’re also bulkier, which matters in tight spaces.
For beginners on a budget, fluorescents get you growing without breaking the bank. If you’re building a long-term system or running multiple racks, LEDs make financial and practical sense. Both will grow excellent seedlings when positioned 2-4 inches above plants and run for 14-16 hours daily. The “best” choice really depends on your budget, space, and how seriously you’ve caught the seed-starting bug.
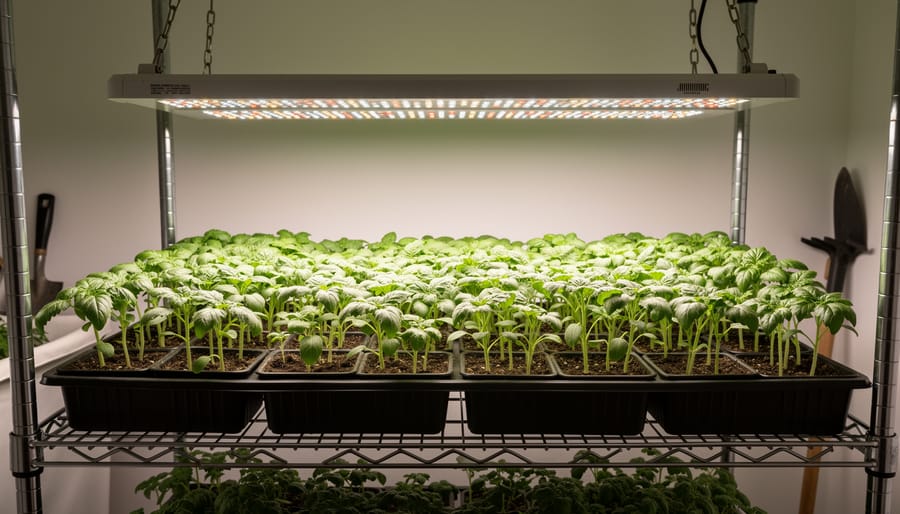
How to Position Your Lights for Best Results
Getting your lights positioned correctly can make the difference between leggy, weak seedlings and strong, stocky plants ready to thrive in your garden. The good news is, it’s easier than you might think once you understand a few basic principles.
Start by placing your lights about 2-3 inches above your seed trays immediately after planting. Yes, that close! This proximity ensures seedlings don’t stretch toward the light source as they emerge. I learned this the hard way my first year—I placed lights a foot above the trays and ended up with seedlings that looked more like bean sprouts than future tomato plants.
As your seedlings grow, you’ll need to raise the lights to maintain that 2-3 inch distance. If you’re using a shelf system with adjustable chains, this becomes a simple weekly adjustment. Check your seedlings every few days, and if you notice them reaching or developing long stems between the soil and first leaves, lower those lights immediately.
For timing, aim for 14-16 hours of light per day. A simple timer takes the guesswork out of this routine and ensures consistency, which seedlings absolutely love. Turn lights on early morning and off in the evening—plants need that rest period in darkness to develop properly.
Keep in mind that different seedlings have varying light needs. While most vegetables thrive with standard fluorescent or LED shop lights positioned close, some flowers prefer slightly less intense lighting. Watch your plants—they’ll tell you what they need through their growth patterns and leaf color.
Setting Up Your Seed Starting Station for Success
Location matters more than you might think when setting up your seed starting station. Choose a spot that’s out of the way of daily foot traffic but still easily accessible—you’ll be checking on your seedlings at least once a day. Basements work wonderfully for temperature control, but spare rooms or even a corner of your garage can be just as effective. Just avoid placing your rack near heat vents or drafty windows, which can create temperature swings that stress young seedlings.
Temperature consistency is your secret weapon for germination success. Most seeds germinate best between 65-75°F, though some heat-lovers like tomatoes and peppers prefer it warmer. A simple thermometer placed at seedling level will help you monitor conditions. If your space runs cool, consider adding a heat mat under your trays—it makes a remarkable difference in germination rates. My neighbor swears by setting up her rack near the water heater, which provides gentle, consistent warmth throughout the day.
Humidity management goes hand-in-hand with temperature control. Those clear plastic dome covers that come with seed trays aren’t just for show—they create a mini greenhouse effect that keeps moisture levels steady. Once seedlings emerge, prop the domes open slightly to improve air circulation and prevent damping off disease. A small fan on low speed, positioned to gently move air across your seedlings, strengthens stems and reduces fungal problems.
Organization transforms a functional setup into an efficient one. Keep your supplies within arm’s reach: extra seed trays, labels, markers, and a spray bottle for misting. Consider adding DIY watering solutions nearby to simplify your routine. Install hooks on the side of your rack for hanging tools, and use small bins to corral seed packets and tags. Trust me, when you’re juggling multiple trays of seedlings, this organization saves precious time and prevents those frustrating moments of searching for supplies.
Real Gardeners Share Their Setup Stories
I love hearing how fellow gardeners have tackled their seed starting setups! Here are some real stories from the gardening trenches that might just inspire your own project.
Maria from Wisconsin converted an old bookshelf into her seed starting station three years ago. “I drilled holes in the sides and hung chains to make the lights adjustable,” she shares. “My biggest mistake? Not leaving enough headroom at first. My tomato seedlings actually touched the lights! Now I always plan for at least 24 inches of growing space.” Her favorite feature is the wheels she added to the bottom. “Being able to roll it near the window on sunny days has been a game-changer.”
Tom, a retired teacher in Oregon, built his first rack last spring using basic pine boards. “I watched too many complicated videos and nearly gave up,” he admits. “Then I realized a simple shelf with shop lights would work perfectly. Don’t overthink it!” His advice? Start small. “I began with a two-tier system. Once I saw how well it worked, I built three more.”
Sarah from Vermont has been seed starting for fifteen years and swears by her PVC pipe rack. “People think PVC looks cheap, but mine has lasted eight seasons without wobbling. The secret is using proper fittings and not skimping on zip ties for the lights.” Her one regret? “I wish I’d made it taller from the start. Bending over those bottom shelves gets old fast.”
The common thread? Everyone emphasized starting simple, planning for adjustability, and not being afraid to modify their setup as they learned what worked best for their space and plants.
Troubleshooting Common Seed Starting Rack Problems
Even with careful planning, you’ll occasionally run into challenges with your seed starting rack. The good news? Most problems have simple fixes that’ll get your seedlings back on track quickly.
Leggy seedlings are probably the most common frustration I hear about from fellow gardeners. Those tall, thin stems reaching desperately upward mean your plants aren’t getting enough light. The solution is straightforward: lower your grow lights to sit just 2-3 inches above your seedlings, and make sure they’re running for 14-16 hours daily. If your lights aren’t adjustable, prop up your seed trays on books or blocks to bring them closer to the light source. I learned this lesson the hard way my first year—those spindly tomato seedlings taught me never to skimp on light intensity.
Uneven growth across your shelves often points to inconsistent lighting. Check that your bulbs are all the same wattage and haven’t dimmed with age. LED bulbs typically last longer, but fluorescent tubes should be replaced annually for best results. Also, rotate your trays every few days so each seedling gets equal light exposure.
Temperature fluctuations can stall germination or stress young plants. If your rack sits near a drafty window or heating vent, consider relocating it to a more stable environment. A simple thermometer on each shelf helps you monitor conditions. Most seedlings thrive between 65-75 degrees Fahrenheit.
Running out of space? Get creative by adding an extra shelf to your rack or staging seedlings by moving hardened-off plants outside during the day. You can also succession plant, starting new seeds as older seedlings graduate outdoors. Remember, every experienced gardener has faced these same challenges—troubleshooting is just part of the journey toward growing success.
Now it’s your turn to bring your seed starting dreams to life! Whether you choose a simple two-shelf setup or a more elaborate multi-tiered station, the satisfaction of growing your seedlings under a system you built yourself is truly rewarding. Remember, you don’t need a perfect setup to get started—even a basic rack with proper lighting will transform your seed starting success and give your plants the strong start they deserve.
The beauty of DIY projects like this is that you can always upgrade and refine your system as you learn what works best for your space and needs. Just like other budget-friendly garden builds, your seed starting rack will pay dividends season after season.
Ready to get started? Gather your materials this weekend and give it a try. We’d love to see what you create! Share photos of your finished rack in the comments below, or ask any questions that come up during your build. Your experience might inspire another gardener to take the leap, and we’re here to help you succeed every step of the way.