Harvest leafy greens like lettuce and spinach in the cool morning hours when their moisture content peaks, cutting outer leaves first to encourage continuous production throughout the season. For tomatoes, wait until fruits show full color and yield slightly to gentle pressure at the stem end—they’ll continue ripening indoors if needed, but vine-ripened always delivers superior flavor.
Store root vegetables like carrots and beets unwashed in perforated plastic bags with slightly damp paper towels, keeping them in your refrigerator’s crisper drawer where they’ll maintain quality for weeks. Remove any leafy tops immediately after harvesting, as these draw moisture from the roots and accelerate spoilage.
Time herb harvesting for mid-morning after dew evaporates but before afternoon heat diminishes their essential oils. Snip stems just above leaf nodes to promote bushier growth, and never remove more than one-third of the plant at once.
Check summer squash and zucchini daily once flowering begins—these grow rapidly and taste best when harvested young, typically at 6-8 inches long. Frequent picking signals plants to produce more, often overwhelming gardeners who master vertical growing techniques for space efficiency.
The difference between mediocre meals and extraordinary dishes often comes down to these crucial final steps. You’ve invested time nurturing your culinary garden through unpredictable weather and persistent pests—now proper harvesting and storage ensure that effort translates into peak-flavor ingredients that enhance every recipe.
Why Harvest Timing Makes or Breaks Your Culinary Garden
I’ll never forget the summer I learned this lesson the hard way. I let my zucchini grow into baseball bats and picked my basil after it flowered, wondering why everything tasted so disappointing. That’s when an experienced gardener friend shared a truth that transformed my kitchen garden: timing isn’t just important, it’s everything.
When you harvest produce determines far more than convenience. At the molecular level, fruits and vegetables undergo dramatic changes as they ripen. Sugars develop, starches convert, and aromatic compounds reach their peak concentration during a relatively narrow window. Pick too early, and many crops never develop full flavor since they’ve been separated from their nutrient source. Wait too long, and those same compounds begin breaking down, textures turn mealy or tough, and nutritional value starts declining.
Here’s where home gardening gives you a massive advantage over store-bought produce. Commercial growers harvest most crops before peak ripeness because they need produce that can survive shipping and storage. That tomato picked green and gassed with ethylene to turn red? It will never match the complex sweetness of one ripened on your vine. You get to harvest at true peak flavor because your “supply chain” is just a few steps to your kitchen.
Different crops have vastly different harvest windows. Lettuce might give you just two or three days of perfect crispness before turning bitter. Tomatoes offer a more forgiving several-day window at peak ripeness. Winter squash actually improves with a few weeks of curing after harvest. Understanding these individual timelines is crucial.
Miss your window, and consequences vary by crop. Overgrown cucumbers become seedy and bitter. Bolted lettuce turns impossibly sharp. Overripe berries mold within hours instead of lasting days. But the real tragedy isn’t just wasted produce. It’s missing out on the extraordinary flavors that made you want to garden in the first place. Getting timing right means tasting what food is truly meant to be.

Reading Your Plants: Signs That Say ‘Pick Me Now’
Herbs: The Morning Advantage
Morning is the golden hour for your culinary herb garden. Pick herbs after the dew has dried but before the sun gets too hot, typically between 8-10 AM. This timing captures peak essential oil content, which gives your herbs maximum flavor.
To check for optimal harvest, gently rub a leaf between your fingers. If the aroma is strong and immediate, the oils are concentrated and ready. Here’s what to look for in common herbs:
Basil should have vibrant green leaves without flowers. Once those flower buds appear, pinch them off or harvest immediately, as flowering reduces leaf quality.
Parsley is ready when stems have three segments. Cut outer stems first, leaving the center to keep producing.
Cilantro needs frequent harvesting before it bolts. Look for full, feathery leaves and pick regularly.
Rosemary and thyme can be harvested anytime but are most fragrant in morning. Cut sprigs when plants are at least six inches tall, never removing more than one-third at once.
The touch-and-sniff test works for all herbs. Trust your senses, and you’ll quickly learn when your plants are at their flavorful best.
Leafy Greens and Salad Crops
Leafy greens reward you with one of the longest harvest windows in the garden, but timing still matters for peak flavor. Here’s what I’ve learned through seasons of salad bowl success.
Lettuce leaves taste sweetest when harvested in the morning after dew has dried. For loose-leaf varieties, start snipping outer leaves once they reach 4-6 inches, leaving the center to keep producing. Butterhead and romaine heads are ready when they feel firm but give slightly when gently squeezed. Watch for signs of bolting – a sudden upward growth spurt and bitter flavor that signals it’s time to harvest everything immediately.
Spinach becomes your best friend in cool weather. Harvest individual leaves at 3-4 inches, or wait for full rosettes around 6 inches across. The texture test works beautifully here: tender leaves snap crisply, while tough ones bend. Once you see a flower stalk forming, gather your entire harvest within days.
Arugula develops its signature peppery bite as it matures. Pick leaves young at 2-3 inches for mild salads, or wait until 4-5 inches for more punch. This green bolts quickly in heat, so harvest frequently.
Kale improves after light frost. Start harvesting lower leaves at 8-10 inches, always leaving at least four upper leaves so the plant continues growing. Smaller leaves offer tenderness, while larger ones suit cooking better.
Fruiting Vegetables
Fruiting vegetables offer some of the most rewarding harvests in your culinary garden, and timing makes all the difference between ordinary and extraordinary flavor. For tomatoes, look for rich, uniform color and a slight give when gently squeezed. The stem should separate easily with a gentle twist. Peppers are trickier – while you can harvest them green, waiting for full color development brings sweeter, more complex flavors. They should feel firm and glossy.
Cucumbers and zucchini need frequent checking since they grow rapidly. Harvest cucumbers when they’re firm, bright green, and about 6-8 inches long. Zucchini tastes best at 6-8 inches too – those baseball-bat-sized monsters are impressive but often watery and bland. For eggplant, press the skin gently; if it springs back, it’s ready. The skin should be shiny, not dull.
Here’s what many gardeners don’t realize: leaving fruits on the plant too long signals the plant to stop producing. That oversized zucchini you’re proud of? It’s telling the plant its job is done. Regular harvesting, even every other day during peak season, keeps plants productive and ensures tender, flavorful vegetables. Plus, overripe fruits often develop bitter flavors and tough seeds that diminish your culinary experience.
Root Vegetables and Alliums
Root vegetables can be tricky because you can’t see what’s happening underground, but they give you plenty of clues! For carrots, the shoulder (the top of the root) will start pushing through the soil when they’re ready. Gently brush away some dirt to peek at the diameter—most varieties are ready between half an inch to an inch wide. The foliage also hints at readiness; healthy, deep green tops usually mean the roots below are mature.
Beets show similar shoulder signals, with the bulb rising slightly above soil level. Look for beets that are two to three inches across for the best tender texture. Harvest them too late and they become woody.
Radishes are the speediest—often ready in just three to four weeks. Their shoulders pop up prominently, and you can simply grasp the foliage near the base and give a gentle tug to check size before committing to harvest.
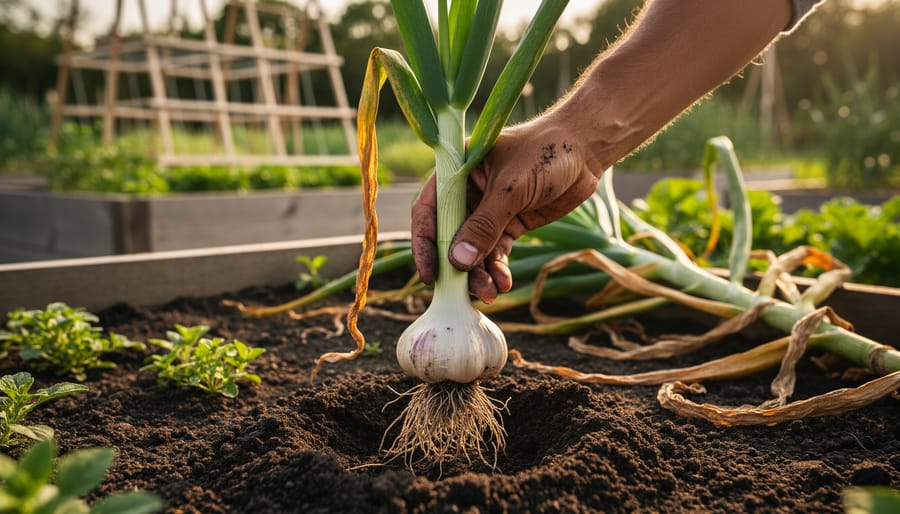
For onions, watch the tops. When about half the foliage falls over naturally, they’re ready. Stop watering and let them cure in the ground for a few days before pulling.
Garlic signals harvest time when the lower leaves turn brown but several green leaves remain at the top—typically mid to late summer depending on your planting time.
Harvesting Techniques That Extend Shelf Life
The way you harvest your produce matters just as much as how you grew it. I learned this lesson the hard way when I rushed through picking tomatoes one summer evening, only to watch half of them spoil within days. Proper harvesting techniques can add days or even weeks to your produce’s storage life.
Start with clean, sharp tools. A dull blade crushes plant cells and creates entry points for bacteria. Keep a pair of bypass pruners or garden scissors specifically for harvesting, and wipe them down with rubbing alcohol between plants. For most crops, cutting is gentler than pulling, which can damage both the fruit and the plant. When harvesting tomatoes, peppers, and eggplants, cut the stem about a quarter-inch above the fruit rather than yanking them free.
Leafy greens and herbs respond best to the cut-and-come-again method. Use sharp scissors to snip outer leaves, leaving the growing crown intact for future harvests. Always cut rather than tear, as torn edges brown quickly and invite decay.
Timing your harvest makes an enormous difference. The golden hour after picking is when your produce is most vulnerable to moisture loss and cell damage. Plan to harvest during the coolest part of the day, ideally early morning after dew has dried but before temperatures climb. This is when plants are fully hydrated and crisp. Avoid harvesting in the heat of afternoon when plants are stressed, or immediately after rain when excess moisture can promote rot.
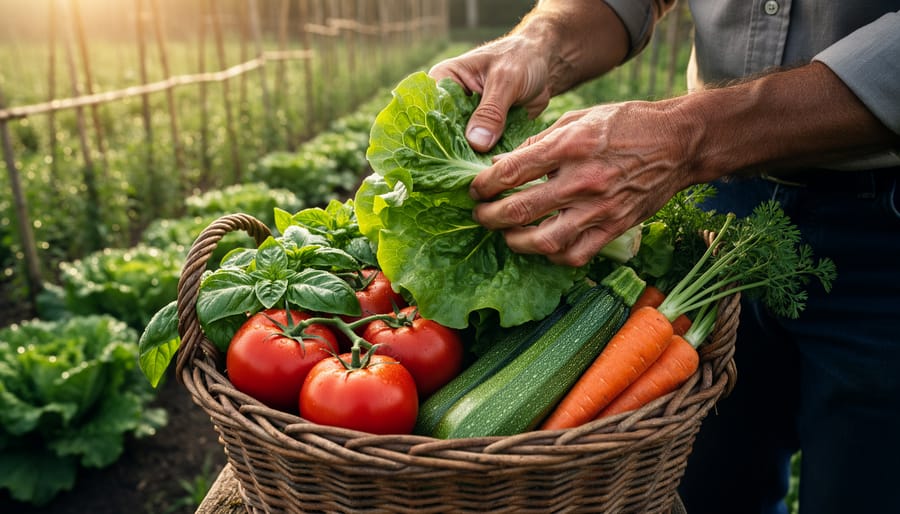
Handle bruising-prone items like berries and peaches with clean, dry hands, placing them gently in shallow containers rather than dropping them into buckets. Even minor bruising releases enzymes that speed up decay and affect neighboring produce. I use small baskets lined with towels to cushion delicate fruits during the walk from garden to kitchen.
Root vegetables like carrots and beets benefit from a gentle brush-off of soil rather than washing, which you should save for right before use. The protective layer of dry soil actually extends storage life.
Speed matters after harvest. Get your produce into appropriate storage conditions within that first hour. This quick transition from garden to proper storage temperature slows respiration and locks in both flavor and nutrients.

The First Hour After Harvest: What You Must Do
The hour after harvest is when your careful months of gardening can either pay off or falter. Most gardeners don’t realize that what happens in these critical sixty minutes affects flavor, texture, and shelf life more than anything else you’ll do.
First, resist the urge to wash everything immediately. Moisture invites decay, especially for tomatoes, berries, and leafy greens. Keep produce dry until you’re ready to use it. The exception? Root vegetables caked in soil can be gently brushed or quickly rinsed, then thoroughly dried before storage.
Temperature shock is a silent flavor killer. Imagine stepping from a hot day into an overly air-conditioned room – uncomfortable, right? Your produce feels the same way. Never place sun-warmed vegetables directly into the refrigerator. Instead, let items like peppers, cucumbers, and summer squash rest in a cool, shaded spot for 30 minutes before refrigerating. This gradual transition preserves cell structure and prevents that mushy texture we’ve all experienced.
Some crops actually require curing before storage, though most gardeners skip this step. Onions, garlic, winter squash, and potatoes need time in warm, dry conditions to develop their protective outer layers. Spread them in a single layer somewhere with good air circulation for one to two weeks. This simple process can extend storage life from weeks to months.
For crops that benefit from immediate cooling – think leafy greens, broccoli, and snap peas – use the quick-cool method. Place them in a colander, mist lightly with cool water, and set them in front of a fan for 10-15 minutes. This removes field heat without causing temperature shock.
Master gardener Patricia Chen, whom I interviewed last spring, shared this wisdom: “The harvest isn’t finished when you pick it. Those first sixty minutes are when you’re still gardening, just with different tools.” She’s absolutely right. These small steps transform good harvests into extraordinary ones.
Storage Methods That Actually Work for Home Gardeners

Counter Storage (and What Never Goes in the Fridge)
Some of your hardest-earned harvest actually suffers in the refrigerator. Tomatoes lose their complex flavor compounds below 55°F, developing that mealy texture we all dislike. I learned this the hard way after chilling a basket of beautiful heirlooms that turned disappointingly bland!
Keep tomatoes stem-side down on your counter, away from direct sunlight. They’ll continue ripening and maintain that garden-fresh taste for about a week. Garlic and onions also prefer room temperature storage in a well-ventilated basket or mesh bag—never plastic, which traps moisture and encourages sprouting or mold. The key is air circulation. I use a wire basket in my pantry where air flows freely around each bulb.
Winter squash needs similar treatment. After proper curing, store them in a cool, dry spot with good airflow. A pantry shelf or kitchen corner away from heating vents works perfectly. These beauties can last months when stored correctly, giving you homegrown flavor well into winter. The same applies to potatoes, though keep them separate from onions, as they’ll cause each other to spoil faster.
Refrigeration Done Right
Your refrigerator has two humidity zones in those crisper drawers, and using them correctly makes all the difference. The high-humidity drawer (with vents closed) is perfect for leafy greens, herbs, broccoli, and carrots – basically anything that wilts easily. These need moisture to stay crisp. The low-humidity drawer (vents open) suits fruits and vegetables that emit ethylene gas, like tomatoes, peppers, and cucumbers.
Here’s a game-changer I learned from veteran gardener Maria Santos: the paper bag trick. Slightly damp paper bags or towels wrapped around delicate greens create the ideal microclimate inside your crisper. They absorb excess moisture while maintaining enough humidity to prevent wilting.
Don’t overcrowd your drawers – good air circulation keeps everything fresher longer. And remember, not everything belongs in the fridge. Tomatoes, winter squash, and onions prefer room temperature storage where they’ll maintain their best flavor and texture.
Root Cellaring Without a Root Cellar
You don’t need a traditional root cellar to store winter squash, potatoes, and root vegetables for months. I’ve helped countless apartment dwellers create effective storage spots using what they already have. Your basement corner, unheated closet, or even a cooler garage can become preservation space with a few adjustments.
The key is finding locations that stay between 32-40°F with good humidity. Basements work beautifully—just designate a corner away from the furnace. For small-space gardening situations, try an insulated cardboard box on a balcony or storing produce in perforated plastic bags inside your refrigerator’s crisper drawer.
Monitor temperatures with an inexpensive thermometer and check stored items weekly, removing any showing signs of spoilage. Apples store well in cool closets, while potatoes prefer complete darkness. Even a styrofoam cooler tucked under stairs can extend your harvest’s life by weeks. Gardener Maria Chen stores her garlic braids in an unheated hallway closet with excellent results.
Quick Preservation for Excess Harvests
When your garden delivers more than you can eat fresh, don’t let that bounty go to waste! Three simple preservation methods can extend your harvest for months without requiring fancy equipment.
Freezing works beautifully for herbs, berries, peppers, and blanched vegetables. Simply wash, dry thoroughly, and portion into freezer bags—removing as much air as possible prevents freezer burn. You can preserve summer squash and many other vegetables this way for winter meals.
Drying intensifies flavors wonderfully in herbs, tomatoes, and hot peppers. Hang herb bundles in a warm, dry spot, or use your oven on the lowest setting. Once completely dry and crispy, store in airtight containers away from light.
Quick pickling transforms cucumbers, green beans, carrots, and onions into tangy treats within days. Heat equal parts vinegar and water with salt and sugar, pour over your vegetables in clean jars, refrigerate, and enjoy within a few weeks. It’s that easy to capture summer’s flavor!
Common Storage Mistakes That Waste Your Hard Work
Even the most careful gardeners can lose precious homegrown produce through simple storage slip-ups. Let’s tackle the most common mistakes so you can enjoy your harvest longer.
The biggest culprit? Storing incompatible produce together. Tomatoes, apples, and stone fruits release ethylene gas as they ripen, which sounds harmless until you realize it causes nearby vegetables to spoil quickly. I learned this the hard way when a basket of beautiful peaches turned my crisp lettuce into a wilted mess overnight. Keep ethylene producers away from leafy greens, cucumbers, and herbs. Think of it as produce matchmaking – some items just don’t play well together.
Temperature mistakes rank second on the hit list. Not everything belongs in the refrigerator. Tomatoes lose their flavor and develop mealy textures in cold storage, while basil turns black and slimy. Room temperature suits these better. Conversely, leaving tender greens on the counter is asking for trouble. When in doubt, remember that most fruits can handle countertop living, but vegetables generally prefer the chill.
Humidity issues often go unnoticed until it’s too late. Too much moisture turns berries into fuzzy science experiments, while too little makes carrots rubbery. Those crisp drawer settings in your fridge actually matter – use high humidity for leafy vegetables and low humidity for fruits.
Finally, know when to let go. That soft spot on your zucchini won’t magically disappear, and moldy berries will contaminate their neighbors. I’ve watched gardeners cling to questionable produce, hoping it’ll improve. It won’t. Compost it and move forward – your garden will thank you with better soil, and you’ll avoid potential foodborne issues. Fresh is best, and sometimes the kindest thing is admitting defeat gracefully.
Creating Your Harvest and Storage Calendar
Creating a personalized harvest calendar doesn’t have to be complicated. Start by listing everything you’ve planted, along with their expected harvest windows. A simple notebook, spreadsheet, or even a wall calendar works perfectly for this purpose.
Your calendar should track three key pieces of information: when you planted each crop, when you expect to harvest based on seed packet information, and when you actually harvested. This creates a valuable reference for future seasons. For example, if your tomatoes consistently ripen two weeks later than the packet suggests, you’ll know to adjust your expectations next year.
I like to organize my calendar by crop groups, noting the first and last harvest dates for each variety. This helps me spot patterns in my garden’s microclimate and understand which varieties thrive in my specific conditions. You might discover that certain lettuce varieties bolt faster than others or that your basil produces abundantly well into fall.
Keep notes about everything that affects your harvest timing. Weather events, unexpected pest problems, or techniques you tried all deserve a mention. Was it an unusually wet spring? Did companion planting help? These observations become gardening gold over time.
Include your seasonal crop rotation plans in this calendar too, as they directly impact when you’ll plant and harvest different crops in various garden beds.
Don’t forget to note flavor and quality alongside quantity. Sometimes the biggest harvest isn’t the best one. Recording when produce tastes most flavorful helps you nail the perfect picking time next season, ensuring your culinary creations shine with the best possible ingredients from your garden.
Mastering harvest timing and storage transforms your culinary garden from a fleeting summer pleasure into a reliable kitchen resource that serves you beautifully throughout the entire year. These aren’t complicated skills requiring fancy equipment or a science degree—they’re practical techniques that become second nature with just a bit of attention and practice.
If you’re feeling overwhelmed by everything we’ve covered, here’s my advice: start small this season. Choose just three crops you love to cook with and really focus on learning their harvest signals and best storage methods. Maybe it’s tomatoes, basil, and lettuce, or perhaps garlic, peppers, and beans. Whatever speaks to your cooking style, give those three your full attention. Notice how they look and feel at peak ripeness. Experiment with different storage approaches. Take notes on what works in your particular climate and kitchen setup.
There’s something deeply satisfying about reaching into your pantry on a gray February afternoon and pulling out sun-dried tomatoes you preserved last August, or snipping fresh herbs from your windowsill that sprouted from summer cuttings. That connection between your garden, your kitchen, and your table doesn’t have to end when the first frost arrives. With these skills in your gardening toolkit, you’re building true food security and independence—one perfectly timed harvest at a time.