
If your plants are struggling despite regular watering, with stunted growth, burned leaf edges, and crusty white deposits on your soil surface, you’re likely dealing with saline-sodic soil—one of the most challenging garden conditions a gardener can face. This double trouble combines excessive salts with high sodium levels, creating a dense, poorly draining soil that suffocates plant roots and prevents proper nutrient uptake.
The good news? You’re not stuck with unusable soil forever. Understanding what makes saline-sodic soil different from other problem soils is your first step toward recovery. Unlike simple salty soil or purely sodic soil, this combination requires a specific treatment approach that addresses both issues simultaneously—and doing it wrong can actually make things worse.
Whether you inherited this soil with your property, created it accidentally through poor irrigation practices, or live in a region where it naturally occurs, you have practical options. From simple home testing methods to targeted amendment strategies and choosing plants that actually thrive in these conditions, you can transform your struggling garden into a productive space. The journey takes patience—soil recovery isn’t overnight—but with the right knowledge and realistic expectations, you’ll see meaningful progress within a single growing season.
What Makes Saline-Sodic Soil Different from Regular Garden Soil
If you’ve been struggling with soil that just won’t cooperate, understanding what makes saline-sodic soil unique can be your first step toward a thriving garden. Think of it as dealing with a double challenge that combines two distinct soil problems into one particularly stubborn situation.
Regular garden soil contains a balanced mix of minerals, organic matter, and air spaces that allow water to drain properly and roots to breathe. Saline-sodic soil, however, is like having both an excess of salts (similar to what you’d find near coastal areas or in regions with poor drainage) and too much sodium specifically attached to the soil particles. It’s facing salty soil challenges with an added twist that makes remediation trickier.
Here’s what makes this combination particularly troublesome: the high salt content creates a hostile environment where plant roots struggle to absorb water, even when moisture is present. Meanwhile, excess sodium causes soil particles to disperse and stick together when wet, destroying the soil structure. This creates a dense, crusty surface that’s rock-hard when dry and sticky as clay when wet—neither condition is friendly to growing plants.
This soil typically forms in areas with poor drainage, high evaporation rates, or irrigation with salty water over time. You might also encounter it in low-lying areas where salts accumulate naturally. Unlike purely saline soil, which can often be improved simply by flushing with water, or sodic soil alone, which needs calcium amendments, saline-sodic soil requires a more thoughtful approach that addresses both issues simultaneously.
The good news? Once you understand what you’re working with, you can develop a targeted strategy to reclaim your garden space and create the growing conditions your plants deserve.
How to Tell If Your Garden Has Saline-Sodic Soil
If you’ve been struggling with your garden and suspect something’s off with your soil, learning to spot saline-sodic conditions can be a real game-changer. The good news? Your garden is already giving you plenty of clues – you just need to know what to look for.
The most telltale sign is a **white or gray crusty layer** on your soil surface. This looks almost like someone sprinkled salt or powder across your garden beds, and that’s essentially what it is – accumulated salts rising to the surface as water evaporates. You’ll notice this especially after watering or rainfall once the soil dries out again.
Take a walk through your garden after a rain shower. Does water pool on the surface for hours, refusing to soak in? **Poor drainage combined with hard, compacted soil** is a classic indicator of saline-sodic conditions. The excess sodium actually breaks down soil structure, creating an almost cement-like surface when dry. You might find yourself struggling to push a spade into the ground, even when the soil should be workable.
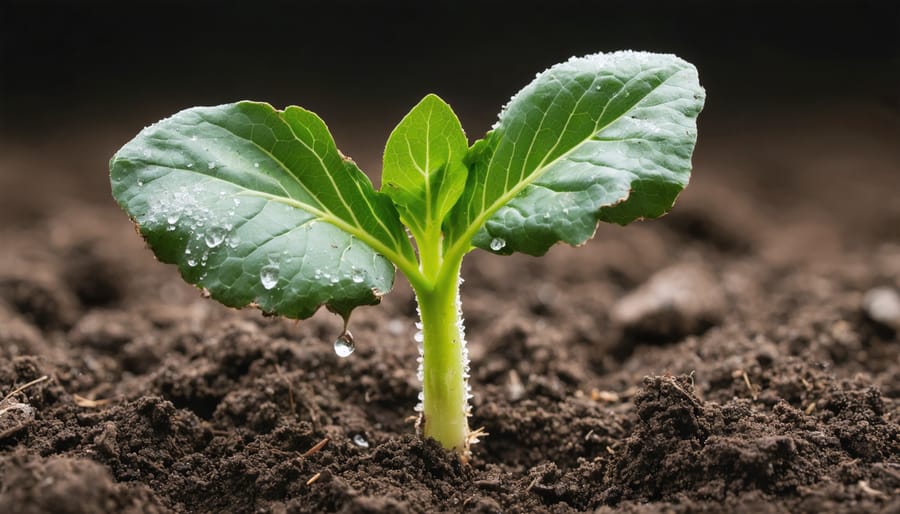
Your plants are probably sending distress signals too. Look for **stunted growth** where plants seem stuck at the same size week after week. **Leaf margins might appear burned or scorched**, turning brown and crispy even though you’ve been watering regularly. Plants may also show yellowing between the veins or simply fail to thrive despite your best efforts.
**Simple at-home tests** can confirm your suspicions. Try the “feel test” – wet a small amount of soil and rub it between your fingers. Saline-sodic soil feels slick and soapy, almost greasy. You can also perform a basic dispersion test: drop a small chunk of dry soil into a glass of distilled water. If it clouds up quickly and stays murky, sodium dispersion is likely occurring.
While these observations are helpful, I always recommend **getting a professional soil test** if you suspect saline-sodic conditions. Your local extension office can analyze salt levels, sodium content, and pH, giving you precise numbers to work with. This investment – usually under $30 – takes the guesswork out of your improvement plan and helps you avoid wasting time and money on ineffective solutions.

Why Plants Struggle in Saline-Sodic Conditions
If you’ve ever wondered why your plants look perpetually stressed despite regular watering, saline-sodic soil might be delivering a one-two punch that’s simply too much for them to handle.
Let’s start with the salt challenge. Think of it this way: when soil contains high levels of dissolved salts, it creates what scientists call “osmotic stress.” Imagine trying to drink a glass of water, but someone keeps pulling it away from you—that’s essentially what happens to plant roots. The salt in the soil is actually more concentrated than the fluids inside the plant’s roots, making it incredibly difficult for plants to absorb water even when plenty is available. Your plants become thirsty in wet soil, leading to symptoms that look a lot like drought stress: wilting, leaf burn, and stunted growth.
Now add sodium to the equation, and things get even trickier. Sodium doesn’t just harm plants directly—it fundamentally changes the soil itself. Picture your soil as being made up of tiny particles held together in clusters. When sodium moves in, it acts like an unwelcome guest at a party, pushing apart these clusters and causing the soil structure to collapse. The result? Dense, compacted soil that’s hard when dry and sticky when wet.
This structural breakdown means water can’t infiltrate properly, oxygen can’t reach roots, and beneficial soil organisms struggle to survive. Your plants are essentially trying to grow in what becomes a hostile environment—dealing with both the chemical stress of salt toxicity and the physical challenge of poor soil structure simultaneously. It’s no wonder they struggle to thrive!

Improving Your Saline-Sodic Soil: Step-by-Step Solutions
Adding Gypsum: Your First Line of Defense
Gypsum (calcium sulfate) is your secret weapon against saline-sodic soil because it works like a friendly negotiator at the microscopic level. When you add gypsum, the calcium ions essentially swap places with the sodium ions clinging to your soil particles. This exchange is crucial—once displaced, sodium can be flushed away with water, allowing your soil structure to recover.
For most garden situations, apply 20-40 pounds of gypsum per 1,000 square feet. If you’re dealing with severely compacted or crusted soil, lean toward the higher end. Don’t worry about over-applying—gypsum won’t harm plants and excess simply washes through.
Timing matters! Fall is ideal because you’ll have winter rains or snow to help flush displaced sodium through the soil profile. Spring application works too, but you’ll need to irrigate more frequently.
Here’s what to expect: spread gypsum evenly across your problem area, then work it into the top 6 inches of soil if possible. Water thoroughly and deeply—this is essential for moving that freed sodium away from plant roots. You might notice some improvement within weeks, but significant structural changes typically take 3-6 months.
Be patient and realistic. One application rarely fixes everything. Plan on reapplying gypsum annually for 2-3 years while monitoring your soil’s progress. Think of it as a marathon, not a sprint—your soil didn’t become problematic overnight, and recovery takes time.

The Critical Role of Drainage and Leaching
Think of drainage as your soil’s escape route – without it, salts and sodium have nowhere to go but deeper into your garden beds, where they’ll continue causing problems. I learned this the hard way when my first attempts at soil amendment failed because I’d overlooked this crucial foundation step.
Good drainage is absolutely essential for reclaiming saline-sodic soil because it allows you to flush out accumulated salts and displaced sodium. Without adequate drainage, you’re essentially trying to bail out a boat with holes in the bottom – except in this case, you need those holes! The water needs somewhere to carry away the troublesome elements.
Before you start any leaching process, test your drainage by digging a hole about 12 inches deep, filling it with water, and observing how quickly it drains. If water remains after 24 hours, you’ll need to improve drainage first. Consider installing drainage tiles, creating raised beds, or incorporating organic matter and gypsum to break up compacted layers. Sometimes, simply breaking through a hardpan layer with a broadfork can work wonders.
Once drainage is adequate, you can begin leaching – the process of applying water to push salts below the root zone. This requires more water than you might expect. Apply about 6 inches of water over several days, allowing it to percolate through slowly. Rapid flooding can actually make things worse by moving salts sideways rather than downward.
Timing matters too. Spring often works best when you can coordinate with natural rainfall. Combine leaching with proper irrigation practices going forward to prevent salt buildup from returning. Remember, patience pays off – this process takes time, but you’re literally clearing the path for healthier growth.
Building Soil Health with Organic Matter
One of the most effective strategies for healing saline-sodic soil is adding organic matter—and I can’t emphasize this enough! When I first started working with challenging soils, I was amazed at how transformative compost could be. Organic amendments like compost, aged manure, and leaf mold work wonders by improving soil structure, which is especially crucial when dealing with compacted, sodic conditions.
Here’s what happens: as organic matter breaks down, it creates spaces between soil particles, improving drainage and allowing those harmful salts to leach away more effectively. Even better, it feeds beneficial soil microbes that help bind soil particles into stable aggregates. These tiny biological workers are your underground allies in improving poor soil health.
For practical application, aim to incorporate 2-4 inches of quality compost into the top 6-8 inches of soil before planting. If your soil is severely compacted, work in stages—forcing too much amendment at once can sometimes create drainage problems. I like to spread a generous layer each season, letting time and earthworms do much of the work.
Consider adding specific organic materials that particularly benefit saline-sodic conditions. Gypsum-enriched compost combines the structural benefits of organic matter with calcium to displace sodium. Wood chips or bark mulch applied as a 3-inch surface layer helps moderate soil temperature and adds organic matter gradually as it decomposes.
Remember, patience is key here. Building healthy soil is a marathon, not a sprint, but every amendment you add is an investment in your garden’s future success!
Plants That Actually Thrive in Saline-Sodic Soil
While you’re working on improving your saline-sodic soil, you don’t have to put your gardening dreams on hold! Several resilient plants actually tolerate—and some even thrive in—these challenging conditions. I’ve learned through trial and error that choosing the right plants can give you a beautiful garden while your soil improvement efforts take effect.
**Vegetables Worth Growing**
Asparagus tops my list for saline-sodic gardens. This perennial vegetable naturally tolerates salt and can produce delicious spears for decades. Beets are another fantastic option—they handle sodium surprisingly well and reward you with both nutritious greens and sweet roots. Kale and Swiss chard also deserve spots in your garden, withstanding moderate salt levels while providing continuous harvests throughout the growing season.
**Herbs That Endure**
Mediterranean herbs are your best friends here. Rosemary flourishes in these conditions, which makes sense given its coastal origins. Thyme, sage, and oregano also perform admirably, and their drought tolerance pairs perfectly with saline-sodic soils—many drought-tolerant plants handle salt stress well since both conditions involve water management challenges.
**Ornamental Options**
For flowers and ornamentals, you have more choices than you might expect. Russian sage creates stunning purple displays while handling both salt and sodium. Blanket flower (Gaillardia) brightens beds with cheerful blooms all summer long. Yarrow offers beautiful clusters of flowers in various colors and spreads readily once established. Sea holly lives up to its name with impressive salt tolerance and architectural interest.
Among shrubs, saltbush naturally thrives in these conditions and provides attractive silvery foliage. Tamarisk, Russian olive, and certain varieties of lilac also demonstrate remarkable resilience.
**Growing Tips**
Even salt-tolerant plants appreciate good practices. Water deeply but less frequently to help leach salts below the root zone. Apply organic mulch to moderate soil temperature and conserve moisture. Most importantly, keep amending your soil with compost and gypsum while these hardy plants hold down the fort—they’re your allies in creating the garden you envision, not a permanent limitation.

Long-Term Maintenance: Keeping Your Garden Healthy
Once you’ve successfully amended your saline-sodic soil, the real work begins—keeping it healthy for the long haul! Think of it as maintaining a friendship: consistent attention prevents problems from sneaking back in.
**Smart Watering Makes All the Difference**
Your irrigation approach is crucial. Deep, infrequent watering beats frequent shallow watering every time. Aim to water thoroughly once or twice weekly rather than daily sprinkling, which encourages salt accumulation near the surface. If possible, install a drip irrigation system—it delivers water directly to roots while minimizing evaporation and salt buildup. I learned this lesson the hard way after years of overhead watering left white crusty deposits on my soil surface!
Always check that your soil drains well after watering. Pooling water signals drainage issues that need immediate attention, as standing water can reverse all your hard work.
**Mulch: Your Secret Weapon**
A 2-3 inch layer of organic mulch works wonders. It moderates soil temperature, reduces evaporation (which concentrates salts), and gradually adds organic matter as it decomposes. Refresh your mulch layer each spring and fall.
**Stay Ahead with Regular Testing**
Test your soil every spring and fall for the first two years after remediation, then annually thereafter. This schedule catches problems early when they’re easier to fix. Keep a simple garden journal noting test results and any changes you observe—patterns often emerge that guide your care strategy.
**Seasonal Maintenance Checklist**
Spring and fall are perfect times to add compost and check drainage. After heavy rains, observe how quickly water absorbs. Continue gypsum applications annually if needed, though typically at reduced rates once soil improves.
If you’ve made it this far, you’re already on the right path to transforming your challenging saline-sodic soil into a thriving garden space. Remember, you’re not alone in facing this issue—countless gardeners have successfully reclaimed their soil, and you can too!
The journey starts with understanding what you’re dealing with. Test your soil to confirm the problem, then create a realistic action plan. Whether you choose gypsum amendments, organic matter enrichment, improved drainage, or a combination of approaches, consistency is your best friend. These improvements don’t happen overnight, but with patience and the right techniques, you’ll see progress season by season.
Don’t let the challenge discourage you from gardening today. While your soil rehabilitation is underway, enjoy immediate success by planting salt-tolerant varieties that actually thrive in these conditions. Think of them as your garden allies, working alongside you to improve the soil structure with their roots while providing beauty and harvest.
Small steps add up to big changes. Start with one area, implement your chosen remediation strategy, and expand from there. Keep records of what works in your specific conditions—you’re becoming an expert in your own garden’s unique needs.
Your soil’s story doesn’t end here; it’s just beginning a new chapter. With the knowledge you’ve gained and a commitment to gradual improvement, you’re equipped to create the garden you’ve been dreaming of. Roll up your sleeves and dig in—literally! Your transformed garden awaits.

