Test your soil immediately using a home testing kit or professional lab analysis to identify heavy metals like lead, arsenic, and cadmium, especially if your garden sits near old buildings with lead paint, former industrial sites, or areas treated with arsenic-based pesticides. Send samples from multiple garden zones at different depths to get the complete picture of what you’re working with.
Remove the top 6-12 inches of heavily contaminated soil if tests reveal dangerous levels, replacing it with certified clean topsoil and compost, then create raised beds with landscape fabric barriers to prevent roots from reaching contaminated layers beneath. This physical removal method works fastest for severely affected areas where children or pets play.
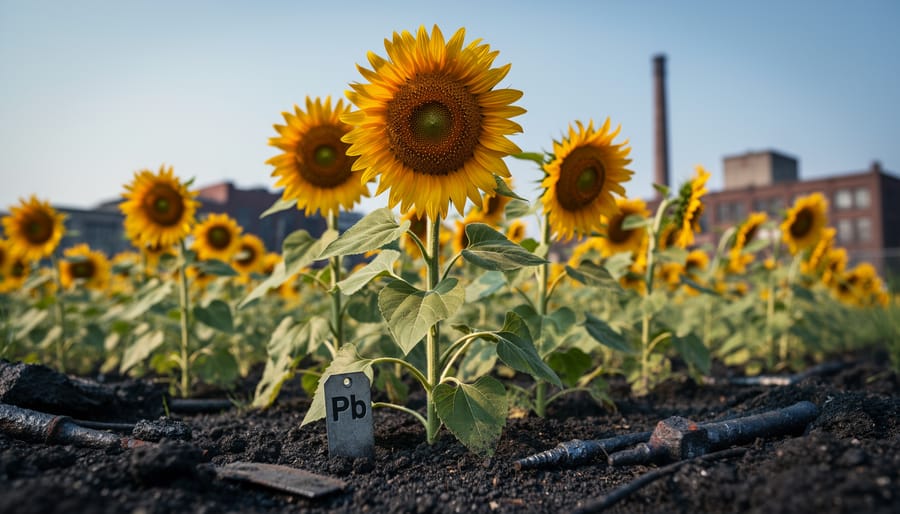
Plant sunflowers, mustard greens, and Indian grass in moderately contaminated zones to naturally absorb toxins through their roots over one to three growing seasons, a process called phytoremediation that lets nature do the cleanup work. These plants pull contaminants from soil into their tissues, which you’ll harvest and dispose of properly, never composting or eating them.
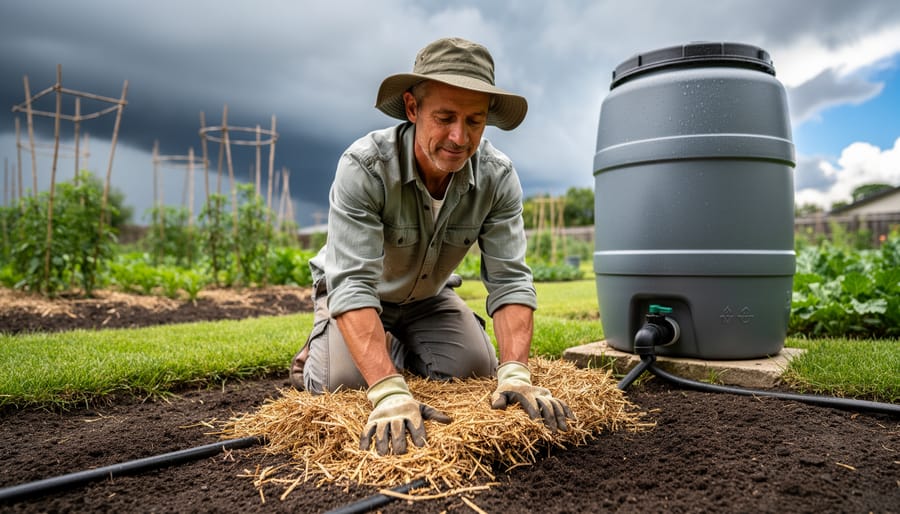
Add 2-4 inches of compost annually to contaminated beds you cannot excavate, building healthy microbial communities that bind heavy metals and prevent plants from absorbing them. This approach won’t eliminate contaminants but significantly reduces their bioavailability, making your garden safer while you implement longer-term solutions. Combining these strategies based on your specific contamination levels gives you a clear path forward, whether you’re dealing with minor concerns or serious pollution that’s been hiding in your backyard for decades.
Understanding What’s Really in Your Soil
Common Culprits in Home Gardens
Let’s talk about what might be lurking in your garden soil. Don’t worry – knowledge is power, and understanding these common culprits is the first step toward healthier soil!
Lead tops the list, especially if your home was built before 1978. Old paint chips from house exteriors settle into foundation beds, and I’ve seen beautiful cottage gardens with surprisingly high lead levels. Drip lines along eaves are particularly vulnerable spots.
Arsenic often shows up from pressure-treated lumber used in raised beds or play structures before 2003. If you’ve got older wooden garden borders or that charming arbor from decades past, it’s worth testing nearby soil.
Petroleum products sneak in from various sources – that spot where the lawnmower drips, areas near old oil tanks, or even from asphalt driveway runoff during heavy rains.
Old pesticides persist longer than most gardeners realize. Properties with former agricultural use or even enthusiastic chemical-dependent previous owners may harbor DDT and chlordane residues. I once interviewed a gardener who discovered her “mystery dead zone” stemmed from pesticides applied thirty years before she moved in.
The good news? Once identified, these contaminants can be managed effectively.
Signs Your Soil Might Be Contaminated
Your garden often speaks volumes about what’s happening beneath the surface, and knowing what to look for can help you catch contamination early. I learned this firsthand when a neighbor noticed her tomatoes weren’t thriving despite her best efforts—turns out her plot was near an old painted fence line.
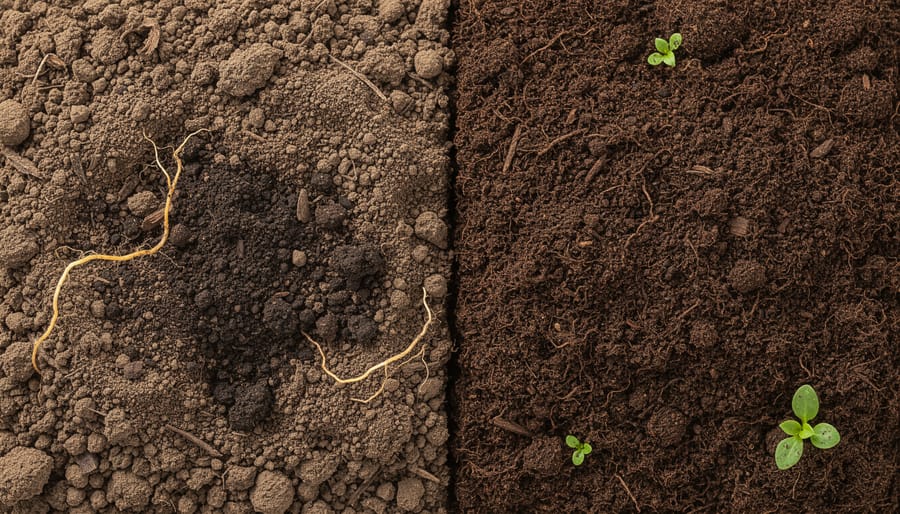
Watch for plants that struggle year after year despite proper care, showing stunted growth, yellowing leaves, or poor yields. Discolored soil is another telltale sign—unusual gray, blue, or orange tints can indicate heavy metal presence. If you notice an oily sheen on water puddles or detect chemical or petroleum odors, that’s definitely cause for concern.
Location matters tremendously. Gardens near busy roads may have lead accumulation from years of leaded gasoline use. Properties with structures built before 1978 often have lead paint residue in the soil. Old industrial sites, former orchards (which used arsenic-based pesticides), and areas near treated lumber also warrant extra attention.
Here’s my advice: if you’re seeing multiple warning signs, or if your property has any of these risk factors, professional soil testing is worth every penny. Don’t rely on guesswork when it comes to your family’s safety and your harvest’s health.
Testing Your Soil: The First Step to Recovery
Before you can heal your soil, you need to know what you’re dealing with. Think of soil testing as a health checkup for your garden—it reveals hidden issues so you can create the right treatment plan.
You have two main paths: DIY test kits or professional lab analysis. DIY kits are perfect for quick assessments and typically cost between $10 and $40. They’re great for checking basic pH levels and major nutrients, and some advanced kits can detect heavy metals like lead. I’ve used them myself on lazy Sunday afternoons, and they give you results within minutes. However, for truly accurate contamination screening, professional lab testing is your best bet.
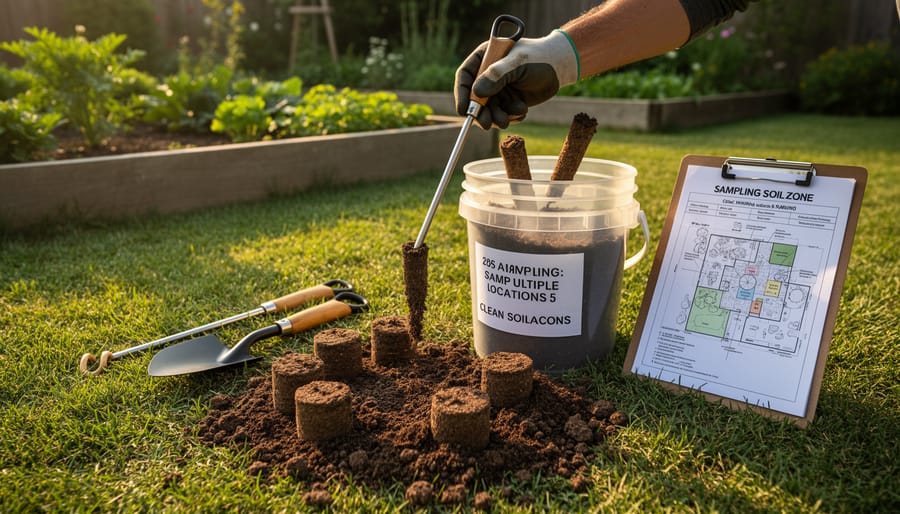
When sending samples to a lab, request a comprehensive contamination panel that includes heavy metals (lead, arsenic, cadmium, chromium), petroleum products, and pesticide residues if you’re near agricultural areas or old orchards. Most university extension services offer testing for $25 to $100, which is remarkably affordable for the peace of mind you’ll gain.
Here’s my practical tip: collect samples from multiple spots in your garden, especially near old painted structures, driveways, or property boundaries where runoff might accumulate. Mix equal amounts from each location in a clean bucket, then submit about two cups of this combined sample.
Understanding your results doesn’t require a chemistry degree. Labs provide clear reports with contamination levels compared to safe thresholds. Numbers above recommended limits mean action is needed, while borderline results suggest monitoring and preventive measures. Many gardeners discover their soil is perfectly fine, which is wonderful news! For those who do find contamination, various soil testing methods can help you track your remediation progress over time, turning this initial test into the first chapter of your soil’s recovery story.
Traditional Remediation Methods for Home Gardeners
Soil Removal and Replacement
Sometimes, despite our best efforts, the contamination is simply too severe for other remediation methods. If testing reveals dangerous levels of heavy metals like lead or arsenic, especially in areas where you grow edibles, removal might be your safest bet.
Here’s the straightforward approach: First, contact your local environmental agency about proper disposal. Many communities have hazardous waste facilities that accept contaminated soil, though you’ll likely need to provide test results. Mark off the contaminated area clearly before you begin digging.
Remove soil to a depth of at least 12 inches, or deeper if testing shows contamination extends further. I learned from master gardener Patricia Chen, who remediated her Detroit garden, that containing the excavated soil in heavy-duty contractor bags prevents spread during transport. Never use contaminated soil elsewhere in your yard.
For replacement, consider building raised beds filled with certified clean topsoil and compost. This creates a physical barrier between your plants and any remaining contamination below. Aim for beds at least 18 inches deep for vegetables, deeper for root crops. The upfront cost feels significant, but you’re investing in safe, productive growing space for years to come. Plus, raised beds offer excellent drainage and easier maintenance as a bonus.
Soil Amendment Strategies
When your soil contains contaminants, you don’t always need to replace it entirely. Strategic amendments can work wonders by binding harmful substances and making them less available to your plants.
Compost is your first line of defense. Adding generous amounts of quality compost increases organic matter, which naturally binds to heavy metals like lead and cadmium. The beneficial soil microbes in compost also help break down certain organic contaminants while improving overall soil structure.
Biochar has become increasingly popular among gardeners tackling contamination. This charcoal-like material acts like a sponge, capturing contaminants in its porous structure and holding them away from plant roots. Mix it thoroughly into the top six inches of soil at a rate of about 10% by volume.
Lime can help too, particularly with heavy metal contamination. By raising soil pH, lime reduces the solubility of metals like lead and zinc, making them less mobile. Always test your pH first though, as overliming creates its own problems.
Think of amendments as a gradual healing process. While they won’t remove contaminants entirely, they create safer conditions for growing, especially when combined with other remediation strategies.
Containment and Barrier Methods
Sometimes the simplest solution is creating a barrier between you and contaminated soil. Think of it as giving your plants a fresh start in a safe zone above the problem area.
Raised beds are my go-to recommendation for gardeners dealing with contamination. Build them at least 12 inches high using untreated wood, stone, or composite materials, then fill with clean topsoil and compost. I’ve seen friends transform contaminated yards into thriving vegetable gardens this way without ever touching the problem soil beneath.
Container gardening offers another excellent workaround, especially for patios or smaller spaces. You’re in complete control of the soil quality, and you can move containers if needed.
For larger areas where you want to preserve existing plants, heavy-duty landscape fabric can prevent contaminated soil from migrating upward. Top it with 6-8 inches of clean soil to create a protective barrier. Master gardener Susan Chen shared with me that she used this method around her fruit trees after discovering lead contamination, and her trees have flourished for five years.
These containment methods work immediately and require minimal maintenance, making them perfect starting points while you explore longer-term remediation options.
Phytoremediation: Let Plants Do the Heavy Lifting
Here’s some exciting news: you don’t always need expensive treatments or heavy equipment to tackle contaminated soil. Sometimes, the best cleanup crew comes with roots, leaves, and a natural ability to work wonders. Welcome to the fascinating world of phytoremediation, where plants become your garden’s environmental superheroes.
Think of phytoremediation as nature’s own cleanup service. Certain plants have evolved remarkable abilities to deal with metals, chemicals, and other nasties in the soil. Some plants act like tiny vacuum cleaners, absorbing contaminants through their roots and storing them safely in their leaves and stems. Others work more like nature’s chemists, breaking down pollutants into harmless substances. Still others stabilize contaminants in place, preventing them from spreading or washing into groundwater.
The beauty of this approach? It’s gentle, sustainable, and surprisingly effective for many common garden contaminants. Sunflowers, for instance, are famous for pulling heavy metals from soil. Willows and poplars excel at cleaning up petroleum products. Indian mustard can tackle lead, while ferns have shown promise with arsenic.
I spoke with Maria Chen, an urban gardener who successfully used phytoremediation on her city lot. “I was skeptical at first,” she admits. “But after two growing seasons of planting sunflowers and Indian mustard in rotation, soil tests showed significant improvement. Plus, my garden looked beautiful while healing itself!”
The process does require patience. Unlike chemical treatments that work quickly, phytoremediation typically takes multiple growing seasons. You’ll also need to safely dispose of harvested plants, since they’ll contain the contaminants they’ve absorbed. However, for gardeners committed to sustainable, eco-friendly solutions, letting plants do the heavy lifting offers a rewarding path forward.
Choosing the Right Plants for Your Contamination Problem
Heavy Metal Accumulators
Nature provides some remarkable cleanup crews in the form of plants that literally soak up heavy metals from contaminated soil. If your soil tests reveal elevated levels of lead, cadmium, or other heavy metals, these green helpers might be your most affordable and eco-friendly solution.
Sunflowers are the superstars of this group, pulling up lead and arsenic through their extensive root systems. They’re incredibly easy to grow—just plant seeds directly in the ground after your last frost, give them full sun, and watch them work their magic while adding cheerful beauty to your garden.
Indian mustard is another powerhouse accumulator, particularly effective with lead, chromium, and cadmium. Sow seeds in early spring or fall, spacing them about 6 inches apart. These fast-growing plants can be harvested in just 4-6 weeks, making them perfect for multiple growing cycles in one season.
Alpine pennycress, though less well-known, absorbs zinc and cadmium with impressive efficiency. It’s a cool-season crop that thrives in spring and fall, tolerating poor soil conditions that would discourage other plants.
Remember, once these plants have done their job, they’ve become contaminated themselves. Never compost them or add them to your regular yard waste. Instead, bag them carefully and dispose of them according to your local hazardous waste guidelines. Think of them as tiny cleanup workers carrying the contaminants away from your garden forever.
Petroleum and Chemical Fighters
When your garden soil has been contaminated with petroleum products or organic chemicals—perhaps from an old oil spill, fuel leak, or chemical storage—certain resilient plants can actually help clean things up naturally. This process might sound like magic, but it’s pure plant science at work!
Willows and poplars are superstars in this category. These fast-growing trees have extensive root systems that reach deep into contaminated soil, absorbing petroleum hydrocarbons and breaking them down through natural enzymes. I’ve seen willows transform a former gas station site into a thriving green space over just five years. Their rapid growth means they process large volumes of contaminated soil relatively quickly.
Certain grasses deserve recognition too. Tall fescue and ryegrass varieties can tackle diesel fuel and oil contamination in shallower soil layers. They’re particularly useful for smaller contaminated areas in residential gardens, as they’re less invasive than trees and easier to manage.
The beauty of these petroleum fighters is their dual purpose—they remediate your soil while creating privacy screens or attractive landscape features. Keep in mind that this approach works best for moderate contamination levels and requires patience. Plants aren’t miracle workers overnight, but given time, they transform poisoned earth into healthy growing space again.
All-Purpose Soil Improvers
If you’re looking for garden workhorses that tackle multiple contamination issues while being beginner-friendly, I’ve got some wonderful options for you. These plants are my go-to recommendations for gardeners who want results without fuss.
Sunflowers deserve a standing ovation in my book. These cheerful giants pull heavy metals like lead and arsenic from soil while being nearly impossible to kill. I remember chatting with Master Gardener Susan Chen, who told me, “I planted sunflowers along my old fence line where lead paint had flaked for decades. Not only did they brighten my yard all summer, but soil tests the following year showed measurable improvement.” Plant them in spring, give them full sun, and watch them work their magic.
Indian mustard is another superstar that handles multiple contaminants, including cadmium, chromium, and lead. It grows quickly, thrives in various conditions, and you can harvest multiple rounds in a single season. The best part? You can treat it as a cover crop, simply tilling it under before it goes to seed.
Hemp is gaining popularity for good reason. It’s incredibly fast-growing, deeply rooted, and effective against heavy metals and even some petroleum products. Check your local regulations first, as growing requirements vary by location, but where permitted, it’s remarkably resilient and productive.
Implementing Your Phytoremediation Garden: A Step-by-Step Approach
Planning Your Remediation Garden
Starting your remediation garden begins with understanding what you’re working with. First, get your soil tested by a certified lab to identify which contaminants are present and their concentration levels. This creates your roadmap, showing you exactly where problem areas exist.
Once you have results, sketch a simple garden map marking contaminated zones. This doesn’t need to be fancy—a hand-drawn diagram works perfectly. Note which areas have the highest contamination levels, as these will need the most aggressive treatment.
Next, match plants to your specific contaminants. Sunflowers excel at absorbing heavy metals like lead, while Indian mustard tackles cadmium and zinc. Poplar trees work wonderfully for petroleum-based pollutants. Choose varieties suited to your climate and growing conditions, just as you would with any garden planning.
Remediation isn’t instant—think marathon, not sprint. Create a realistic timeline spanning 2-5 years depending on contamination severity. Year one might focus on preparing beds and establishing fast-growing accumulators. Years two and three continue the process while you monitor progress through periodic soil testing. Remember, proper soil preparation techniques remain important even when using remediation plants.
Mark your calendar for annual soil retests to track improvement and adjust your plant selections accordingly.
Planting and Maintenance Tips
Getting your remediation plants off to a strong start makes all the difference in how effectively they’ll clean your soil. Before planting, gently loosen root balls to encourage outward growth, and space plants according to their mature size—crowding reduces their contaminant uptake efficiency.
Water consistently during the first growing season to establish deep roots. Most hyperaccumulators prefer consistent moisture but not waterlogged conditions, so aim for soil that feels like a wrung-out sponge. Once established, these plants are surprisingly low-maintenance and often drought-tolerant.
Here’s something that surprises many gardeners: don’t over-fertilize remediation plants. When soil nutrients are too abundant, plants become lazy about absorbing heavy metals. A light application of compost in spring provides sufficient nutrition without hindering their cleanup work.
Monitor your plants regularly for signs of stress. Yellowing leaves or stunted growth might indicate contaminant levels are overwhelming, so you may need to harvest and dispose of the plant material more frequently. I spoke with environmental horticulturist Dr. Maria Chen, who recommends harvesting plants before they go to seed to prevent contaminated plant material from spreading. Cut plants at soil level and dispose of them according to your local hazardous waste guidelines—never compost contaminated plant material.
Safe Harvest and Disposal
Here’s the crucial part many gardeners overlook: plants that have absorbed contaminants should never enter your compost bin or be left on-site. I learned this the hard way when a neighbor composted phytoremediation plants, essentially recycling the very toxins she’d worked to remove!
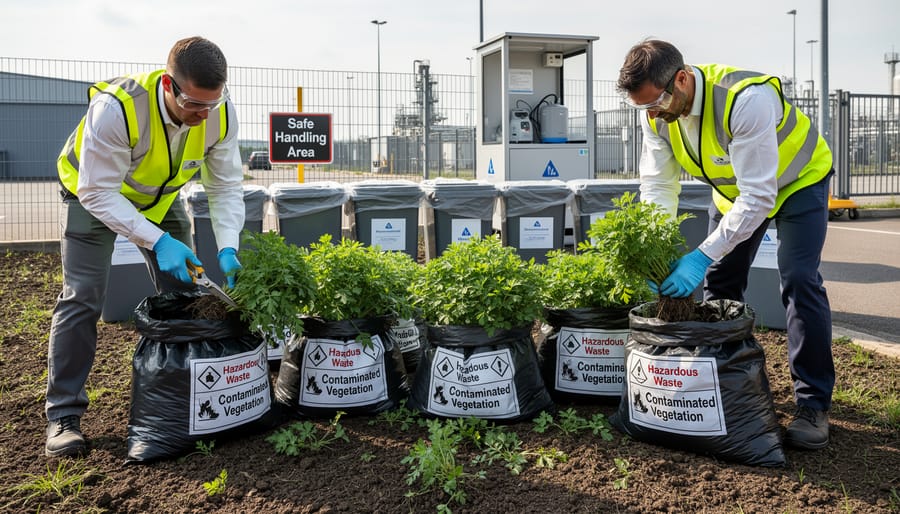
When harvesting hyperaccumulator plants, wear gloves and use dedicated tools. Cut plants at soil level rather than pulling roots, which disturbs contaminated soil. Bag the plant material immediately in heavy-duty plastic bags.
For disposal, contact your local waste management authority about hazardous waste collection days. Many communities offer free drop-off events for contaminated materials. Never burn these plants, as this releases toxins into the air and concentrates them in ash.
Keep contaminated plant material away from children, pets, and wildlife. Store bagged plants in a secure area until proper disposal. Remember, you’re removing these contaminants from your garden ecosystem entirely, not just moving them around. This final step completes your remediation journey and protects your family’s health for years to come.
Real Success Story: How One Gardener Transformed Contaminated Soil
When Maria Rodriguez moved into her Brooklyn brownstone three years ago, she discovered her backyard garden was a toxic legacy of the neighborhood’s industrial past. Soil tests revealed elevated levels of lead and cadmium—a heartbreaking blow for someone who’d dreamed of growing vegetables.
“I was devastated,” Maria recalls. “I couldn’t afford to remove and replace all that soil, and I wasn’t about to give up my garden dreams. That’s when I discovered phytoremediation.”
Maria started her cleanup journey in spring 2021 by planting sunflowers and Indian mustard greens throughout her 400-square-foot garden. These heavy-metal-accumulating plants became her soil’s cleanup crew. She also added compost and mulch to support the process.
“The first year was honestly discouraging,” she admits. “Nothing dramatic happened. The plants grew, I harvested and disposed of them properly, and I wondered if it was working at all.”
But Maria stayed patient. By the second growing season, she expanded her phytoremediation approach, adding alpine pennycress and rotating her plantings. She tested her soil every six months to track progress.
The biggest challenge? Managing expectations. “Everyone wants instant results, but phytoremediation is a marathon, not a sprint. I had to remind myself that I was healing the soil naturally, without harsh chemicals or spending thousands on excavation.”
After two and a half years, Maria’s persistence paid off. Her most recent soil tests showed lead levels had dropped by 40 percent—enough to safely grow leafy greens in raised beds with fresh soil layered on top, while continuing phytoremediation in surrounding areas.
“I still have work to do, but now I’m growing kale and lettuce for my family,” Maria says proudly. “My advice? Start testing, start planting, and trust the process. You don’t need a science degree or a huge budget—just patience and commitment to doing things the natural way.”
Safety First: Protecting Your Family While Remediating
Let me be honest with you—working with contaminated soil isn’t something to take lightly. I’ve seen too many eager gardeners dive into remediation projects without proper precautions, and that’s a recipe for trouble. Your health and your family’s wellbeing always come first.
Before you start any remediation work, invest in proper protective equipment. At minimum, you’ll need heavy-duty gloves (not your regular gardening gloves), a dust mask or N95 respirator, and long sleeves and pants. If you’re dealing with serious contamination—lead, arsenic, or industrial pollutants—consider adding safety goggles and washable work boots you can leave outside.
Here’s something I learned from experienced soil remediation specialist Maria Chen: “Never eat, drink, or touch your face while working with contaminated soil. Keep a bucket of clean water nearby for washing hands, and always shower and change clothes before interacting with family members.” This simple advice has stuck with me through every remediation project.
Keep children and pets completely away from contaminated areas. Mark off the zone with bright fencing or tape, and be clear with kids about why it’s off-limits. I know it’s tough when little ones want to help, but their smaller bodies are more vulnerable to toxins.
Until remediation is complete and you’ve confirmed through testing that contamination levels are safe, avoid growing any edible crops in treated areas. Stick to ornamental plants during the remediation phase. This is where soil conservation practices become especially important—protecting the progress you’ve made while keeping everyone safe.
If contamination is severe, don’t hesitate to call professionals. Some situations are simply beyond DIY remediation.
Here’s the good news that I hope you’ll take to heart: soil contamination is absolutely fixable. Whether your garden has inherited heavy metals from old paint, picked up petroleum residues, or accumulated pesticides over the years, you’re not stuck with damaged soil forever. We’ve explored two main pathways forward—traditional remediation methods like soil replacement and amendments, and the fascinating world of phytoremediation, where plants themselves become your cleanup crew.
The most empowering step you can take right now is getting your soil tested. It removes all the guesswork and gives you a clear roadmap for what needs attention. I’ve seen countless gardeners transform contaminated plots into thriving, productive spaces simply by taking that first step and following through with patience.
Remember, healing your soil is a journey, not a race. Whether you choose sunflowers to tackle heavy metals or opt for bringing in fresh, clean soil, you’re investing in something wonderful—a safer, healthier garden where you and your family can grow food, play, and create memories without worry. Your garden’s best chapters are still ahead, and you’ve got everything you need to write them. Happy gardening!