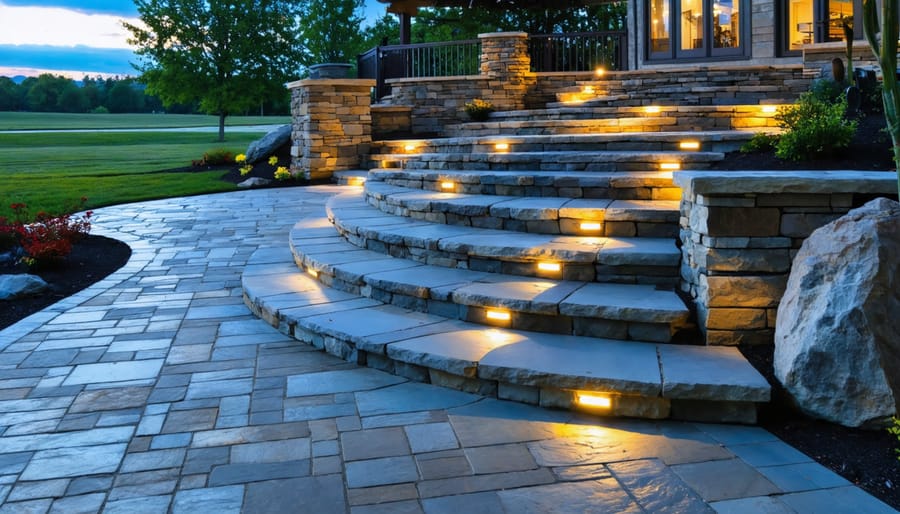
Position uplights at the base of stone walls and pillars to create dramatic shadows that transform ordinary hardscape features into nighttime focal points. Install path lights every 8-10 feet along walkways and stairs to ensure safe navigation while maintaining an inviting ambiance. Highlight textured surfaces like stacked stone or brick by placing fixtures 12-18 inches away at a 30-degree angle to emphasize depth and character.
Low-voltage lighting systems operate on just 12 volts, making them incredibly safe to install yourself without an electrician. This means you can finally bring those beautiful retaining walls, stone patios, and garden steps to life after sunset without worrying about electrical hazards or expensive professional installation. The energy-efficient LED bulbs use roughly 80% less electricity than traditional lighting, saving you money while extending your outdoor living hours well into the evening.
Whether you’ve invested in elegant pavers, rustic stone borders, or modern concrete elements, proper lighting turns these daytime investments into 24-hour assets. Your carefully chosen materials deserve to shine, literally. The gentle glow from strategically placed fixtures creates layers of visual interest, guides guests safely through your garden, and adds significant curb appeal that neighbors will notice.
This complete guide walks you through selecting the right fixtures, planning your layout for maximum impact, and installing everything yourself in a single weekend. You’ll discover which lighting techniques work best for different materials, how to avoid common mistakes, and simple maintenance practices that keep your system glowing beautifully for years.
Why Low-Voltage Lighting Works Best for Hardscape Features

Safety First: Why 12-Volt Systems Are Garden-Friendly
One of my favorite things about low-voltage lighting is the peace of mind it brings to your garden space. Operating at just 12 volts instead of the standard 120 volts from your house, these systems are remarkably safe for outdoor environments where moisture, curious children, and playful pets are part of everyday life.
Think about where you’ll likely place your hardscape lights: near water features, along pathways where morning dew collects, or around stone patios where kids race barefoot on summer evenings. Standard voltage systems can pose serious risks in these situations, but low-voltage lighting dramatically reduces the chance of electric shock. Even if a wire gets accidentally cut while you’re digging or a fixture gets knocked over, the lower voltage means there’s minimal danger.
I spoke with master gardener Ellen Rodriguez, who installed low-voltage lighting around her koi pond last spring. “I love that my grandkids can play near the water without me worrying,” she told me. “And when I’m working in the garden and accidentally nick a wire with my spade, it’s not a crisis.”
The gentler electrical current is also kinder to nearby plants, as it doesn’t generate excessive heat that might stress delicate roots or foliage growing close to fixtures.
Lower Energy Bills, Brighter Nights
Here’s something that might surprise you: switching to low-voltage lighting for your hardscape can slash your outdoor lighting energy costs by up to 80% compared to traditional line-voltage systems. Think about that for a moment. If you’re currently spending $20 a month lighting your pathways and patio, you could be spending just $4 instead.
Low-voltage systems typically use LED bulbs that operate at just 12 volts, compared to the standard 120 volts running through your home. To put this in perspective, a single 7-watt LED low-voltage bulb produces the same light as a 40-watt traditional bulb while using a fraction of the electricity. Over the course of a year, that’s equivalent to the energy your refrigerator uses in about a week.
The environmental impact is equally impressive. By choosing low-voltage LED lighting, you’re reducing your carbon footprint in a meaningful way. Each pathway light you install prevents approximately 200 pounds of carbon dioxide emissions annually compared to conventional lighting. That’s like planting two trees every year, just by making a smarter lighting choice.
The best part? These energy-efficient systems don’t require you to sacrifice brightness or ambiance. Modern low-voltage fixtures deliver warm, inviting light that enhances your outdoor spaces while letting you enjoy those beautiful evening hours in your garden without the guilt of wasting energy or money.
Planning Your Hardscape Lighting Design
Walk Your Space at Night (Yes, Really)
Here’s something that might sound a bit odd, but trust me on this one: the best time to plan your lighting layout is after the sun goes down. Grab a flashlight and take a slow walk through your garden and hardscape areas at night. You’ll be amazed at what you discover.
During my first nighttime walkthrough, I realized my beautiful stone pathway became completely invisible after dark, and guests were constantly missing the steps down to our patio. Those safety concerns became my top priorities.
As you wander, make mental notes or use your phone to record observations. Where do shadows create potential hazards? Which stepping stones disappear into darkness? Are there any architectural features, like that gorgeous retaining wall or decorative pillar, that deserve some spotlight love?
Pay attention to how you naturally navigate the space. You’ll likely notice yourself drawn toward existing light sources, even dim ones. This helps you understand traffic patterns and where people will want illumination most.
Consider bringing a friend along for a fresh perspective. Sometimes we’re so familiar with our own spaces that we miss obvious concerns. Plus, it’s more fun than wandering around alone in the dark!
Which Hardscape Features Deserve the Spotlight
Not all hardscape features need equal lighting attention—some naturally deserve the spotlight more than others. Let’s talk about where your efforts will create the most impact.
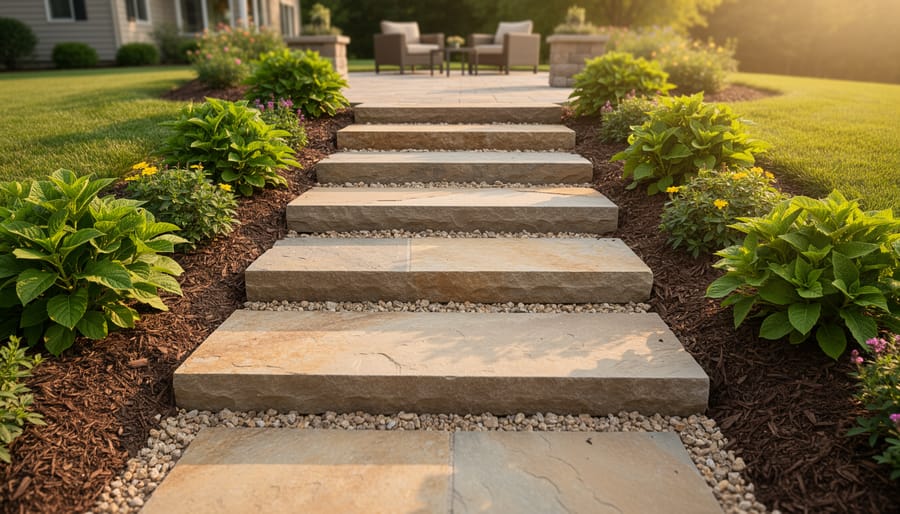
Safety comes first, so prioritize pathways and steps. These high-traffic areas need consistent illumination to prevent trips and stumbles during evening strolls. I always recommend placing lights every six to eight feet along walkways, creating a welcoming guidepost effect that’s both functional and beautiful.
Retaining walls are perfect candidates for dramatic uplighting or grazing techniques. Position fixtures at the base to wash light upward, highlighting the texture of stone or brick while adding depth to your landscape. This works especially well with stacked stone walls where shadows enhance the dimensional quality.
Your patio serves as your outdoor living room, so create ambiance with softer lighting around seating areas. Consider post lights at corners or string lights overhead for a cozy gathering space.
Pergolas and arbors become magical with downlighting that mimics moonlight filtering through leaves. Mount fixtures on crossbeams to create dappled patterns below.
Water features truly shine with submersible or adjacent lighting that makes moving water sparkle. Even a simple fountain becomes a captivating focal point when properly lit, transforming your garden into an evening oasis that beckons you outside.

Sketching Your Lighting Layout (No Art Degree Needed)
You don’t need to be a landscape architect to sketch out an effective lighting plan. I promise, stick figures are totally acceptable here! Start with a simple bird’s-eye view of your hardscape features on graph paper, marking pathways, patios, retaining walls, and steps. Each square can represent a foot or two, whatever scale works for you.
If paper isn’t your thing, free phone apps like iScape or even a basic drawing app work beautifully. Take photos of your space and sketch right over them. I’ve seen people create fantastic plans using nothing more than their finger on a tablet screen.
As you sketch, think about where you naturally walk after dark and which features you want to highlight. Place fixture symbols (simple circles work fine) where you need light, spacing them 8-10 feet apart along pathways. Mark potential transformer locations near outdoor outlets. Don’t forget to note obstacles like tree roots or irrigation lines that might affect your installation path.
Here’s my favorite tip: walk your property at dusk with a flashlight, shining it where you’re considering fixtures. This quick test reveals what will actually be illuminated and helps you avoid over-lighting, which is surprisingly common.
Choosing the Right Fixtures for Each Hardscape Element
Path Lights and Step Lights for Safety and Beauty
Walkways and stairs deserve special attention when planning your hardscape lighting—they’re where safety meets beauty in the most practical way. I’ve learned through experience that properly lit paths not only prevent stumbles but also create an inviting atmosphere that draws you outside on warm evenings.
For walkways, space your path lights every 8-10 feet along both sides if possible, or stagger them alternately if you prefer a softer look. Choose fixtures that cast light downward rather than outward to avoid glare. I’m particularly fond of low-profile bollard lights or mushroom-style fixtures that blend naturally with garden borders.
Step lights require different thinking. Mount them directly into risers or adjacent walls, positioning one at every change in elevation. This creates a gentle rhythm of light that clearly defines each step without overwhelming the space. Recessed fixtures work beautifully here, tucking discreetly into the hardscape itself.
A landscape designer friend once told me that the best path lighting makes you feel guided, not spotlighted. Aim for warm-toned LEDs around 2700-3000K—they’re welcoming and easy on the eyes. Remember, you’re creating a gentle glow that enhances your outdoor experience, not flooding the area with harsh brightness.
Wall Washers and Downlights for Vertical Features
When you’re ready to bring your vertical hardscape elements to life after dark, wall washers and downlights are your secret weapons for creating stunning depth and drama.
Wall washers work beautifully to illuminate the entire face of retaining walls or fences, casting a gentle glow that highlights texture and creates visual interest. Position these fixtures about 12 to 18 inches away from the wall’s base, angled upward at roughly 30 degrees. This creates that lovely wash of light that makes stone, brick, or wood surfaces really pop.
For garden walls with particular features you want to emphasize, downlights mounted at the top work wonderfully. They create dramatic shadows as light travels downward, perfect for showcasing decorative stonework or interesting patterns.
I’ve found that mixing both techniques often yields the most impressive results. Try wall washers for broad illumination and add a few strategic downlights to highlight special details. Remember to use warm white bulbs (2700K to 3000K) to keep that inviting, natural feel in your outdoor space. Start with lower wattage fixtures and adjust upward if needed – you can always add more light, but overly bright installations feel harsh and unwelcoming.
Spotlights and Well Lights for Focal Points
Spotlights and well lights are your secret weapons for creating dramatic focal points in your hardscape. Think of them as stage lighting for your outdoor space, drawing the eye exactly where you want it to go.
For water features like fountains or small ponds, position spotlights at a low angle to catch the shimmer and movement of water. I learned this trick from a landscape designer friend who swears by placing lights just beneath the waterline for a magical glow that makes evening garden visits unforgettable.
Well lights work beautifully when you want fixtures to disappear. These recessed lights sit flush with the ground, making them perfect for illuminating sculptures, ornamental trees, or architectural columns without cluttering your visual space. Install them about two to three feet from the object you’re highlighting, angled upward at roughly 30 degrees.
Here’s a practical tip: use spotlights with adjustable heads so you can fine-tune the direction as plants grow or seasons change. And remember, less is often more. Choose two or three special features to spotlight rather than trying to illuminate everything. This creates genuine focal points that guide visitors through your garden like a well-told story, letting each special element shine in its moment.

Your Step-by-Step Installation Guide
Gathering Your Tools and Materials
Before you begin your hardscape lighting project, let’s gather everything you’ll need. You’ll want a low-voltage transformer (100-300 watts depending on your fixture count), LED light fixtures designed for outdoor use, low-voltage cable (typically 12 or 14 gauge), wire connectors, a timer or smart control system, and ground stakes.
For quality considerations, invest in a solid transformer with weather-resistant housing and consider LED fixtures with brass or copper construction rather than plastic, as they’ll last years longer. Budget-conscious? Start with fewer high-quality fixtures rather than many cheap ones that’ll need replacing.
You can find these supplies at home improvement stores, specialty landscape lighting retailers, or online. Local electrical supply shops often carry professional-grade options at reasonable prices. Don’t forget wire strippers, a voltage meter for testing, and landscape staples to secure your cables.
Pro tip from seasoned installer Maria Chen: “Spending an extra twenty dollars on a quality transformer with multiple taps saves you headaches later when adjusting brightness.” She’s absolutely right—that flexibility becomes invaluable during installation.
Installing the Transformer (Your System’s Heart)
The transformer is truly your lighting system’s powerhouse, so let’s get it positioned perfectly. Start by selecting a location within 10 feet of a GFCI-protected outdoor outlet. I always recommend mounting it on an exterior wall near your garage or under an eave where it’s protected from direct rain but still has good ventilation.
Before mounting, check your transformer’s capacity. Add up the wattage of all your planned lights and choose a transformer rated at least 20% higher than your total. For example, if you’re running 120 watts of lights, go with at least a 150-watt transformer.
Mount the transformer at least 12 inches above ground level using corrosion-resistant screws. Make sure it’s easily accessible for future adjustments and timer programming. Most models have a built-in timer that you’ll want to reach comfortably.
Connect your low-voltage cable to the transformer’s terminals, being careful to match positive and negative correctly. The connections should be snug but not overtightened. Finally, plug the transformer into your GFCI outlet and test it before proceeding. You’ll feel a real sense of accomplishment seeing that first light glow, knowing you’ve properly powered your system’s heart.
Running Your Cable Like a Pro
Running cable properly is one of those tasks that separates a good lighting installation from a great one. I learned this the hard way during my first attempt, when I lazily laid cable on top of the ground and covered it with mulch. One enthusiastic gardening session later, I’d nicked three wires with my spade!
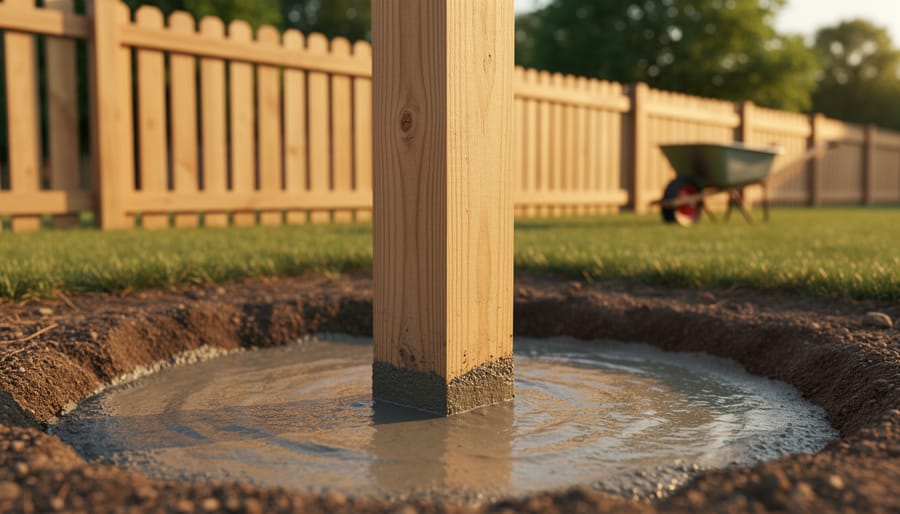
Start by planning your cable routes along natural pathways where they won’t interfere with future plantings or maintenance. For hardscape installations, route cables behind walls, under pavers, or along the edges of pathways where they’re protected. When crossing lawns or garden beds, dig trenches at least 6 inches deep. This protects your wires from curious critters, garden tools, and frost heaving.
Here’s a pro tip I picked up from master landscape designer Maria Chen: always route cables in gentle curves rather than sharp angles. This prevents stress on connections and makes future troubleshooting easier. When securing cable along walls or posts, use specialized cable clips designed for outdoor use, spacing them every 18 to 24 inches.
Protect exposed wires where they emerge from the ground by running them through PVC conduit for the first 12 inches above and below grade. This simple step prevents accidental damage during weeding or edging.
Finally, create a simple map of your cable routes before backfilling. Take photos with your phone showing measurements from fixed landmarks. Trust me, your future self will thank you when you need to expand your system or troubleshoot an issue down the road.

Connecting and Positioning Your Fixtures
Now comes the exciting part—bringing your lighting design to life! Start by positioning your fixtures along your hardscape features. For path lights, space them 6-10 feet apart for consistent illumination. I learned the hard way that closer spacing works better around curved pathways, creating a more inviting glow.
When installing uplights near walls or columns, place them 12-18 inches from the base and angle them upward at about 30-45 degrees. This creates dramatic shadows and highlights texture beautifully. For step lights, mount them flush to the vertical surface of each riser, ensuring the light casts downward to prevent glare.
Making connections is straightforward with modern quick-connect systems. Simply strip about half an inch of wire insulation, insert the fixture wire into the connector, and snap it closed. The connector pierces the wire jacket to complete the circuit—no wire stripping of the main cable needed! Always leave a bit of slack in the wires to accommodate adjustments.
Before finalizing positions, turn on your system at dusk and take a walk around your yard. This is my favorite part of any installation. Adjust fixture angles to eliminate hot spots and ensure light falls exactly where you want it. Sometimes moving a fixture just six inches makes all the difference.
Pro tip from landscape designer Maria Chen: “Test your lighting on a cloudy evening first. It reveals how the fixtures will perform on your typical nights, not just the clearest ones.” This simple advice has saved countless clients from disappointment.
Fine-Tuning Your Lighting for Maximum Impact
The Magic of Layered Lighting
Think of outdoor lighting like painting with light—you’re creating depth and interest through three distinct layers. Once you understand this trio, your hardscape features will truly come alive after sunset.
Ambient lighting is your foundation, providing overall illumination for safety and navigation. For hardscapes, this might mean path lights along your walkway or soft downlights that gently wash your patio, creating a welcoming glow without harsh shadows.
Task lighting serves a specific purpose—illuminating areas where you’ll be doing activities. Think of lights positioned near your outdoor kitchen counter, around seating areas where you’ll read, or focused on steps for safe passage. These fixtures need to be brighter and more directional than your ambient layer.
Accent lighting is where the magic happens! This layer highlights your hardscape’s best features—uplighting that gorgeous stone wall, grazing lights that emphasize your paver patterns, or spotlights showcasing a beautiful fountain. Use these sparingly; the key is creating visual interest, not a theme park effect.
Here’s my practical tip: Start with ambient lighting for safety, add task lighting where needed, then finish with accent lights as your creative flourish. You can always add more fixtures later as your vision evolves.
Setting Timers and Adding Smart Controls
Adding timers and smart controls to your low voltage lighting system is easier than you might think, and they make a world of difference in convenience and energy savings. At the simplest level, a basic photocell timer turns your lights on at dusk and off at dawn automatically—no programming needed. These cost around $20-30 and plug right into your transformer.
If you want more flexibility, digital timers let you set specific on/off times and create custom schedules. Maybe you only want your path lights on until midnight, or your accent lighting to shine just during evening hours when you’re actually enjoying the space. These typically range from $40-80 and are still straightforward to program, usually with clear buttons and digital displays.
For tech-savvy gardeners, WiFi-enabled smart controllers connect to your phone, allowing you to adjust schedules from anywhere, dim lights for different moods, or even sync with sunrise and sunset times automatically. Many integrate with popular smart home systems too. While these cost $100-200, they offer maximum control and energy efficiency by ensuring lights only run when you truly need them, potentially cutting your electricity usage by 30-50% compared to leaving lights on all night.
Maintaining Your Low-Voltage Lighting System
Seasonal Checkups That Take Minutes
I’ll be honest—when I first installed my hardscape lighting, I thought it would be one of those “set it and forget it” things. But a quick seasonal checkup routine keeps everything glowing beautifully year-round, and it truly takes just minutes.
In spring, I spend about ten minutes cleaning each fixture with a soft cloth and mild soap solution. Dirt, pollen, and winter grime can dim your lights significantly. While cleaning, I check that all connections are still snug and haven’t worked loose from freeze-thaw cycles. This is also when I trim back any plants that have grown over the lights during winter dormancy.
Summer calls for another quick inspection. I look for spider webs inside fixtures and adjust lighting angles if plants have grown taller or bushier. It’s amazing how much a rhododendron can shift the light pattern!
Fall is my favorite maintenance season. I clear fallen leaves from around fixtures and check wire connections before winter weather arrives. I also make sure pathway lights aren’t obscured by seasonal mulch applications.
Winter maintenance is minimal—just a quick visual check during garden walks to ensure no fixtures have shifted from frost heave. These simple seasonal habits keep my hardscape lighting looking professional and performing flawlessly for years.
Troubleshooting Common Issues
Even the best-designed lighting systems occasionally hiccup, but don’t worry—most issues have simple fixes! If your lights appear dim, first check your transformer’s wattage capacity. You might be asking it to power more fixtures than it can handle, which spreads the available power too thin. Try removing a few lights temporarily to test if brightness improves.
Flickering lights usually signal a loose connection. Walk your system and firmly secure all wire connectors, paying special attention to junction points. Sometimes moisture sneaks into connections, causing intermittent contact. A bit of dielectric grease can work wonders here.
When an entire section goes dark, you’re likely dealing with a voltage drop issue. This happens when fixtures are too far from the transformer or when wire gauge is too thin for the distance. The solution? Add another transformer closer to the affected area or upgrade to heavier-gauge wire.
I’ve learned that keeping a simple troubleshooting journal helps identify patterns. Note which fixtures act up and when—this detective work often reveals the culprit faster than random fixes!
Real Gardeners, Real Results: A Lighting Success Story
When Sarah Mitchell decided to illuminate her garden pathways and retaining walls, she had no electrical experience whatsoever. “I’m much more comfortable with a trowel than a wire cutter,” she laughs. But the transformation she achieved in just two weekends proves that hardscape lighting is within reach for any motivated gardener.
Sarah’s main challenge was lighting her curved stone pathway and three-tiered retaining wall without creating harsh shadows or overwhelming her cottage garden aesthetic. “I wanted something subtle that would highlight the beautiful stonework I’d spent years perfecting, not turn my backyard into a stadium,” she explains.
Her solution started with careful planning. Sarah spent an evening walking her property after dark, marking spots with garden stakes where she wanted light. This simple trick helped her visualize the finished project before purchasing anything. She opted for a 12-volt system with a 150-watt transformer, choosing nine path lights and four well lights specifically designed for hardscape features.
The installation surprised her with its simplicity. “The hardest part was actually digging the shallow trenches for the cable,” Sarah admits. “Connecting the lights was just plug-and-play. I kept expecting it to get complicated, but it never did.”
Her biggest tip for fellow gardeners? Start small and add more lights later if needed. “I initially thought I needed twice as many fixtures, but testing them before burying the cable showed me that less really is more. The soft glow perfectly highlights the texture of the stone without overpowering my plantings.”
The result speaks for itself. Sarah’s evening garden now features gentle pools of light that guide visitors along the path while showcasing the dimensional beauty of her retaining walls. “It’s extended my garden enjoyment well into the evening hours,” she says. “And honestly, if I can do this, anyone can.”
You’ve made it to the finish line, and I hope you’re feeling excited about the possibilities that hardscape low voltage lighting can bring to your outdoor space. We’ve covered everything from planning your design to connecting those final fixtures, and the beauty of this project is that it’s truly within reach for gardeners of all experience levels. You don’t need to be an electrician or hire expensive contractors to create stunning nighttime landscapes that highlight your beautiful stonework, pathways, and garden features.
Think about what you’ll gain: enhanced safety for evening walks, extended hours to enjoy your outdoor living spaces, increased home value, and that magical ambiance that only thoughtfully placed lighting can create. The low voltage system we’ve discussed is forgiving, energy-efficient, and completely manageable as a weekend DIY project. Plus, once it’s installed, you’ll wonder how you ever enjoyed your garden without it.
Now it’s your turn to grab that transformer, plan your layout, and start transforming your hardscape into an evening showpiece. Take it one step at a time, remember that you can always adjust fixture placement, and don’t be afraid to experiment with different lighting angles and intensities.
We’d absolutely love to hear about your lighting journey! Share your before-and-after photos, any creative solutions you discovered along the way, or questions that came up during installation with the Bluestem community. Your experience might be exactly the inspiration another gardener needs to take that first step.