Install steel or aluminum edging 4-6 inches deep to create permanent boundaries that stop grass runners cold—the vertical barrier blocks rhizomes while remaining nearly invisible at ground level. This one-time investment eliminates the weekly trimming battle that eats up your weekend gardening time.
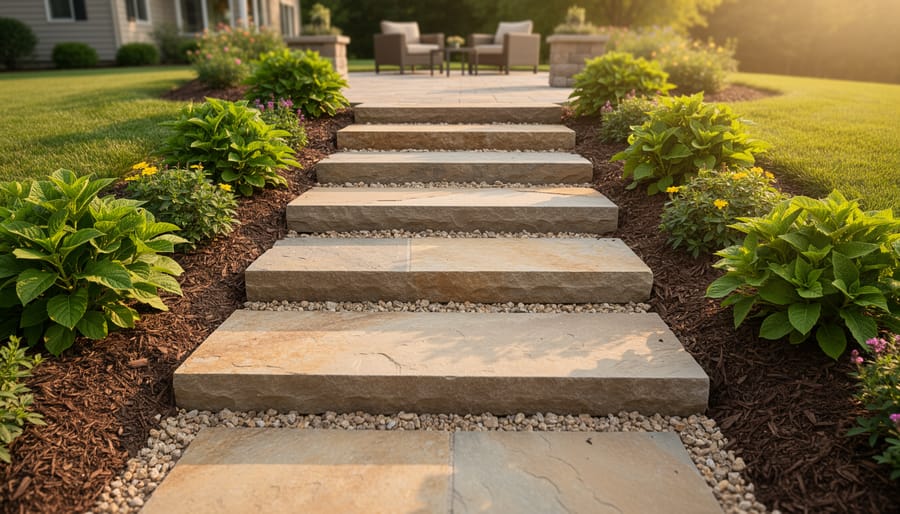
Choose natural stone edging for sloped gardens where drainage matters most. Stack flat fieldstones or bluestone at a slight backward angle, burying the bottom third of each piece, and you’ll channel water away from plant beds while creating texture that complements cottage and woodland designs beautifully.
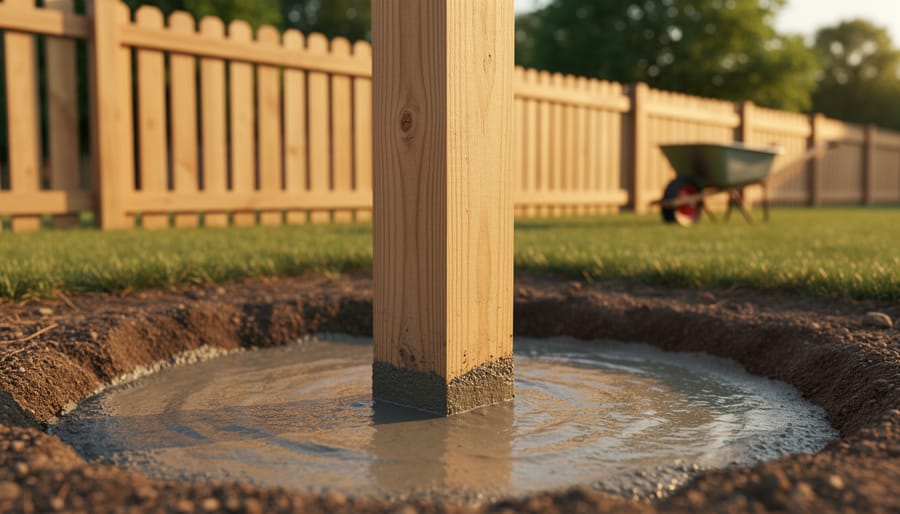
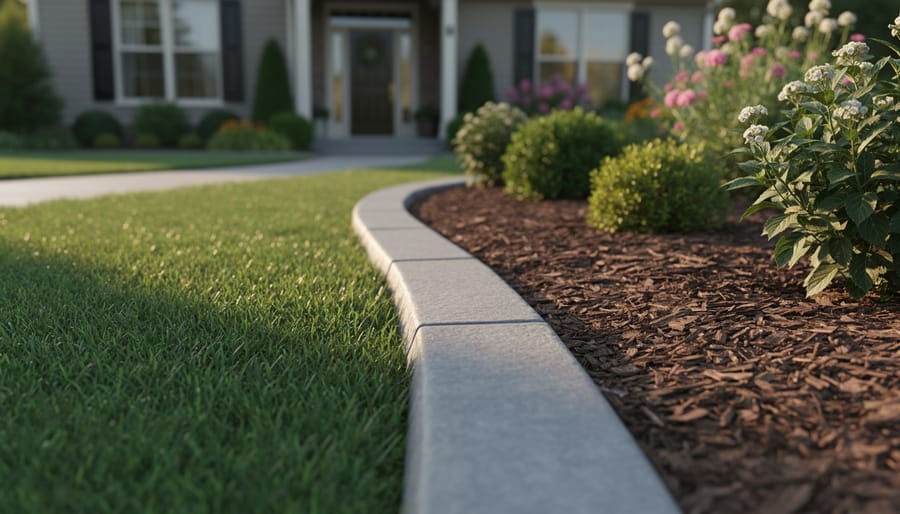
Pour concrete curbing for curves and custom shapes that manufactured products can’t match. A simple 4-inch-wide, 6-inch-deep trench filled with quick-setting concrete gives you control over every contour, and adding decorative stamps or exposed aggregate transforms basic function into eye-catching design. You’ll spend one Saturday on installation and never edge that bed again.
Transform reclaimed brick into charming soldier-course edging by setting each brick vertically in a 3-inch sand base. This technique works perfectly for formal herb gardens and rose beds, giving you that timeless English garden feel without the professional landscaper price tag. The narrow profile means you sacrifice minimal planting space while gaining maximum definition.
The right hardscape edging solves your maintenance headaches permanently while framing your garden beds with intention. Whether you’re battling aggressive turf grass, defining a new planting area, or simply tired of constant touchups, these durable materials create boundaries that last decades, not seasons.
Why Hardscape Edging Matters More Than You Think
If you’ve ever spent a Saturday afternoon trimming grass away from your flower beds only to see it creep right back by the following week, you already understand why hardscape edging deserves serious attention. Quality edging isn’t just about making your garden look polished—though it certainly does that beautifully—it’s about solving real problems that frustrate gardeners every single day.
Let’s start with the biggest time-saver: preventing grass invasion. Without proper edging, lawn grass sends its determined roots straight into your carefully prepared beds, competing with your plants for nutrients and water. A solid edging barrier stops this underground invasion, meaning you’ll spend far less time on your hands and knees digging out stubborn grass clumps. I’ve talked with experienced gardeners who estimate they’ve cut their bed maintenance time in half simply by installing proper edging.
Beyond keeping grass at bay, well-designed edging dramatically improves drainage patterns around your hardscape features. It channels water where you want it to go and prevents soil erosion that can undermine pathways and patios. When combined with thoughtful elements like hardscape lighting, your garden becomes both functional and stunning after dark.
Perhaps most importantly, edging creates visual definition that transforms a garden from merely nice to genuinely impressive. It establishes clear boundaries between different zones—lawn, beds, pathways, and seating areas—giving your entire landscape a cohesive, intentional appearance. This visual clarity makes even modest gardens feel more spacious and professionally designed.
The bottom line? Quality hardscape edging is an investment that pays dividends in reduced maintenance, better plant health, and lasting beauty. It’s one of those foundational elements that truly elevates your entire outdoor space.
Your Best Hardscape Edging Materials (And When to Use Each)
Stone and Natural Rock Edging
Stone and natural rock edging brings timeless beauty to any garden while creating edges that truly stand the test of time. If you’re drawn to organic, earthy aesthetics, this might be your perfect match!
Fieldstone offers wonderful irregularity—those flat-sided stones stack beautifully along bed edges and work particularly well in cottage gardens and naturalized landscapes. I love how each stone is unique, telling its own geological story. River rock, with its smooth, water-worn surfaces, creates a softer look that’s absolutely perfect for pathways and around water features. These stones nestle together nicely and won’t damage bare feet—a bonus if you garden barefoot like I do!
Flagstone pieces lay flat and can be partially buried for a clean, low-profile edge that suits formal gardens and Mediterranean styles beautifully.
Installation does require some muscle—stones are heavy!—but the payoff is incredible durability. Plan for a shallow trench, add landscape fabric beneath to prevent weed growth, and use smaller stones to fill gaps. Stone edging handles freeze-thaw cycles exceptionally well and never needs replacing.
The natural color variations in stone coordinate with virtually any plant palette, and as they weather and develop moss or patina, they only become more charming.
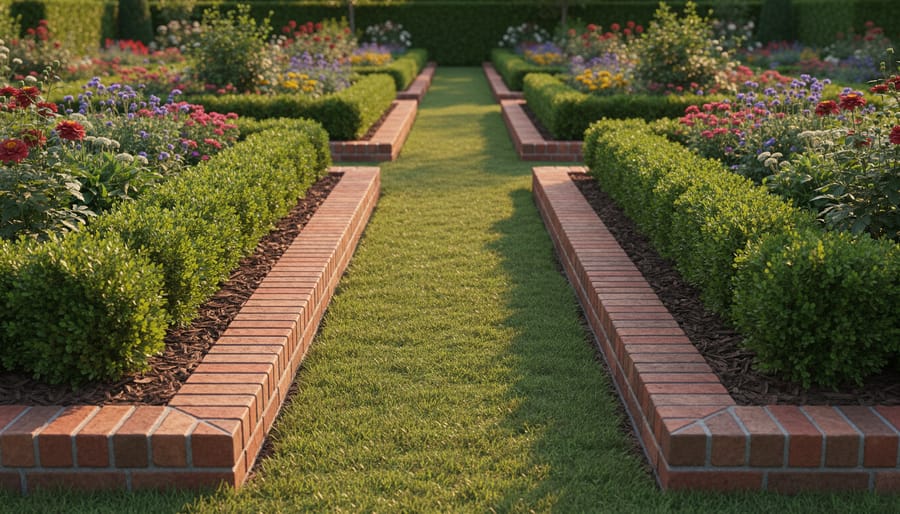
Brick Edging
Brick edging brings timeless charm to any garden, and I love how it transforms over the years. Traditional red clay bricks develop beautiful moss and weathering that adds character, while you can also choose new pavers for a crisp, uniform look.
For laying patterns, try running bond (end-to-end in a line) for a casual cottage garden feel, or soldier course (standing upright) for more formal spaces. Basket weave and herringbone patterns create stunning visual interest but require more cutting and patience during installation.
Brick works wonderfully with virtually any garden style. In formal settings, precise alignment and clean edges create structure. For informal gardens, slightly irregular placement or allowing moss to grow between bricks softens the look naturally.
One tip from master gardener Susan Chen: “Set bricks in a sand base for flexibility, or use mortar if you need permanence.” The beauty of brick is its versatility—you can match existing architecture, create curves easily, and replace individual pieces if needed. Plus, salvaged bricks add instant vintage appeal while being budget-friendly and environmentally conscious.
Concrete and Paver Edging
Concrete and paver edging offers incredible versatility for gardeners seeking durable, low-maintenance borders. I’ve experimented with all three types—modern pavers, pre-cast stones, and poured concrete—and each brings something special to the table.
Pre-cast concrete edging stones are my go-to recommendation for beginners. These interlocking pieces install quickly without special tools, and their uniform appearance creates clean, professional lines. You’ll find them in various profiles, from simple rounded tops to decorative scalloped designs. They’re particularly cost-effective, typically running $3-8 per linear foot.
Concrete pavers provide exciting design flexibility. Arrange standard pavers in soldier courses (standing upright), stack them for added height, or lay them flat for wider borders. The variety of colors and textures means you can match existing hardscaping beautifully.
Poured concrete edging offers the ultimate in customization. While it requires more skill—I recommend practicing on a small section first—you can create curves, incorporate color additives, and achieve seamless transitions. The permanence is unmatched, lasting decades with minimal maintenance. For complex installations, watching experienced contractors work teaches valuable techniques that make DIY projects more successful.
Metal Edging
Metal edging brings a distinctly modern, architectural feel to your garden beds. Steel and aluminum options are wonderfully flexible, making them perfect for creating those graceful curves we often envision but struggle to achieve with rigid materials. I’ve found aluminum particularly beginner-friendly since it’s lightweight and cuts easily with simple tools.
Corten steel deserves special mention—it develops that gorgeous rusty patina over time, adding warmth and character while actually protecting the metal beneath. If you’re drawn to industrial-chic aesthetics, it’s stunning. Regular steel will rust through eventually unless powder-coated, so choose accordingly for your climate.
Installation is refreshingly straightforward. Most metal edging comes with stakes that you simply hammer through pre-drilled holes into the ground. The thin profile means it virtually disappears visually while still providing excellent containment for mulch and soil. One tip from experience: wear gloves during installation, as the edges can be surprisingly sharp before you settle everything into place.
Composite and Recycled Materials
If you’re passionate about sustainable gardening, composite and recycled materials offer wonderful eco-friendly edging solutions. Rubber edging, often made from recycled tires, deserves special attention. It’s incredibly flexible, making it perfect for curved beds, and it won’t crack or split over time. I’ve used rubber edging in several projects, and clients love how it quietly does its job without stealing the show from their plantings.
Composite materials blend recycled plastics with wood fibers, creating borders that mimic natural wood but last decades longer. They resist rot, insects, and weather damage while requiring virtually no maintenance. The aesthetic has improved dramatically in recent years—newer composites look remarkably authentic. Plus, you’re giving new life to materials that might otherwise end up in landfills. These options typically cost more upfront than basic plastic, but their longevity and environmental benefits make them worthwhile investments. Installation is straightforward too, with most systems featuring simple stake-and-slot designs that anyone can handle.
Timber and Railroad Ties
Timber and railroad ties bring wonderful rustic character to raised beds and cottage-style gardens, though they require realistic expectations. I’ve always loved how weathered wood softens hardscape edges, creating that lived-in garden feel. However, untreated wood typically lasts only 5-7 years, while treated lumber extends to 15-20 years. Here’s the trade-off: chemically treated wood raises concerns near edible gardens, so many gardeners now choose naturally rot-resistant cedar or black locust instead. Railroad ties, while characterful, can leach creosote and feel heavy to work with. Wood makes perfect sense for temporary garden experiments, rental properties, or when you’re prioritizing immediate budget over longevity. Just embrace that eventual replacement becomes part of your garden’s evolution.
Getting Your Installation Right the First Time
The Foundation Work Nobody Talks About (But Everyone Needs)
Here’s the truth I wish someone had told me before my first edging project: what happens below ground matters far more than what shows above it. I learned this the hard way when my beautiful brick edging shifted and settled within a single season.
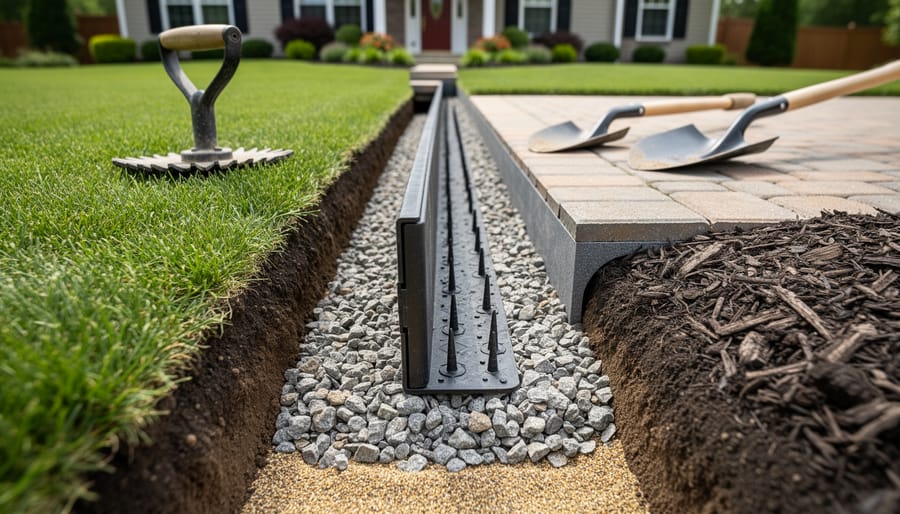
Proper foundational preparation starts with digging a trench about 4-6 inches deep, depending on your edging material. For heavy materials like stone or concrete pavers, aim for the deeper end. The trench should be at least twice as wide as your edging material to allow room for adjustment and backfilling.
Next comes your base layer, typically 2-3 inches of crushed gravel or stone dust. This isn’t just filler—it creates stability and allows water to move through rather than pooling against your edging. I use a hand tamper to compact this layer firmly, working in sections rather than trying to do it all at once.
Proper drainage considerations are essential here. Slope your base slightly away from structures, and consider adding drainage channels in low-lying areas. A landscape fabric barrier beneath the gravel prevents soil from mixing up into your base over time.
Take your time with compaction—I know it feels tedious, but firm, well-compacted base material prevents the frustrating settling and shifting that sends you back to redo everything next season.
Setting Your Edging Like a Pro
Let me walk you through the installation process—I promise it’s more straightforward than you might think! The key to professional-looking edging is taking your time with preparation.
Start by marking your border with a garden hose or spray paint to visualize the line. For straight edges, use stakes and string to maintain perfect alignment. When working with curves, make gentle, flowing arcs rather than sharp turns—your eye will thank you later, and installation becomes much easier.
Dig your trench about 4-6 inches deep, keeping the bottom level. Here’s a trick I learned from landscape designer Maria Chen: check your depth every few feet with a small level. Consistency matters tremendously for the finished look.
For securing methods, each material has its quirks. Stone and brick need a solid foundation—lay 2 inches of compacted gravel first, then add sand for leveling. Metal and plastic edging typically come with stakes that drive through pre-made holes. With aluminum or steel, angle stakes slightly inward for extra holding power.
Curves require special attention. Most flexible materials bend naturally, but rigid options like brick need smaller units or creative angling. Create curves by adjusting the angle of each piece slightly—think of it like a gentle fan opening rather than forcing a hard bend.
Corners present their own challenge. For 90-degree turns with stone or brick, cut pieces at 45-degree angles for clean miters. Plastic edging often includes corner connectors, which honestly make life so much easier.
Always backfill both sides of your edging, tamping soil firmly against it. This anchoring technique prevents shifting during freeze-thaw cycles and keeps everything looking crisp season after season.
The Finishing Touches That Make It Last
You’ve done the hard work of choosing and installing your edging, and now it’s time to secure your investment with those crucial final steps. Trust me, I’ve learned the hard way that skipping these details can mean the difference between edging that lasts decades and materials that shift by next spring.
Start with proper backfilling on both sides of your edging. Tamp the soil firmly against the edging using the back of your shovel or a hand tamper, working in layers rather than all at once. This compression creates support that prevents tilting and settling. For metal or plastic edging, backfill higher on the bed side to create a slight slope that directs water away from your plants.
If you’ve installed stone, brick, or concrete pavers with gaps, filling those joints is essential for stability. Sweep polymeric sand into the spaces between units, then mist lightly with water to activate the binding agents. This creates a semi-solid mass that locks everything together while still allowing for minor movement. For a more natural look, use fine gravel or even moss tucked into wider gaps.
Those first few weeks matter tremendously. Water your backfilled areas gently to help soil settle, then add more if needed. Walk your edging line weekly, checking for any shifting or settling spots. Catch these issues early, and a quick adjustment now saves major repairs later. With proper finishing care, your beautiful new edging will define your garden beds for years to come.
Design Ideas That Blend Function and Beauty
Creating Clean Lines in Formal Gardens
If you love the timeless elegance of traditional gardens, brick or concrete pavers create those beautifully crisp edges that formal designs are known for. I’ve found that the key to achieving that polished, estate-garden look lies in choosing uniform materials and committing to straight lines or precise curves.
Brick edging laid soldier-style (standing upright) offers classic appeal and works wonderfully for rectangular beds and parterre-style layouts. The uniformity creates visual rhythm that guides the eye through your garden. For a more contemporary take, concrete pavers in matching sizes give you clean geometry while allowing flexibility in color choices.
Here’s a practical tip from my experience: use a taut string line and stakes when installing these materials. Even slight wobbles become obvious in formal designs. I learned this the hard way when my first attempt at a symmetrical rose garden looked charmingly crooked rather than elegantly structured!
Consider running your edging deeper than casual borders require, at least four to six inches below ground level. This prevents lawn grass from sneaking underneath and disrupting those crisp lines you’ve worked so hard to achieve. The investment in precision pays off with gardens that look professionally maintained year-round.
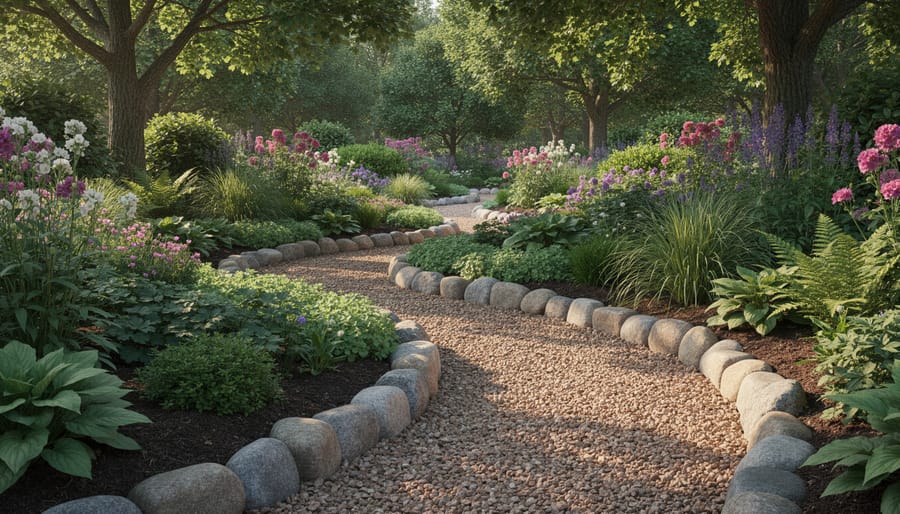
Natural Transitions for Cottage and Woodland Gardens
For cottage and woodland gardens, the goal is creating edges that feel discovered rather than installed. I love using irregular flagstones partially buried at varying depths, allowing moss and creeping thyme to soften the gaps. This technique mimics nature’s own boundaries and invites that magical, timeworn look.
Curved lines are your friend here. Forget rigid straight edges—instead, let your edging meander gently, following the natural contours of your landscape. River rock can create beautiful transitions between garden beds and mulched paths, especially when you vary the sizes and let plants spill over them.
One gardener I spoke with shared how she edges her woodland beds with weathered fieldstone, positioning pieces at random intervals rather than in a continuous line. This creates visual breathing room while still defining the space. The result? A garden that looks like it’s been there for generations, even when it’s just a few seasons old.
Mixed-Material Combinations That Work
Mixing materials creates dynamic transitions while stretching your budget. One approach I’ve seen work beautifully combines affordable gravel pathways with strategic stone accents at entry points and focal areas. This gives you the premium look where it matters most without breaking the bank.
Try pairing smooth river rock with rough-cut timber for textural contrast, or use brick edging to transition between metal-edged formal beds and natural stone around trees. The key is repeating at least one material throughout different zones to maintain visual cohesion.
For budget-conscious projects, start main borders with economical concrete pavers, then add a few decorative metal inserts or stone caps at corners and intersections. This creates interest without requiring expensive materials everywhere. When transitioning from manicured lawn areas to wilder garden spaces, gradually shift from formal brick edging to looser stacked stone, helping each zone feel intentional rather than abrupt.
Solutions for Slopes and Challenging Terrain
Slopes and uneven terrain need special attention when installing hardscape edging. The key is working with gravity, not against it. For gentle slopes, stepped edging creates a natural, terraced effect—dig your trench level in sections, creating mini-platforms that follow the hillside’s contour. This prevents water from rushing straight downhill and eroding your beds.
Steeper grades often require retaining walls rather than simple edging. For moderate inclines, consider mortared stone or interlocking concrete blocks that lock together securely. Areas with drainage challenges benefit from permeable materials like dry-stacked stone or gravel-filled trenches that allow water to flow through rather than pooling behind your edging.
I’ve found that curving your edging lines along hillside contours looks more natural and reduces erosion better than fighting the slope with straight lines. Always install edging with a slight backward lean on slopes for stability.
What I Learned From My Own Edging Mistakes
I’ll be honest—my first edging project was a disaster, and looking back, I’m grateful for every mistake because they taught me lessons that saved me time and money on every project since.
Five years ago, I decided to install stone edging around my front flower bed. I was so excited about the visual result that I skipped the tedious prep work. Big mistake. I laid the stones directly on the soil without excavating properly or adding a base layer. Within three months, they’d shifted, tilted, and looked worse than having no edging at all. I learned the hard way that proper foundation is everything—now I always dig at least four inches deep and add compacted gravel.
My second mistake was buying materials before measuring accurately. I eyeballed the curved bed and ended up with way too much edging for one section and not enough for another. Multiple trips to the store later, I realized that taking ten minutes to map everything out would have saved me hours of frustration.
The biggest lesson? Start small. I wanted to edge my entire yard in one weekend. Instead, I should have completed one section properly, learned from it, and then tackled the rest. That first perfect bed would have been so much more satisfying than four half-finished projects.
Now when I see enthusiastic gardeners at the supply store loading up their carts, I always want to share these lessons. Take your time with preparation, measure twice, and remember that even edging mistakes can become wonderful teachers.
Choosing the right hardscape edging for your garden might feel overwhelming with so many options available, but remember that every beautiful landscape started with a single thoughtful decision. Focus on what matters most for your specific situation: your budget, the style of your garden, and how much maintenance time you’re willing to invest. There’s no universally perfect choice, just the right choice for you and your outdoor space.
If you’re feeling uncertain about where to begin, start small. Pick one problem area in your garden that frustrates you most—perhaps where grass constantly invades your flower bed or where mulch keeps washing away. Tackle that single project first. You’ll gain confidence with the installation process, see immediate results, and discover what works best in your landscape before committing to larger areas.
Think of quality edging as an investment rather than an expense. Yes, materials like natural stone or steel cost more upfront than plastic alternatives, but they’ll save you countless hours of tedious maintenance over the years. Those weekends you’d spend re-edging beds with a spade can instead be enjoyed relaxing in your beautifully defined garden.
Your garden deserves clean lines and lasting structure that makes every planting shine. So grab your measuring tape, sketch out that first section, and take action this weekend. The transformation you create will inspire you to tackle the next area, and before you know it, your entire landscape will have the polished, professional look you’ve always envisioned.