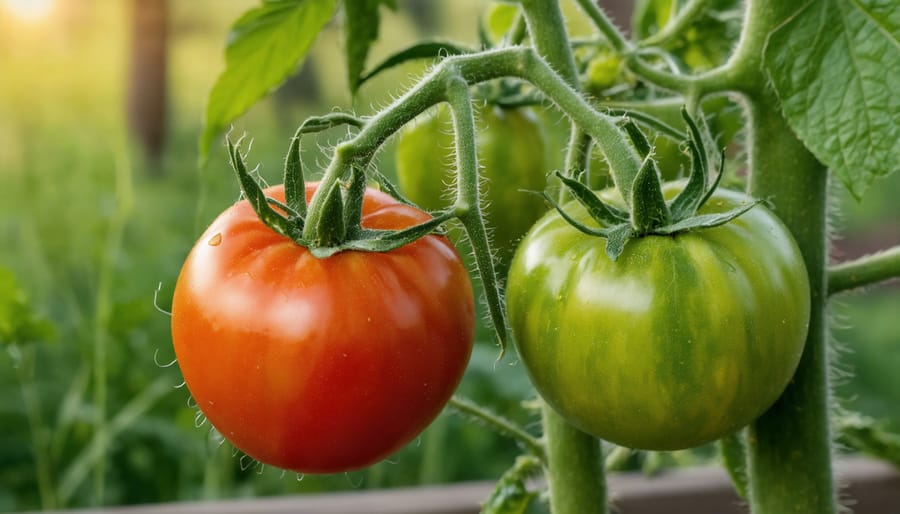
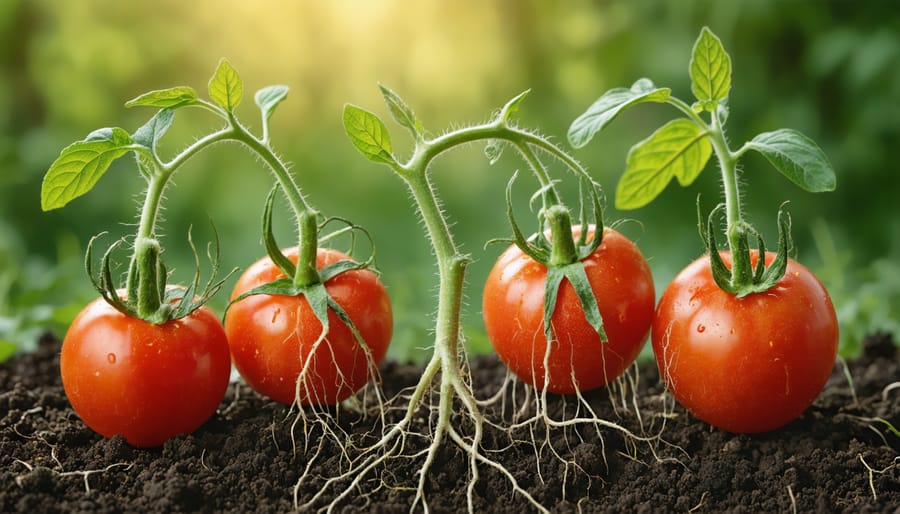
Tomatoes thrive in soil with a pH between 6.0 and 6.8—that slightly acidic sweet spot where nutrients become most available to hungry roots. Get it wrong, and you’ll watch your plants struggle with yellowing leaves, blossom end rot, and disappointing harvests, even when you’re doing everything else right.
I learned this lesson the hard way during my second season of gardening. My tomato plants looked healthy but produced barely half what my neighbor’s did. After testing my soil, I discovered my pH sat at 7.4—far too alkaline. Once I corrected it, my yields doubled the following year.
pH isn’t just a number on a scale. It’s the gatekeeper that controls whether your tomatoes can actually access the nutrients sitting in your soil. When pH drifts too high or too low, essential elements like iron, phosphorus, and calcium become chemically locked away, unavailable to your plants no matter how much fertilizer you apply.
The good news? Adjusting soil pH is straightforward once you understand what you’re working with. Whether your soil skews too acidic or too alkaline, simple amendments can bring it into that optimal range. And maintaining proper pH isn’t a one-time fix—it’s an ongoing practice that pays dividends in healthier plants and heavier harvests.
Let’s walk through exactly how to test your soil, interpret the results, and make the right adjustments for tomato-growing success.
Why Soil pH Makes or Breaks Your Tomato Harvest
What Happens When pH Is Too Low (Acidic)
When soil pH drops below 6.0, your tomato plants start sending distress signals that are hard to miss. I learned this the hard way one season when my seedlings looked stunted despite regular watering and plenty of sunshine!
In overly acidic soil, you’ll first notice slower growth and leaves that turn pale yellow-green, particularly the older ones at the bottom. This happens because essential nutrients like nitrogen, phosphorus, and calcium become locked up in the soil—they’re physically present but chemically unavailable to your plants’ roots. It’s like having food in the pantry but not being able to open the door!
Calcium deficiency is especially troublesome in acidic conditions, leading to the dreaded blossom end rot—those dark, sunken spots on the bottom of developing fruits. You might also spot purple-tinged leaves, indicating phosphorus deficiency, or weak, spindly stems that struggle to support fruit production.
The roots themselves suffer too, becoming damaged by excess aluminum and manganese that become toxic when released in acidic environments. This creates a vicious cycle: unhealthy roots can’t absorb nutrients properly, even when you fertilize. If your soil tests below 6.0, addressing the acidity should be your first priority before troubleshooting other issues.
What Happens When pH Is Too High (Alkaline)
When your soil pH climbs above 7.5, your tomato plants face an uphill battle. In alkaline conditions, essential nutrients like iron, manganese, and zinc become “locked up” in the soil—they’re technically present, but your tomatoes simply can’t access them. It’s like having a pantry full of food behind a locked door!
You’ll notice the telltry signs pretty quickly. The newest leaves often develop interveinal chlorosis, where the veins stay green but the tissue between them turns yellow. This happens because iron can’t move freely through the plant in alkaline soil. Your tomatoes might also show stunted growth, with smaller leaves and a generally lackluster appearance.
I once watched a neighbor struggle with pale, wimpy tomato plants for an entire season before we tested her soil and discovered a pH of 7.8. The plants were working overtime just to survive, producing only a handful of small fruits despite her careful watering and feeding routine.
Blossom end rot can also become more prevalent in alkaline conditions, since calcium uptake gets disrupted. Even with adequate calcium in the soil, your plants might display those telltale dark, sunken spots on the bottom of their fruits.
The Sweet Spot: Ideal pH Range for Tomatoes
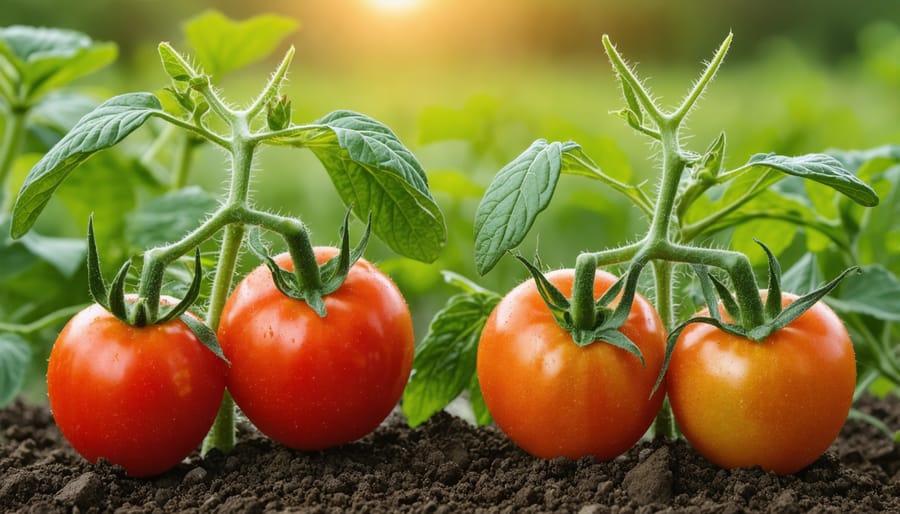
After years of growing tomatoes in various garden beds and containers, I’ve learned that hitting the right pH sweet spot can make the difference between struggling plants and a bountiful harvest. The magic number range you’re looking for is **6.0 to 6.8**, with 6.5 being the absolute sweet spot that most tomato varieties adore.
Why does this range work so beautifully? Within these parameters, your tomato plants can access nearly all the essential nutrients they need. Think of it as unlocking a nutritional treasure chest—nitrogen, phosphorus, potassium, calcium, and those crucial micronutrients all become readily available to your plants’ roots. I’ve noticed my plants develop deeper green foliage and stronger stems when the pH sits comfortably in this zone.
Now, here’s something interesting: not all tomatoes are created equal when it comes to pH preferences. Most common varieties like ‘Big Boy’ and ‘Early Girl’ thrive right in that 6.0-6.8 range. However, some heirloom varieties can tolerate slightly lower pH levels, down to around 5.8, while certain paste tomatoes seem happiest closer to 6.8.
What happens at the edges of this range? At 6.0, your plants will still grow well, though calcium uptake might slow down slightly—something to watch if you’re prone to blossom end rot. Push toward 6.8, and you’re still in excellent territory, though iron and manganese availability begins to decrease ever so slightly. The key takeaway? Stay within this range, aim for the middle when possible, and your tomatoes will reward your efforts generously.
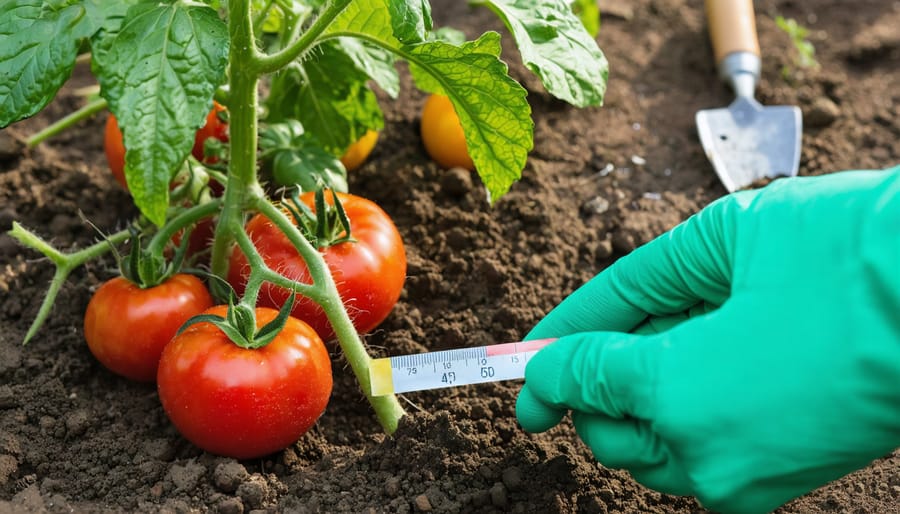
Testing Your Soil pH: Three Methods That Actually Work
DIY Test Kits (The Budget-Friendly Option)
DIY test kits are perfect for most home gardeners and cost just $10-15. I’ve used them for years with great success! These simple kits use color-matching charts—you mix soil with water, add a testing solution, and compare the resulting color to find your pH level.
Here’s the truth about accuracy: they’ll get you within 0.5 pH units of the actual reading, which is honestly good enough for tomatoes. Since you’re aiming for that sweet spot between 6.0 and 6.8, knowing whether you’re at 5.5 or 7.5 is what really matters.
When are they perfect? For annual garden checks, troubleshooting problem areas, and monitoring after amendments. Use them before planting season and whenever your tomatoes show mysterious yellowing or stunted growth. Pro tip: test multiple spots in your garden—pH can vary surprisingly within just a few feet!
Digital pH Meters (The Tech Approach)
If you’re ready to step up your pH testing game, digital meters offer accuracy and ease that’s hard to beat. I switched to a digital meter three years ago and haven’t looked back—no more squinting at color charts!
These handheld devices give you precise readings within seconds. Simply insert the probe into moist soil (not soggy!), wait for the display to stabilize, and you’ll have your pH reading. Most quality meters range from $20 to $60 and will last for years with proper care.
**Here’s the key to accuracy:** calibration. Before first use and every few months after, calibrate your meter using buffer solutions (usually pH 4.0 and 7.0). It takes five minutes but makes all the difference between reliable readings and misleading numbers.
Store the probe properly too—many come with storage caps filled with a solution to keep the sensor hydrated. Let it dry out, and you’ll need a replacement probe sooner than expected.
For serious tomato growers testing multiple beds regularly, digital meters quickly pay for themselves in convenience and consistency.
Professional Lab Testing (The Gold Standard)
Professional lab testing is worth every penny when you’re serious about optimizing your tomato harvest. I recommend investing in it when you’re planting a large tomato bed, dealing with persistent growth problems, or planning a major soil amendment project. You’ll typically spend $15-40 per sample, and what you receive is invaluable: precise pH readings, nutrient levels, organic matter content, and specific amendment recommendations tailored to tomatoes.
Here’s how to collect samples properly. Using a clean trowel, gather soil from 6-8 spots in your tomato area, digging 4-6 inches deep (where roots actually feed). Mix these thoroughly in a clean bucket, then bag about two cups for the lab. Avoid sampling near compost piles or recently fertilized spots—you want an average reading. Most university extension offices offer affordable testing, and they’re wonderfully helpful with interpreting results.
I send samples to my local extension every three years, and the detailed reports have saved me from making costly mistakes. One test revealed my phosphorus was sky-high despite yellowing plants—turned out my pH was blocking nutrient uptake, not a deficiency! That $25 test saved me hundreds in unnecessary amendments.
Raising Soil pH: Fixing Acidic Soil for Tomatoes
Using Garden Lime (The Classic Fix)
Garden lime remains the gold standard for raising soil pH, and I’ve relied on it countless times to transform acidic beds into thriving tomato havens. Let’s walk through how to use it effectively.
**Choosing Your Lime**
You’ll encounter two main types at the garden center. Dolomitic lime adds both calcium and magnesium—perfect if your soil test reveals low magnesium levels. Calcitic lime provides primarily calcium and works faster. For most tomato growers, dolomitic lime offers better overall nutrition.
**Calculating Application Rates**
Here’s where your soil test becomes invaluable. Generally, sandy soils need 25-50 pounds of lime per 1,000 square feet to raise pH by one point, while clay soils may require 50-100 pounds for the same adjustment. Your test results should include specific recommendations, but as a starting point, if you’re moving from pH 5.5 to 6.5 in average loam, plan on about 40-60 pounds per 1,000 square feet.
I always measure my garden bed dimensions carefully—it’s surprisingly easy to misjudge! A simple formula: multiply length by width to get square footage, then divide by 1,000 and multiply by the recommended pounds per 1,000 square feet.
**Timing Matters**
Apply lime at least three months before planting, ideally in fall for spring tomatoes. Lime works slowly, needing time to neutralize soil acidity. Work it into the top 6-8 inches of soil thoroughly, then water well. I’ve learned patience here pays dividends—rushing this process means disappointing harvests.

Wood Ash and Eggshells (The Kitchen Scraps Method)
I’ve experimented with wood ash and crushed eggshells in my tomato beds for years, and I’ll be honest—they’re gentle pH adjusters rather than quick fixes. Wood ash from your fireplace contains calcium carbonate and potassium, slowly raising pH over several months. Scatter a thin layer (no more than 1/4 inch) across your bed and work it into the top few inches of soil. Too much can swing pH too high and harm beneficial soil microbes.
Eggshells work even more gradually since they break down slowly. Rinse, dry, and crush them finely—I use a coffee grinder for powder consistency. Sprinkle around your tomato plants or add to compost.
The reality? These kitchen scraps might nudge pH up by 0.2-0.5 points over a growing season. They’re perfect for minor tweaks or maintaining pH rather than correcting serious acidity. Think of them as nutritional supplements rather than medicine. If you’re dealing with pH below 5.5, you’ll need lime for meaningful results. But for sustainable, long-term soil improvement? These free amendments are wonderful additions to your gardening routine.
How Long Changes Take (And What to Do While You Wait)
Patience is key when adjusting soil pH—these changes don’t happen overnight! Raising pH with lime typically takes 2-3 months to show significant results, though you might see modest improvements in 4-6 weeks. Lowering pH with sulfur works even more slowly, often requiring 3-6 months for full effect.
Don’t let this discourage you! For your current tomatoes, focus on what you *can* control right now. Apply foliar feeds with chelated nutrients to bypass soil pH issues temporarily—your plants absorb these directly through their leaves. Add compost around existing plants to create beneficial microbial activity that helps make nutrients more available.
I always remind fellow gardeners: this season is your learning opportunity. Take detailed notes about what you’re observing, continue monitoring your soil, and know that you’re setting up next year’s garden for incredible success. Meanwhile, those amendments are working their magic underground, transforming your soil into tomato paradise for seasons to come.
Lowering Soil pH: Fixing Alkaline Soil for Tomatoes
Sulfur Products (The Reliable Approach)
When you need to lower your soil pH more predictably, sulfur products are your go-to solution. I’ve found them particularly reliable because they work gradually and provide lasting results—no dramatic swings that stress your tomato plants.
**Elemental sulfur** is the most common form, available as fine powder or granules. Soil bacteria convert it to sulfuric acid over several weeks, slowly acidifying the soil. I prefer the granular form because it’s less dusty and easier to spread evenly. Apply it at least 3-4 months before planting, as it needs time to work its magic.
**Aluminum sulfate** acts much faster—within days rather than months—making it handy when you’ve discovered pH issues mid-season. However, use it sparingly, as excess aluminum can harm plants.
**Application rates** depend on your current pH and soil type. Sandy soils need less sulfur than clay soils. Generally, you’ll need 1-2 pounds of elemental sulfur per 100 square feet to drop pH by one point, but always follow product instructions and retest periodically.
**Safety tip**: Wear gloves and a dust mask when handling sulfur products. Work them into the top 6 inches of soil and water thoroughly after application. Remember, patience pays off—gradual changes create healthier, more stable growing conditions for your tomatoes.
Organic Matter and Acidic Mulches
Nature offers some wonderfully gentle solutions for lowering soil pH when your tomatoes need a more acidic environment. These organic amendments work gradually, which is actually a blessing—you’re less likely to overshoot your target and harm your plants!
**Compost** is my go-to recommendation because it’s a multitasker. While it typically lowers pH only slightly, it improves soil structure and feeds beneficial microorganisms that support a healthy soil ecosystem. Work 2-3 inches into your tomato beds each spring.
**Peat moss** is more acidic (pH 3.5-4.5) and creates longer-lasting effects. Mix it thoroughly into the soil at planting time—I usually blend one part peat moss with three parts native soil for container tomatoes.
**Pine needles** make an excellent mulch around established plants. Despite the myth that they drastically acidify soil, they actually lower pH very gradually as they decompose, which is perfect for gentle adjustments.
**Coffee grounds** (used, not fresh!) can be sprinkled around plants or added to compost. They’re mildly acidic and add nitrogen, though use them sparingly—a thin layer every few weeks is plenty.
Remember, these organic methods take time, often several months, so patience pays off!
Container Growing as a Workaround
When you’re battling stubbornly alkaline soil that just won’t budge, containers offer a brilliant solution! I’ve seen gardeners transform their tomato harvests simply by switching to pots filled with quality potting mix adjusted to that sweet spot of 6.0-6.8 pH. You get complete control over every aspect of your soil chemistry, bypassing years of soil amendment work. Choose containers at least 5 gallons for determinate varieties and 10+ gallons for indeterminate types. Mix your own blend or purchase premium potting soil, then adjust the pH before planting. It’s like giving your tomatoes their own custom environment!
Maintaining Optimal pH Throughout the Season
Think of pH maintenance like tending a campfire—you can’t just set it and forget it! Regular monitoring keeps your tomatoes thriving all season long.
I test my tomato beds every four to six weeks during the growing season, and I always check once in early spring during soil preparation. This frequency catches pH drift before it becomes a problem. Keep a simple notebook or phone app to track your readings—patterns often emerge that help you understand your soil’s personality.
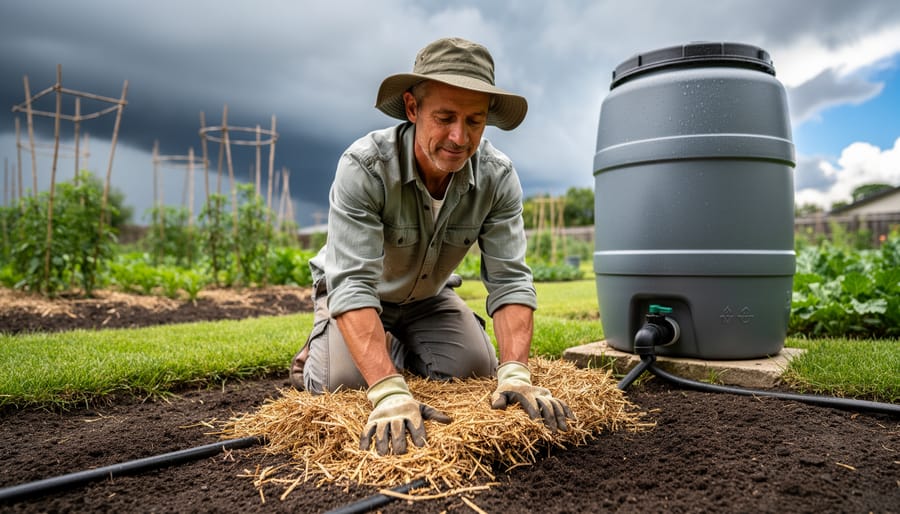
Mulching is your secret weapon for pH stability. A two to three inch layer of organic mulch like straw or shredded leaves moderates soil temperature and moisture, which indirectly stabilizes pH. As mulch breaks down, it releases nutrients gradually without shocking your soil chemistry. I’ve noticed my mulched beds need fewer pH adjustments than my unmulched experimental patch.
Here’s something that surprised me: fertilizers dramatically impact pH over time. Synthetic nitrogen fertilizers, especially ammonium-based ones, tend to acidify soil with repeated use. If you’re feeding your tomatoes weekly, you might be gradually lowering pH without realizing it. Organic options like compost tea or fish emulsion are gentler on pH levels. When I switched to primarily organic feeding, my pH readings became noticeably more stable.
Watch your watering practices too. If you have alkaline tap water, it can slowly raise soil pH over months of regular irrigation. Rain barrels became my solution—collected rainwater is naturally slightly acidic and perfect for tomatoes.
Remember, small corrections are always better than dramatic interventions. Catching a pH of 6.3 and nudging it to 6.5 is far easier than rescuing soil that’s dropped to 5.0. Your tomatoes will reward your vigilance with healthier foliage and more abundant fruit.
Common Mistakes (And How I Learned to Avoid Them)
I’ll be honest—my first year growing tomatoes, I made every pH mistake in the book. When my plants looked yellowing and sad, I dumped lime everywhere without testing first. Big mistake! I over-corrected so dramatically that my soil shot up to 7.8, creating a whole new set of nutrient lockout problems.
The biggest lesson I learned? **Always test before you treat.** I wasted an entire season chasing my tail because I assumed my soil was too acidic when it was actually perfect at 6.5. Those yellow leaves? Turned out to be a simple nitrogen deficiency, not a pH issue at all.
Another rookie error was using my neighbor’s soil recommendations. What works in their clay-heavy yard doesn’t necessarily apply to my sandy loam. Regional soil types vary dramatically, and pH amendments need to match your specific conditions. I now test my own beds every spring rather than following generic advice.
I also used to panic-adjust pH mid-season, adding sulfur or lime whenever plants looked unhappy. This created wild pH swings that stressed my tomatoes more than the original imbalance. Now I make gradual adjustments and give amendments at least 4-6 weeks to fully integrate before retesting.
The fix? Start with a proper soil test, make small adjustments, be patient, and keep records. Your tomatoes will thank you for the consistency!
Getting your soil pH right isn’t just another gardening task—it’s the secret ingredient that transforms frustrating tomato growing into bountiful harvests year after year. I’ve watched countless gardeners go from struggling with yellowing plants and disappointing yields to proudly sharing photos of their vibrant, productive tomato patches, all because they took control of their soil pH.
The beauty of this journey? It’s completely achievable, no matter where you’re starting from. You don’t need a chemistry degree or expensive equipment—just a simple soil test kit and the willingness to take that first step. Remember, you’re aiming for that sweet spot between 6.0 and 6.8, and once you know where you stand, the path forward becomes crystal clear.
Start with testing your soil this week. Even if the results aren’t perfect, you’ll have the knowledge you need to make targeted improvements. Whether you’re adding lime to raise pH or sulfur to lower it, each small adjustment brings you closer to tomato-growing success. Your future self—the one harvesting armfuls of gorgeous tomatoes—will thank you for starting today.