

Master the art of tree pruning with three fundamental cuts: heading cuts to control growth direction, thinning cuts to improve air circulation, and reduction cuts to maintain size while preserving natural form. Proper pruning transforms unruly branches into healthy, shaped canopies that enhance your shade garden’s beauty and vitality.
Late winter marks the ideal time for major pruning work, when trees are dormant and branch structure is clearly visible. Remove dead, diseased, or crossing branches first, then shape the remaining growth to allow filtered sunlight to reach understory plants. The result? A thriving, multi-layered garden sanctuary.
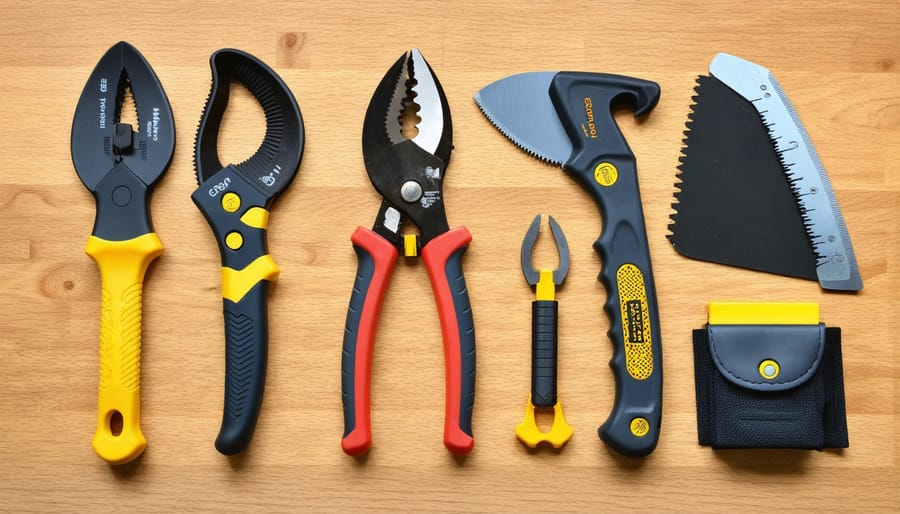
Sharp, clean tools make all the difference – invest in quality bypass pruners for branches under 1 inch, loppers for medium cuts, and a pruning saw for larger limbs. Before each cut, envision how removing specific branches will affect both the tree’s health and your garden’s light patterns. This thoughtful approach ensures your pruning efforts create the perfect balance of shade and growth for years to come.
Essential Tools for Successful Tree Pruning
Basic Hand Tools
Every successful pruning project starts with the right tools, and three essential implements belong in every gardener’s toolkit. Pruning shears, also called hand pruners or secateurs, are perfect for branches up to ½ inch in diameter and offer precise control for detailed work. Choose bypass pruners for clean cuts that promote quick healing.
For medium-sized branches between ½ to 2 inches thick, loppers are your go-to tool. Their long handles provide extra leverage and reach, making overhead cuts less strenuous. Look for models with telescoping handles for even better accessibility in dense canopies.
A quality hand saw rounds out your basic tool collection, handling branches over 2 inches in diameter. Curved blade saws are particularly effective for tree work, as they cut on the pull stroke and tend to stay cleaner than straight blades. Remember to keep all your tools sharp and clean – this not only makes your work easier but also helps prevent disease transmission between plants.
Safety Equipment
Before you begin any pruning work, it’s essential to gear up with the right safety equipment. A sturdy pair of safety goggles will protect your eyes from falling debris and sawdust, while ear protection is necessary when using power tools. Always wear a well-fitted hard hat when working with taller trees or overhead branches.
Quality work gloves are non-negotiable – look for ones that offer both grip and protection against thorns and splinters. For larger pruning jobs, consider steel-toed boots to protect your feet from falling branches. If you’re working above ground level, a safety harness is absolutely essential, and never prune alone when using ladders or climbing equipment.
Keep a first-aid kit nearby and ensure your tetanus vaccination is up to date. When using power tools, wear close-fitting clothes to prevent snagging, and avoid loose jewelry that could catch on branches. Remember, investing in proper safety gear isn’t just about protection – it gives you the confidence to focus on pruning with precision and care.
The Three Core Pruning Cuts
Thinning Cuts
Thinning cuts are essential for maintaining a healthy, vibrant tree and improving light penetration throughout its canopy. This technique involves removing entire branches back to their point of origin at either the main trunk or a larger branch. When properly executed, thinning cuts create a more open structure that allows sunlight to reach inner branches and understory plants.
To make a successful thinning cut, first identify branches that are crossing, rubbing against each other, or creating dense shade patches. Using sharp, clean pruning tools, cut the selected branch just outside the branch collar – the swollen area where the branch connects to the trunk or larger branch. Avoid leaving stubs or cutting too close to the trunk, as this can damage the tree’s natural healing process.
The benefits of thinning cuts extend beyond improved light penetration. This method also enhances air circulation, reduces disease risk, and maintains the tree’s natural shape. For best results, remove no more than 25% of the tree’s live branches in a single season, focusing on the smallest diameter branches first. This conservative approach helps prevent stress and promotes healthy growth while gradually achieving the desired level of shade reduction.
Reduction Cuts
Reduction cuts are essential ornamental tree pruning techniques that help maintain a tree’s natural shape while controlling its size. This method involves cutting back branches to a smaller lateral branch that’s at least one-third the diameter of the removed portion. Think of it as giving your tree a gentle haircut rather than a dramatic chop!
When performing reduction cuts, always make your cut at a slight angle just above the lateral branch. This encourages proper healing and prevents water from collecting on the cut surface. Choose a lateral branch that grows in the direction you want the tree to develop, as this will help maintain its natural form and aesthetic appeal.
For the best results, limit reduction cuts to branches no larger than 4 inches in diameter. Larger cuts can create wounds that take longer to heal and may invite disease. Remember to step back occasionally while pruning to assess your work and ensure you’re maintaining the tree’s natural balance and symmetry.
If you’re new to reduction cuts, start with smaller branches to build confidence. As you become more comfortable, you can tackle larger branches while always keeping the tree’s health and natural form in mind.
Heading Cuts
Heading cuts are essential pruning techniques that involve removing the entire top portion of a branch or stem back to a larger branch or trunk. When performed correctly, these cuts help shape trees, control their size, and promote healthy growth patterns. Think of heading cuts as giving your tree a haircut – they’re particularly useful when you need to reduce the height of branches or create a more compact form.
To make a proper heading cut, position your pruning shears about ¼ inch above a healthy bud, cutting at a slight angle (around 45 degrees) to allow water to run off. This prevents moisture from collecting and potentially causing rot. When selecting where to cut, look for outward-facing buds to encourage growth away from the center of the tree.
While heading cuts are valuable tools in your pruning arsenal, use them sparingly. Too many heading cuts can result in dense, bushy growth that may look unnatural and affect the tree’s health. They’re most appropriate for formal hedges, topiary work, or when you need to rejuvenate an overgrown shrub. For most shade trees, it’s better to rely primarily on thinning cuts, using heading cuts only when necessary to maintain the desired shape or size.
Seasonal Pruning Guide
Spring Pruning
Spring is the perfect time to give your trees a fresh start after winter dormancy. Focus on removing dead, diseased, or damaged branches that didn’t survive the cold season. Look for water sprouts and suckers – those straight, fast-growing shoots that emerge from the trunk or roots – and remove them cleanly at the base. Crossed or rubbing branches should also be addressed, as they can create wounds and entry points for diseases.
For flowering trees, timing is crucial. Prune spring-blooming trees like dogwood and cherry immediately after they finish flowering to avoid cutting off next year’s buds. Summer-flowering trees can be pruned earlier in spring before new growth begins. Remember to step back occasionally as you work to assess the tree’s overall shape and ensure your cuts contribute to a balanced, healthy structure.
Always make clean cuts just above a bud or branch collar, and avoid removing more than 25% of the tree’s live branches in one season.
Summer Maintenance
Summer is the perfect time for light maintenance pruning to keep your trees looking their best. Focus on removing dead, damaged, or crossing branches while the tree is in full leaf, making it easier to spot problem areas. Keep your cuts small – ideally no larger than the diameter of your thumb – to ensure quick healing during the growing season. Shape maintenance during summer months helps control the tree’s size and maintains its aesthetic appeal without causing stress. Remember to step back occasionally while pruning to assess the tree’s overall shape and ensure balanced growth. For fruit trees, summer pruning can help improve light penetration and air circulation, leading to better fruit production. Just be mindful not to remove more than 10-15% of the tree’s living branches during this season.
Fall Preparation
Fall is the perfect time to prepare your trees for winter’s challenges. Start by removing any dead, diseased, or crossing branches while they’re still visible before leaf drop. Focus on structural pruning to help your trees maintain their shape under winter snow loads. It’s also crucial to avoid heavy pruning this late in the season, as it might stimulate new growth that won’t have time to harden off before frost. Instead, concentrate on light maintenance cuts and cleaning up any damaged limbs. Remember to clean up all pruned materials from around the tree base to prevent disease and pest problems during winter. Finally, take this opportunity to inspect your trees thoroughly for any signs of stress or damage that might need professional attention before harsh weather sets in.
Winter Dormancy
Winter dormancy is the ideal time for major structural pruning, as trees are in their resting phase and have shed their leaves. During this period, typically from late fall to early spring, you can clearly see the tree’s framework and make precise cuts without worrying about sap loss or disease spread. Focus on removing dead, damaged, or crossing branches, and shape the overall structure to promote healthy growth come spring. The absence of foliage also makes it easier to spot potential problems and correct them before they become serious issues. However, avoid pruning during freezing temperatures, as this can damage the tree’s tissue. For most deciduous trees, late winter is perfect timing – just before the spring growth surge begins, allowing cuts to heal quickly as the growing season starts.
Special Considerations for Shade Gardens
Canopy Management
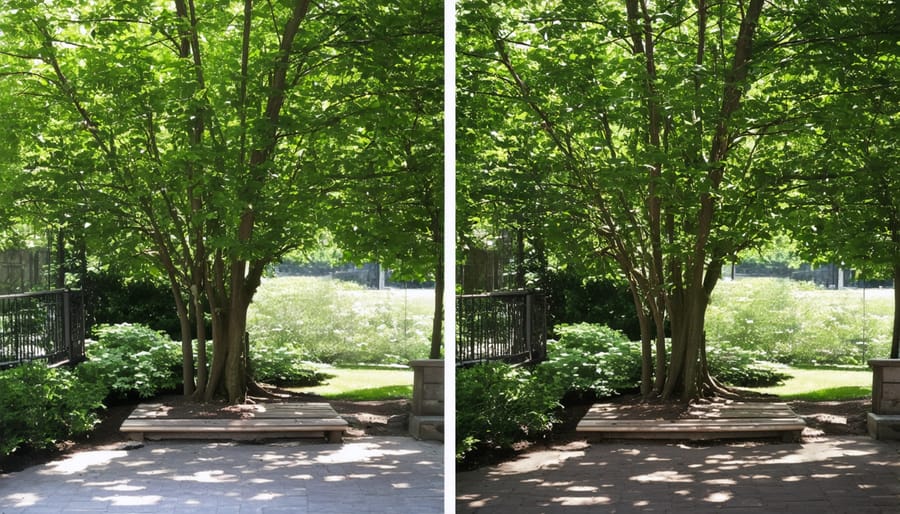
Effective canopy management is crucial for maintaining a healthy balance of sunlight in your garden. Whether you’re focusing on shade garden management or trying to promote growth for sun-loving plants, understanding how to control your tree’s canopy is essential.
Start by assessing the current shade patterns throughout the day. Look for areas where dense foliage might be blocking too much light from reaching understory plants. The goal is to create dappled shade rather than deep shade, which allows enough sunlight for plants below to thrive while maintaining the cooling benefits of tree cover.
When pruning for light penetration, focus on thinning out smaller branches rather than removing large limbs. Remove crossing branches and those growing toward the center of the tree to allow more light to filter through. This approach helps maintain the tree’s natural shape while improving light distribution.
Remember to step back frequently and assess your work. It’s better to prune gradually over several seasons than to remove too much at once. Consider the seasonal changes in sun angle and how they affect shade patterns throughout the year. This thoughtful approach ensures your understory plants receive the right amount of light while preserving the tree’s health and beauty.
Light Penetration Techniques
Light penetration pruning is essential for maintaining healthy tree growth and ensuring that sunlight reaches all parts of your garden. This technique involves strategically removing branches to create “windows” in the tree canopy, allowing sunlight to filter through to lower branches and understory plants.
Start by observing your tree throughout the day to identify areas where light struggles to penetrate. Focus on thinning out dense clusters of branches, particularly in the crown’s center. Remember to maintain the tree’s natural shape while removing no more than 20-25% of the living crown in a single season.
When selecting branches to remove, prioritize those that cross or grow inward toward the trunk. Look for opportunities to create balanced openings that will allow dappled light to reach lower areas. Think of it as creating a series of small skylights throughout the canopy.
A good rule of thumb is to space main branches 18-24 inches apart on mature trees. This spacing allows enough room for light to penetrate while maintaining the tree’s structural integrity. After pruning, observe how sunlight patterns change and adjust your cuts accordingly in future sessions.
For the best results, combine light penetration pruning with regular maintenance cuts, focusing on creating a sustainable pattern of growth that benefits both the tree and surrounding plants.
Common Pruning Mistakes to Avoid
Even experienced gardeners can make pruning mistakes, but being aware of common errors helps you maintain healthier trees. One frequent mistake is making flush cuts directly against the trunk, which removes the branch collar and slows healing. Instead, look for the slight swelling where the branch meets the trunk and cut just outside this collar.
Another error is leaving stubs that are too long. These “coat hangers” can’t heal properly and often become entry points for decay. The right approach is to make clean cuts at the proper angle, allowing the tree to form a protective callus.
Many gardeners fall into the trap of removing too much foliage at once. Limiting removal to no more than 25% of live branches helps prevent tree diseases and maintains the tree’s energy reserves. Over-pruning stresses trees and can lead to weak growth or decline.
Timing matters too. Pruning during wet weather increases the risk of fungal infections, while pruning in late fall can stimulate new growth that won’t survive winter. Schedule major pruning during the dormant season or early spring for best results.
Using dull or inappropriate tools is another common mistake. Rough, jagged cuts from blunt blades create larger wounds that heal slowly. Keep your pruning tools sharp and clean, and choose the right size tool for each cut. For larger branches, remember the three-cut method to prevent bark tearing.
Remember to step back periodically and assess your work. It’s easy to get caught up in pruning and lose sight of the tree’s overall shape and balance.
Proper tree pruning is both an art and a science that rewards patience and practice. Throughout this guide, we’ve explored the essential techniques and timing that contribute to healthy, vibrant trees in your shade garden. Remember that each cut you make serves a purpose, whether it’s removing dead branches, shaping for better light penetration, or promoting new growth.
By following the basic principles we’ve discussed – using clean, sharp tools, making proper cuts at the right angles, and respecting seasonal timing – you’ll develop confidence in your pruning skills. Start small, observe your trees’ responses to pruning, and gradually tackle more challenging projects as your experience grows.
Most importantly, always prioritize tree health and safety. When in doubt, consult with a certified arborist, especially for large trees or complex situations. Regular, thoughtful pruning not only enhances your garden’s beauty but also ensures your trees remain strong and healthy for years to come.
Keep these guidelines handy as you tend to your garden, and remember that every careful cut contributes to your trees’ long-term well-being. Happy pruning!


