Transform your garden into a perennial paradise with strategic seasonal care that ensures decades of vibrant blooms. Divide overgrown perennials in early spring or fall, cutting through the root ball with clean, sharp spades to promote healthy growth and prevent overcrowding. Apply a 2-3 inch layer of organic mulch around plants while leaving a few inches of space near the stems, maintaining consistent soil moisture and suppressing weed growth throughout the growing season. Monitor soil moisture levels weekly, watering deeply when the top 2 inches feel dry to encourage deep root development and drought resistance. Remove spent blooms promptly, cutting stems back to the nearest set of healthy leaves to extend flowering periods and prevent self-seeding. With these foundational care practices, perennials reward gardeners with reliable beauty that multiplies in value each passing year, creating an evolving landscape that becomes more magnificent with time.
Spring Care: Waking Up Your Perennial Garden
Early Spring Cleanup
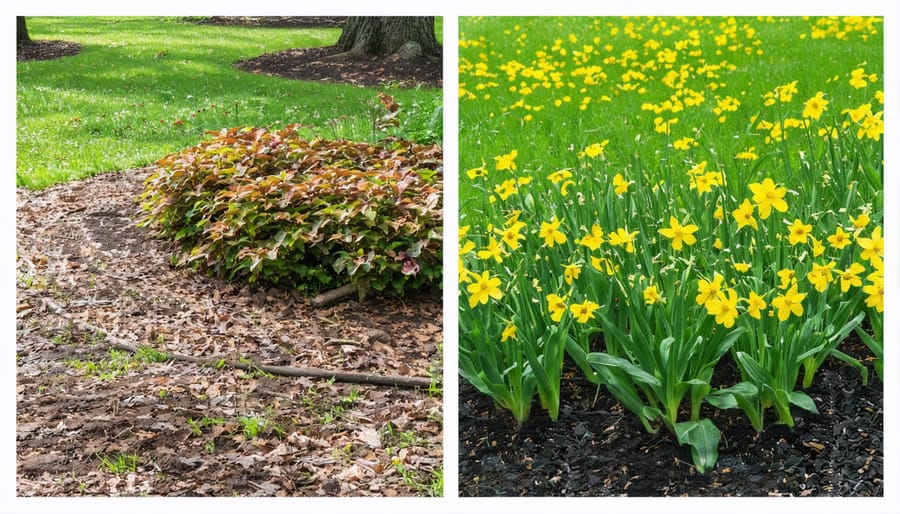
As winter fades and the first signs of spring emerge, it’s time to give your perennial garden the attention it needs to thrive in the coming growing season. Start by removing any winter protection, such as mulch or frost covers, gradually over several days to help plants acclimate to changing temperatures.
Clear away dead leaves, broken branches, and other debris that accumulated during winter. This not only improves your garden’s appearance but also prevents disease and pest problems. Using clean, sharp pruning shears, cut back any dead or damaged stems from last year’s growth to about 4-6 inches above ground level.
Inspect your plant beds for signs of frost heaving – where plants have been pushed up from the ground by freeze-thaw cycles. Gently press these plants back into the soil and add fresh compost around their bases. This is also the perfect time to divide any overcrowded perennials and remove any unwanted self-seeded plants.
Finally, refresh your mulch layer but keep it away from direct contact with plant stems to prevent rot. A 2-3 inch layer of organic mulch will help retain moisture and suppress weeds as your perennials begin their spring growth.
Division and Transplanting
Dividing perennials is like giving your plants a fresh start, and it’s essential for maintaining healthy, vibrant gardens. Most perennials benefit from division every 3-5 years, typically when they begin to show signs of overcrowding, such as reduced flowering or dead spots in the center of the clump.
The best time to divide most perennials is either early spring, just as new growth emerges, or early fall, about 6 weeks before the first frost. This timing gives plants enough time to establish new roots before extreme weather hits.
To divide your perennials, start by watering the plant thoroughly the day before. Using a sharp spade, dig around and under the entire clump, then lift it from the ground. Gently shake off excess soil and pull or cut the clump into smaller sections, ensuring each division has healthy roots and several growth points.
Replant the divisions immediately at the same depth they were growing before, spacing them according to their mature size. Water thoroughly and add a layer of mulch to retain moisture. Keep the newly divided plants well-watered for several weeks until they establish themselves in their new locations.
Spring Fertilization
Spring marks the perfect time for fertilizing your perennials, just as they begin their active growth phase. Start by applying a balanced, slow-release fertilizer (such as 10-10-10) when new shoots emerge from the soil, typically in early to mid-spring. Gently work the fertilizer into the top layer of soil around your plants, being careful not to disturb their roots. Water thoroughly after application to help nutrients reach the root zone.
For organic gardeners, compost or well-rotted manure makes an excellent natural alternative. Apply a 1-2 inch layer around your plants, leaving a small gap around the stems to prevent rot. Remember that over-fertilizing can lead to excessive foliage growth at the expense of blooms, so always follow package instructions for proper dosage. Most perennials only need one good feeding in spring to thrive throughout the growing season.
Summer Maintenance: Peak Growth Period
Watering Strategies
Proper watering is crucial for the health and longevity of your perennial garden. While different plants have varying water needs, with shade-loving perennials typically requiring less water than those in full sun, there are some universal guidelines to follow.
Water deeply and less frequently rather than giving your plants frequent light sprinklings. This encourages roots to grow deeper into the soil, making your plants more resilient during dry spells. The best time to water is early morning, which allows plants to absorb moisture before the heat of the day while reducing the risk of fungal diseases.
To determine if your perennials need water, stick your finger about 2 inches into the soil near the plant’s base. If it feels dry at that depth, it’s time to water. Consider using a soaker hose or drip irrigation system to deliver water directly to the roots while keeping leaves dry.
During the first growing season, most perennials need consistent moisture to establish strong root systems. Once established, many perennials become quite drought-tolerant, though they’ll still appreciate deep watering during extended dry periods. Apply a 2-3 inch layer of organic mulch around your plants to help retain moisture and reduce watering frequency.
Remember that overwatering can be just as harmful as underwatering, leading to root rot and other problems. Always check soil moisture before watering and adjust your schedule based on rainfall and seasonal changes.
Deadheading and Pruning
Regular deadheading and pruning are essential tasks that keep your perennials looking their best while promoting healthy growth and abundant blooms. As flowers fade, remove them by cutting just above the nearest set of healthy leaves. This simple practice prevents the plant from wasting energy on seed production and encourages it to produce more flowers instead.
For most perennials, trimming back the foliage by about one-third after the first flush of blooms can stimulate a second flowering period. When pruning, always use clean, sharp tools and make cuts at a 45-degree angle to prevent water from pooling on the stems, which could lead to rot.
Late fall or early spring is ideal for major pruning work. Cut back dead stems to about 3-4 inches above ground level, but consider leaving some stems standing through winter to provide shelter for beneficial insects and visual interest in your garden. Some plants, like ornamental grasses and sedums, look particularly striking with frost on their dried stems.
Remember that each perennial species has slightly different pruning needs, so it’s worth taking time to learn about your specific plants’ requirements.
Pest and Disease Management
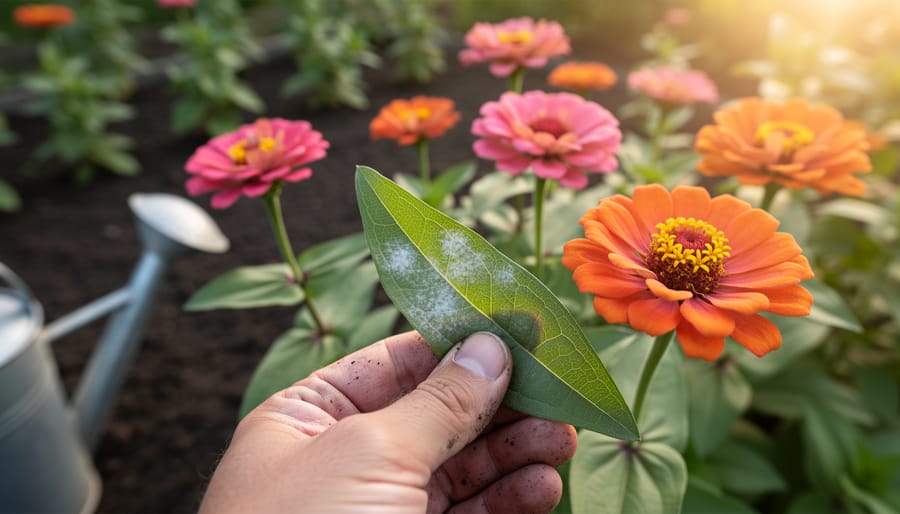
Summer brings its share of challenges, but don’t worry – there are plenty of natural ways to keep your perennials healthy and thriving. Common issues include powdery mildew, which often appears as white patches on leaves during humid weather, and aphids that cluster on new growth. To combat these naturally, try a solution of one part milk to nine parts water for mildew, or introduce beneficial insects like ladybugs to control aphid populations.
Leaf spot diseases can be prevented by ensuring good air circulation between plants and watering at the base rather than overhead. For persistent fungal problems, neem oil offers an organic solution that’s safe for beneficial insects. Japanese beetles and slugs are frequent summer visitors too – hand-picking beetles in the morning when they’re sluggish is surprisingly effective, while a shallow dish of beer can trap slugs overnight.
Remember to inspect your plants weekly, catching problems early before they spread. Maintaining healthy soil and proper spacing between plants creates natural resistance to pests and diseases. Companion planting with aromatic herbs like lavender and thyme can also help deter unwanted insects while attracting pollinators to your garden.
Fall Preparation: Setting Up for Success
Fall Cleanup
As autumn’s crisp air signals the end of the growing season, it’s time to prepare your perennial garden for winter. Start by removing dead foliage and spent flowers from your plants, cutting stems back to about 4-6 inches above ground level. However, consider leaving some seed heads intact – they provide winter interest and food for birds.
Clean up fallen leaves and debris from around your plants to prevent disease and pest problems. But don’t be too tidy – some beneficial insects overwinter in plant material, so leaving a few areas untouched can support your garden’s ecosystem.
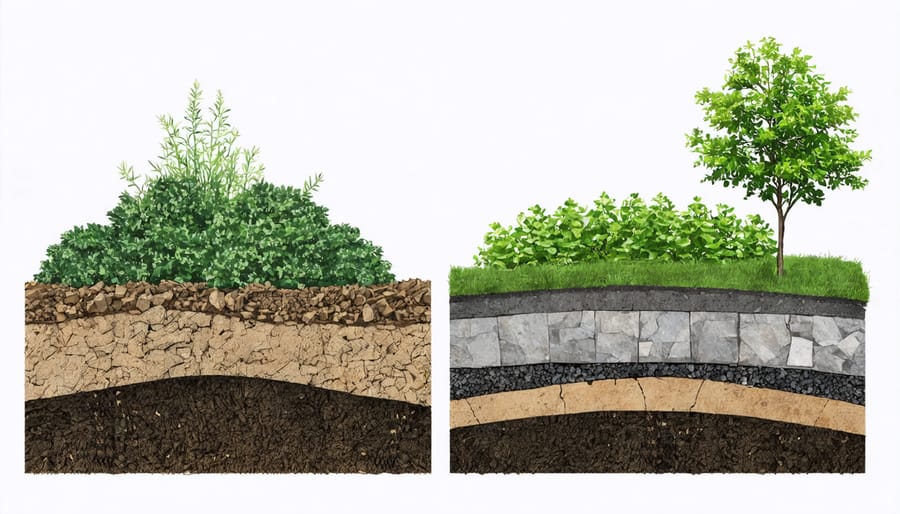
Now’s the perfect time to add a protective layer of mulch around your perennials. Apply 2-3 inches of organic material like shredded leaves, straw, or compost after the ground has frozen. This helps regulate soil temperature and prevents frost heaving that can damage plant roots.
Take this opportunity to assess your garden bed’s overall health. Add a layer of compost to nourish the soil and improve its structure for next spring. Remove any aggressive spreaders that might have ventured beyond their boundaries, and divide overcrowded plants if needed.
Make notes about what worked well this season and what didn’t – this information will be invaluable for next year’s planning. Finally, clean and store your gardening tools properly to ensure they’re ready for spring.
Late Season Care
As autumn approaches, your perennials need final preparations for the upcoming winter months. Start by gradually reducing fertilization about six weeks before your first expected frost date. If you continue feeding too late in the season, you’ll encourage tender new growth that won’t survive winter’s chill.
In early fall, apply a low-nitrogen, high-phosphorus fertilizer to promote strong root development without stimulating new foliage growth. This final feeding helps plants store energy for next spring’s growth. Remember to water thoroughly after fertilizing to help nutrients reach the root zone.
Protection is crucial for winter survival. Once the ground begins to freeze, add a 3-4 inch layer of mulch around your perennials. Use materials like straw, fallen leaves, or pine needles to insulate the soil and protect roots from freeze-thaw cycles. Don’t pile mulch directly against plant stems, as this can lead to rot.
For tender perennials in cold regions, consider additional protection methods. Place wire cages filled with leaves around delicate plants, or use frost blankets on particularly vulnerable specimens. Some gardeners successfully protect their plants by upturning large pots over them or wrapping them in burlap.
Keep an eye on weather forecasts and be ready to add extra protection during severe cold snaps. With proper late-season care, your perennials will emerge strong and healthy when spring returns.
Winter Protection: Ensuring Survival
Mulching for Winter
Mulching is like tucking your perennials in for a cozy winter nap. Apply a 2-3 inch layer of organic mulch around your plants after the ground has frozen, typically in late fall or early winter. This protective blanket helps regulate soil temperature and prevents the damaging freeze-thaw cycles that can heave plants out of the ground.
Choose materials like shredded leaves, straw, pine needles, or bark mulch. Each has its benefits, but what matters most is keeping the layer loose and not packing it against plant stems, which can lead to rot. For most perennials, extend the mulch about 6 inches beyond the plant’s drip line.
I’ve found that leaving some stems and seed heads standing before mulching provides natural protection and creates winter interest in your garden. Plus, these plant structures offer valuable shelter for beneficial insects and food for winter birds.
Remember to remove heavy mulch gradually in spring as temperatures warm up. This allows your perennials to emerge naturally without becoming leggy from searching for light through thick coverage.
Winter Monitoring
Regular winter monitoring is crucial for keeping your perennial garden healthy during the coldest months. After each snowfall or ice storm, gently brush off heavy snow from your plants to prevent stem breakage. Be especially vigilant with evergreen perennials, as their foliage can become damaged under the weight of accumulated snow and ice.
Check your winter mulch periodically to ensure it hasn’t been displaced by strong winds or animals. If you notice any areas where the mulch has thinned, add more to maintain that crucial protective layer. Pay special attention to newly planted perennials, as they’re more vulnerable to winter damage.
Watch for signs of frost heaving, where plants are pushed up out of the ground by freezing and thawing cycles. If you spot any exposed roots, carefully press the plant back into the soil and add additional mulch around the base. Keep an eye out for animal damage too – rabbits and deer often become desperate for food in winter and may nibble on your perennials.
Should you notice any damaged stems or foliage, resist the urge to prune until spring arrives. Those seemingly dead parts actually provide valuable protection for the crown of the plant during winter’s harshest moments.
Maintaining perennial plants is a rewarding journey that unfolds throughout the seasons, bringing beauty and life to your garden year after year. As we’ve explored, successful perennial care requires a thoughtful balance of seasonal tasks, from spring cleanup to winter protection. Remember that each plant has unique needs, so take time to design your perennial garden with plants that complement each other and suit your local climate.
The key to thriving perennials lies in consistent attention and care. Regular monitoring for signs of stress or disease, proper watering practices, and timely pruning will keep your garden healthy and vibrant. Don’t forget the importance of soil maintenance – annual amendments and mulching will provide your plants with the foundation they need to flourish.
As you become more familiar with your perennials, you’ll develop an intuitive understanding of their needs and cycles. Remember that gardening is a learning experience, and even experienced gardeners face challenges. Stay patient, be observant, and adjust your care routine as needed.
By following the seasonal maintenance guidelines we’ve discussed, you’ll create a resilient and beautiful garden that rewards you with stunning blooms and foliage throughout the growing season. Your perennial garden isn’t just a collection of plants – it’s a living ecosystem that grows more magnificent with each passing year.