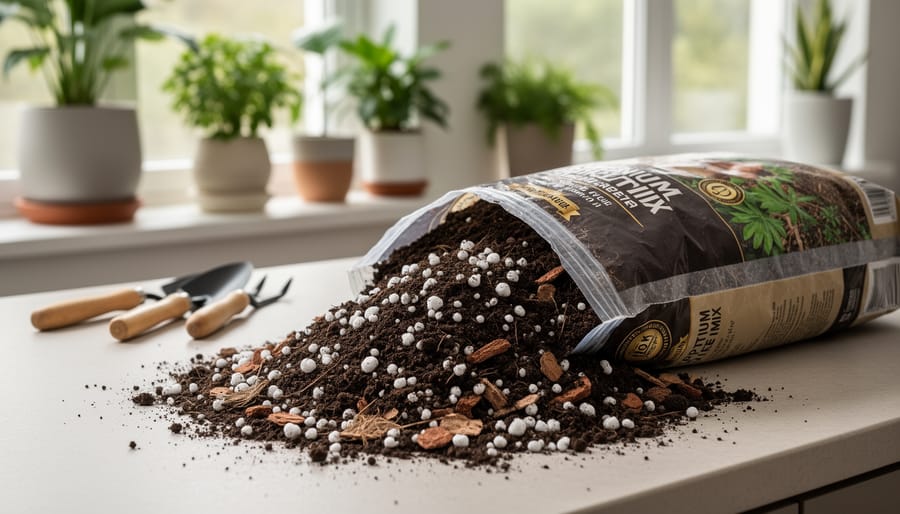
Choose a lightweight, soilless potting mix specifically designed for containers rather than garden soil when starting an indoor vegetable garden. Garden soil compacts in pots, suffocates roots, and often harbors pests that thrive indoors. Quality potting mix contains ingredients like peat moss or coco coir for moisture retention, perlite or vermiculite for aeration, and compost for nutrients—creating the perfect balance your tomatoes, peppers, and leafy greens need to flourish on your windowsill.
Mix your own blend using equal parts coco coir, perlite, and compost to save money while controlling exactly what feeds your plants. This combination drains quickly enough to prevent root rot yet holds sufficient moisture between waterings, which matters tremendously when you cannot rely on natural rainfall. Add a handful of worm castings to boost beneficial microorganisms that help plants absorb nutrients more efficiently.
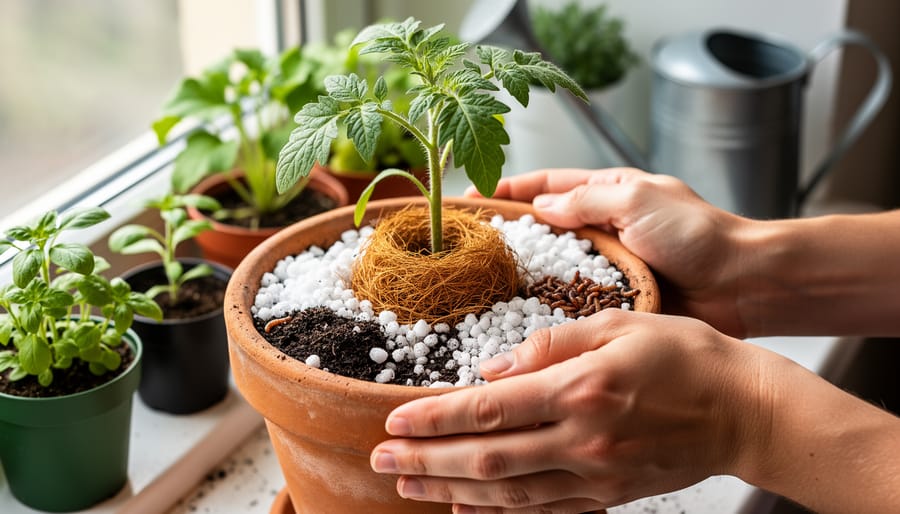
Test your mix by squeezing a handful after moistening it—the mixture should clump together but crumble easily when poked. This texture indicates proper drainage and aeration. Remember that indoor vegetables grow entirely dependent on what you provide in their containers, making your potting mix choice the foundation of your harvest success.
What Makes Indoor Potting Mix Different from Outdoor Soil
If you’ve ever tried using garden soil in containers indoors, you might have discovered the hard way that it just doesn’t work the same magic as it does outdoors. Let me explain why indoor potting mix is specially designed for container-grown vegetables, and trust me, these differences really matter.
First and foremost, drainage is everything when growing vegetables in pots. Garden soil is dense and compact, which works perfectly fine in the ground where roots can spread far and wide. But pack that same soil into a container, and it becomes waterlogged, heavy, and suffocating for your plant roots. Indoor potting mix, on the other hand, is specifically formulated to be light and fluffy, allowing excess water to drain quickly while still holding just enough moisture for your vegetables to thrive. Think of it like the difference between a heavy wool blanket and a breathable cotton sheet for your plant’s roots.
Weight plays a surprisingly important role too. Garden soil can make containers incredibly heavy and difficult to move around, which becomes a real issue when you’re chasing sunlight through different windows or rearranging your indoor garden setup. Potting mix keeps things manageable and your back happier.
Here’s another critical factor: sterility. Outdoor garden soil comes loaded with beneficial organisms, but it also harbors weed seeds, pests, and potential diseases that can wreak havoc in the controlled environment of your home. Quality potting mix starts clean and sterile, giving your vegetables a fresh start without uninvited guests competing for resources or causing problems.
These differences aren’t just technicalities. They directly impact whether your indoor tomatoes flourish or your container lettuce languishes. The right foundation makes all the difference.
The Essential Ingredients Your Indoor Vegetable Mix Needs
Peat Moss or Coco Coir: The Moisture Manager
Think of peat moss or coco coir as the spongy foundation of your indoor potting mix. These ingredients are the moisture managers, holding water like a reservoir while keeping your mix light and airy—exactly what vegetable roots crave. Peat moss has been the traditional go-to for decades, offering excellent water retention and a slightly acidic pH that many vegetables love. However, coco coir, made from coconut husks, has become increasingly popular as a sustainable alternative. It performs similarly to peat but is renewable and environmentally friendlier. I’ve used both in my indoor garden, and honestly, vegetables thrive with either option. Coco coir tends to retain moisture a bit longer, which can be helpful if you occasionally forget to water. Whichever you choose, aim for this base to make up about 50-60% of your mix. The key is creating that perfect balance—moist enough to support growth, but never waterlogged. Your tomatoes, peppers, and leafy greens will thank you with vigorous root development and healthy foliage.
Perlite and Vermiculite: Your Drainage Dream Team
Think of perlite and vermiculite as the secret ingredients that keep your potting mix from becoming a brick-hard disappointment. These lightweight minerals are game-changers for container vegetables, and here’s why they deserve a spot in your mix.
Perlite looks like tiny white popcorn kernels and works wonders at creating air pockets throughout your soil. When you water your tomatoes or peppers, those little spaces prevent the mix from packing down tight, ensuring roots can breathe freely. I’ve seen struggling indoor gardens completely transform just by adding more perlite to their mix.
Vermiculite is the softer cousin, with a sponge-like quality that holds moisture while still maintaining fluffiness. Together, they’re your drainage dream team. Aim for about 10-15% of each in your mix, though you can adjust based on your vegetables’ needs. Leafy greens appreciate the extra moisture retention from vermiculite, while herbs prefer perlite’s quick-draining properties. The beauty is that neither material breaks down over time, so your soil structure stays reliable season after season.
Compost: The Nutrient Powerhouse
Think of compost as a slow-release multivitamin for your indoor vegetables. Unlike synthetic fertilizers that provide a quick nutrient burst, compost works gradually, feeding your plants as it continues to break down over weeks and months. This organic matter is absolutely essential in potting mixes because it does double duty—it feeds beneficial microorganisms while releasing nitrogen, phosphorus, and potassium that your tomatoes, peppers, and leafy greens crave.
When I add compost to my indoor mixes, I aim for about 20-30% of the total volume. Well-aged compost should smell earthy and sweet, never sour or ammonia-like. The beauty of compost is that it also improves the soil structure, helping retain just enough moisture while still allowing proper drainage. If you’re buying bagged compost, look for brands specifically labeled as aged or finished. Your vegetables will reward you with stronger growth and better harvests when they have this nutrient powerhouse supporting them from the start.
Extra Additions for Heavy Feeders
If you’re growing nutrient-hungry vegetables like tomatoes, peppers, or leafy greens indoors, consider boosting your potting mix with some powerhouse amendments. Worm castings are my personal favorite—they’re like nature’s slow-release fertilizer, packed with beneficial microbes that help plants absorb nutrients more efficiently. Add about one cup per gallon of mix for a gentle but steady nutrient boost.
Bone meal is excellent for fruiting vegetables, providing phosphorus that supports strong root development and flower production. Mix in two to three tablespoons per gallon of potting mix at the start. Kelp meal brings trace minerals to the party and can improve overall plant vigor—use one to two tablespoons per gallon.
Don’t feel pressured to add everything at once. Start with worm castings if you’re new to amendments, then experiment as you gain confidence. Remember, these additions work best when combined with regular fertilizing throughout the growing season, not as a complete replacement for feeding your plants.

Matching Your Mix to Your Vegetables
Light Mix for Greens and Herbs
Greens like lettuce, spinach, and arugula, along with herbs such as basil and cilantro, thrive in a lighter potting mix that promotes quick drainage and prevents their delicate roots from staying too wet. For these fast-growing beauties, I blend equal parts peat moss or coir, perlite, and good-quality compost. This creates an airy texture that shallow roots can easily penetrate while still holding enough moisture to keep these quick drinkers happy.
The key here is drainage. Greens and herbs hate sitting in soggy soil, which leads to root rot faster than you can say “salad bar.” The extra perlite ensures water flows through freely, while the compost provides gentle nutrition without overwhelming these relatively light feeders. I’ve found this mix particularly forgiving for beginners since it’s nearly impossible to overwater. Fill your containers, plant your seeds or seedlings, and watch them take off within weeks.
Rich Mix for Fruiting Vegetables
Fruiting vegetables like tomatoes, peppers, and cucumbers are the rock stars of indoor gardening, but they need some serious fuel to perform! These heavy feeders demand a richer mix than their leafy cousins. Start with your basic potting mix recipe, then boost it with extra compost—aim for about 40% compost instead of the usual 25%. I also love adding worm castings at this stage, about one cup per gallon of mix, because they’re packed with slow-release nutrients your plants will thank you for later.
Here’s a trick I learned from seasoned gardener Maria Lopez: mix in a handful of bone meal and kelp meal to support fruit development. The calcium in bone meal helps prevent blossom end rot in tomatoes, while kelp provides essential trace minerals. Since these plants will live in their containers for months, you’re building a nutrient bank they can draw from throughout their growing season. Remember, healthy roots lead to abundant harvests!
Loose Mix for Root Vegetables
Root vegetables like carrots, radishes, and beets have special needs when growing indoors. These crops need room to stretch downward, so your potting mix should be lighter and looser than standard blends. Think of it like giving them a fluffy pillow to grow into rather than a dense mattress.
For root vegetables, aim for a mix with extra perlite or coarse sand—about 40% of your total blend. This creates air pockets that let roots expand without resistance. I learned this the hard way when my first indoor carrots grew stubby and forked because the mix was too compact!
Keep peat moss or coir to around 40%, and compost at 20%. The key is avoiding anything that might clump or create hard spots. Sift out any large chunks before filling your containers.
Choose deep pots—at least 12 inches for carrots and 8 inches for radishes. Give the mix a gentle squeeze test: it should crumble easily rather than hold together. This loose texture means more frequent watering, but your vegetables will thank you with straight, well-formed roots.
Container Selection: Why Your Pot Matters as Much as Your Mix
Size Guidelines for Common Vegetables
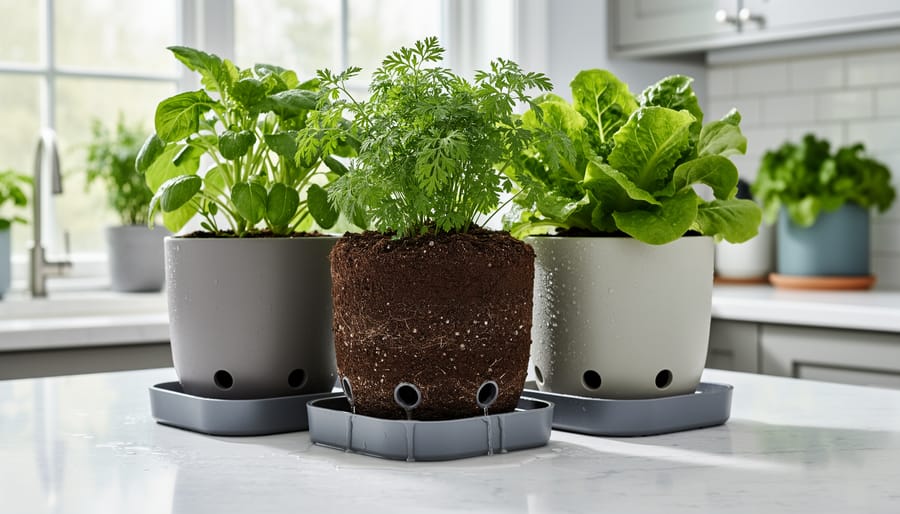
Choosing the right container size can make or break your indoor vegetable garden. Here’s a practical guide to help you match your crops with their ideal homes:
Leafy greens like lettuce, spinach, and arugula thrive in containers 6-8 inches deep, perfect for windowsill gardening. Herbs such as basil, parsley, and cilantro do well in similar depths.
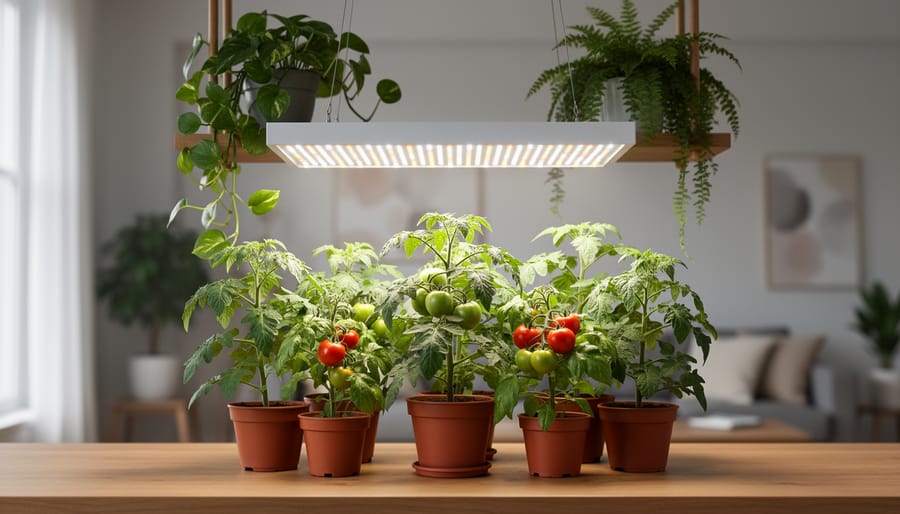
Tomatoes need generous space—at least 5 gallons (12-14 inches deep) for determinate varieties, while cherry tomatoes can manage in 3-gallon containers. Peppers are happy in 3-5 gallon pots.
Root vegetables require depth: carrots need 12 inches, while radishes manage with 6-8 inches. Bush beans work wonderfully in 2-gallon containers, about 8-10 inches deep.
Compact crops like green onions only need 4-6 inches, making them fantastic for tight spaces. Kale and chard appreciate 10-12 inch depths.
Remember, bigger is often better when in doubt. Larger containers hold more potting mix, which means better moisture retention and more nutrients for your plants. Your vegetables will reward you with healthier growth and better harvests when their roots have room to spread comfortably.
Material Matters: Plastic, Terracotta, and Fabric Pots
Your choice of container material significantly influences how your potting mix performs, especially when growing vegetables indoors. Let me walk you through the three most common options and what they mean for your plants.
Plastic pots are budget-friendly champions of moisture retention. They hold water longer than other materials, which means less frequent watering—perfect if you travel or have a busy schedule. However, this same quality can lead to overwatering problems if you’re not careful. I’ve learned to check plastic pots more carefully before watering, especially during cooler months when evaporation slows down.
Terracotta pots bring a charming, rustic look to your indoor garden, but they’re thirsty containers. These porous clay pots allow air and moisture to pass through their walls, which helps prevent root rot but requires more frequent watering. Root temperatures stay more consistent in terracotta, which many vegetables appreciate. Just remember that lightweight potting mixes dry out faster in these pots, so you might need to water every day or two during active growing periods.
Fabric grow bags have become my favorite for vegetables like tomatoes and peppers. They provide excellent drainage and air circulation, naturally air-pruning roots for healthier growth. They do dry out quickly though, so pair them with moisture-retentive potting mixes that include coconut coir or peat moss. Consider placing fabric bags on saucers to catch drainage and protect your floors.
Drainage: The Make-or-Break Factor for Indoor Success
How Many Drainage Holes Do You Really Need?
For most containers, you’ll want at least 3-5 drainage holes, each about half an inch in diameter. Smaller pots can get by with one large hole, while larger containers benefit from multiple holes spaced evenly across the bottom. Think of it like this: more holes mean faster drainage and better air circulation to your vegetable roots.
I’ve learned the hard way that one tiny hole just doesn’t cut it for thirsty vegetables like tomatoes or peppers. If your container only has one hole, consider drilling a few more using a standard drill bit. Space them evenly, about 2-3 inches apart, to prevent water from pooling in any corner.
Here’s a quick rule: if water takes more than a few seconds to drain after watering, you need more holes. And don’t forget to elevate your containers slightly using pot feet or small stones, allowing water to escape freely rather than sitting trapped underneath.
Setting Up a Catch System That Actually Works
Let me share a game-changer for indoor veggie growing: protecting your floors while keeping plants happy. The secret is creating layers of protection that catch water before it becomes a problem.
Start with waterproof saucers or trays that extend at least an inch beyond your container’s edge. I learned this the hard way when my cherry tomato overflow stained my hardwood floor! For added security, place cork mats or rubber shelf liners underneath your saucers. These grip surfaces and catch any sneaky drips.
Here’s a pro tip from master gardener Sarah Chen I interviewed: use deep saucers filled with pebbles. Your container sits on top of the pebbles, elevated above any collected water. This prevents root rot while catching excess moisture that evaporates back up, creating helpful humidity.
For larger setups, consider boot trays or plastic storage bin lids. They’re inexpensive and handle multiple containers. Just remember to empty standing water within a few hours after watering to keep your vegetables thriving and your floors pristine.
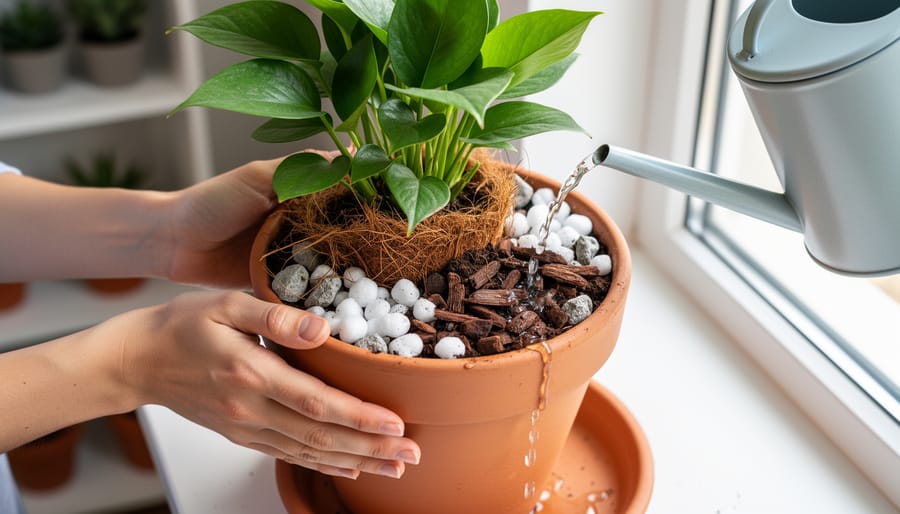
The Bottom Layer Myth You Need to Forget
You’ve probably heard this advice a million times: put gravel or rocks at the bottom of your containers for better drainage. Here’s the truth—it actually makes drainage worse! This practice creates what’s called a perched water table, where water gets trapped in the soil just above the gravel layer instead of draining freely through.
Think of it like a sponge sitting on a plate. The water stays in the sponge until it’s completely saturated, right? The same thing happens in your pot. Instead of that rock layer helping, it reduces the overall volume of soil available for your vegetable roots and keeps the bottom portion waterlogged.
What works better? Skip the rocks entirely and use quality potting mix alone. Make sure your containers have adequate drainage holes, and if you’re worried about soil washing out, place a coffee filter or piece of newspaper over the holes before adding your mix. This simple switch will keep your vegetables happier and healthier.
Mixing Your Own vs. Buying Pre-Made: What Makes Sense for You
I’ll be honest with you—when I first started growing vegetables indoors, I grabbed whatever potting mix was on sale. It worked, but it wasn’t until I experimented with making my own that I really understood what my plants needed. The choice between mixing your own and buying pre-made really depends on your scale, budget, and how much you enjoy tinkering.
Store-bought mixes offer incredible convenience. You open the bag, fill your containers, and you’re planting within minutes. Quality brands have already balanced all the ingredients, and you don’t need storage space for multiple components. For beginners or anyone growing just a few pots, this simplicity is often worth the slightly higher cost. Expect to pay around $8-15 for a bag that fills several medium containers.
Making your own mix becomes cost-effective when you’re growing more than a handful of plants. You’ll spend $40-60 initially on ingredients, but this creates enough mix for dozens of containers. The math really works in your favor if you’re committed to indoor gardening long-term. Plus, you control exactly what goes into your soil.
Here’s my go-to recipe that works beautifully for most vegetables: combine 3 parts peat moss or coco coir, 2 parts compost, 2 parts perlite or vermiculite, and 1 part coarse sand. Mix in a large bucket or wheelbarrow until everything is evenly distributed.
The real question isn’t which option is better—it’s what fits your situation. Starting out? Buy pre-made and focus on learning how your plants grow. Ready to scale up or customize? Mixing your own opens new possibilities. Both paths lead to delicious homegrown vegetables, so choose what feels right for where you are in your gardening journey.
Common Mistakes That Sabotage Your Indoor Vegetable Garden
Even experienced gardeners sometimes stumble into traps that can doom an indoor vegetable garden before it starts. Let’s talk about the most common mistakes so you can sidestep them entirely.
First up: reusing old potting mix. I get it—it feels wasteful to toss last season’s mix. But used potting mix becomes compacted, loses nutrients, and may harbor diseases or pests. Think of it like trying to bake bread with flour that’s lost its rising power. If you must reuse mix, rejuvenate it first by adding fresh compost and perlite, but honestly, starting fresh gives your vegetables the best shot at success.
Another pitfall is over-packing containers. When you press potting mix down too firmly, you squeeze out the air pockets that roots desperately need. Your mix should feel light and fluffy when you fill containers—gently firm it around plants, but resist the urge to compact it like you’re packing a suitcase.
Poor drainage setup trips up many indoor gardeners. Without drainage holes and a proper saucer system, water pools at the bottom, creating a swampy environment where roots rot. Always ensure containers have adequate drainage before adding any mix.
Finally, bringing outdoor garden soil indoors seems economical but invites trouble. Outdoor soil is too heavy for containers, drains poorly, and often contains weed seeds, insects, and diseases. Keeping indoor plants thriving starts with purpose-made potting mix designed specifically for container conditions.
You’ve now got everything you need to grow thriving vegetables indoors, and it all starts with the foundation beneath your plants. The right potting mix truly makes the difference between struggling seedlings and abundant harvests on your windowsill or under grow lights. Whether you’ve chosen to purchase a quality bagged mix or create your own custom blend, you’re setting yourself up for success.
Remember, there’s no single perfect recipe that works for everyone. Your indoor environment, the vegetables you’ve selected, and even your watering habits all play a role in what works best. Don’t be afraid to experiment a little and adjust as you go. Pay attention to how your plants respond, and you’ll quickly develop an intuition for what they need.
Starting an indoor vegetable garden is such a rewarding journey, and I genuinely believe anyone can do it with the right approach. You’re already ahead of the game by understanding how crucial proper potting mix and drainage are to your plants’ health.
Now comes the fun part: getting your hands dirty and watching your garden come to life! I’d love to hear how your indoor vegetable garden progresses. What vegetables are you growing? Have you discovered any potting mix tricks that work particularly well? Share your experiences in the comments below.