That sloping yard you’ve been viewing as a problem? It’s actually your ticket to creating one of the most visually stunning and diverse gardens on your block. Slopes offer natural drainage, distinct microclimates from top to bottom, and dramatic vertical interest that flat gardens struggle to achieve. The key is working with gravity instead of fighting it.
Transform your slope into three distinct planting zones: the dry, sun-baked crown at the top; the moderate middle section; and the moisture-rich base where water naturally collects. Each zone supports different plant communities, giving you triple the gardening possibilities of a flat space. Install terraces using stone, timber, or even densely planted groundcovers to slow water runoff and create level planting pockets. Position deep-rooted perennials and shrubs strategically to anchor soil while their root systems do the erosion-control work for you.
The secret most gardeners miss? Plant in fall when rainfall does the watering work, giving roots all winter to establish their grip before summer stress arrives. Start at the bottom and work upward, which keeps you from trampling freshly planted areas. With the right approach, your slope becomes a low-maintenance, self-watering garden that neighbors will envy.
Why Slopes Actually Make Excellent Gardens
If you’ve been viewing your sloped yard as a gardening headache, I have wonderful news for you—that slope is actually a hidden treasure! I’ll admit, when I first started working with sloped gardens, I shared the same concerns many of you probably have. But after years of experience and conversations with seasoned gardeners, I’ve learned that slopes offer some remarkable advantages you simply can’t get with flat terrain.
Let’s start with drainage, which is perhaps the biggest gift a slope provides. Water naturally flows downward, meaning your plants are far less likely to suffer from waterlogged roots—a common killer in flat gardens. This improved drainage creates healthier root systems and reduces the risk of fungal diseases that thrive in standing water.
Here’s something even more exciting: your slope creates multiple microclimates within a single garden space. The top of your slope typically receives more sunlight and wind, making it perfect for heat-loving, drought-tolerant plants. Meanwhile, the middle and lower sections retain more moisture and offer slightly cooler conditions, expanding your planting options dramatically. It’s like having several different gardens in one!
The visual appeal of a slope garden is truly stunning. Imagine creating cascading layers of color and texture that draw the eye naturally downward. Each plant becomes more visible when terraced or staggered on a slope, unlike flat gardens where plants in back rows can disappear. Your friends and neighbors will stop to admire the dimensional beauty you’ve created.
Finally, many gardeners discover their slopes offer extended growing seasons. South-facing slopes warm up earlier in spring and retain heat longer into fall, giving you extra weeks of productive growing time. That challenging slope you’ve been worrying about? It’s actually your ticket to a more dynamic, healthier, and visually captivating garden.

Understanding Your Slope Before You Plant
Measuring Your Slope’s Grade
Before you start planning your slope garden, it’s helpful to understand just how steep your terrain is. Don’t worry—you don’t need fancy surveying equipment! There are several simple methods you can try right at home.
The easiest approach is using a smartphone app designed to measure slope angles. Apps like Clinometer or Measure can instantly tell you the degree of your slope. Just place your phone flat against the slope or hold it level while pointing down the hill, and you’ll get an immediate reading.
If you prefer a hands-on method, grab a long board, a level, and a tape measure. Place one end of the board at the top of your slope and extend it horizontally (use the level to ensure it’s straight). Measure the vertical distance from the lower end of the board to the ground. Divide this number by the board’s length and multiply by 100 to get your slope percentage.
Here’s what those numbers mean for your garden: slopes under 10 percent are gentle and easiest to work with using standard gardening methods. Between 10-25 percent, you’ll want to incorporate terracing or contour planting. Anything steeper than 25 percent requires more substantial erosion control measures like retaining walls or extensive terracing to create stable planting areas.
Observing Water Flow and Sun Patterns
Before you plant a single seed, spend some time getting to know your slope’s unique personality. This observation phase is absolutely crucial and can save you from costly mistakes down the road.
Start by watching what happens during a rainstorm. Grab your raincoat and head outside to see where water naturally collects, where it races downhill, and which areas stay relatively dry. Take photos or sketch a simple map marking these wet and dry zones. You might notice that water channels form in certain spots or pools at the base—these observations will guide your plant choices and help you position water-loving plants in naturally moist areas while keeping drought-tolerant varieties on the drier sections.
Next, track the sun’s journey across your slope throughout the day. Check at morning, midday, and late afternoon to understand which areas receive full sun (six-plus hours), partial shade, or deep shade. Remember that slopes facing south typically get more intense sunlight, while north-facing slopes stay cooler and shadier. A simple trick: place stakes with ribbons in different zones and note the sun exposure at each spot.
This detective work typically takes a few weeks but pays tremendous dividends when you’re ready to match the right plants to the right locations.
Testing Your Soil on a Slope
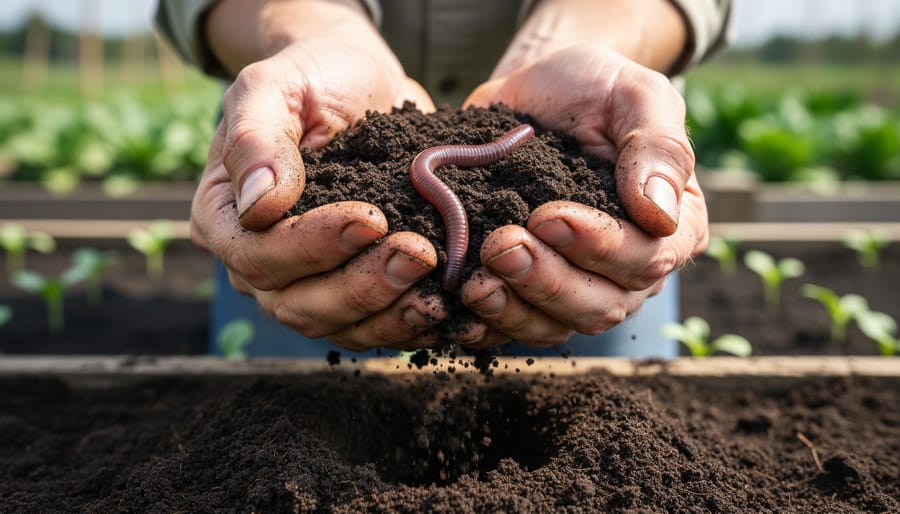
Here’s a fun fact that catches many gardeners by surprise: your slope’s soil isn’t the same from top to bottom! Water naturally carries nutrients and fine particles downward, meaning your hilltop soil might be lean and sandy while the base is rich and clay-heavy. Before you start digging, take time for testing your soil at multiple points along your slope.
Start by collecting samples from the top, middle, and bottom sections. The squeeze test is wonderfully simple: grab a handful of moist soil and squeeze it tight. Sandy soil (common at the top) crumbles apart easily, while clay-rich soil (often at the bottom) forms a sticky ball. Silty loam holds together but breaks with gentle pressure—that’s your gardening gold!
You can also check drainage by digging small holes at each level, filling them with water, and timing how quickly it drains. This information will guide your plant choices and tell you where amendments are most needed.
Essential Techniques to Prevent Erosion
Ground Covers That Hold Soil in Place
Ground covers are your secret weapon for stabilizing slopes while creating a beautiful, low-maintenance carpet of green. These hardworking plants spread their roots horizontally, knitting the soil together like natural netting. For sunny slopes, creeping juniper and creeping phlox offer excellent coverage with minimal fuss. In shadier spots, consider sweet woodruff or pachysandra, which thrive without full sun and spread reliably.
To establish ground covers quickly, plant them closer together than you normally would—spacing them 6-8 inches apart rather than 12 inches helps them fill in faster and start stabilizing soil within the first season. I always recommend applying a thin layer of mulch between new plants to prevent erosion while they’re getting established.
Native options like wild strawberry or Pennsylvania sedge are particularly vigorous, and many ornamental grasses work beautifully as ground stabilizers too. The key is selecting plants suited to your specific conditions—sun exposure, moisture levels, and foot traffic all matter. Water new plantings regularly for the first six weeks, and you’ll be rewarded with a living mulch that holds your slope securely while requiring less maintenance than traditional lawn.

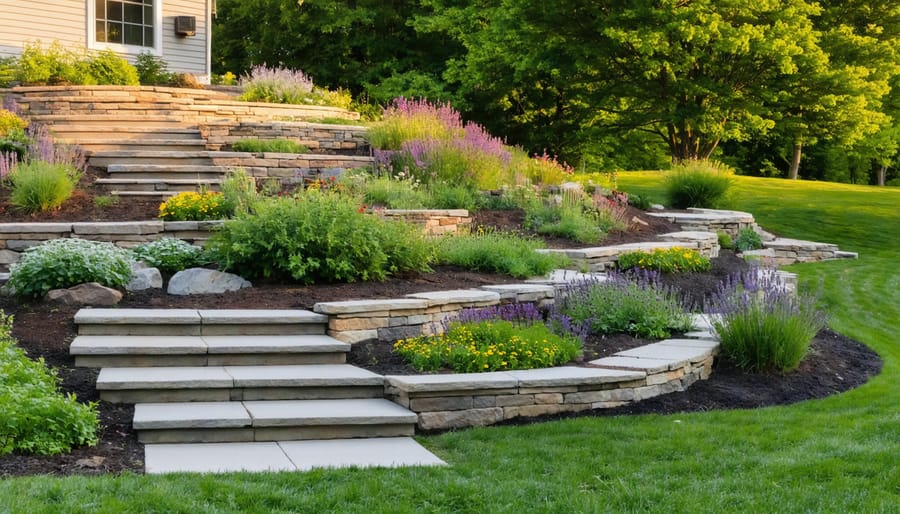
Creating Simple Terraces and Raised Beds
Building terraces on a slope doesn’t require professional landscaping skills or a huge budget. The basic principle is simple: create flat platforms that hold soil in place while allowing you to garden comfortably. Let’s explore approaches that work for different situations and budgets.
For a budget-friendly option, timber terraces are incredibly effective. Use untreated cedar or rot-resistant wood planks, at least 2 inches thick and 8-10 inches high. Start at the bottom of your slope, digging a shallow trench to anchor your first board. Secure it with wooden stakes driven into the ground every 3-4 feet. Backfill with soil to create your first level bed, then repeat the process moving upward. The principles of building raised beds apply beautifully to terraced gardens.
Stone terraces offer a more permanent solution. Gather flat rocks or purchase landscaping stones, stacking them in a slight backward lean for stability. No mortar is necessary for low terraces under 2 feet high. Fill gaps with smaller stones and pack soil behind them firmly.
On a tight budget? Sandbags or burlap sacks filled with soil work surprisingly well for temporary terraces. They’re perfect for testing layouts before committing to permanent structures. Stack them in a staggered brick pattern, and they’ll last 2-3 seasons while plants establish roots that further stabilize the slope. Remember, start small with one or two terraces to build confidence before tackling your entire hillside.
Mulching Strategies That Work on Slopes
Keeping mulch in place on a slope requires a bit of strategy, but once you’ve got it down, it makes all the difference! The key is choosing materials that knit together rather than roll downhill. Shredded bark and wood chips work beautifully because their irregular shapes interlock naturally. I’ve found that pine needles are absolutely fantastic on slopes—they create a mat that stays put even during heavy rain.
Here’s my tried-and-true layering approach: Start with a thin layer of compost directly on the soil, then add 2-3 inches of your chosen mulch. For steeper areas, consider creating small terraces or depressions as you plant to catch and hold the mulch. You can also anchor mulch using erosion control netting or jute mesh, which biodegrades over time while your plants establish. Some gardeners swear by mixing in larger chunks of bark or small branches to create natural barriers that slow water flow and keep finer mulch from washing away. Whatever method you choose, avoid piling mulch too thickly—it’s better to refresh lighter layers seasonally than fight gravity with one heavy application.
Choosing the Right Plants for Each Zone
Top of the Slope: Drought-Tolerant Choices
The top of your slope is where water drains away fastest, creating naturally dry conditions that many plants actually prefer. Think of this area as prime real estate for drought-tolerant perennials and Mediterranean herbs that struggle in overly moist soil.
Start with tough performers like Russian sage, catmint, and lavender, which not only tolerate dry conditions but reward you with gorgeous blooms and fragrant foliage. Sedum varieties are absolute champions here, storing water in their fleshy leaves while providing season-long interest. I’ve had wonderful success with ornamental grasses like little bluestem and blue fescue, which send deep roots down to anchor the soil.
For herbs, this spot is perfect. Rosemary, thyme, oregano, and sage all hail from hillsides in their native habitats and will flourish with minimal fussing. Consider adding small shrubs like potentilla or caryopteris for structure.
The beauty of planting at the crest is that once established, these plants practically care for themselves. Group them close together to shade the soil and reduce water evaporation, creating a self-supporting community that thrives on benign neglect.
Middle Sections: Your Versatile Growing Zone
The middle sections of your slope are truly your gardening sweet spot! Here, you’ll find the most balanced conditions—moderate drainage, easier access for maintenance, and soil that’s neither too dry nor waterlogged. This is where I always plant my vegetables and favorite flowers, and I think you’ll love the possibilities.
Think of this zone as your traditional garden space with the added benefit of good air circulation. Tomatoes, peppers, beans, and squash all thrive here, along with most annual flowers like zinnias, marigolds, and cosmos. The gentle slope actually works in your favor by preventing water from pooling around plant roots during heavy rains.
Master gardener Susan Chen, whom I interviewed last spring, shared that she grows her prize-winning dahlias in the middle section of her sloped property. “The drainage is perfect,” she explained, “and I can easily tend them without worrying about erosion issues.”
Consider creating terraced beds in this area for even more planting options. You’ll maximize your growing space while keeping maintenance simple and enjoyable.
Bottom of the Slope: Moisture-Loving Plants
The bottom of your slope is where nature does you a favor—all that rainwater naturally collects here, creating perfect conditions for plants that love consistent moisture. Instead of fighting against potential sogginess, embrace it by choosing vegetation that thrives in these conditions.
Consider planting cardinal flower, astilbe, or Joe Pye weed, which flourish with their feet slightly damp. Hostas are excellent choices for shadier slope bases, offering beautiful foliage throughout the growing season. For edible options, try watercress, mint (contained in pots to prevent spreading), or even cranberries if your soil is acidic enough.
I learned this firsthand when landscape designer Maria Torres told me during an interview, “The slope bottom is prime real estate—don’t waste it on grass that’ll stay soggy. Plant what actually wants to be there.” Her advice transformed my perpetually damp lower garden into a productive herb and flower bed.
The key is ensuring adequate drainage even here. While these plants appreciate moisture, they don’t want standing water. Adding organic matter helps maintain that balance, keeping soil moist but not waterlogged.
Watering Your Slope Garden Without Runoff
Drip Irrigation and Soaker Hoses
Drip irrigation and soaker hoses are your secret weapons for watering a sloped garden without losing precious soil or nutrients. These systems deliver water directly to plant roots slowly and steadily, giving moisture time to soak in rather than race downhill.
Installing a drip irrigation system is surprisingly straightforward. Start by laying your main line along the top of your slope, then run drip lines downward following your plant rows. Use stakes to secure the lines every few feet so they stay put. The beauty of drip irrigation is that you can customize it with individual emitters placed exactly where each plant needs water. For larger sloped areas, soaker hoses offer a simpler solution. These porous hoses “weep” water along their entire length, creating an even moisture distribution.
Here’s my favorite trick: bury your soaker hoses under a couple inches of mulch. This keeps them from shifting during storms and reduces water evaporation. Connect either system to a timer, and you’ve got a hands-off watering solution that prevents erosion while keeping your plants happy. The slow delivery rate, typically around 1-2 gallons per hour, means water penetrates deeply instead of running off, encouraging stronger root systems that further stabilize your slope.

Hand-Watering Tips for Slopes
Hand-watering on a slope requires a bit more finesse than watering flat ground, but once you get the rhythm down, it becomes second nature. The key is working with gravity rather than against it. I’ve found that early morning watering works best—the soil has time to absorb moisture before the sun intensifies, and you’ll lose less water to runoff.
Start at the top of your slope and work your way down, pausing to let water soak in rather than rushing through the task. A quality hose spray gun with adjustable settings lets you control water pressure, which is crucial for preventing erosion. Use a gentle shower setting instead of a strong stream that’ll wash soil downhill.
Here’s a technique that transformed my sloped garden: create small temporary water-catching basins around each plant by mounding soil on the downhill side. This gives water precious extra seconds to penetrate before gravity pulls it away. Water in multiple shorter sessions rather than one long soak—perhaps ten minutes, take a break, then return for another round. This interval approach dramatically improves absorption and reduces waste, especially on steeper grades.
Your First Season: A Step-by-Step Planting Plan
Starting your slope garden doesn’t have to be an all-at-once project. I learned this the hard way when I tried tackling my entire hillside in one ambitious weekend! Breaking it into seasonal phases makes the work enjoyable rather than exhausting.
Spring is your planning and foundation season. Begin by walking your slope during and after a rainstorm to identify where water naturally flows. Mark these pathways with stakes, as they’ll guide your drainage strategy. Start small by choosing one section of your slope, ideally 10 by 10 feet, for your first planting area. Install any necessary terracing or edging in this zone, and add a thick layer of compost to enrich the soil. Before the ground warms too much, plant groundcovers like creeping phlox or periwinkle in this section. They’ll establish roots while spring moisture is still abundant.
As summer arrives, focus on maintenance and observation. Water your spring plantings deeply but infrequently to encourage deep root growth. This is when you’ll see which areas dry out fastest and need more drought-tolerant selections. Add mulch generously around your plants, at least three inches thick, to conserve moisture and prevent erosion. If your spring section is thriving, prepare a second adjacent area by sheet mulching with cardboard and compost layers. This no-dig method smothers weeds while building soil for fall planting.
Fall is your expansion season. The cooler temperatures and increased rainfall make it ideal for adding more plants without the stress of summer heat. Plant shrubs like forsythia or sumac in your prepared zones, as they’ll establish strong root systems over winter. Add spring-blooming bulbs between your existing plantings for next year’s color. Take photos from the same spot each month to track your progress and plan next year’s additions.
By winter, you’ll have created a manageable foundation that’s already working to stabilize your slope. Resist the urge to expand too quickly. Even experienced gardener Barbara Damrosch, whom I once heard speak at a conference, advises that patient, incremental garden building leads to better long-term success than overwhelming yourself with too much at once.
Here’s the truth that every slope gardener discovers: yes, the first season requires thoughtful planning and a bit more effort than flat-ground gardening. But once you’ve established your terraces, chosen your plants, and watched your first root systems take hold, something wonderful happens. Your slope garden begins working with you instead of against you. Those deep-rooted perennials stabilize the soil year after year. The drainage that once seemed problematic becomes an asset for Mediterranean herbs and alpine plants. The visual drama of cascading flowers and layered plantings rewards you every time you look outside.
I encourage you to start small if the whole slope feels overwhelming. Pick one section, perhaps the most visible or problematic area, and apply what you’ve learned here. As that first patch thrives and your confidence grows, expand gradually. Many successful slope gardeners I’ve spoken with started with just a single terrace or a small grouping of erosion-control plants. Within a few seasons, they’d transformed their entire hillside into something extraordinary. Your slope garden journey doesn’t need to happen overnight. Take that first step, and you might be surprised how quickly challenging terrain becomes your favorite gardening space.