Clean your garden tools with simple household ingredients like white vinegar and baking soda to remove dirt and sap without synthetic chemicals. Mix equal parts vinegar and water in a spray bottle, apply to metal surfaces, then scrub with a stiff brush and rinse thoroughly. For stubborn residue, create a paste using baking soda and water, let it sit for 15 minutes, and wipe clean.
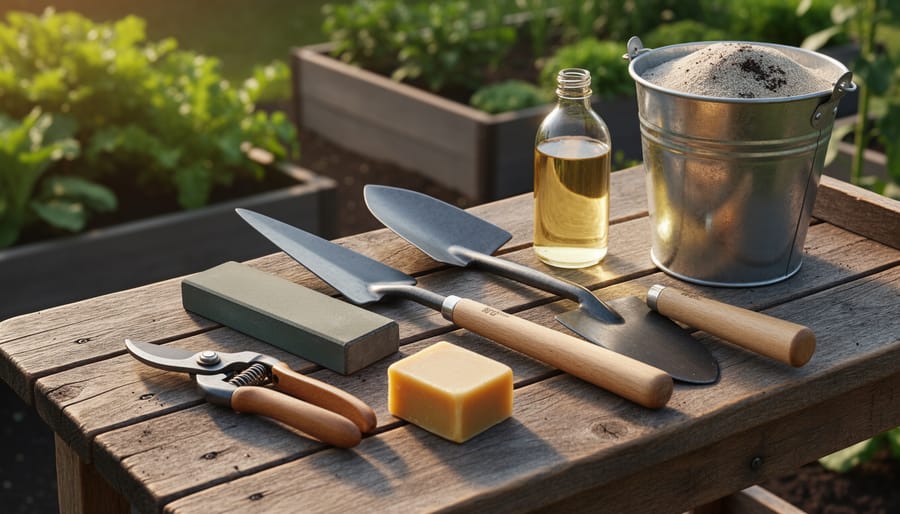
Prevent rust naturally by coating clean, dry metal parts with food-grade mineral oil or beeswax after each use. This protective barrier keeps moisture away while remaining completely safe for your organic garden beds. Store tools in a dry location, and consider filling a bucket with sand mixed with mineral oil for quick cleaning and oiling in one step.
Sharpen pruners, hoes, and spades regularly using a simple metal file or whetstone, working at a consistent angle to maintain the original bevel. Sharp tools require less force, reducing strain on your body and creating cleaner cuts that help plants heal faster. Check blade edges monthly during growing season and before winter storage.
Replace wooden handles showing cracks or splinters by sanding rough spots smooth and treating with linseed oil to prevent moisture absorption. This simple maintenance extends tool life for years while keeping your hands blister-free and safe from chemicals that might transfer to soil or plants.
What Makes Organic Gardening Tools Different
When you step into the world of organic gardening, you’ll quickly discover that the tools themselves reflect a different philosophy. Unlike conventional gardening equipment, organic gardening tools often favor natural materials and traditional designs that have stood the test of time. Many of these essential gardening tools feature wooden handles instead of synthetic plastics, metal heads without chemical coatings, and construction methods that prioritize durability over disposability.
The most noticeable difference? Organic gardening tools typically avoid synthetic treatments and protective coatings. While conventional tools might be dipped in petroleum-based preservatives or sprayed with chemical rust inhibitors, tools for organic gardens embrace bare metal and untreated wood. This commitment to natural materials means you can handle them confidently knowing they won’t leach unwanted substances into your carefully tended soil.
Hand trowels, pruners, hoes, and spades designed for organic use often feature stainless steel or carbon steel blades rather than chrome-plated alternatives. Wooden handles are frequently made from sustainably harvested hardwoods like ash or hickory, left unvarnished or treated only with natural oils.
This natural approach does require more attentive care. Without synthetic protective barriers, these tools are more vulnerable to rust, wood deterioration, and weather damage. Think of it this way: just as you nurture your plants with organic practices, your tools need similar mindful attention. The trade-off is worth it, though. You’re maintaining equipment that aligns with your values while developing a deeper connection to the gardening process. Regular, gentle maintenance using natural methods keeps these tools performing beautifully for years, sometimes even decades.
Natural Cleaning Solutions That Actually Work
The Vinegar Soak Method
White vinegar is one of my favorite go-to solutions for bringing rusty tools back to life, and it’s completely natural! This method works beautifully for moderate rust and accumulated grime without any harsh chemicals.
Start by filling a bucket or container large enough to submerge your tool heads with white distilled vinegar. You don’t need to cover wooden handles, just the metal portions. Let smaller tools like pruners and trowels soak for 2-4 hours, while heavily rusted items like hoes or spades might need 8-12 hours or even overnight. Check them periodically to monitor progress.
After soaking, use a stiff brush or steel wool to scrub away the loosened rust. You’ll be amazed how easily it comes off! Rinse thoroughly with clean water to remove all vinegar residue, as any remaining acid can actually promote new rust formation.
Here’s an important tip: dry your tools immediately and completely. I like to leave mine in the sun for 30 minutes after toweling them off. The vinegar temporarily removes the tools’ protective layer, so apply a thin coat of oil right away to prevent flash rusting. Always work in a well-ventilated area, as vinegar fumes can be strong, and wear gloves to protect your hands.
Sand and Oil: The Gardener’s Secret Weapon
Here’s an old-timer’s trick that’ll save you time and keep your tools in beautiful shape: the sand-oil bucket. I learned this from my neighbor Margaret, who’s been gardening organically for forty years, and I haven’t looked back since.
Simply fill a five-gallon bucket about three-quarters full with coarse builder’s sand, then pour in a quart of mineral oil. Mix it thoroughly until the sand feels like damp beach sand. After each gardening session, plunge your spades, trowels, and hoes into this mixture several times. The abrasive sand scrubs away soil and sap while the oil creates a protective barrier against moisture and rust.
This method works beautifully because it’s both cleaner and preserver in one motion. The mineral oil is food-safe and won’t harm your soil or plants, keeping your organic principles intact. Position the bucket near your garden shed for easy access, and you’ll find yourself actually looking forward to this quick cleanup ritual.
One tip: add fresh sand and oil as needed throughout the season. The mixture should always feel slightly damp. This simple setup has kept my grandmother’s vintage tools rust-free for decades, and it’ll do the same for yours.
When Water Alone Is Enough
Often, your organic gardening tools only need a good rinse with water to keep them in top shape. After light work like transplanting seedlings or weeding soft soil, plain water removes most dirt and debris effectively. I’ve found this works beautifully for hand trowels, cultivators, and pruners used on fresh growth. Simply spray or wipe down your tools with clean water, paying attention to joints and crevices where soil accumulates.
The key to preventing rust and damage isn’t just the cleaning itself, but what comes after. Always dry your tools thoroughly with an old towel or cloth before storing them away. Moisture is the enemy here, encouraging rust even on high-quality steel. For tools with wooden handles, proper drying prevents wood from swelling, cracking, or harboring mold. On sunny days, I like leaving my freshly rinsed tools in a warm spot for thirty minutes to air-dry completely before the final wipe-down and storage. This simple routine keeps your tools functional and extends their lifespan naturally.
Rust Prevention Without Synthetic Chemicals
Choosing the Right Natural Oil
Protecting your garden tools with natural oils keeps them in top condition without contradicting your organic principles. Let me walk you through the best options I’ve discovered over years of trial and refinement.
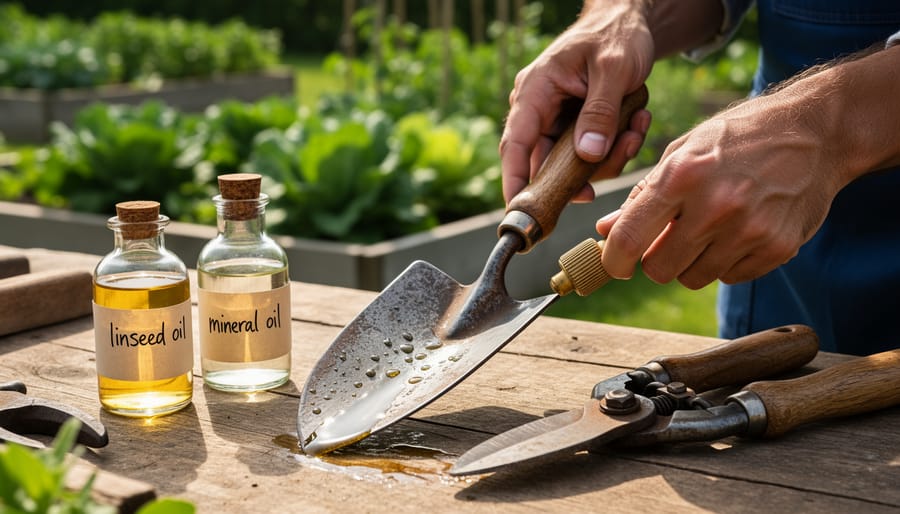
Linseed oil, also called flaxseed oil, stands as the gold standard for wooden handles. It penetrates deeply into the wood fibers, preventing moisture damage and splintering. I prefer boiled linseed oil because it dries faster than raw varieties, typically within 24 hours. Apply a thin coat with a clean cloth, working it into the grain, and wipe away any excess. Two coats annually provide excellent protection for most climates.
For metal parts, mineral oil works beautifully as a rust preventative. It creates a protective barrier without the sticky residue that attracts dirt. Simply wipe it on clean, dry metal surfaces after each use, focusing on joints and moving parts. Some gardeners swear by vegetable oils, but I’ve found they can turn rancid over time, especially in warm conditions.
Tung oil offers another fantastic option, particularly for handles that see heavy use. It creates a harder, more water-resistant finish than linseed oil, though it takes longer to cure. Apply thin coats, allowing 48 hours between applications.
Whichever oil you choose, remember this golden rule: always start with clean, dry tools. Applying oil over dirt or moisture traps problems underneath. Store your oiled tools in a dry location, and reapply seasonally or whenever handles appear parched. This simple routine extends tool life dramatically while maintaining your commitment to chemical-free practices.
Smart Storage Solutions
Proper storage is your secret weapon for keeping organic gardening tools in top condition year after year. I learned this the hard way when I left my favorite trowel in a damp corner of the shed—rust took over within weeks!
The sand bucket method is brilliantly simple and effective. Fill a large bucket with coarse sand mixed with a bit of mineral oil, then plunge your clean, dry hand tools into it after each use. This combination prevents moisture contact while providing a light protective coating. I keep mine right by my potting bench for easy access.
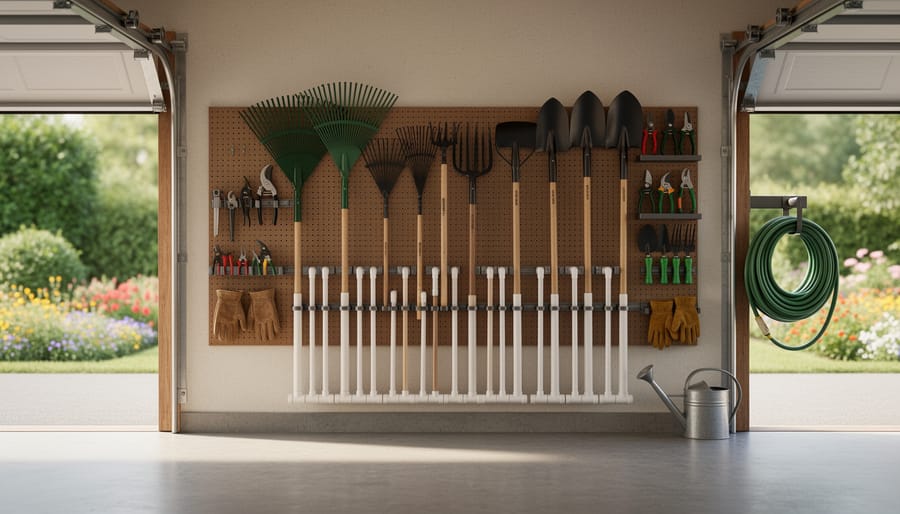
For larger tools like spades and hoes, create a vertical storage rack using reclaimed wood pallets. Mount them against a wall with the slats facing outward, allowing air to circulate freely around each tool handle. This prevents that dreaded moisture buildup that leads to wooden handle deterioration.
If you have a garden shed, ventilation is everything. Install simple mesh vents near the roof to encourage airflow, or keep the door slightly ajar during dry days. Hanging tools on pegboards keeps them off the ground where dampness collects.
Even a small covered outdoor station with a slanted roof can work wonders, protecting your tools from direct rain while allowing them to breathe. The goal is always the same: keep moisture away and air moving freely.
Sharpening Tools the Traditional Way
There’s something deeply satisfying about sharpening your garden tools by hand. Not only does it keep you connected to traditional practices, but it also eliminates the need for electricity and gives you better control over the blade’s edge. Let me walk you through the simple art of keeping your tools sharp using just whetstones and files.
For pruners and secateurs, start with a medium-grit whetstone or diamond file. Hold the tool firmly and identify the beveled edge, which is the side that’s already angled. Always sharpen at the existing angle, typically around 20-30 degrees. Make smooth, consistent strokes away from your body, moving from the base of the blade to the tip. I usually do about ten strokes, then check the edge. You’ll know you’re making progress when you feel a slight burr forming on the opposite side.
Hoes and spades require a slightly different approach. A mill bastard file works wonderfully for these larger tools. Secure the tool in a vise if possible, or have someone hold it steady. Using the file, push it across the blade edge in one direction only, maintaining that consistent angle. The key is patience and rhythm. I’ve found that listening to the scraping sound helps me maintain steady pressure.
Here’s a tip from my friend Margaret, an organic farmer for thirty years: “Test sharpness with paper, not your thumb.” A properly sharpened blade should slice through paper cleanly without tearing.
After sharpening, wipe the blade with a cloth dampened in vegetable oil. This prevents rust and keeps your tools in prime condition. Remember, proper tool maintenance extends tool life and makes every garden task easier.
Dedicate just fifteen minutes weekly to sharpening, and you’ll always have tools that cut cleanly, reducing plant stress and making your gardening more enjoyable.
Caring for Wooden Handles and Natural Materials
Preventing Splinters and Cracks
There’s nothing quite as disappointing as grabbing your favorite spade only to be greeted by a painful splinter. Fortunately, keeping your wooden-handled tools smooth and safe is straightforward with a simple maintenance routine that fits perfectly with organic gardening principles.
I learned this lesson the hard way after ignoring my garden fork for an entire season. When spring arrived, the handle felt rough and showed tiny cracks starting to form. Now I make sanding and oiling a regular habit, and my tools feel better than ever.
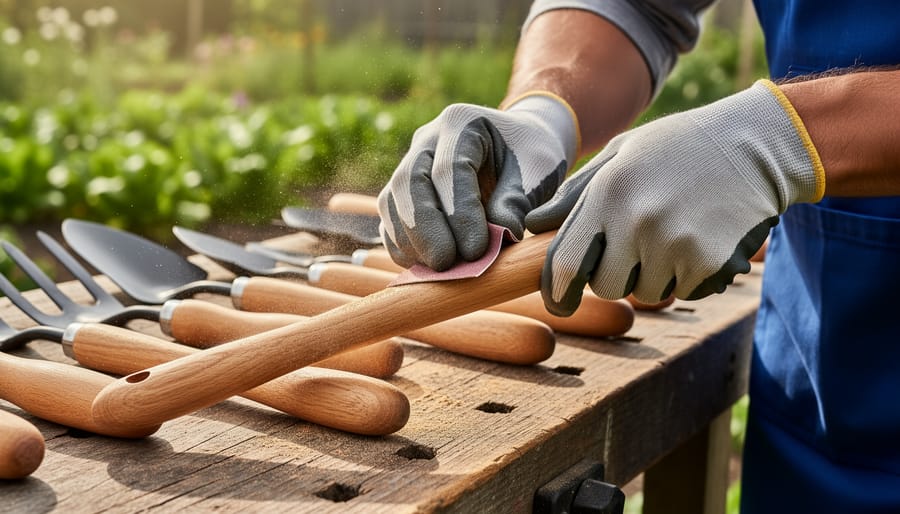
Start by inspecting your wooden handles every few weeks during active gardening season. Run your hand along the entire surface to feel for rough spots or raised grain. When you notice any roughness, use fine-grit sandpaper (around 220-grit works beautifully) to smooth the area. Sand with the grain of the wood, applying gentle, even pressure.
After sanding, it’s time to nourish the wood with a protective coating. Linseed oil is my go-to choice because it’s completely natural and readily available. Simply pour a small amount onto a clean cloth and rub it into the wood, working your way around the entire handle. Let it soak in for about 20 minutes, then wipe away any excess. Two coats provide excellent protection against moisture and weathering.
This quick routine takes just minutes but extends your tools’ lifespan significantly while keeping your hands comfortable and splinter-free.
When to Replace vs. Repair
Knowing when to repair versus replace your tool handles is key to maintaining your organic gardening toolkit sustainably. First, assess the damage honestly. Minor splits, rough patches, or surface wear can usually be fixed with simple tool repair techniques like sanding and oiling. However, deep cracks that compromise structural integrity, severe rot, or handles broken clean through typically warrant replacement.
When replacement becomes necessary, consider it an opportunity to choose sustainably sourced handles. Look for FSC-certified wood or reclaimed materials from local suppliers. Many garden centers now stock replacement handles made from responsibly harvested ash or hickory.
Here’s a practical tip I learned from master gardener Elena Rodriguez: if you can flex the handle and hear creaking, or if it shows dark discoloration that doesn’t sand away, replacement is safer than repair. Your safety matters, and a broken handle mid-task can cause injury or damage your plants. Keep spare handles on hand so you’re never caught without your favorite tools during peak gardening season.
Seasonal Maintenance Schedule for Organic Gardeners
Keeping your organic gardening tools in prime condition doesn’t have to be complicated when you follow nature’s rhythm. Think of tool maintenance as another seasonal task, just like pruning roses or planting tomatoes.
Spring is your fresh-start season. Before the growing frenzy begins, inspect every tool for winter damage. Check wooden handles for splinters and tighten any loose connections. Sharpen your pruners, hoes, and spades using a simple file or whetstone. I like to set aside a sunny March morning for this ritual, making it feel less like a chore and more like preparing for an adventure. Give metal parts a good scrub with a wire brush dipped in a solution of white vinegar and water to remove any rust spots naturally.
During summer’s active months, practice quick maintenance after each gardening session. Rinse off soil and sap immediately, since dried debris is much harder to remove later. Keep a bucket of sand mixed with a bit of mineral oil in your shed for plunging tools in after use. This simple step prevents rust and keeps blades clean without any harsh chemicals.
Fall calls for your deep-clean session. After the harvest rush, thoroughly wash all tools with warm, soapy water. Dry them completely, then apply a protective coating of food-grade mineral oil or beeswax to metal surfaces. This creates a natural barrier against moisture during the dormant months.
Winter storage is crucial for longevity. Hang tools off the ground in a dry location, with handles pointing down to prevent moisture accumulation. This is also the perfect time to sand and oil wooden handles, giving them a protective treatment before spring arrives again.
Interview Insight: What Master Organic Gardeners Do Differently
We spoke with three master organic gardeners who’ve tended their plots for over twenty years, and their tool care wisdom surprised us. Margaret Chen, who runs a community teaching garden, swears by her evening ritual: “I keep a bucket of sand mixed with mineral oil by my shed. After each use, I plunge my tools in a few times. It cleans and protects in one motion.”
James Whitaker, known for his heirloom tomatoes, shared his rust-prevention secret: “Tea! I save used tea bags and rub them on metal surfaces. The tannic acid creates a protective layer, and it costs nothing.” He also emphasized investing in quality ergonomic garden tools from the start, noting that comfortable handles mean you’re more likely to maintain them properly.
Perhaps most intriguing was Sarah Patel’s approach to wooden handles. She applies a thin coat of walnut oil monthly, buffing it in with an old cotton t-shirt. “Linseed oil works too, but walnut doesn’t go rancid,” she explained. “My grandmother’s spade still has its original handle because of this trick.”
All three agreed on one point: maintenance isn’t a chore when you view it as meditation. “Those five minutes after gardening, cleaning my tools while reflecting on the day’s work, that’s when I notice what my plants really need,” Margaret told us. This mindset shift transforms tool care from obligation to opportunity.
Taking care of your organic gardening tools isn’t just about keeping them in good shape—it’s about honoring the values that brought you to organic gardening in the first place. When you maintain your tools using natural, chemical-free methods, you’re making a choice that saves money, boosts performance, and stays true to sustainable living.
Think about it: well-maintained tools last for years, sometimes even decades, which means less waste in landfills and fewer resources consumed in manufacturing replacements. Your pruners will cut cleaner, your spades will dig easier, and your hoes will glide through soil when they’re properly cared for. Plus, those natural rust prevention methods and homemade cleaning solutions cost pennies compared to commercial products.
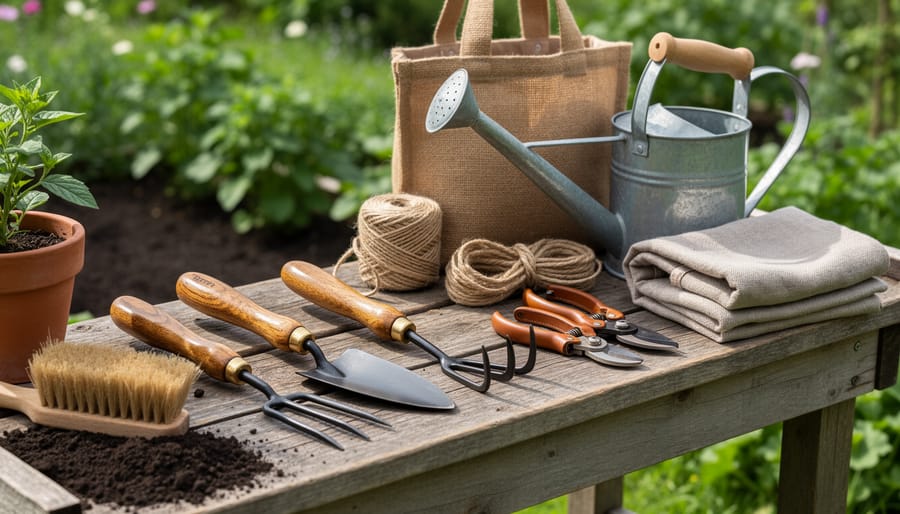
The beauty of organic tool maintenance is that it’s simple and rewarding. You don’t need a garage full of specialty products—just basic ingredients like oil, vinegar, and a little elbow grease. Why not start today? Pick one tool that needs attention and give it fifteen minutes of care. You’ll be amazed at the difference, and your garden will thank you for it.