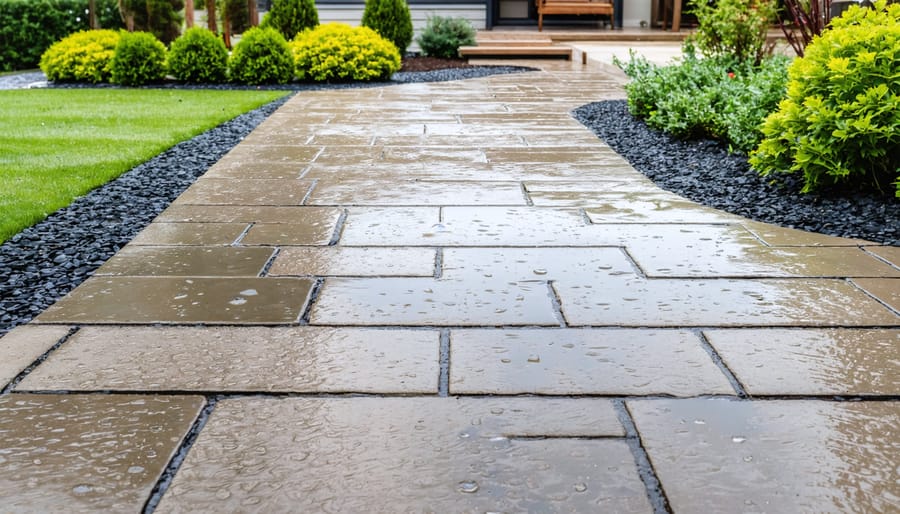
**Evaluate your slope before breaking ground.** Measure the height difference from top to bottom—walls under 3 feet often work as DIY projects with proper planning, while anything taller demands professional engineering to prevent costly, dangerous failures. A retaining wall isn’t just stacked stones holding back soil; it’s a carefully engineered structure resisting thousands of pounds of lateral earth pressure, managing water drainage, and maintaining stability through freeze-thaw cycles.
**Calculate the load your wall must handle.** Soil type determines pressure—clay exerts far more force than sandy soil, especially when saturated. Factor in additional weight from driveways, patios, or plantings above the wall. Professional engineers use soil bearing capacity calculations, but understanding these basics helps you communicate effectively with contractors and recognize when a project exceeds DIY capabilities.
**Design for drainage first, aesthetics second.** Water trapped behind retaining walls increases pressure exponentially and causes most failures. Install perforated drainage pipe at the wall’s base, backfill with gravel rather than soil, and create weep holes every 4-6 feet. This invisible infrastructure matters more than your stone selection.
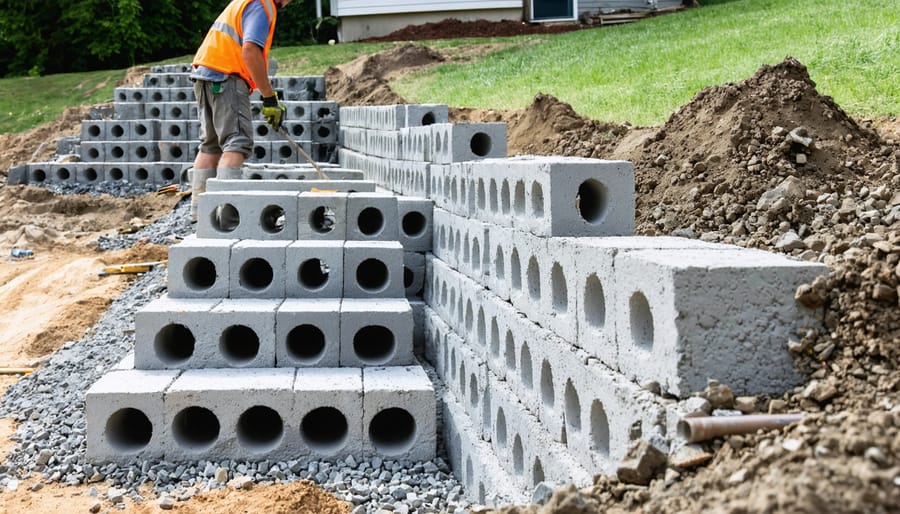
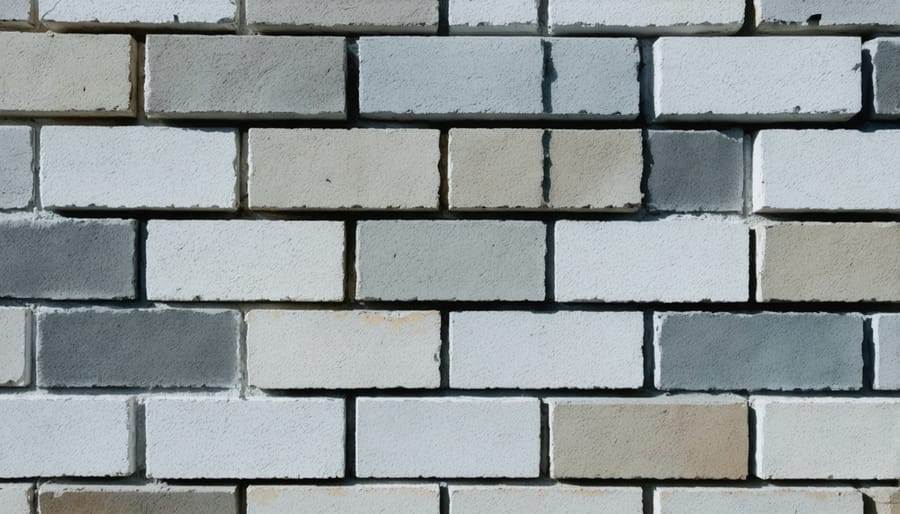
**Choose materials matching your wall’s engineering demands.** Interlocking concrete blocks work beautifully for walls up to 4 feet with built-in setback angles. Natural stone requires expert dry-stacking skills or mortar knowledge. Timber suits garden settings but degrades faster than masonry options.
The difference between a retaining wall and an expensive lawsuit? Engineering principles applied correctly from day one.
What Makes a Retaining Wall ‘Engineered’?
The Height That Changes Everything
You know that exciting moment when you’re sketching out your dream garden terrace? There’s one measurement that’ll determine whether you can tackle this as a weekend project or need to call in the pros: height.
Most building codes draw a firm line at retaining walls between 3 and 4 feet tall. Above this threshold, you’ll typically need engineered plans stamped by a licensed professional. Why? The physics change dramatically. A 4-foot wall holds back roughly twice the soil pressure of a 2-foot wall, but the forces don’t increase evenly—they grow exponentially with height.
Think of it like stacking books. A small pile stays put easily, but add more height and suddenly everything wants to topple. That’s lateral earth pressure at work, and it’s no joke when combined with water saturation and freeze-thaw cycles.
Your local building department sets these rules based on decades of real-world experience with what works—and more importantly, what fails. Even if you’re confident in your DIY skills, walls over this magic height carry serious liability. A collapsing retaining wall can damage property, divert water into neighbors’ yards, or worse.
When in doubt, a quick call to your building department costs nothing and could save everything.
Understanding Soil Pressure (In Plain English)
Think of your garden soil like water in a pool. When you’re standing in the shallow end, you feel gentle pressure against your legs. But dive to the deep end? That pressure intensifies considerably. Soil behaves the same way—the deeper you go, the more it pushes outward.
This is why retaining walls sometimes fail, especially taller ones. That soil behind your wall isn’t just sitting there peacefully. It’s actively pushing, like an enthusiastic crowd leaning against a fence. Add water to the mix (from rain or irrigation), and it’s like that crowd suddenly got heavier and more determined.
I learned this lesson watching my neighbor’s beautiful stacked-stone wall slowly bow outward over two seasons. The problem? He’d built it just three feet tall, assuming the modest height meant minimal pressure. But he hadn’t accounted for the clay soil behind it, which held water like a sponge and doubled the pushing force.
Here’s the key insight: lateral earth pressure (that sideways push from soil) increases dramatically with height and varies by soil type. Sandy soil? It drains well and pushes less. Clay soil? It’s the heavyweight champion of pressure. Understanding this relationship helps you recognize why properly engineered walls need reinforcement, proper drainage, and sometimes even anchoring systems. It’s not overengineering—it’s working intelligently with natural forces you can’t see but definitely need to respect.
The Five Foundation Principles Engineers Always Follow
Proper Base Preparation: Why Digging Deeper Saves You Later
Think of your retaining wall’s base like the foundation of a house – it’s where everything either succeeds or fails. Here’s your step-by-step approach to getting it right:
**Calculate Your Base Width**: A reliable rule of thumb is making your base trench width equal to 60% of your wall’s height. For a 3-foot wall, dig an 18-inch-wide trench at minimum. This distributes weight effectively and prevents forward tipping.
**Dig to Solid Ground**: Remove all topsoil, loose material, and organic matter. You need to reach firm, undisturbed soil – typically 6-12 inches deep depending on your location. In areas with frost, dig below the frost line to prevent heaving.
**Create Your Drainage Layer**: Spread 4-6 inches of crushed ¾-inch angular gravel (not rounded river rock) in your trench. The angular edges lock together better.
**Compact Thoroughly**: Use a plate compactor or hand tamper, working in 2-inch layers. Proper compaction is crucial – loose material will settle over time, causing your wall to shift. Each layer should feel solid and barely move when you stomp on it.
This preparation might seem tedious, but I’ve seen walls that skipped these steps fail within a single season. Do it right once!
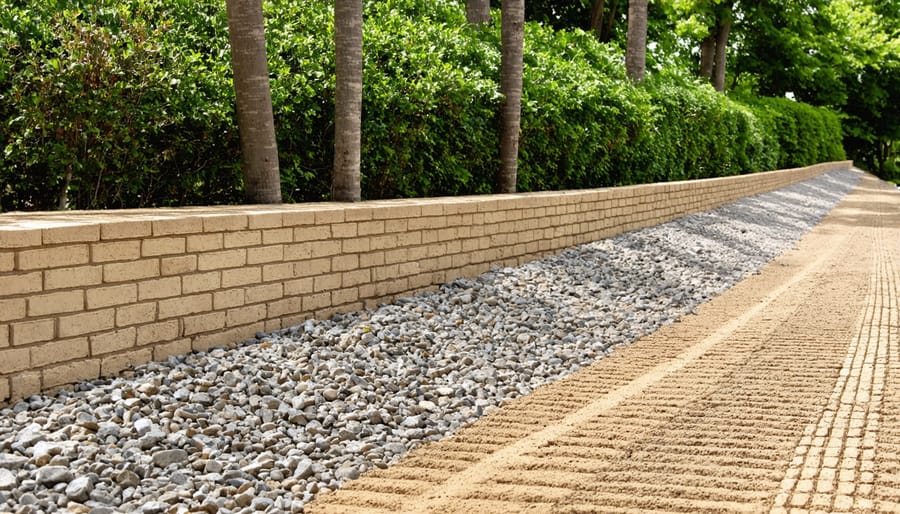
Drainage That Actually Works
Water is your retaining wall’s biggest enemy, but here’s the good news: preventing water damage is totally doable with the right approach! Think of it this way—you’re creating an escape route for water instead of letting it build up pressure behind your wall.
Start with proper backfill material. Skip regular soil and use clean gravel (three-quarter inch works great) directly behind your wall. This creates a vertical drainage layer about 12 inches wide that lets water flow downward instead of pushing against your structure. I learned this the hard way when my first small wall started tilting after one rainy season!
Weep holes are your wall’s pressure-relief valves. Space them every 4-6 feet along the bottom course, using 3-inch PVC pipes angled slightly downward. Position them just above ground level so water can escape freely. Some gardeners skip these thinking they look unsightly, but trust me—a standing wall beats a pretty one that fails.
For walls over three feet, install perforated drainage pipe at the base of your gravel layer. Wrap it in landscape fabric to prevent clogging, and ensure it slopes toward a proper outlet. These proper drainage solutions work together as a complete system—each element supports the others to keep your wall dry and stable for years to come.
The Batter (Backward Lean) You Can’t Skip
Here’s a secret that keeps many retaining walls standing strong: they lean backward slightly into the soil they’re holding. This backward tilt, called “batter,” is absolutely essential for structural integrity.
Think of it this way—when you push against something heavy, you naturally lean into it for stability. Your wall needs to do the same thing! Most engineered retaining walls require a batter of about 1 inch backward for every 12 inches of height. So a 3-foot wall would lean back roughly 3 inches at the top.
Perfectly vertical walls look appealing but fight against physics. The soil pushing forward has nothing to counter it, leading to bulging, cracking, or complete failure over time.
Achieving proper batter varies by material. With interlocking blocks, the setback is often built right into their design—each course automatically steps back slightly. For stacked stone or timber walls, you’ll need to measure carefully as you build, checking the angle with a level modified with a shim. Natural stone walls actually benefit from even more aggressive batter, sometimes 2-3 inches per foot, since the irregular stones need extra insurance against shifting.
Backfill Material: Not All Dirt Is Created Equal
Here’s the thing about backfill—the material you pack behind your retaining wall matters enormously. I learned this the hard way when I first assumed “dirt is dirt” and used my heavy clay soil. Big mistake!
Engineered backfill, typically crushed gravel or angular stone, allows water to drain through quickly rather than building pressure behind your wall. Think of it like the difference between a sponge and a brick—you want water moving away from the structure. This directly connects to proper hardscape drainage throughout your garden.
Native soil often holds too much water, especially clay, which becomes incredibly heavy when saturated. That weight pushes against your wall with surprising force.
For compaction, add backfill in 6-inch layers, tamping firmly with a hand tamper or plate compactor. Proper compaction prevents settling that could destabilize your wall later. A landscape professional once told me: “Compact like you’re angry at it, but do it gently enough not to disturb the wall itself.”
Reinforcement Strategies for Taller Walls
When your retaining wall exceeds 4 feet, you’re entering territory where engineering reinforcement becomes crucial. Think of these strategies as giving your wall extra muscles to handle the increased soil pressure.
**Geogrid** is like adding internal scaffolding—synthetic mesh layers installed horizontally within the backfill that anchor deep into the soil, distributing weight more effectively. Many DIYers successfully incorporate geogrid into block walls following manufacturer specifications.
**Tiebacks** work differently, using anchors driven into stable soil behind the wall, essentially pulling it back against earth pressure. These require precise installation and often professional expertise.
**Terracing**—creating multiple shorter walls instead of one tall structure—might be your smartest choice. Each tier handles less pressure, making construction more manageable and often more visually appealing in garden settings.
Here’s my honest advice: walls over 4 feet typically require engineering stamps and permits. I’ve seen experienced gardeners tackle these projects successfully, but they worked closely with structural engineers. Don’t compromise safety for savings—professional consultation isn’t just recommended at this height, it’s essential for long-term stability and your family’s wellbeing.
Choosing Your Wall System: Engineering Considerations
Segmental Block Systems (The DIY-Friendly Option)
If you’re handy with projects and want to tackle your retaining wall yourself, segmental block systems are your best friend! These interlocking concrete blocks stack together like sophisticated LEGO pieces, creating surprisingly strong walls without requiring specialized skills or equipment.
The engineering magic happens through their design. Each block features a setback lip that automatically creates the proper backward lean (called “batter”) as you stack them. This lean directs weight into the hillside rather than letting it push outward—clever, right? Many systems also use hollow cores that you can fill with gravel for drainage or even soil for planting pockets, transforming your wall into a living feature that complements permeable hardscaping solutions beautifully.
**Installation is refreshingly straightforward**: Start with a compacted gravel base, level your first course meticulously (this matters most!), then stack subsequent rows, offsetting joints like brickwork. Most systems include built-in pins or tabs that lock blocks together.
However, know your limits. Without engineering, keep DIY segmental walls under three feet tall—four feet maximum on stable, level ground. Beyond that height, the forces at play require professional design, geogrid reinforcement layers, and often building permits. There’s no shame in calling experts for taller projects!
Poured Concrete and Masonry Walls
When you’re planning a retaining wall taller than four feet or dealing with challenging soil conditions, poured concrete or reinforced masonry walls often become your best option. These solid structures excel at handling substantial lateral pressure and can last decades with proper construction—but here’s the important part: they absolutely require professional engineering.
I’ll be honest with you—this isn’t a weekend DIY project. A structural engineer needs to calculate the exact footing depth, wall thickness, and reinforcement requirements based on your specific site conditions. The footing typically extends below the frost line and spreads wider than the wall itself, creating a stable base that won’t shift with seasonal ground movement.
Steel reinforcement bars (rebar) run vertically through the wall and horizontally through the footing, creating an interconnected skeleton that gives concrete its incredible strength. Without proper rebar placement and adequate drainage systems behind the wall, even the thickest concrete can eventually crack and fail.
For garden terracing projects, concrete walls work beautifully when faced with stone or brick veneers, giving you both structural integrity and aesthetic appeal. While the investment is higher upfront, you’re building something that can support your garden dreams for generations.
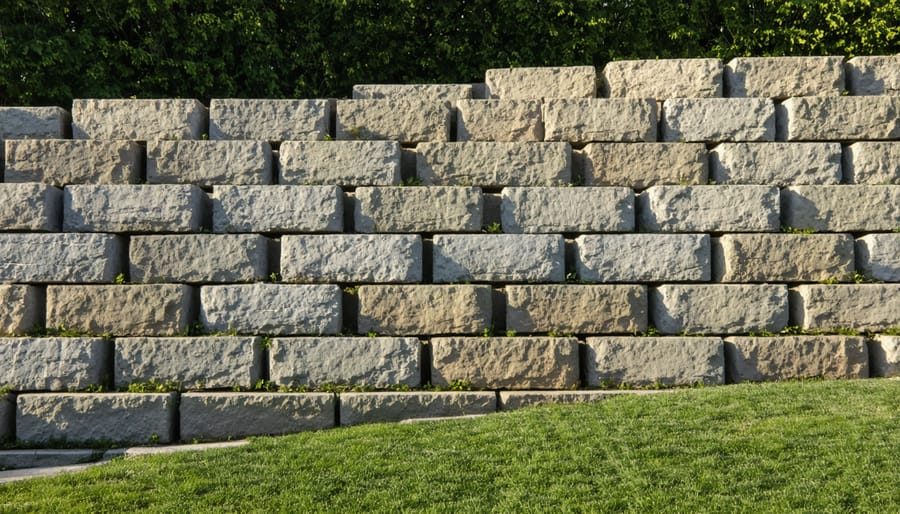
Timber and Natural Stone: Beautiful but Tricky
There’s something undeniably charming about timber sleepers or natural stone creating garden terraces—they blend beautifully with plantings and feel wonderfully organic. I’ve used both in my own garden, and when done right, they’re spectacular. But here’s what many gardeners don’t realize: these traditional materials present real engineering challenges that you need to understand before committing.
Timber works wonderfully for walls up to about 3 feet, but it has limitations. Wood naturally deteriorates when buried in soil, even pressure-treated varieties. The bigger concern is lateral strength—timber doesn’t interlock like segmental blocks, so it relies entirely on how it’s anchored. I learned this the hard way when a timber wall I built in my first garden began leaning after just two seasons of heavy rain.
Natural stone is more permanent but equally tricky. Dry-stacked stone walls (without mortar) look gorgeous and drain beautifully, but they’re essentially gravity walls—they work by sheer weight alone. This means they need substantial thickness at the base, often taking up precious garden space. Realistically, dry-stacked stone should stay under 3 feet unless you’re working with a stonemason experienced in proper battering and interlocking techniques.
For mortared stone walls exceeding 4 feet, you’re entering territory where proper footings, drainage systems, and sometimes engineering stamps become necessary. At that height, the weight and pressure make professional guidance essential rather than optional.
Red Flags: When to Call an Engineer (Before You Start Digging)
Site Conditions That Require Professional Help
While many garden retaining walls make wonderful DIY projects, certain conditions absolutely require bringing in a professional engineer. Let’s talk about when it’s time to call in the experts—not to discourage you, but to keep your project safe and successful!
If your slope exceeds a 2:1 ratio (that’s a rise of more than one foot for every two feet horizontally), you’re in professional territory. Walls taller than four feet also typically need engineered plans and permits. Poor soil conditions—clay that expands and contracts, sandy soil that shifts easily, or areas with bedrock close to the surface—can undermine even the best-built walls without proper engineering solutions.
Water issues like underground springs, high water tables, or significant runoff demand sophisticated water management strategies that engineers can design effectively. Similarly, if your wall will be near buildings, property lines, utilities, or support a driveway or patio, professional engineering ensures everyone’s safety and protects your investment.
Think of it this way: hiring an engineer for complex situations isn’t admitting defeat—it’s making the smart choice that lets you enjoy your beautiful terraced garden for decades to come!
Working With Engineers: What to Expect
Working with a structural engineer might sound intimidating, but it’s surprisingly straightforward—and often more affordable than you’d think. Most consultations start with a site visit where the engineer assesses your soil, slope, and drainage conditions. They’ll ask about your vision for the space and take measurements, treating your project with the same attention whether it’s a small garden terrace or extensive hillside landscaping.
Expect to invest between $500-$2,000 for engineered plans for a typical residential retaining wall. While this feels like a big expense upfront, these plans actually save money by specifying exactly what materials you need—no over-buying “just to be safe”—and preventing costly failures that could cost tens of thousands to repair. I’ve spoken with homeowners who initially skipped engineering to save money, only to watch their walls crack within two years.
The engineer delivers stamped plans showing dimensions, reinforcement requirements, and drainage details. These plans also satisfy building departments and can make future home sales smoother. Think of engineering fees as insurance for your garden investment—protecting both your budget and the beautiful outdoor space you’re creating.
Building Your Engineered Wall: A Step-by-Step Overview
Site Preparation and Excavation
Proper preparation sets the stage for a wall that stands strong for decades. Start by marking your wall’s location with stakes and string, ensuring it follows your planned layout precisely. You’ll need to excavate a trench that’s twice the width of your wall blocks—this gives you working room and space for drainage materials behind the wall.
The depth matters tremendously here. Dig down at least 6 inches, plus an additional inch for every 8 inches of wall height above grade. For a 3-foot wall, that means a 10-inch deep trench. This foundation sits below the frost line in most garden applications and provides the stable base your wall absolutely requires.
Remove all organic material, roots, and loose soil from the trench bottom. Compact the soil firmly with a hand tamper or plate compactor—this step prevents settling that could compromise your wall’s integrity later. The trench floor should be level from side to side but can slope slightly along its length if your yard naturally slopes.
Base Installation That Won’t Settle
Your retaining wall is only as strong as what sits beneath it. Start with crushed angular gravel—those jagged edges lock together far better than smooth river rock. Aim for ¾-inch minus material that includes smaller particles to fill gaps.
Spread your base material 6-8 inches deep and compact in 2-inch lifts using a plate compactor you can rent for about $60 daily. I learned this lesson the hard way when my first wall settled unevenly because I skipped proper compaction! Make three passes over each section, moving slowly.
Check levelness every few feet with a 4-foot level. Even a quarter-inch slope can compound dramatically over several courses. For longer walls, use string lines anchored at both ends to maintain consistent height. If you hit a low spot, add base material and re-compact rather than trying to correct it later with your blocks. This foundation work isn’t glamorous, but spending extra time here prevents the heartbreak of watching your beautiful wall lean or crack months later. Trust me—your future self will thank you!
Course-by-Course Construction
Building your retaining wall is like assembling a puzzle—each course matters! Start with your perfectly level base course, then work upward methodically. As you place each block, maintain the backward lean (batter) by offsetting blocks slightly—usually about 1 inch per foot of height. This creates that crucial stability.
Between each course, add your drainage layer: crushed stone or pea gravel works beautifully. Think of it as insurance against water pressure buildup. Stagger your joints like bricklaying—never align vertical seams, which creates weak points.
After every two courses, step back and check three things: level side-to-side, consistent batter backward, and proper alignment. Use a long level and measuring tape. It’s easier to adjust now than later!
Pro tip from experienced hardscapers: compact the backfill material every few courses. This prevents settling that could compromise your wall’s integrity. Take your time—rushing leads to problems down the road.
Finishing Touches That Protect Your Investment
Once your wall stands strong, these final steps ensure it lasts for decades. Install caps or coping stones on top—they’re not just decorative; they shed water away from the wall’s core and prevent freeze-thaw damage. Double-check that your drainage outlets are clear and functioning properly before completing backfill. Compact your backfill material in 6-inch layers using a plate compactor, working from the base upward. This prevents future settling that could stress your wall. Think of these finishing touches as insurance—small efforts now that protect your hardscape investment and the beautiful garden beds it supports for years to come.
Common Engineering Mistakes (Even Experienced DIYers Make)
Even seasoned DIYers can stumble into pitfalls that threaten a retaining wall’s stability. I’ve seen beautiful walls fail within just a few seasons because of these common oversights.
The biggest mistake? Skimping on drainage. I once interviewed a gardener who built a gorgeous stone wall for her terraced herb garden, only to watch it lean dangerously after one wet winter. She’d forgotten the drainage pipe behind the wall, allowing water pressure to build up and push it forward. Always install perforated drain pipe in a gravel bed at the base, and backfill with at least 12 inches of crushed stone before adding soil.
Another frequent error is inadequate base preparation. Your wall is only as strong as what sits beneath it. Many people place stones directly on soil rather than excavating and creating a compacted gravel base. This leads to settling and shifting. For every foot of wall height, dig down at least 6 inches for your foundation trench.
Ignoring the batter angle catches many builders too. Walls should lean slightly backward (about 1 inch per foot of height) into the soil they’re retaining. Building straight up looks easier but creates instability as soil pressure increases.
Finally, there’s the temptation to go too tall without reinforcement. Most DIY-friendly materials max out safely at 3-4 feet. I’ve watched homeowners attempt 6-foot walls with simple stackable blocks—a recipe for disaster. If your project exceeds that height or retains steep slopes, it’s time to consult a structural engineer. Some investments in professional guidance save you from rebuilding entirely.
Understanding the engineering principles behind retaining walls doesn’t just make you a more informed homeowner—it transforms you into a confident decision-maker in your garden. You’ve now got the knowledge to look at a slope and understand what forces are at play, to evaluate whether that terraced garden you’re dreaming about needs professional engineering or falls within the DIY-friendly zone.
Start small. That eighteen-inch decorative wall bordering your herb garden? Absolutely within your capabilities now that you understand proper base preparation and drainage. You’ll sleep better knowing it’s built to last, not just to look pretty. As you gain experience with smaller projects, you’ll develop an intuition for what works and what doesn’t.
But here’s the crucial part: knowing when to call in the pros is just as important as knowing how to build. Walls over four feet, slopes with drainage issues, or anything supporting a structure—these aren’t the places to test your limits. A qualified engineer or experienced contractor brings liability insurance, specialized equipment, and years of problem-solving experience that protects both your investment and your family’s safety.
Think of this knowledge as your new superpower. You can now have meaningful conversations with contractors, ask the right questions, and spot red flags. Whether you’re rolling up your sleeves or hiring help, you’re equipped to create beautiful, lasting hardscapes that will support your garden dreams for decades to come.