Start by walking your property at different times of day, noting where water pools after rain, which areas receive full sun versus shade, and where existing wildlife congregates. This simple observation reveals your garden’s microclimates and helps you match the right native plants to each spot, setting you up for success from day one.
Choose a focal point for your native garden, whether it’s a sunny corner by your mailbox or a shady spot beneath mature trees. Beginning with one manageable area, rather than redesigning your entire yard, lets you learn what works without feeling overwhelmed. You can always expand once you’ve gained confidence and seen your first natives thrive.
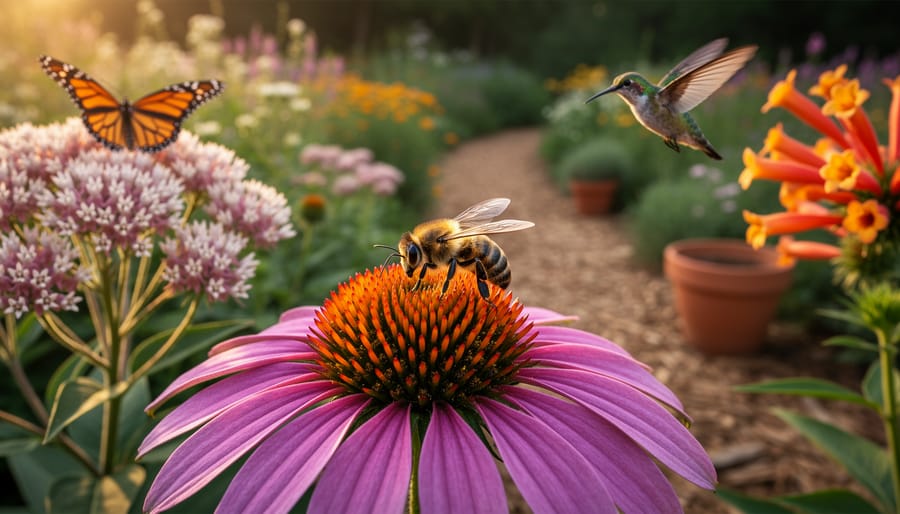
Group plants by their water and sunlight needs, creating natural-looking clusters of three to five of the same species. This mimics how plants grow in nature and creates visual impact that single specimens can’t achieve. Native grasses, wildflowers, and shrubs arranged in drifts look stunning together while supporting more pollinators than scattered individual plants.
Replace your lawn in sections, removing turf and replacing it with native groundcovers, perennials, and grasses suited to your region. This gradual approach makes the project manageable and gives you time to observe how each section develops through the seasons.
The beauty of native garden design is that you’re working with plants that already want to grow in your conditions. They’ve spent thousands of years adapting to your local climate, soil, and wildlife. Your job isn’t to fight nature but to arrange these perfectly suited plants into combinations that delight your eye while creating habitat for butterflies, birds, and beneficial insects.
Why Native Plants Make Gardening Easier (Not Harder)
I’ll be honest with you—I used to think native gardening meant letting my yard turn into an unruly meadow. I imagined waist-high weeds, tangled vines, and neighbors giving me the side-eye. But after years of fighting with my traditional garden, battling aphids, dragging hoses across the lawn every evening, and watching my water bill skyrocket each summer, I decided to give native plants a try. That decision transformed not just my garden, but how much time and money I spent maintaining it.
Let me clear up that biggest misconception right away: native gardens don’t have to look wild or messy. With thoughtful design, they can be every bit as polished and beautiful as traditional landscapes. The difference is what happens behind the scenes, where native plants quietly make your life easier.
The most immediate benefit I noticed was my water bill. Because native plants evolved in your local climate, they’re adapted to your region’s natural rainfall patterns. After the initial establishment period, most need little to no supplemental watering. Compare that to thirsty exotic plants that demand constant irrigation, and you’ll understand why my summer water costs dropped by nearly 60 percent.
Then there’s maintenance. Native plants don’t need the constant pampering that traditional gardens demand. They thrive in your local soil without amendments or chemical fertilizers, which aligns perfectly with organic gardening methods. I’ve largely put away my fertilizer spreader and soil test kits. The plants simply know what to do.
Natural pest resistance is another game-changer. Native plants have developed defenses against local insects over thousands of years, meaning fewer aphid infestations and less need for pesticides. Sure, you’ll see some nibbled leaves—that’s actually a sign of a healthy ecosystem—but rarely the devastating damage that requires intervention.
Perhaps my favorite benefit is the wildlife. My garden now buzzes with native bees, hosts monarch butterflies, and welcomes songbirds year-round. It’s become a living ecosystem that largely takes care of itself, giving me more time to actually enjoy my garden rather than constantly working in it.

Understanding Your Garden’s Natural Environment
Reading Your Landscape’s Clues
Before you rush to the nursery, take a few weekends to become a detective in your own neighborhood. The plants thriving around you are already telling you exactly what will succeed in your native garden.
Start by walking your property at different times of day. Notice where puddles form after rain and which spots stay bone-dry. Observe where morning sun hits versus afternoon shade. These observations are gold when you’re planning your plant palette later.
Next, take a stroll around your neighborhood with fresh eyes. What’s flourishing in your neighbors’ yards without much fuss? Those established oaks, black-eyed Susans, or wild bergamot didn’t get there by accident. They’re proof that these plants love your local conditions. Don’t be shy about knocking on doors to ask what’s growing well for them. Most gardeners love sharing their successes.
Pay special attention to indicator plants, those helpful volunteers that reveal your soil’s secrets. Finding lots of moss? You’ve got acidic, possibly compacted soil. Seeing clover everywhere? That suggests nitrogen-poor soil. Dandelions actually indicate decent soil, despite their bad reputation.
I like to photograph these discoveries on my phone, creating a simple visual reference library. Renowned garden designer Larry Weaner once told me in an interview that understanding your site’s existing plant communities is the single most valuable step in native garden design. When you work with what nature’s already suggesting, you’re setting yourself up for a garden that practically takes care of itself.

Simple Soil and Site Tests You Can Do Today
Before you start sketching your garden design, let’s get to know your soil and site. These simple tests require nothing more than items you probably have at home, and they’ll save you from choosing plants that won’t thrive in your conditions.
Start with the ribbon test to check your soil composition. Grab a handful of moist soil and rub it between your fingers. Sandy soil feels gritty and won’t hold together. Clay soil feels sticky and forms a ribbon when squeezed. Loam, the gardening goldilocks, feels slightly gritty but holds its shape. This tells you whether you’ll need plants that tolerate dry, fast-draining conditions or those that handle moisture-rich clay.
Next, test your drainage with the percolation test. Dig a hole about 12 inches deep, fill it with water, and let it drain completely. Fill it again and time how long it takes to empty. If water disappears within 4 hours, you have excellent drainage. Between 4-12 hours indicates moderate drainage, while anything longer suggests poor drainage that suits moisture-loving natives.
For pH testing, pick up an inexpensive kit from any garden center. Most native plants adapt to a range of pH levels, but knowing yours helps narrow choices. Acidic soils below 6.0 suit plants like blueberries, while alkaline soils above 7.5 favor prairie natives.
These quick tests are your first steps toward improving soil health and selecting plants that’ll flourish naturally in your space.
Choosing the Right Native Plants for Your Space
Creating Your Plant Palette
Think of your native garden as a living tapestry that changes with the seasons. The secret to year-round beauty lies in mixing different plant types and bloom times, creating a space that’s never boring.
Start by building your garden’s framework with native trees and shrubs. These are your anchors, providing structure even in winter. Consider dogwoods for spring flowers, serviceberries for early fruit, or viburnums for fall color. Layer in mid-sized shrubs like ninebark or buttonbush to fill the middle ground.
Next, add perennials and grasses for texture and seasonal drama. Here’s where bloom time becomes crucial. I like to map out the calendar, ensuring something’s flowering from early spring through fall. March might bring bloodroot, June welcomes black-eyed Susans, and asters carry you into October. Don’t forget about supporting pollinators by including their favorites like bergamot and goldenrod.
Native grasses deserve special mention. Little bluestem, prairie dropseed, and switchgrass add movement and winter interest long after flowers fade.
Landscape designer Maria Chen shared this gem with me: “Aim for at least three plants blooming in each season.” This simple rule ensures your garden never looks bare. Start with 10-15 species, choosing plants with overlapping bloom periods and varying heights. You can always expand your palette as you gain confidence and watch how plants perform in your specific conditions.
Where to Find Quality Native Plants
Finding quality native plants is easier than you might think! Start by seeking out specialty native plant nurseries in your area—these businesses focus specifically on propagating true native species and their staff can offer invaluable advice for your region. Many botanical gardens and arboretums also host seasonal native plant sales, which are wonderful opportunities to purchase healthy specimens while supporting conservation efforts.
Local conservation organizations and native plant societies are goldmines of information. They often organize plant swaps, sale events, and can connect you with trusted suppliers. I’ve met some of my favorite gardening friends at these gatherings!
Here’s an important heads-up: be cautious about nativars (cultivated varieties of native plants). While some selections like straight species plants work beautifully, heavily bred cultivars with doubled flowers or altered characteristics may not provide the nectar, pollen, or seeds that native wildlife depends on. When shopping, look for true native species rather than hybrids. Ask sellers about the plant’s origin—ideally, you want plants grown from local seed sources that match your region’s genetics.
Don’t hesitate to ask questions about growing practices too. Reputable nurseries will gladly discuss their propagation methods and help you choose plants suited to your specific conditions.
Avoiding the Biggest Native Plant Mistake
Here’s the single biggest mistake I see gardeners make: falling in love with a plant without considering whether it’s happy in their space. I learned this the hard way when I planted sun-loving coneflowers in a shady corner—they languished for two seasons before I finally moved them. The truth is, matching plant to site is absolutely crucial for success.
Think of it like this: even the healthiest goldfish won’t thrive in a desert terrarium. Similarly, moisture-loving cardinal flowers will struggle in dry, sandy soil, while drought-tolerant plants like prairie dropseed will rot in soggy conditions. Before choosing any plant, honestly assess your site’s light levels, soil moisture, and drainage. Then select species that naturally thrive in those exact conditions. This approach saves you money, eliminates frustration, and creates a garden where plants genuinely flourish rather than merely survive.
Designing Your Native Garden Layout
Starting Small: The Island Bed Approach
I always recommend starting with a single island bed—think of it as your native garden “starter kit.” This approach lets you learn as you grow without the overwhelm of tackling your entire yard at once.
Begin with a bed that’s 4 to 6 feet wide and 8 to 10 feet long. This size is manageable for weekend projects and gives you room for about 12 to 15 plants, creating enough visual impact to feel rewarding. Choose a spot you see regularly, perhaps visible from a kitchen window, so you’ll enjoy watching the wildlife it attracts.
For shaping, gentle curves feel more natural than straight lines and create planting pockets that add depth. Use a garden hose to outline your bed, adjusting until the shape feels right from different viewing angles. Pro tip: view it from inside your home too.
Here’s where beginners often stumble—plant placement matters more than you’d think. Start by positioning your tallest plants (those 3 to 4 feet high) toward the back or center if it’s a true island bed. Add mid-height plants around them, then edge with low growers. Space plants according to their mature width, not their current nursery pot size. Yes, it’ll look sparse at first, but trust the process.
I like using the “rule of three”—plant in odd-numbered groups of the same species for a cohesive, professional look. Three purple coneflowers here, five black-eyed Susans there. This repetition creates rhythm while maintaining that natural, unforced feeling that makes native gardens so appealing.

Blending Natives With Your Existing Garden
You don’t need to rip everything out and start from scratch! The beauty of transitioning to a native garden is that you can take it one step at a time, making the process manageable and budget-friendly.
Start by identifying your garden’s most demanding plants—those that need constant watering, fertilizing, or pest control. These are your prime candidates for replacement. When that thirsty lawn section finally gives up or those fussy roses succumb to disease, swap them out with native alternatives that thrive naturally in your conditions.
Creating buffer zones works wonderfully for a cohesive look. Try clustering natives together in dedicated beds while gradually expanding these areas over time. This approach lets you experiment and learn as you go, rather than feeling overwhelmed by a complete overhaul.
Master gardener Susan Chen, whom I interviewed last spring, shared a brilliant tip: “Mirror your existing color palette with native plants. If you love your pink roses, transition to native wild roses or coral honeysuckle. Your garden maintains its personality while becoming more sustainable.”
Consider keeping some non-invasive, well-behaved non-natives that you truly love, especially if they support pollinators. The goal isn’t perfection—it’s progress toward a healthier ecosystem.
Remember, most gardeners won’t even notice you’re transitioning unless you tell them! Natives can be just as lush and beautiful as traditional garden plants, often more so once established. The key is thoughtful placement and patience as your new plants settle in.
Adding Structure and Pathways
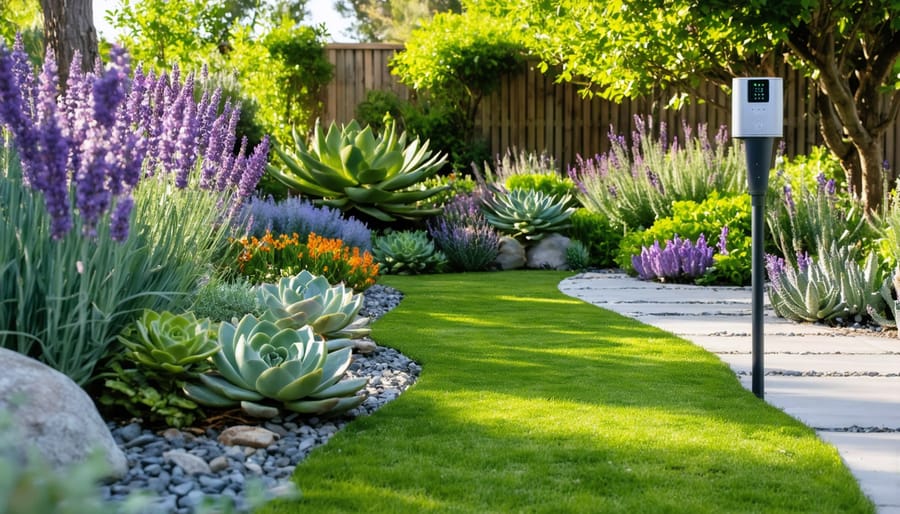
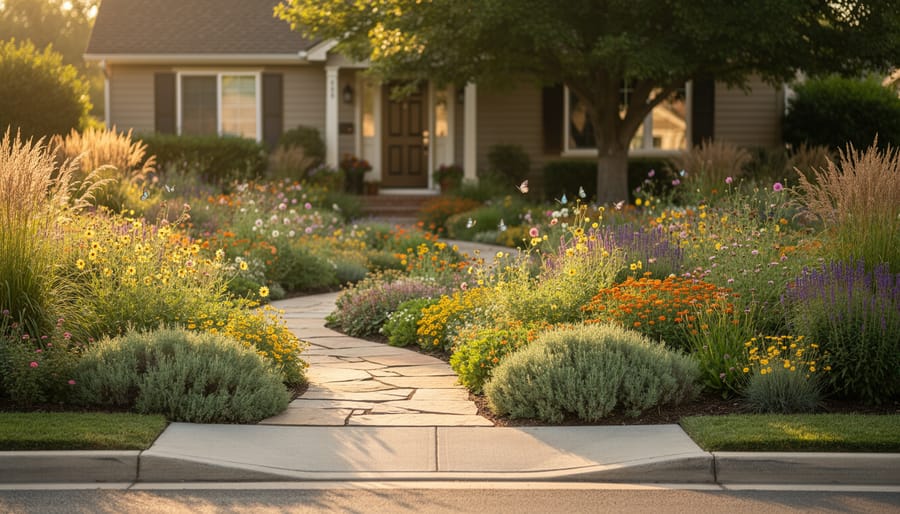
While native gardens celebrate naturalistic beauty, thoughtful hardscaping helps define spaces and creates visual structure. Simple wooden or stone edging along planting beds instantly gives your garden a more intentional look while preventing grass from creeping into your native plantings. I’ve found that even a basic border makes all the difference in how visitors perceive the space—what was once mistaken for “unmowed” suddenly becomes “designed.”
Mulched pathways meandering through your garden invite exploration while protecting plant roots from foot traffic. Consider using locally-sourced materials like pine straw, wood chips, or decomposed granite that blend naturally with your landscape. Master gardener Elena Rodriguez shared with me that she uses stepping stones placed just far enough apart to slow visitors down, encouraging them to pause and observe pollinators at work.
Remember that hardscaping also serves ecological purposes. Flat stones create basking spots for butterflies and beneficial insects, while a simple dry-stacked rock wall provides shelter for small creatures. Keep pathways permeable to allow rainwater infiltration, supporting the very ecosystem you’re creating.
Planting and Establishment: The Critical First Year

Preparing Your Planting Beds
Before you plant, you’ll need to clear your chosen area and prepare the soil. The good news? Native plants are wonderfully forgiving and often thrive in existing soil conditions.
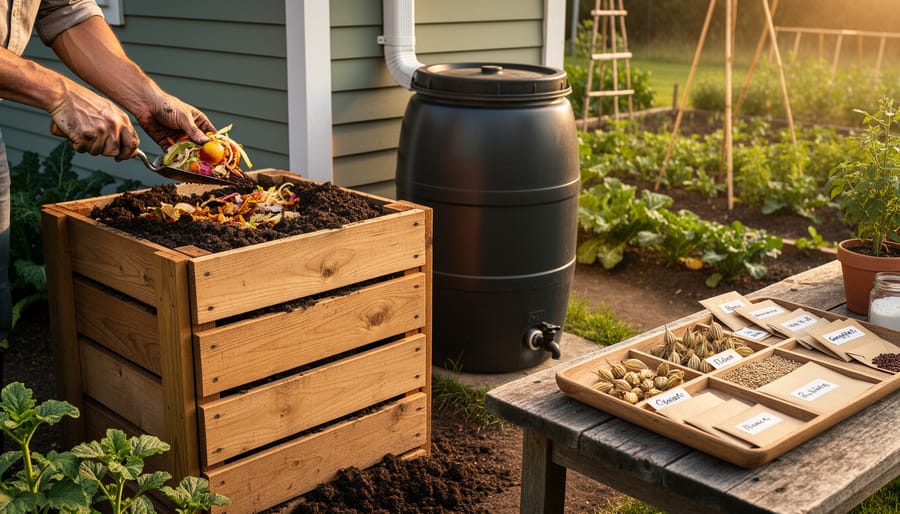
For lawn removal, I’m a fan of the sheet mulching method. Layer cardboard or newspaper over the grass, wet it thoroughly, then add 4-6 inches of compost or mulch on top. Let this sit for several weeks, and the grass will break down naturally. If you’re in a hurry, you can remove sod with a spade, though it’s more labor-intensive.
Here’s something I learned from master gardener Sarah Chen: resist the urge to heavily amend your soil unless absolutely necessary. Native plants evolved to handle your region’s natural soil conditions. A simple soil test will tell you if you need adjustments, but most natives will establish beautifully in whatever nature provided.
Timing matters tremendously. Fall planting gives roots months to establish before summer stress arrives, making it ideal in most regions. Spring works too, but you’ll need to monitor water more carefully during that first summer. In warmer climates, winter planting can be perfect when rainfall is abundant.
Watering Native Plants the Right Way
Here’s a secret that surprised me when I first started working with native plants: they need more attention at the beginning than at the end. Think of it as an investment in their future independence!
During the first growing season, your native plants are working hard to establish deep root systems. Water them deeply once or twice weekly, encouraging roots to grow downward rather than spreading sideways near the surface. I learned this from landscape designer Maria Gonzalez, who told me, “Shallow, frequent watering creates lazy roots that depend on you forever.”
The key is to saturate the soil thoroughly, then let it dry out between waterings. This might feel counterintuitive, especially on hot days, but it’s training your plants to become drought-tolerant survivors. After the first year, most established natives will only need supplemental water during extended dry spells or extreme heat.
Here’s my simple rule: if you’re watering more than once a week after year two, you’re probably overdoing it. Native plants adapted to your region over thousands of years, so trust their natural resilience. By year three, many will thrive on rainfall alone, giving you more time to simply enjoy your beautiful, self-sufficient garden.
Managing Weeds While Plants Establish
During the first year, your native plants are building root systems and need a little extra care to compete with weeds. The good news? You can manage weeds effectively without reaching for herbicides that harm the beneficial insects you’re trying to attract.
Start with a generous 2-3 inch layer of organic mulch around your plants, leaving a small gap around stems to prevent rot. This smothers most weed seeds and keeps soil moist for your establishing natives. Hand-pulling weeds is surprisingly therapeutic when done regularly—tackle them when they’re small, ideally after rain when soil is loose. Pull gently but firmly to get the entire root.
For persistent weeds, try the “smother method” with cardboard topped with mulch in paths and open areas. As your natives mature and develop natural pest resistance, they’ll fill in gaps and naturally outcompete most weeds. Remember, a few weeds won’t hurt—perfection isn’t the goal. Your garden will become lower-maintenance as plants establish, typically within 1-2 growing seasons.
Ongoing Care for a Thriving Native Garden
The Fall Cleanup Debate
Here’s a secret that might surprise you: the “messy” look of an autumn garden actually serves an important purpose. Those dried flower heads and standing stems you might be tempted to cut down? They’re lifelines for wildlife preparing for winter.
Seed heads from coneflowers, black-eyed Susans, and asters provide essential food for songbirds during cold months. Hollow stems become winter homes for beneficial insects like native bees, which tunnel inside to lay eggs and overwinter safely. By leaving your native garden standing through winter, you’re creating a miniature ecosystem right in your yard, and you’re reducing your own workload too.
I know what you’re thinking: won’t my garden look unkempt? Here’s where thoughtful design helps. If you’re concerned about curb appeal, consider leaving wildlife-supporting plants in your backyard or side gardens while maintaining a tidier front border. You can also embrace the beauty of winter structure. Those frost-kissed seed heads and graceful dried grasses create stunning silhouettes, especially when dusted with snow.
Master gardener Laura Stevens shared with me that she actually prefers her garden’s winter appearance now. “Once I started seeing goldfinches perched on my dried coneflowers, I never looked back,” she told me. The wildlife activity more than compensates for any perceived untidiness.
When and How to Prune Native Plants
The beauty of native plants is that they naturally thrive with minimal fuss, but a little strategic pruning keeps them looking their best. The key is working with their natural growth habits rather than fighting against them.
For native grasses and perennials, timing is everything. Wait until late winter or early spring to cut back last season’s growth, leaving those dried seed heads standing through winter. They provide food for birds and add beautiful texture to your garden when frost sparkles on the stems. Simply trim them down to about 4-6 inches above ground level before new growth emerges.
Native shrubs generally need less pruning than their non-native cousins. Remove dead or damaged branches anytime you spot them, but save any shaping for right after flowering. This ensures you won’t accidentally cut off next year’s blooms. A light touch is best—removing no more than one-third of the plant at a time.
Here’s my golden rule: when in doubt, prune less. Native plants have evolved to maintain their own shape beautifully. Resist the urge to turn them into tight balls or boxes. Instead, step back and let their natural form shine through, only intervening when branches cross or the plant genuinely needs rejuvenation.
Starting your native garden journey might feel overwhelming, but here’s the secret: you don’t need to transform your entire yard overnight. Begin with a small bed, even just a corner or a few containers. I’ve talked with experienced gardeners who started with a single native wildflower patch and gradually expanded as they learned what thrived in their space. This approach lets you observe, experiment, and build confidence without feeling pressured.
The beauty of native gardening is that it gets easier with time, not harder. Unlike traditional gardens that demand constant intervention, native plants become increasingly self-sufficient as they establish deep roots and form relationships with local wildlife and soil organisms. You’ll spend less time watering, weeding, and worrying, and more time enjoying the butterflies, birds, and seasonal changes that make each day in the garden rewarding.
Will you make mistakes along the way? Absolutely, and that’s perfectly okay. Every gardener I’ve interviewed has stories about plants that didn’t work out or design choices they’d change. These experiences teach you about your specific site conditions and help you become a better gardener.
By choosing native plants, you’re joining a growing community of gardeners who understand that beautiful landscapes can also support local ecosystems. You’re creating habitat, conserving water, and reducing chemical use while designing a garden that reflects the natural beauty of your region. So grab your spade, start small, and enjoy the journey. Your native garden is waiting to bloom.