Discover contaminated soil in your garden by testing for heavy metals like lead, arsenic, and cadmium through your local extension office or an accredited lab—costs typically range from $15-50 per sample, and results guide your entire remediation strategy. Urban gardens face particular risk from decades of leaded paint, industrial runoff, and old fuel spills, but nature offers a remarkable solution: certain plants actually absorb, break down, or stabilize these pollutants through their root systems.
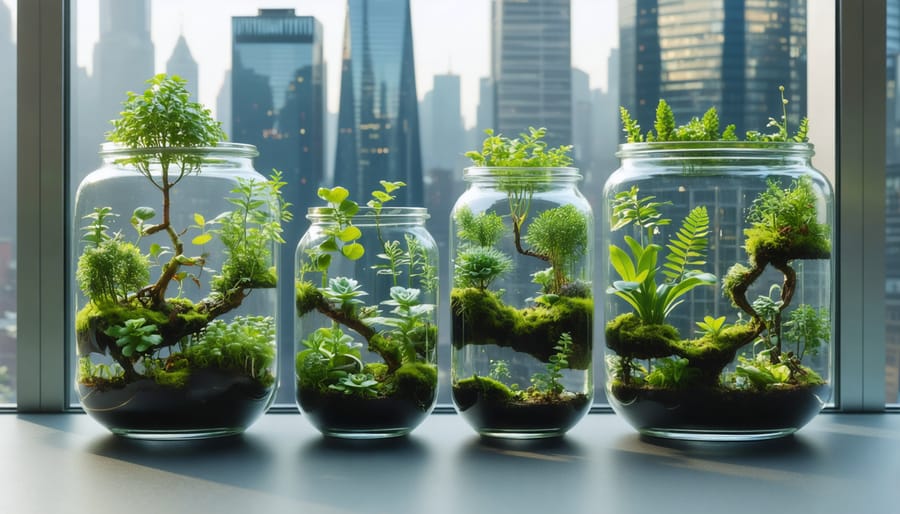
Phytoremediation harnesses specific plant species that act as living soil cleaners, drawing contaminants from earth into their tissues over growing seasons. Sunflowers extract lead and uranium, Indian mustard pulls out heavy metals including cadmium and selenium, while willow trees tackle petroleum products and certain pesticides. This method works best for low-to-moderate contamination levels in areas where you’re growing ornamentals rather than edibles—think of it as creating a purposeful, pollution-fighting garden that improves soil quality while adding beauty to your space.
The process demands patience, as plants need multiple growing seasons to make measurable impacts, but it costs significantly less than excavating and replacing contaminated soil. You’ll plant densely, harvest the pollutant-laden plant material carefully, and dispose of it as hazardous waste rather than composting. Combining phytoremediation with raised beds for food crops creates a comprehensive approach—remediation plants clean existing soil gradually while elevated gardens with fresh soil provide immediate safe growing space for vegetables and herbs. This dual strategy transforms contaminated yards into productive, healing landscapes that protect both your family and the environment.
What’s Really Lurking in Your Urban Soil
Before you start planning your dream garden, let’s talk about something that might be hiding beneath those beautiful blooms you’re envisioning. Urban and suburban soils often carry invisible passengers from decades past, and knowing what’s there can make all the difference in creating a safe, thriving garden space.
Lead is probably the most common uninvited guest in city soils. If your home was built before 1978, there’s a good chance old paint chips have been seasoning your soil for years. Each time someone scraped, sanded, or let that exterior paint naturally flake away, tiny lead particles settled into the ground around your home’s foundation. Even if your house is newer, lead from vehicle emissions back when leaded gasoline was the norm has left its mark, especially near old roadways and high-traffic areas.
Petroleum products are another frequent find. Old heating oil tanks, whether removed or still lurking underground, can leak for years. Even small drips from parked cars accumulate over time, creating pockets of contamination in driveways and along street edges. That rainbow sheen you sometimes see in puddles? That’s your clue.
Heavy metals like arsenic, cadmium, and chromium often trace back to industrial activities. Perhaps your neighborhood was once home to factories, dry cleaners, or auto repair shops. These legacy contaminants can persist for generations, making sustainable urban gardening both a challenge and an opportunity for environmental healing.
Understanding your soil’s history isn’t about fear, it’s about informed action. Before breaking ground, consider your property’s past uses. Talk to longtime neighbors, check old city directories, or contact your local health department about testing resources. This detective work helps you make smart decisions about where and what to plant, protecting both your family and your harvest.
How Plants Actually Clean Contaminated Soil
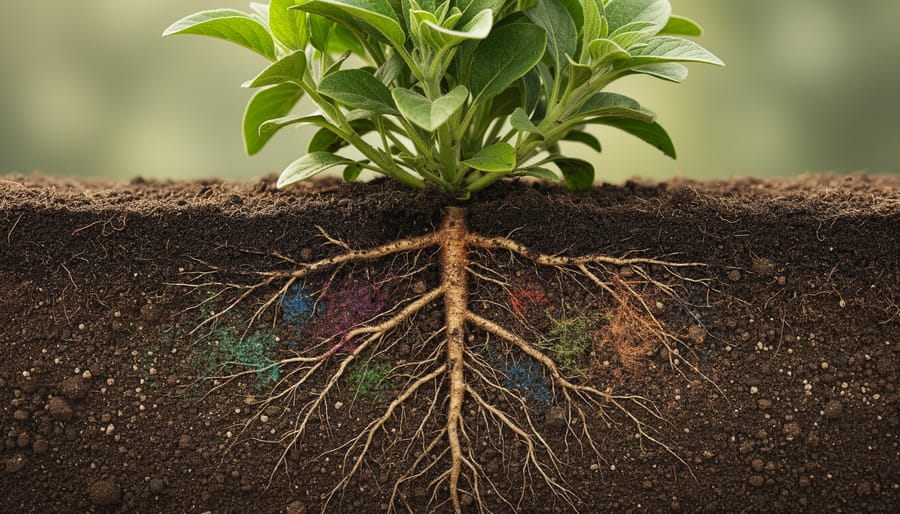
Think of plants as nature’s vacuum cleaners, but instead of simply sucking up dirt, they’ve developed several clever strategies to deal with soil contaminants. Understanding these methods helps you appreciate just how remarkable your garden allies truly are.
The first method, called phytoextraction, works exactly like it sounds. Plants pull contaminants up through their roots and store them in their stems and leaves. Imagine a sunflower as a living sponge, drawing up heavy metals like lead or zinc from the soil and locking them away in its tissues. Some plants are particularly gifted at this. Indian mustard, for example, can accumulate impressive amounts of lead in just one growing season. When you harvest and properly dispose of these plants at season’s end, you’re literally removing pollution from your yard.
The second approach is phytodegradation, where plants act like tiny chemical factories. Their roots release enzymes and beneficial microbes that actually break down pollutants into harmless substances. Poplar trees excel at this with petroleum products, essentially digesting the contamination through their root systems. It’s a bit like how your stomach breaks down food, except the plant is processing industrial chemicals instead.
Then there’s phytovolatilization, which sounds complicated but is quite straightforward. Some plants absorb contaminants and release them through their leaves as harmless gases. Think of it as the plant breathing out a safer version of what it took in. Willow trees can do this with certain compounds, transforming them during uptake.
Finally, phytostabilization doesn’t remove contaminants but instead locks them in place. Plant roots create a protective barrier, preventing pollutants from washing away into groundwater or blowing around as dust. The plants don’t accumulate the toxins themselves, making this approach useful when you need to stabilize an area quickly.
Many plants use combinations of these methods simultaneously. Your garden isn’t employing just one strategy but rather a whole toolkit of approaches. The key is matching the right plants to your specific contamination issue, which we’ll explore in upcoming sections. Remember, this process takes time, but with patience and the right plant selections, you’re harnessing millions of years of evolution to heal your soil naturally.
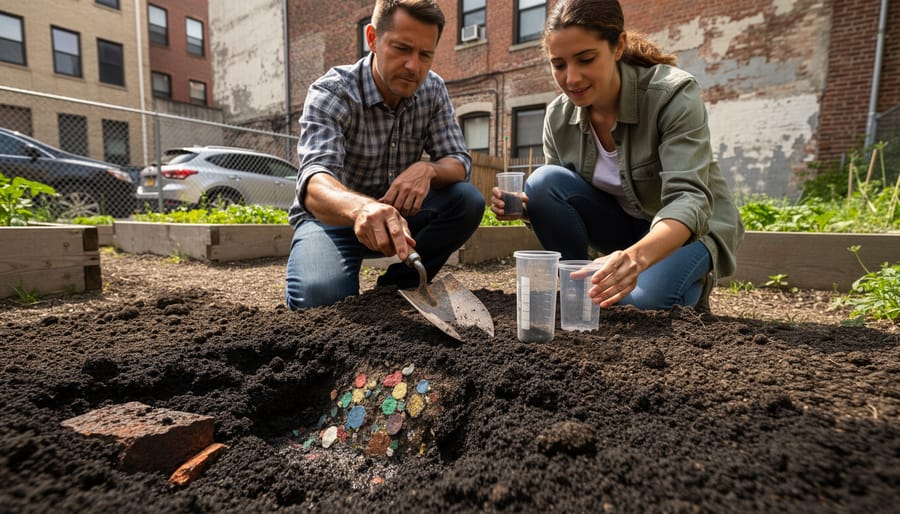
Testing Your Soil: Know What You’re Dealing With
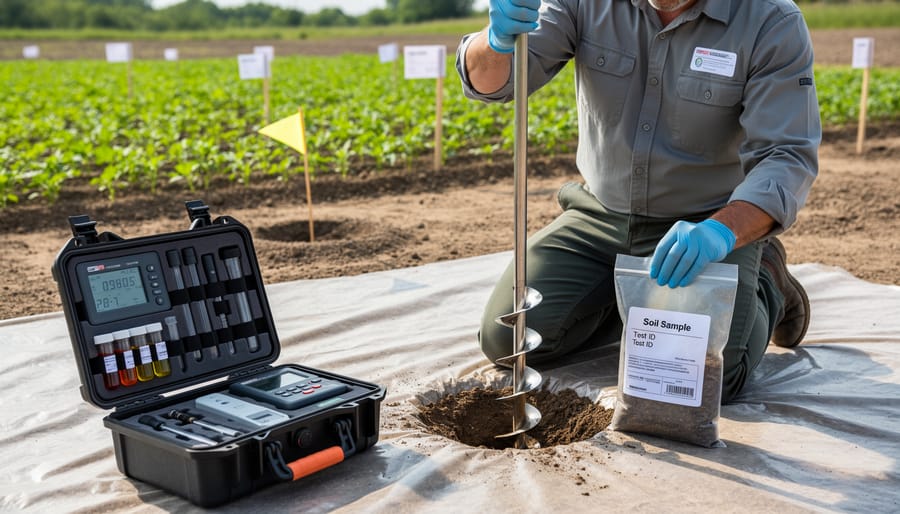
Before you start any remediation project, you need to understand exactly what’s lurking in your soil. Think of soil testing as getting a health check-up for your garden—you wouldn’t treat a headache with heart medication, right? The same logic applies here.
Getting your soil tested is surprisingly straightforward. Contact your local agricultural extension office or a certified environmental testing lab. For contamination testing (not just basic nutrients), you’ll need to specify what you’re testing for—heavy metals like lead, arsenic, or cadmium are common culprits in urban areas, while petroleum products or pesticides might be concerns near old industrial sites or orchards. A comprehensive heavy metal panel typically costs between $50-150, which is a small investment for peace of mind.
When your results arrive, you’ll see contamination levels measured in parts per million (ppm) or milligrams per kilogram (mg/kg). Compare these numbers to EPA residential soil screening levels. For example, lead levels above 400 ppm warrant action, while anything below 100 ppm is generally considered safe for gardens.
Here’s where it gets practical: phytoremediation works best for low to moderate contamination levels. If your soil shows lead at 200-800 ppm or cadmium below 50 ppm, you’re in the sweet spot for plant-based remediation. Higher levels might require professional remediation or soil replacement first, followed by phytoremediation as a maintenance strategy.
Don’t forget to test soil pH and nutrient levels too—these factors dramatically affect how plants uptake contaminants. Maintaining healthy soil health practices actually enhances phytoremediation effectiveness. Armed with your test results, you can make informed decisions about which plants to choose and whether phytoremediation is your best path forward.
Your Phytoremediation Plant Arsenal
Heavy Metal Fighters (Lead, Arsenic, Cadmium)
When it comes to tackling heavy metals in your soil, you’ll want to call in the real champions of phytoremediation. These remarkable plants can actually pull lead, arsenic, and cadmium from contaminated ground, making them nature’s own cleanup crew.
Sunflowers are the superstars here, and I love recommending them because they’re so cheerful to grow. These beauties can accumulate significant amounts of lead in their stems and leaves, especially varieties like Helianthus annuus. They thrive in full sun with well-drained soil and moderate watering. Studies show sunflowers can reduce lead levels by 20-40% over a single growing season, though heavily contaminated sites need multiple plantings.
Indian mustard, or Brassica juncea, is another heavy-hitter that’s incredibly effective at absorbing cadmium, lead, and arsenic. It’s a fast grower that prefers cooler weather and can be planted in spring or fall. The best part? It’s ready to harvest in just 6-8 weeks, and research indicates it can remove up to 45% of heavy metals from the top soil layer in one season.
Alpine pennycress, Noccaea caerulescens, is the specialist of the group, particularly effective with cadmium and zinc. This compact plant prefers cooler climates and well-drained soil. While it grows more slowly than mustard, it’s remarkably efficient at metal uptake.
Remember, never compost or consume these plants after they’ve done their work. They need proper disposal as hazardous waste to complete the remediation process safely.
Petroleum and Chemical Cleanup Crew
When your soil has been contaminated with petroleum products like oil or gasoline, or organic chemicals from industrial activities, you’ll want to call in the heavy-duty cleaners of the plant world. These remarkable species actually break down complex hydrocarbons and transform them into less harmful substances.
Poplar trees are the superstars here, particularly the hybrid varieties. Their extensive root systems dive deep into contaminated soil, and their tissues contain enzymes that literally digest petroleum compounds. I’ve visited remediation sites where poplars transformed former gas station lots into thriving green spaces within just a few years. They grow quickly too, which means they get to work fast on your contamination problem.
Willows work similarly and have the added advantage of tolerating wet conditions. If your contaminated area tends to stay damp or has poor drainage, willows might be your best choice. They’re also easier to propagate from cuttings, making them budget-friendly for larger areas.
Certain grasses deserve recognition too. Tall fescue and ryegrass varieties have shown impressive abilities to break down petroleum products in their root zones. The benefit of grasses is their fibrous root systems create extensive networks that process contamination throughout the upper soil layers. They’re perfect for blending remediation with a more traditional landscape appearance.
One word of caution: petroleum cleanup takes time, typically several growing seasons. Start with a soil test to identify contamination levels, and retest annually to track your progress. These plants work steadily but need patience to complete their important work.
Multi-Purpose Remediators
Some plants are the superheroes of the phytoremediation world, capable of tackling multiple soil contaminants while thriving in typical garden conditions. These versatile remediation champions are perfect if you’re dealing with complex contamination or simply want to maximize your garden’s cleaning potential.
Sunflowers top this list with their impressive ability to absorb lead, cadmium, zinc, and even radioactive elements. These cheerful giants grow quickly, produce abundant biomass, and brighten any space while working hard beneath the surface. I’ve grown them along fence lines where old paint may have contaminated soil, and they never disappoint.
Indian mustard is another powerhouse that handles lead, chromium, cadmium, nickel, and zinc. This fast-growing plant works exceptionally well in raised bed situations or areas where you want quick results. One urban gardener I spoke with transformed a neglected lot using successive plantings of Indian mustard over two growing seasons, and soil tests showed remarkable improvement.
Willows and poplars deserve mention for larger spaces. These trees address petroleum products, heavy metals, and excess nutrients simultaneously. Their extensive root systems and rapid growth make them ideal for screening unsightly areas while cleaning contaminated soil.
Alfalfa offers versatility in smaller gardens, targeting petroleum compounds and several heavy metals. Its deep taproot breaks up compacted urban soil while extracting contaminants from surprising depths.
Remember, these multi-taskers still require proper disposal after harvest. Never compost plants used for remediation, and consider testing your soil periodically to track progress and adjust your plant selections accordingly.
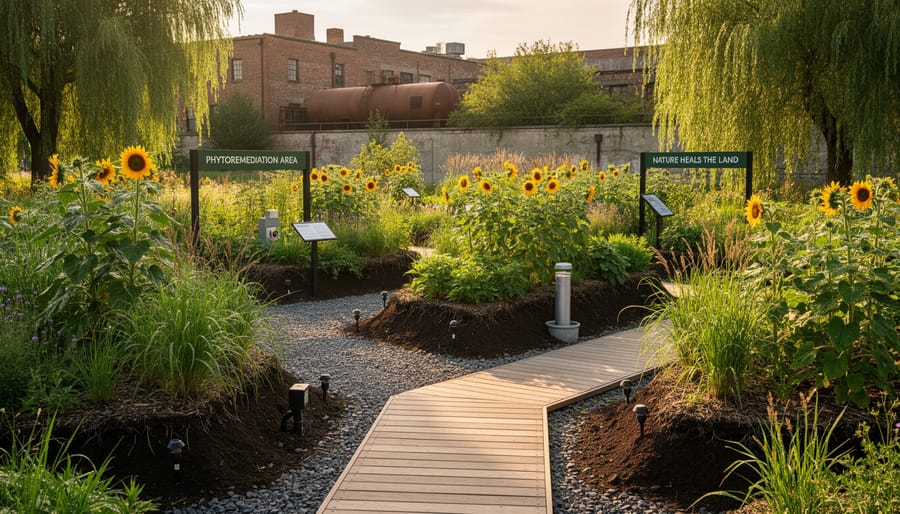
Designing Your Phytoremediation Garden
Creating a phytoremediation garden is like designing any beautiful garden space, with the added bonus that your plants are actively cleaning the soil while they grow. Let me walk you through the process, and I promise it’s more straightforward than you might think.
Start by mapping your space and understanding your contamination zones. Sketch your garden area on paper, noting which sections have confirmed contamination and which are safer. This becomes your master plan. Place your most vigorous accumulator plants like sunflowers and Indian mustard in the most contaminated areas, while edible gardens should occupy cleaner zones or areas that have already been remediated for several seasons.
Think layers when designing your layout. Position taller plants like willow trees or sunflowers toward the back or north side so they don’t shade smaller species. Create middle layers with shrubs like poplar saplings, and fill ground level with low-growing accumulators like alpine pennycress. This tiered approach maximizes both visual appeal and remediation efficiency since different root depths access various soil layers.
Companion planting works beautifully in remediation gardens. Pair nitrogen-fixing legumes with heavy feeders to support overall plant health without adding potentially contaminated fertilizers. I like clustering different accumulator species together, each targeting different contaminants, which speeds up the cleaning process while creating attractive plant groupings. The principles of biodiversity garden design apply perfectly here, supporting beneficial insects that keep your remediation plants healthy.
Add hardscaping elements strategically. Pathways made from clean gravel or stone allow you to enjoy your garden without tracking contaminated soil elsewhere. Consider raised beds filled with clean soil for annual displays or vegetables, creating safe growing spaces while perennial remediators work underground.
Don’t forget aesthetics. Your remediation garden can be stunning. Sunflowers create dramatic backdrops, while the silvery foliage of willow adds movement. Mix in colorful native wildflowers that also happen to accumulate metals, like certain aster varieties. Edge pathways with decorative grasses that stabilize soil and prevent contamination spread.
Plan for the long term by designating harvest and disposal areas. You’ll need somewhere to dry plant material before proper disposal, so incorporate this practical element into your design, perhaps screened by attractive fencing or taller ornamental grasses. Remember, this garden serves a purpose beyond beauty, and embracing both functions creates something truly special.
Safety First: What You Must Know Before Starting
Before we roll up our sleeves and dive into the exciting world of phytoremediation, let’s talk about something absolutely essential: your safety and that of your loved ones. Working with contaminated soil requires a thoughtful, cautious approach that I can’t stress enough.
First and foremost, always wear protective gear when handling potentially contaminated soil. This means sturdy gloves, long sleeves, long pants, and closed-toe shoes at minimum. Consider wearing a dust mask or respirator when digging or disturbing dry soil, as you don’t want to inhale contaminated particles. After working in your remediation garden, wash your hands thoroughly and change your clothes before entering your home.
Here’s a critical rule that bears repeating: never, ever grow edible crops in soil you’re actively remediating. This includes vegetables, herbs, and fruits. The whole point of phytoremediation is that plants absorb contaminants from the soil, which means those toxins end up in the plant tissues. You definitely don’t want those on your dinner plate. Stick exclusively to ornamental plants during the remediation process.
Speaking of those hardworking plants, you’ll need to dispose of them properly once they’ve done their job. Don’t compost them or leave them lying around. Contact your local waste management authority to learn about proper disposal methods for contaminated plant material in your area. Some communities have special collection programs for hazardous materials.
Keep children and pets away from remediation areas. Kids love to dig in dirt, and pets often graze on plants or roll in garden beds. Consider installing temporary fencing or creating a physical barrier that clearly marks the area as off-limits. Better safe than sorry when it comes to protecting the little ones in your life, both two-legged and four-legged.
The Timeline: What to Expect and When
Let me be honest with you: phytoremediation isn’t a quick fix, and understanding this timeline from the start will save you disappointment down the road. Think of it as a marathon, not a sprint—most phytoremediation projects take anywhere from three to ten years to achieve significant results, depending on the type and level of contamination you’re dealing with.
During the first growing season, you’re essentially establishing your plant team. Don’t expect dramatic changes yet, but you should see healthy plant growth if you’ve chosen the right species for your conditions. This is actually your first sign of progress—thriving hyperaccumulator plants mean they’re actively working on your soil.
By year two or three, you might notice improvements in soil structure and color. The earth may look darker and feel more crumbly. These subtle changes tell you things are moving in the right direction. I recommend keeping a garden journal with photos to track these gradual transformations—it’s incredibly rewarding to look back and see how far you’ve come.
Plan to retest your soil every two to three years. This gives plants enough time to make measurable differences while keeping you informed about progress. Many gardeners retest in early spring before planting, creating a consistent baseline for comparison.
Maintenance during this period is relatively straightforward. Water regularly during establishment, remove and properly dispose of mature plants (remember, they’ve absorbed those contaminants), and replant with fresh specimens. Think of it as crop rotation with a purpose. Add compost annually to support microbial activity, which enhances the remediation process.
Patience is your greatest asset here, but every season brings you closer to healthier, safer soil for future growing.
Beyond Plants: Complementary Soil Healing Strategies
While plants do remarkable work cleaning contaminated soil, you can supercharge your remediation efforts by combining several complementary strategies. Think of it as giving your garden a complete wellness treatment rather than just one remedy.
Compost amendments are perhaps the most accessible starting point. Adding quality organic compost does more than feed your plants – it introduces beneficial microorganisms that actively break down contaminants and help bind heavy metals, making them less likely to leach into groundwater. I’ve seen struggling remediation plots come alive within months after regular compost applications, with soil structure improving dramatically.
Mycoremediation, or using mushrooms for soil healing, might sound like something from a science fiction novel, but it’s surprisingly practical for home gardeners. Oyster mushrooms are particularly talented at breaking down petroleum-based contaminants and even some pesticides. You can purchase mushroom spawn online and introduce it to contaminated areas, where the fungal networks work tirelessly underground.
Biochar, a specialized charcoal made from organic materials, acts like a sponge in your soil. It captures and holds contaminants while simultaneously improving water retention and providing habitat for beneficial microbes. A local community garden I visited mixed biochar with their contaminated soil and saw measurable improvements in plant health within a single growing season.
The real magic happens when you combine these approaches. Imagine layering compost-enriched soil with biochar, planting hyperaccumulator species, and introducing beneficial fungi – you’re essentially transforming soil ecosystems from the ground up. Each method supports the others, creating a comprehensive healing system that works faster and more effectively than any single technique alone. Start with what feels manageable, then expand your toolkit as you gain confidence.
Real Stories: Urban Gardeners Who’ve Done This
When Maria discovered her Detroit community garden sat on former industrial land, she didn’t give up. Instead, she turned to sunflowers and mustard greens. “We planted densely for three seasons before growing food,” she explains. “Those first-year sunflowers were massive but went straight to the compost. By year three, our soil tests showed lead levels had dropped by 40%.” Maria learned that patience pays off, and she now mentors other urban gardeners facing similar challenges.
Across the country in Portland, James tackled his backyard’s petroleum contamination from an old fuel tank. He started with Indian mustard around the perimeter and poplar trees along the back fence. “The hardest part was watching my neighbors grow vegetables while I waited,” he admits. “But I kept reminding myself this was an investment.” After two years, James successfully grew tomatoes in raised beds filled with his remediated soil mixed with compost. His biggest lesson? Test regularly to track your progress and stay motivated.
In Brooklyn, the Green Streets Collective transformed an abandoned lot with visible oil stains into a thriving garden. Coordinator Lisa shares their approach: “We combined phytoremediation with practical gardening. Willow trees and switchgrass handled the heavy lifting in contaminated zones, while we immediately started growing food in raised beds with clean soil.” This hybrid strategy let them serve the community right away while addressing long-term soil health.
These gardeners all emphasize the same wisdom: start with thorough testing, choose appropriate plants for your specific contaminants, and don’t rush to harvest. Their success stories prove that contaminated soil isn’t the end of your gardening dreams, just a different beginning.
Healing contaminated soil through phytoremediation is truly a remarkable journey, and you’re now equipped with everything you need to begin. Remember, this isn’t a quick fix, but rather a gentle, natural process that rewards patience with genuine transformation. Just as a garden teaches us to work with nature’s rhythms, phytoremediation reminds us that even damaged soil can find its way back to health.
The beauty of plant-based remediation lies in its accessibility. You don’t need expensive equipment or specialized training to start making a difference in your corner of the world. Whether you’re planting sunflowers in a small urban plot or establishing a larger remediation garden, every plant you add contributes to cleaner, healthier soil.
Think of your phytoremediation project as an investment in the future. The plants you establish today will continue working season after season, gradually drawing out contaminants while creating habitat for beneficial insects and wildlife. You’re not just cleaning soil; you’re rebuilding an ecosystem.
Don’t let uncertainty hold you back. Start small if you need to. Test your soil, choose a few appropriate plants, and watch what happens. Connect with other gardeners, share your experiences, and celebrate the small victories along the way. Every journey begins with a single step, and yours might be as simple as planting that first Indian mustard seed or sunflower seedling. Your soil is waiting, and the transformation starts now.