When temperatures drop and frost threatens, most gardeners assume their container gardens must end until spring. Here’s the truth: winter container gardening not only survives the cold—it thrives in it, offering fresh harvests, vibrant blooms, and year-round beauty when your landscape needs it most.
The secret lies in working with winter rather than against it. Many vegetables, herbs, and ornamentals actually prefer cooler temperatures, developing sweeter flavors and richer colors than their summer counterparts. Kale becomes candy-sweet after a hard frost. Pansies bloom cheerfully through snow. Winter-grown lettuces develop a buttery texture impossible to achieve in summer heat.
Beyond the harvest, winter containers solve a common problem: the barren, lifeless look that settles over outdoor spaces from November through March. Strategic plantings transform dreary patios and porches into four-season focal points, proving your gardening skills extend beyond fair-weather months.
Success requires rethinking your approach to container gardening basics. You’ll need to select cold-hardy plants, choose freeze-resistant containers, protect roots from damaging temperature swings, and adjust your watering schedule. These aren’t complicated skills—they’re simple adaptations that open up an entirely new growing season.
Whether you’re hoping to extend your vegetable harvest, maintain ornamental interest, or simply prove that gardening doesn’t hibernate, winter container gardening delivers rewards that justify every effort. Let’s explore exactly how to make it happen.
Why Container Gardens Actually Work Better in Winter
Here’s something that might surprise you: container gardening during winter actually comes with some remarkable perks that you won’t enjoy during warmer months. If you’ve been hesitating to keep your containers going through the cold season, let me share why this might be the perfect time to embrace this gardening approach.
First, you gain exceptional control over your growing environment. The container gardening advantages become even more pronounced in winter because you can manage soil temperature far more precisely than with in-ground beds. Containers freeze and thaw more slowly than exposed garden soil, which means less stress on plant roots. You can also add insulation exactly where needed, wrapping containers with burlap or moving them against warm foundation walls.
Winter also brings a wonderful break from pest pressure. Those aphids, spider mites, and other troublesome insects that plague summer gardens? They’re largely dormant or eliminated by cold temperatures. This means healthier plants with far less intervention on your part.
The mobility factor becomes your secret weapon during harsh weather. When a brutal cold snap threatens, you can simply move containers to sheltered spots, under eaves, or even temporarily into an unheated garage. Try doing that with an in-ground garden! This flexibility means you’re not gambling with nature quite as much.
I spoke with master gardener Patricia Chen, who’s maintained container gardens through fifteen Canadian winters. She told me, “People think winter gardening is harder, but I find it more forgiving. You water less, there are fewer pest problems, and winter-hardy plants are remarkably tough once established.”
The bottom line? Winter container gardening isn’t just possible; it’s genuinely easier in several key ways.

Choosing the Right Containers for Cold Weather
Materials That Survive the Freeze
Choosing the right container material can mean the difference between a pot that lasts for years and one that cracks apart during the first hard freeze. I learned this lesson the hard way when I lost three beautiful terracotta pots in a single winter!
The best materials for winter container gardening are those that can handle the freeze-thaw cycle without cracking. Resin and fiberglass containers are absolute champions in cold weather. They’re lightweight, won’t crack even in sub-zero temperatures, and they insulate plant roots better than many other materials. Wood containers, especially cedar and redwood, are also excellent choices because they’re naturally rot-resistant and provide good insulation for roots during temperature swings.
Thick plastic containers work well too, as long as they’re specifically rated for outdoor use. Look for containers at least a quarter-inch thick, as thinner plastic can become brittle and crack when temperatures plummet.
Now, let’s talk about what to avoid. Terracotta and thin ceramic pots are beautiful, but they’re your winter garden’s worst enemy. These porous materials absorb water, which expands when it freezes and causes those heartbreaking cracks. Even glazed ceramic can fail if the glaze isn’t perfect, allowing moisture to seep in.
If you absolutely adore your terracotta pots, bring them indoors for winter or store them empty in a protected area. Your future self will thank you when spring arrives and your favorite containers are still intact and ready for planting!
Size and Drainage Considerations
When selecting containers for winter gardening, size truly matters. Larger pots are your best friends during cold months because they provide more soil volume, which acts as natural insulation for plant roots. Think of it like wrapping up in a thick winter coat versus a light jacket. A container that’s at least 12 to 16 inches in diameter will retain heat far better than smaller pots, giving roots the buffer they need against temperature fluctuations. I’ve learned this lesson the hard way after losing several plants in petite containers during my first winter gardening attempt.
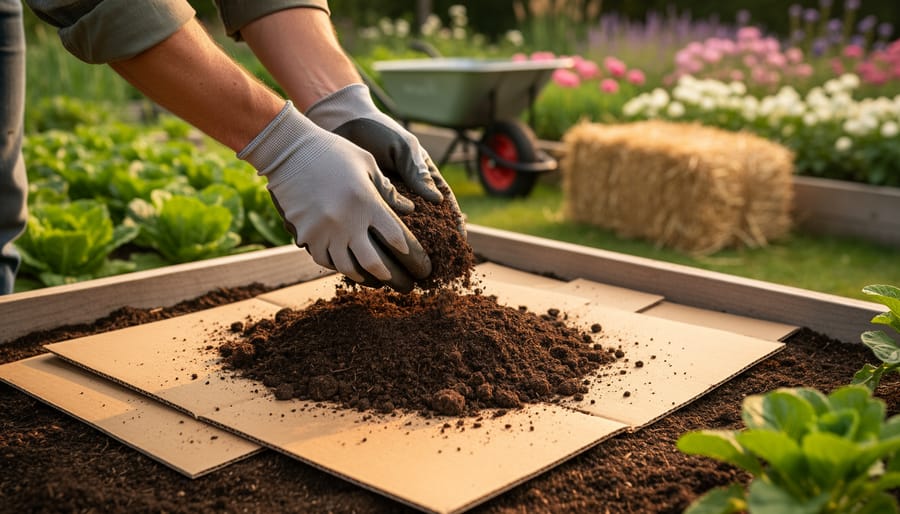
Drainage becomes absolutely critical in winter, even more so than in warmer seasons. Without proper drainage holes, water accumulates and freezes, expanding as it turns to ice and potentially cracking your beautiful pots. Make sure every container has adequate drainage, and consider adding extra holes if needed. Using proper container soil that drains well is equally important to prevent waterlogging.
Protecting container bottoms from ground freeze is simple but essential. Elevate your pots using pot feet, bricks, or even scraps of wood to create airflow underneath. This prevents the container from sitting directly on frozen ground, which can cause moisture to freeze at the drainage holes. As master gardener Elena Rodriguez shared with me, “Lifting containers just an inch or two can mean the difference between cracked pots and containers that last for years.”
Cold-Hardy Plants That Love Container Life
Vegetables That Taste Better After Frost
Here’s a secret that might surprise you: some vegetables actually improve in flavor after a good frost! I discovered this myself when I forgot about my container kale one November and returned to find it sweeter than ever. It felt like discovering garden magic.
Winter greens thrive in containers and become remarkably delicious once temperatures drop. Kale, spinach, and arugula are your cold-weather champions, tolerating hard frosts while developing a sweeter, more complex flavor profile. The science behind this is actually quite simple: when plants experience cold stress, they convert starches into sugars as a natural antifreeze. These extra sugars protect the plant cells from damage while making the leaves taste less bitter and more pleasant to our palates.
For your winter containers, kale is particularly forgiving and can withstand temperatures down to 20°F. Spinach follows closely behind, becoming incredibly tender after frost exposure. Arugula adds a peppery punch that mellows beautifully in cold weather.
Root vegetables also excel in containers, provided you choose pots deep enough to accommodate their growth. Carrots need containers at least 12 inches deep, while radishes can manage with 8 inches. Both develop exceptional sweetness after experiencing freezing temperatures. Beets require 10-12 inch depths and reward your patience with earthy-sweet flavor.
I spoke with master gardener Patricia Chen, who shared this advice: “Think of frost as nature’s seasoning. Those vegetables you grew all season? They’re just waiting for winter to reach their full potential.”

Herbs for Your Winter Kitchen
Winter is the perfect time to keep your favorite herbs thriving right outside your door. Some herbs are surprisingly cold-hardy and will reward you with fresh flavor even during the chilliest months. Parsley, both flat-leaf and curly varieties, can handle temperatures well below freezing and will keep producing until the ground freezes solid. Chives die back in winter but their roots survive, making them reliable returnees come spring. Winter savory, true to its name, actually thrives in cold weather and adds a peppery note to hearty winter meals.
For growing herbs in containers through winter, rosemary and thyme need a bit more attention but are absolutely worth the effort. Position them in the sunniest spot available and protect them from harsh winds with a simple windbreak. I’ve found that moving containers against a south-facing wall makes all the difference. During extreme cold snaps, drape frost cloth over your herbs overnight. Remember that overwatering is the biggest winter threat, so water sparingly only when the soil is dry to the touch. With these simple steps, you’ll have fresh herbs ready whenever your winter recipes call for them.
Ornamental Plants for Winter Color
Who says winter has to mean empty, lifeless containers? Some of my favorite plantings happen during the cooler months, and I’m always amazed at how cheerful they make my patio feel on gray days.
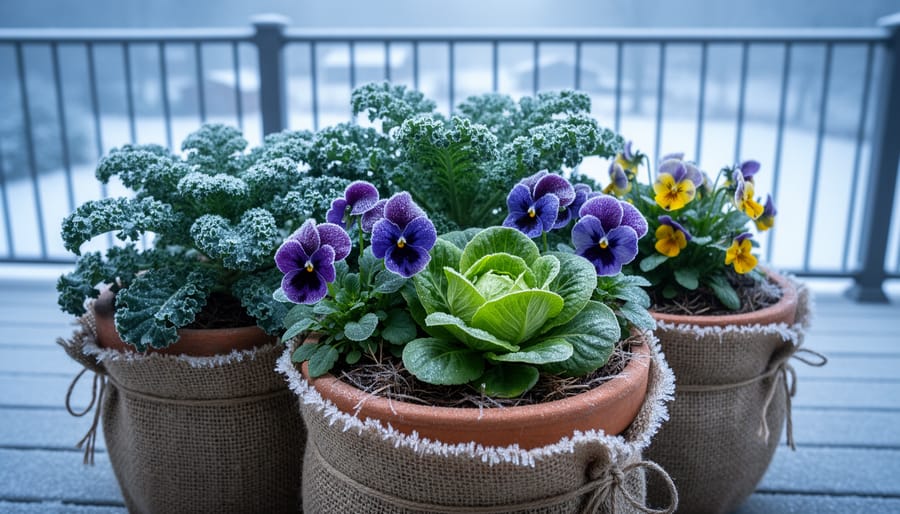
Pansies and violas are your cold-weather champions. These hardy little beauties actually thrive in cooler temperatures and come in gorgeous jewel tones that pop against winter’s muted backdrop. I’ve seen them bloom happily through light frosts and even bounce back after snow. Plant them in clusters for maximum impact, and you’ll have color from fall straight through early spring.
Ornamental cabbage and kale offer something completely different with their sculptural rosettes in shades of purple, pink, and cream. They get more vibrant as temperatures drop, which seems almost magical. Plus, they’re incredibly low-maintenance and can handle quite a bit of neglect.
Don’t overlook evergreens for year-round structure. Small conifers, boxwood, or trailing ivy provide reliable greenery that anchors your container displays. Mix them with seasonal bloomers for a layered look, or let them stand alone for elegant simplicity. I often tuck in some winterberry holly branches for a festive touch that lasts for weeks.
Protecting Your Containers From Winter’s Worst
Insulation Techniques That Actually Work
Protecting your containers from winter’s harsh conditions doesn’t require expensive equipment or professional expertise. I’ve found that a few simple insulation methods make all the difference between thriving plants and frozen disappointments.
The bubble wrap method is remarkably effective and budget-friendly. Wrap large bubble wrap around your container’s exterior, securing it with twine or tape. The air pockets create an insulating barrier that prevents root damage. For extra protection, I like to wrap it twice, ensuring the wrap extends from the container’s base to just below the rim. This technique works beautifully for ceramic and terracotta pots that are especially vulnerable to cracking.
Burlap wrapping offers both insulation and a rustic aesthetic. Simply wrap burlap fabric around containers, securing with jute twine. You can stuff the space between the container and burlap with straw or leaves for additional warmth. This method allows containers to breathe while providing gentle protection from temperature fluctuations.
Grouping containers together creates a microclimate where plants share warmth and shield each other from harsh winds. Position them against a south-facing wall for maximum sun exposure and wind protection. Think of it as your plants huddling together for warmth.
Applying a three-inch layer of organic mulch over the soil surface acts like a cozy blanket for roots. Use shredded bark, straw, or pine needles. This simple step prevents moisture loss and moderates soil temperature swings. Just remember to pull mulch slightly away from plant stems to prevent rot.

Strategic Placement for Maximum Protection
Think of your home’s exterior as a collection of cozy nooks just waiting to shelter your winter containers. The key is learning to read your property’s microclimates and using them strategically.
South-facing walls are absolute gold for winter gardening. These spots absorb heat during the day and radiate it back at night, creating a buffer zone that can be several degrees warmer than open areas. I like to cluster my containers against these sunny walls, giving them both warmth and wind protection. Just remember to pull them a few inches away from the wall itself to allow air circulation and prevent moisture buildup.
Under eaves and overhangs, your containers gain natural shelter from harsh precipitation and wind. This is particularly helpful during ice storms or heavy snow, which can damage delicate foliage or crack containers. These protected spots also make it easier for you to access your plants during nasty weather without trudging through deep snow.
Heat escaping from dryer vents, outdoor lighting fixtures, and foundation walls creates surprising pockets of warmth. Position containers near these areas, but not directly against active heat sources, to give tender plants an extra advantage during cold snaps.
When temperatures plummet into truly dangerous territory, be prepared to relocate containers to an unheated garage, covered porch, or even a garden shed. These transitional spaces protect against wind and extreme cold while keeping plants dormant. I typically move mine when forecasts predict multiple nights below 20 degrees Fahrenheit, then return them outside during milder stretches to maintain their cold hardiness.
Winter Watering Without the Guesswork
Winter watering feels counterintuitive, doesn’t it? We’re programmed to think that dormant plants need less attention, and while that’s partly true, completely neglecting your containers can spell disaster. The trick is finding that sweet spot between keeping roots hydrated and avoiding freeze damage.
Here’s what I’ve learned through some trial and error: plants in containers still lose moisture during winter, even when they’re not actively growing. Wind and occasional sunny days can dry out soil surprisingly quickly. I chatted with Sarah Martinez, a master gardener in Minnesota, who explained that “the real danger isn’t watering in winter, it’s watering at the wrong time.” She recommends checking containers on mild days when temperatures are above freezing and will remain so for at least 24 hours.
The finger test still works wonders in winter. Push your finger about two inches into the soil. If it feels bone dry, your plants need water. If it’s slightly moist, wait a few days and check again. Evergreens in containers are particularly thirsty since they’re still transpiring through their needles.
Time your watering for mid-morning on days forecasted to stay above 40 degrees Fahrenheit. This gives water time to soak in before any overnight temperature drops. Water thoroughly but less frequently than summer, aiming for deeply moist soil rather than saturated. Skip the saucers underneath containers during winter as standing water increases freeze risk.
One surprising tip: if you’re expecting a deep freeze, slightly dry soil actually insulates roots better than soggy soil. Waterlogged containers freeze solid, potentially damaging roots and cracking pots. When in doubt during extreme cold snaps, lean toward the drier side.
Common Winter Container Mistakes (And How to Avoid Them)
We’ve all been there – learning what works in winter container gardening often comes through trial and error. Here are some common hiccups I’ve encountered over the years, and the good news is they’re all easily avoidable once you know what to watch for.
Overwatering tops the list, and it’s surprisingly easy to do. Winter plants grow slowly and need far less water than their summer counterparts. I’ve learned to check soil moisture by poking my finger an inch down before reaching for the watering can. If it feels damp, wait another day or two. Remember, wet soil plus freezing temperatures can spell disaster for roots.
Drainage becomes even more critical in cold weather. Those drainage holes you might overlook in summer? They’re essential now. Without proper drainage, water freezes, expands, and can crack containers or drown roots. I always elevate my pots slightly on pot feet or bricks to keep water flowing freely.
Choosing plants that aren’t truly hardy for your zone is another learning opportunity. That beautiful ornamental cabbage rated for zone 7 won’t thrive in a zone 5 winter, no matter how much we wish otherwise. Stick with plants rated at least one zone hardier than yours for container growing.
Finally, don’t forget about your containers during those unexpected warm spells. Winter isn’t constant – those sunny February days can dry out soil faster than you’d think. A quick weekly check-in keeps everyone happy and healthy.
Winter container gardening isn’t just about surviving the cold months—it’s about thriving through them and staying connected to the joy of growing year-round. If you’re just starting a container garden, winter is actually a wonderful time to experiment with hardy plants and discover what works in your unique space. There’s no need to go all-in with dozens of pots; even a single container of leafy greens or a cheerful arrangement of winter pansies can brighten those grey days and give you something to nurture.
Don’t be afraid to try different approaches and learn as you go. Every garden and gardener is unique, and what works for your neighbor might need adjusting for your patio or balcony. The beauty of container gardening is its flexibility and forgiveness. As you gain experience, you’ll develop your own rhythm and understanding of what your plants need.
Imagine stepping outside on a crisp January morning to snip fresh kale for your breakfast or admiring colorful winter blooms dusted with frost. That connection to nature, even in the depths of winter, is absolutely worth the small effort required. Keep growing, keep experimenting, and enjoy every season.