Start conditioning your straw bales 10-14 days before planting by soaking them thoroughly and adding nitrogen-rich fertilizer to kickstart decomposition—this transforms the bales from dry, hostile environments into nutrient-rich growing mediums. Water the bales daily while sprinkling them with high-nitrogen fertilizer every other day for the first week, then reduce to every third day as internal temperatures rise and beneficial microbes break down the straw. Test readiness by inserting your hand into the bale’s center; when the temperature drops to warm rather than hot, and the straw feels soft and damp throughout, you’re ready to plant.
Straw bale gardening offers an ingenious solution for anyone facing poor soil conditions, limited space, or back problems that make traditional gardening challenging. Unlike raised bed gardening or container gardening, this method requires no digging, weeding, or soil preparation—just properly conditioned bales placed wherever sunlight reaches. The straw decomposes throughout the growing season, creating a warm, well-draining environment that vegetables absolutely love, while elevating your plants to a comfortable working height.
The secret to success lies entirely in that conditioning phase. Rush it, and your plants will struggle in dry, nitrogen-depleted straw. Skip it altogether, and they’ll likely fail completely. But follow the process correctly, and you’ll create self-contained growing stations that produce remarkable harvests while gradually composting into garden-ready mulch for next season.
What Actually Happens Inside a Straw Bale (And Why It Matters)
Here’s the thing about straw bales: they’re not ready to support plant life right out of the field. In fact, if you plant directly into a fresh bale, you’ll likely do more harm than good to your seedlings. Understanding what happens inside that bale during the conditioning process is like getting a backstage pass to nature’s most impressive transformation.
When you first bring home a straw bale, it’s essentially a compact bundle of dried plant stems with very little nutritional value. It’s not soil, and it certainly doesn’t behave like soil. The magic happens when you introduce nitrogen and water, which awakens millions of dormant microorganisms already present in the straw. These tiny workers, primarily bacteria and fungi, begin breaking down the tough plant fibers in a process called decomposition.
As these microorganisms feast on the straw, they generate heat as a byproduct, sometimes reaching internal temperatures of 120 to 140 degrees Fahrenheit. This is actually a good sign that the conditioning is working. However, here’s the critical part: during this active decomposition phase, those hungry microbes are competing for nitrogen, the same nutrient your plants desperately need to grow. If you plant too early, the microorganisms will essentially steal all available nitrogen from your seedlings, leaving them stunted and yellowing.
This is exactly why unconditioned bales harm plants. The decomposition process must run its course first, typically taking about two weeks. During this time, the microbes do their work, the bale’s internal temperature gradually decreases, and the straw begins transforming into a spongy, nutrient-rich growing medium. The result is a perfect environment where roots can easily penetrate, moisture is retained beautifully, and nutrients become readily available for your plants to thrive.
The 10-Day Conditioning Timeline That Prepares Your Bales

Days 1-3: The Saturation Phase
Your first task is simple but absolutely crucial: get those bales completely soaked! Think of this phase as giving your straw bales a long, luxurious drink. Each day for the next three days, water your bales thoroughly until water runs freely from the bottom. You’ll need about 3-5 gallons per bale daily, depending on their size and the weather.
During this initial soaking, you’re watching for the straw to change from golden and dry to a deeper, amber color as moisture penetrates. The bales should feel heavy when you lift a corner—that’s your sign that water is reaching the center, not just wetting the surface. Don’t worry if the first day’s watering seems to run right off; straw naturally repels water at first. By day three, you’ll notice the bales absorbing moisture more readily, almost like a sponge learning its job. This saturation sets the stage for the decomposition process that transforms ordinary straw into a nutrient-rich growing medium for your plants.
Days 4-6: Feeding the Microbes
Now we’re getting to the exciting part where your straw bales start their transformation! Over the next three days, you’ll be feeding the beneficial microbes that will break down the straw and create the perfect growing environment for your plants.
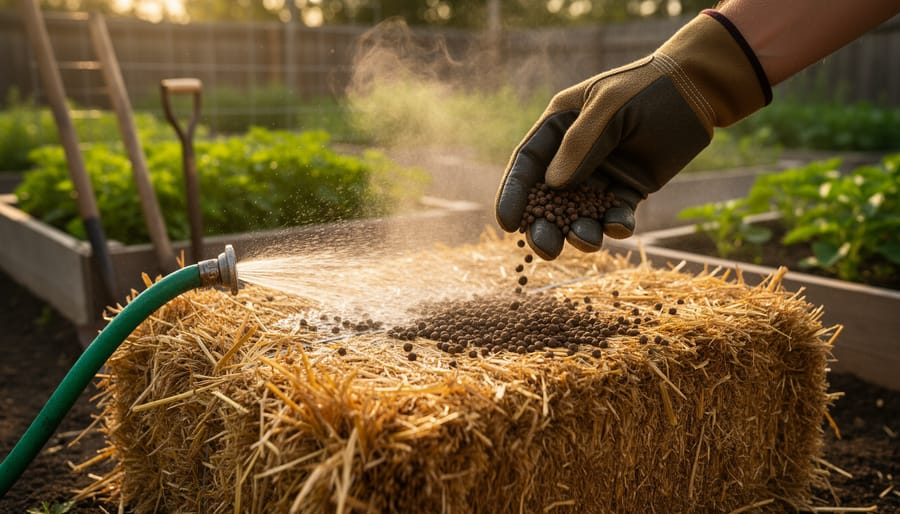
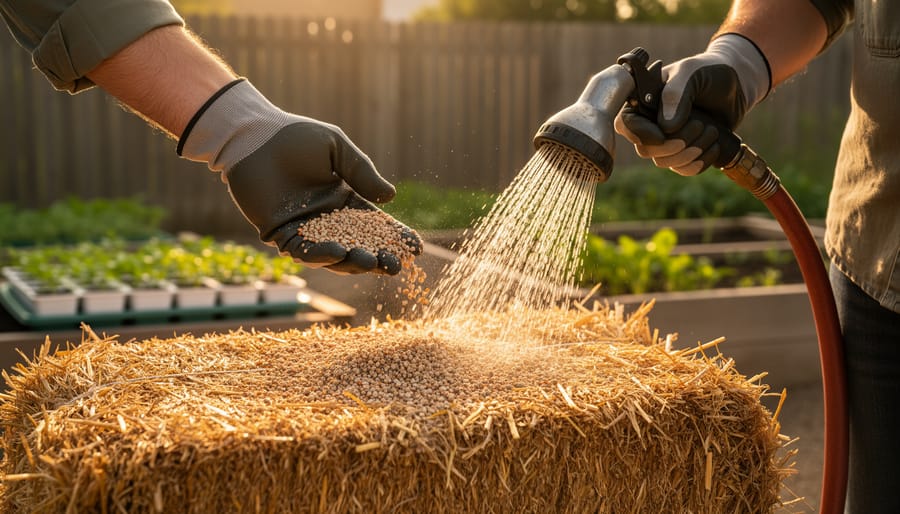
Each day, sprinkle half a cup of high-nitrogen fertilizer (like ammonium nitrate or urea) evenly across the top of each bale, then water it in thoroughly. You want to really soak those bales, using at least a gallon of water per bale to help the fertilizer penetrate deep inside. Think of this as breakfast, lunch, and dinner for the hardworking microbes that are about to wake up and get busy.
Here’s what’s happening behind the scenes: the nitrogen feeds the microorganisms, which multiply rapidly and start decomposing the straw. This process generates heat, and you should notice your bales becoming noticeably warm to the touch by day five or six. Some gardeners have measured internal temperatures reaching 120-140 degrees Fahrenheit during peak activity!
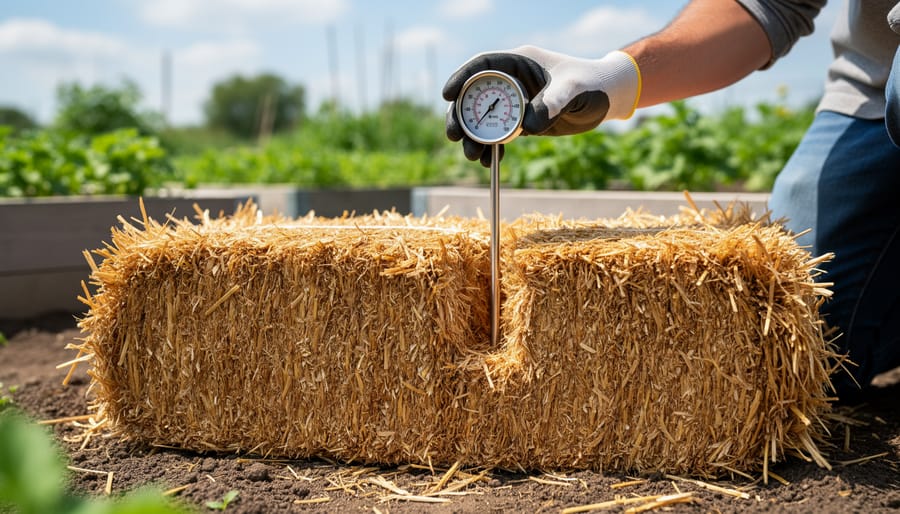
If you have a soil thermometer, stick it into the center of a bale to check the temperature. This warming is a great sign that conditioning is working. Don’t worry if the bales feel almost hot—that’s exactly what you want. Just remember to keep watering daily, as all this microbial activity makes the bales thirsty.
Days 7-9: Reducing Fertilizer and Monitoring Heat
As your straw bales continue breaking down, it’s time to cut back on fertilizer while keeping a close eye on the internal temperature. During days 7 through 9, reduce your nitrogen fertilizer to half the original amount—about half a cup per bale of the same balanced organic fertilizer you’ve been using. Water the bales thoroughly after each application, but you’ll notice they need less moisture now as they’re retaining water better.
This is when things get exciting! The bales may feel quite warm to the touch, sometimes reaching 100 to 140 degrees Fahrenheit inside. Don’t worry—this heat is exactly what you want. It means the decomposition process is in full swing, creating that nutrient-rich environment your plants will love. Check the temperature daily by pushing your hand several inches into the bale. If it feels uncomfortably hot, that’s perfect. You’re almost ready to plant! By day 9, the intense heat should start subsiding, signaling that your bales are nearly conditioned and prepared for your seedlings.
Day 10: The Planting Readiness Test
You’ve made it! Day 10 is when most bales are ready for planting, but let’s make sure yours have truly completed their transformation. The first test is temperature—stick your hand or a compost thermometer into the center of the bale. You’re looking for temperatures below 100°F, ideally closer to ambient air temperature. If it still feels hot, give your bales another day or two.
Next, assess the texture. The interior should feel soft and spongy, almost like peat moss, rather than stiff straw. Pull out a handful from the center—it should come apart easily and feel slightly damp and crumbly. If you can still see defined straw pieces that resist breaking, continue the conditioning process.
Finally, do the squeeze test: grab a handful and squeeze it. It should hold together briefly but crumble when you release pressure. This indicates the perfect moisture balance and decomposition level for root development. Once your bales pass all three tests, congratulations—you’re ready to plant and watch your garden thrive!
How to Position and Prepare Your Bales for Maximum Success
Getting your straw bales positioned correctly from the start makes everything easier down the line. I learned this the hard way during my first attempt at straw bale gardening when I had to reposition waterlogged bales halfway through the season. Trust me, you don’t want to move a conditioned bale!
First, let’s talk about orientation. This is crucial: place your bales with the strings running vertically along the sides, not horizontally across the top and bottom. The cut ends of the straw should face upward, creating natural channels for water and roots to penetrate downward. When strings are on top, they can interfere with planting and watering. I always tell fellow gardeners to think of those vertical strings as the bale’s spine, keeping everything together while allowing the top surface to be your planting canvas.
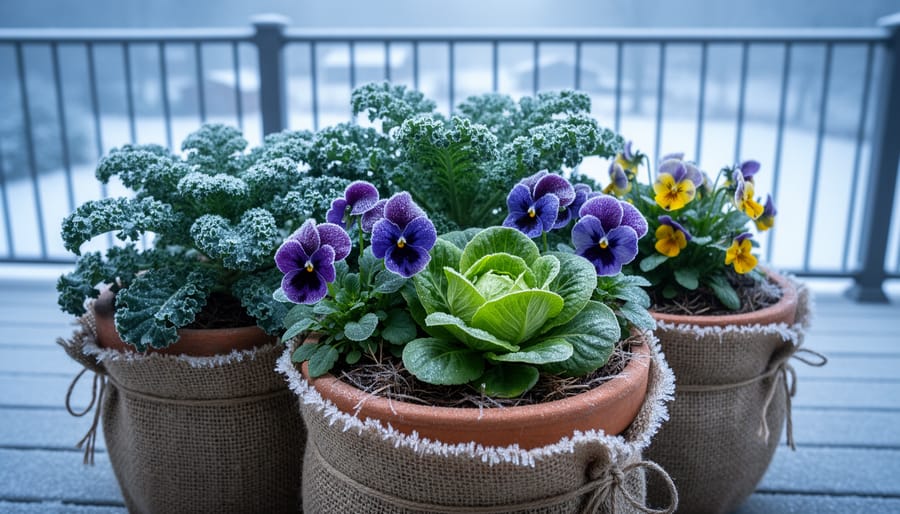
Location matters tremendously. Choose a spot that receives at least six to eight hours of direct sunlight daily for most vegetables. Since these bales will stay put for the entire growing season and become quite heavy once conditioned, make sure you’re happy with their placement. Consider access from all sides for watering and harvesting. If you’re working with limited space, straw bale gardening actually complements vertical gardening techniques beautifully, as you can train vining plants upward using simple supports.
Now, here’s something many beginners overlook: creating a weed barrier underneath. Lay down landscape fabric, cardboard, or several layers of newspaper beneath each bale. This prevents weeds from creeping up through the bottom and competing with your plants. I’ve seen gardens where persistent grass pushed right through unbuffered bales, creating a maintenance nightmare.
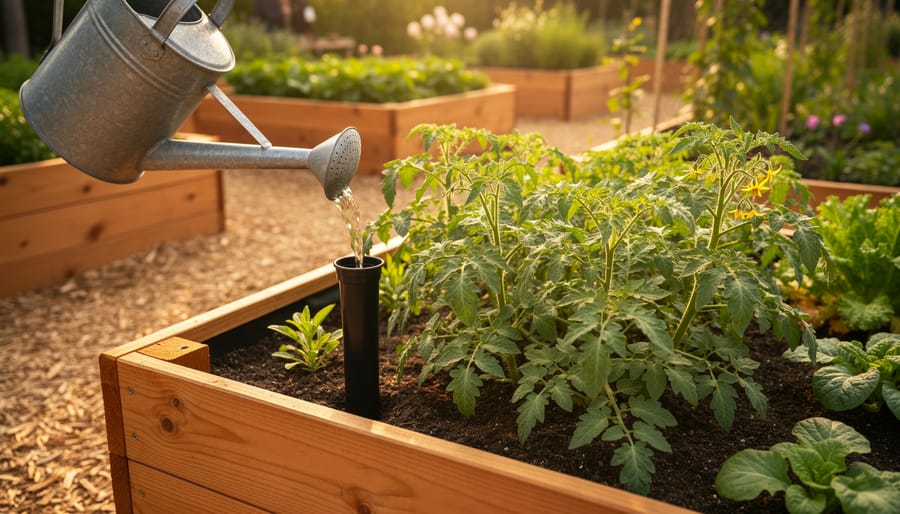
Setting up your watering system before conditioning begins saves considerable effort. Straw bales require consistent moisture, especially during the conditioning phase. Position soaker hoses along the top of each bale, or install a drip irrigation line if you’re managing multiple bales. For smaller setups, a simple oscillating sprinkler works well. Whatever system you choose, ensure even coverage across all bales. Remember, once these bales start decomposing and plants take root, they’ll need daily watering during hot weather.
The Right Way to Plant Seeds and Seedlings in Conditioned Bales
Planting Seedlings and Transplants
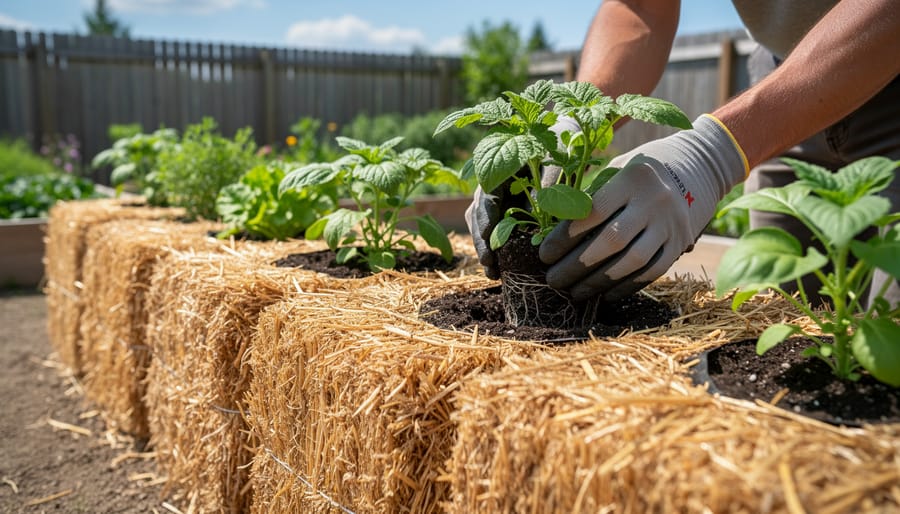
Now comes the exciting part—getting your plants into those conditioned bales! Once your straw bales have completed the conditioning process and cooled down, you’re ready to create cozy homes for your seedlings and transplants.
Start by using a trowel or your hands to create planting pockets in the top of the bale. For most vegetables like tomatoes, peppers, or squash, you’ll want pockets about 4-6 inches deep and wide enough to accommodate the root ball comfortably. If you’re planting seeds directly, shallow depressions work perfectly fine.
Here’s a tip I learned from master gardener Susan Ellis during one of our garden visits: add a handful or two of potting mix or compost into each pocket before planting. While the conditioned straw provides nutrients, this extra boost gives your transplants’ roots something familiar to grab onto as they establish themselves. Think of it as a welcoming committee for your plants!
When placing your transplants, gently loosen the root ball and position the plant at the same depth it was growing in its container. Firm the potting mix around the base—not too tight, just snug enough to provide support. The straw itself may feel loose, so don’t hesitate to nestle your plants securely.
For taller plants like tomatoes, insert stakes or cages immediately after planting to avoid disturbing roots later. Water thoroughly after planting, ensuring moisture reaches deep into the bale. Your plants should settle in beautifully within a few days, ready to thrive in their unconventional but nutrient-rich home.
Direct Seeding in Straw Bales
Once your bales are properly conditioned, you’re ready for the exciting part—planting! Direct seeding is a fantastic option for many vegetables and herbs, and it’s easier than you might think.
Start by adding a 2-3 inch layer of planting medium on top of your conditioned bale. I like to use a mix of compost and peat-free potting soil, which gives seeds a comfortable environment to germinate while their roots can eventually reach down into the nutrient-rich straw below. Think of it as giving your seeds a welcoming doormat to your bale garden!
Not all seeds are created equal for direct seeding in straw bales. Your best bets are quick-germinating vegetables like lettuce, radishes, carrots, beans, and squash. Leafy greens such as spinach and arugula also perform beautifully. I’ve had wonderful success with herbs like basil, cilantro, and dill too. These plants establish quickly and aren’t as fussy about perfect soil conditions.
For germination success, keep that top layer consistently moist but not waterlogged. Seeds need steady moisture to sprout, so you’ll likely need to water daily, especially during warm weather. The straw underneath retains moisture well, but that surface layer can dry out quickly in the sun.
Space your seeds according to packet directions, and don’t be afraid to plant a few extra—you can always thin them later. Within days, you’ll see those first green shoots pushing through, and you’ll be amazed at how vigorously they grow in their cozy straw bale home.
Common Mistakes That Ruin Straw Bale Gardens (And How to Avoid Them)
Even experienced gardeners can stumble when starting their first straw bale garden, but knowing these common pitfalls will save you time, money, and disappointment.
The biggest mistake? Using hay instead of straw. I’ve seen this countless times, and it’s an easy mix-up. Hay contains seeds that will sprout enthusiastically in your garden, turning your neat bale into a weedy mess. Straw, on the other hand, is just the hollow stems left after grain harvest—no seeds included. When you’re at the feed store, double-check you’re getting straw bales, not hay.
Under-watering during the conditioning phase is another garden-killer. Many beginners think a quick sprinkle will do the trick, but those bales need to be thoroughly soaked—we’re talking saturated all the way through. During the initial conditioning days, your bales should feel heavy and dripping wet. If the center stays dry, the decomposition process won’t happen, and your plants will suffer in uncomposted straw that can’t provide nutrients.
Impatience leads to the third major mistake: planting too early. I know it’s tempting to get those seedlings in as soon as possible, but if you plant before the bales cool down from their initial heat spike, you’ll literally cook your plants’ roots. Wait until you can comfortably hold your hand inside the bale without feeling excessive warmth—usually around day 12 or later.
Finally, choosing the wrong plants sets many gardeners up for failure. Deep-rooted vegetables like carrots and potatoes don’t thrive in the limited depth of a bale. Stick with shallow-rooted crops like lettuce, tomatoes, peppers, and herbs for your best success. During my conversation with master gardener Ellen Rodriguez, she emphasized that “working with the bale’s natural advantages, rather than against them, makes all the difference between a struggling garden and a thriving one.”
You’ve learned the essential steps for conditioning your straw bales, and while the process takes patience, the rewards are absolutely worth it. Remember, those two weeks of preparation aren’t just busy work—they’re transforming plain straw into a thriving growing medium that will support your plants throughout the season. Don’t rush the conditioning phase or skip any steps. Your bales need that time to break down internally and develop the nitrogen-rich environment where roots will flourish.
As master gardener Patricia Hendricks shared with us, “The biggest mistake new straw bale gardeners make is jumping ahead to planting too soon. Trust the process, and you’ll see amazing results.” With your properly conditioned bales ready, you’re set to enjoy bountiful harvests all season long. Take a deep breath, gather your supplies, and start conditioning those bales today—your future garden is waiting!