Transform those humble straw bales sitting in your yard into thriving vertical gardens that produce abundant vegetables without the backbreaking work of traditional soil gardening. Straw bale gardening ranks among the most innovative alternative gardening methods available today, perfect for gardeners dealing with poor soil, limited mobility, or even concrete patios.
The secret to success lies in proper conditioning. Before you plant a single seed, you’ll need to spend 10-14 days transforming those dry bales into nutrient-rich planting beds through a simple process of watering and fertilizing. This conditioning phase breaks down the straw’s interior, creating the warm, decomposing environment that vegetables absolutely love.
Once conditioned, your bales become elevated planting platforms that warm up faster in spring, drain perfectly to prevent root rot, and eliminate the need for tilling or weeding compacted ground. You’ll position plants directly into the softened straw, where they’ll flourish with proper watering and feeding throughout the growing season. Whether you’re a beginner looking for an easier entry into vegetable gardening or an experienced gardener seeking to extend your growing space, straw bale planting offers a straightforward path to homegrown harvests.
What Makes Straw Bales Different from Traditional Soil
If you’re coming from traditional soil gardening, straw bale gardening might feel like a completely different universe at first. The most striking difference is that you’re starting with something that looks nothing like soil, and that’s exactly the point.
Unlike garden soil that’s already packed with nutrients and beneficial microorganisms, a fresh straw bale is essentially just dried plant material. Think of it as raw material waiting to be transformed. This is why you can’t simply poke your seedlings into a bale and expect them to thrive. That straw needs to break down first, which is where the fascinating science comes in.
The conditioning process kickstarts decomposition inside the bale. When you add nitrogen fertilizer and water, you’re creating the perfect environment for beneficial bacteria to move in and start breaking down the straw’s tough cellulose fibers. This microbial party generates heat, sometimes reaching temperatures of 100 to 140 degrees Fahrenheit inside the bale. You might even notice steam rising on cool mornings during conditioning.
As decomposition progresses, the straw gradually transforms into a rich, compost-like material that plants absolutely love. The bacteria release nitrogen and other nutrients that become available to your plants. The bale’s structure also changes, becoming softer and more receptive to roots while still maintaining excellent drainage and aeration.
This transformation typically takes 10 to 14 days, which might seem like a long time when you’re eager to start planting. However, I’ve learned that patience here pays enormous dividends. A properly conditioned bale becomes an incredibly productive growing medium, often outperforming traditional garden beds because of its superior drainage, warmth, and nutrient availability throughout the growing season.
The 10-Day Conditioning Process (Your Bale’s Most Important Phase)
Days 1-3: Starting the Decomposition
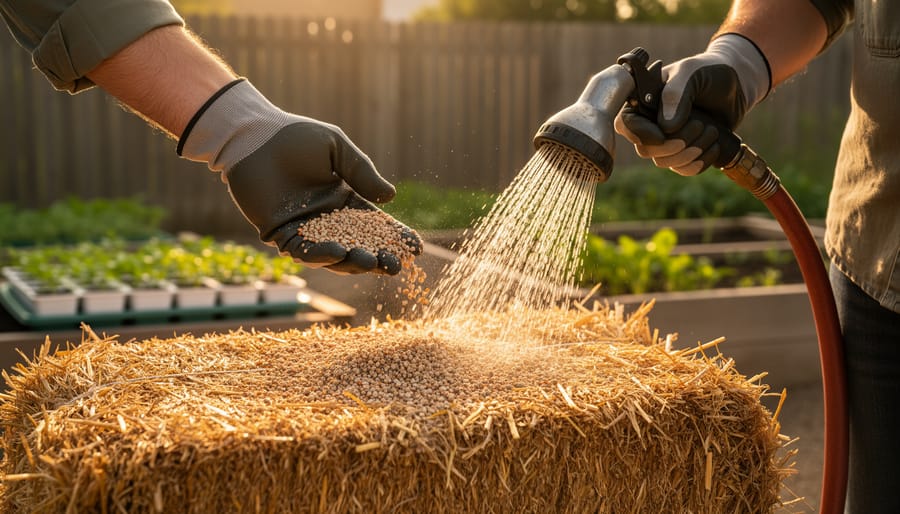
The first three days are all about giving your straw bales a wake-up call. Think of it as brewing a compost tea party right inside the bale! Start by thoroughly soaking each bale with water until it’s completely saturated. You’ll need about 5-10 gallons per bale, depending on how dry it is to begin with.
Once your bales are nicely drenched, sprinkle half a cup of high-nitrogen fertilizer evenly across the top of each bale. You can use organic options like blood meal or conventional lawn fertilizer with a high first number (like 29-0-0). Water again to wash that nitrogen down into the straw.
Repeat this process daily for three days straight. Yes, it seems like a lot of work, but you’re essentially feeding the microorganisms that will break down the straw and create that nutrient-rich growing environment your plants will love. The bales should feel warm to the touch as decomposition kicks in, which is exactly what you want to see happening!
Days 4-9: Feeding and Monitoring
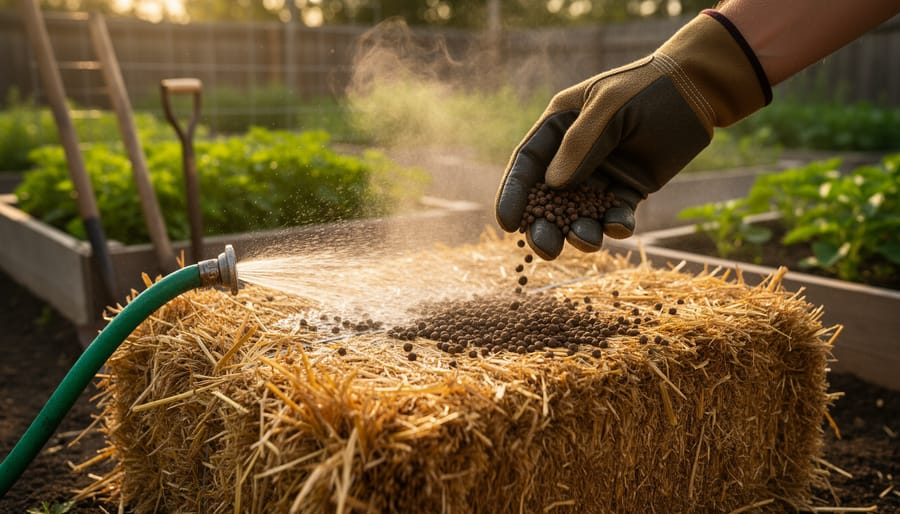
Now you’re in the rhythm! Continue feeding your bales every other day during Days 4-9, alternating between fertilizer and plain water. On Days 4, 6, and 8, apply half the amount of fertilizer you used earlier (just 1.5 cups per bale of organic or 0.25 cups of chemical). On Days 5, 7, and 9, give them a good soaking with water only.
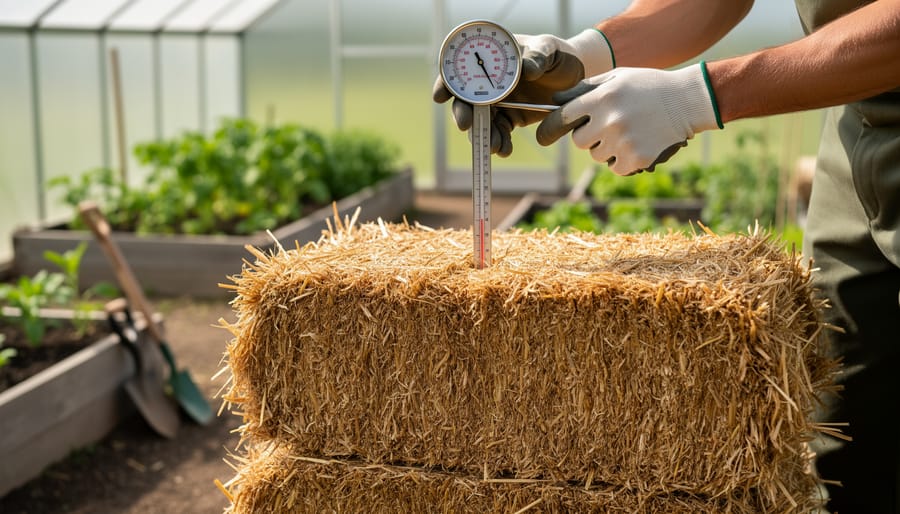
During this phase, you should notice the bales heating up significantly. Stick your hand deep into the center—it might feel almost hot! Temperatures between 100-140°F are perfectly normal and indicate that beneficial microbes are breaking down the straw. You’ll likely see the bales turning darker and feeling softer when you press them.
Here’s an encouraging sign: if your bales start developing a mushroom-like, earthy smell instead of that fresh hay scent, you’re on the right track. The straw should also begin to feel less prickly and more compressed. Some gardeners even notice steam rising from their bales on cool mornings!
Don’t worry if the process seems slow—every climate is different. Warmer weather speeds things up, while cooler temperatures mean your bales might need a few extra days. Just stay consistent with the feeding schedule, and trust the process.
Day 10: The Ready Test
After ten days of faithful conditioning, your straw bale should be ready for planting, but it’s worth taking a moment to verify. Think of this as your pre-planting inspection—a simple checkpoint that ensures your success.
Start with the temperature test. Thrust your hand several inches into the center of the bale. It should feel warm, not hot. If it’s still generating significant heat, give it another day or two. Hot bales can literally cook young plant roots, so patience here pays off.
Next, check the texture. The straw should feel softer and more pliable than when you started, beginning to break down but still holding its structure. If you squeeze a handful, it should feel damp like a wrung-out sponge—moist but not dripping.
Finally, look for visual cues. The interior straw often darkens slightly and may show early signs of decomposition. Some gardeners even notice a pleasant, earthy smell, similar to forest floor mulch.
If your bale passes these three checks, congratulations! You’ve successfully conditioned your straw bale and you’re ready to start planting.
Creating the Perfect Planting Pockets
For Seedlings and Transplants
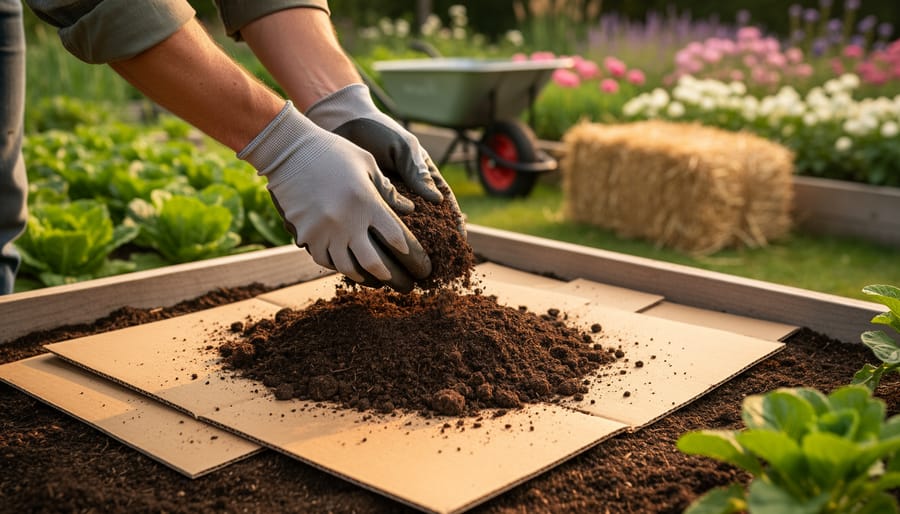
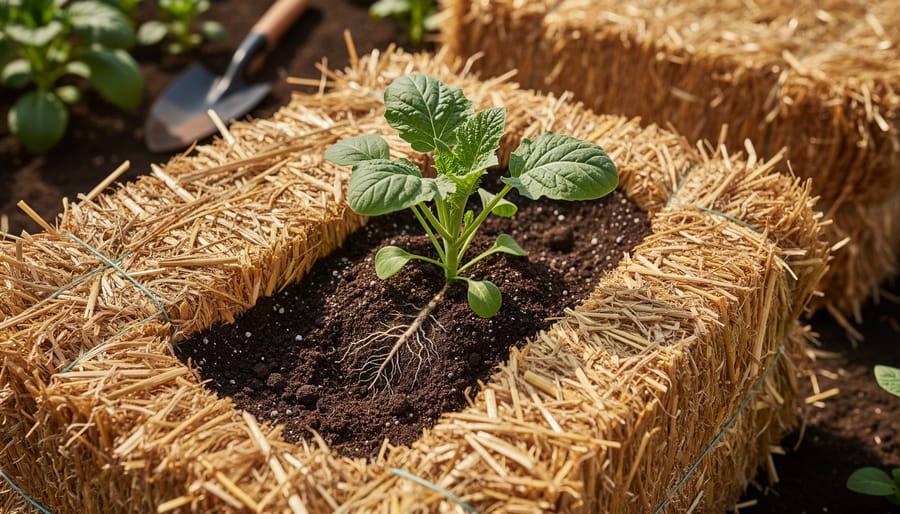
For transplanting seedlings or established plants, you’ll need to create individual pockets in your conditioned straw bale. Using a trowel or your hand, dig out a pocket about 4 to 6 inches deep and 3 to 4 inches wide. The key here is creating enough space for the root ball to settle comfortably without being cramped.
Fill each pocket with a good quality potting soil or compost. I learned this trick from Master Gardener Patricia Hughes during a workshop last spring: she recommends using about a quart of soil per transplant pocket. This gives your seedlings a nutrient-rich foundation while their roots gradually expand into the surrounding straw.
Gently remove your transplant from its container, being careful not to disturb the root ball too much. Place it in the prepared pocket so the plant sits at the same depth it was growing previously. Firm the soil around the base and water thoroughly. The surrounding straw will help retain moisture, but those first few days are critical. Check daily and keep the soil consistently moist as your transplant adjusts to its new home. Space transplants according to their mature size, keeping in mind that bale gardening often allows for slightly closer spacing than traditional gardens.
For Direct Seeding
If you’re starting from seeds rather than transplants, you’re in for a wonderfully rewarding experience! Direct seeding in straw bales is remarkably straightforward once your bales are properly conditioned.
Start by creating shallow troughs or indentations on the top surface of your bale. Use your hand or a small trowel to push down the straw, making a depression about 2-3 inches deep. Fill these troughs with a quality seed-starting mix or potting soil—this gives your seeds the fine-textured environment they need to germinate successfully. Don’t rely on the straw alone for seed starting, as seeds need consistent contact with soil particles.
Plant your seeds at the same depth you would in a traditional garden, following the packet instructions. As a general rule, plant seeds at a depth roughly twice their diameter. Smaller seeds like lettuce or carrots need just a light covering, while larger seeds like beans can go deeper.
Water gently but consistently to keep the soil moist without washing seeds away. A misting nozzle works beautifully here. Within days, you’ll see those first green shoots emerging, and you’ll be amazed at how vigorously they grow in the warm, nutrient-rich environment of your straw bale garden!
Positioning Your Bales for Maximum Growth
Finding the perfect spot for your straw bales can make all the difference in your harvest. Think of it as choosing real estate for your plants, where location truly matters.
Start with sun exposure, which is crucial for most vegetables. Position your bales where they’ll receive at least six to eight hours of direct sunlight daily. South-facing locations work wonderfully in most climates, though if you’re growing heat-sensitive crops like lettuce in warmer regions, a spot with afternoon shade can prevent bolting.
Here’s a detail many beginners miss: bale orientation. The strings should run along the sides of the bale, not across the top and bottom. This matters because you’ll be planting into the cut side where the straw stems create natural pockets for roots to penetrate. Planting into the smooth, compressed side makes it much harder for roots to establish.
Consider drainage carefully. While straw bales hold moisture beautifully, they shouldn’t sit in standing water. Place them on slightly elevated ground or ensure your chosen area drains well after heavy rains. I learned this the hard way when my first bales became waterlogged swamps after a spring downpour.
Don’t forget practical access. You’ll be watering, harvesting, and maintaining these bales regularly, so position them within comfortable reach of your water source. Leave enough space between bales to walk through easily. I recommend at least two feet between rows, which gives you room to maneuver without compacting soil or damaging plants. Creating a pleasant workspace makes gardening feel less like a chore and more like the joy it should be.
What to Plant (And What to Skip)
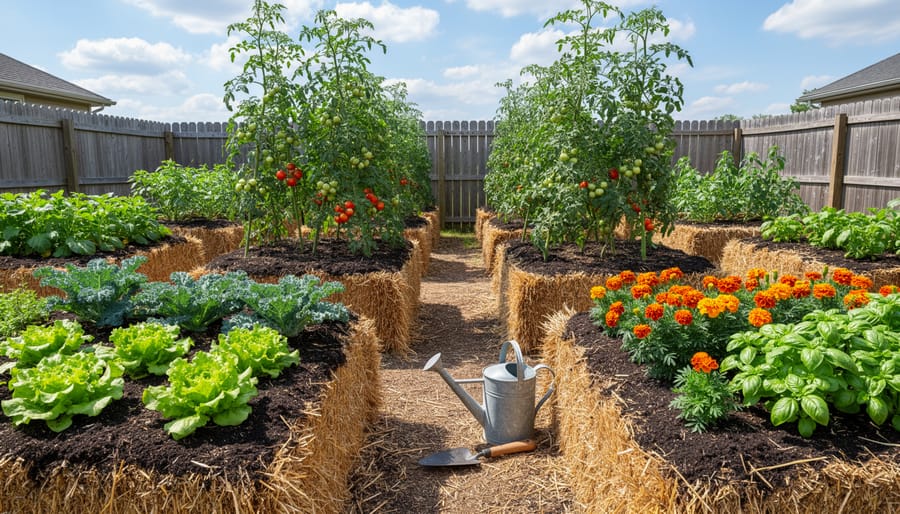
The beauty of straw bale gardening is that most vegetables absolutely love it! The warm, nutrient-rich environment is perfect for heat-loving crops. Tomatoes are superstars in straw bales, developing extensive root systems and producing abundant harvests. Peppers, cucumbers, squash, and zucchini flourish here too, with the elevation providing excellent drainage and air circulation. Root vegetables like potatoes and carrots can work surprisingly well if you create deep pockets for them to grow.
Leafy greens such as lettuce, spinach, and kale appreciate the loose structure, especially in spring and fall when the bales stay cooler. Many herbs thrive in straw bales, including basil, parsley, cilantro, and oregano. The warmth encourages robust growth and intense flavors. Flowers like marigolds, nasturtiums, and petunias add beauty while attracting beneficial pollinators.
However, some plants struggle in this environment. Perennials aren’t ideal since bales decompose within two years. Corn needs deeper root anchoring than bales provide, and large, heavy plants like Brussels sprouts may become top-heavy and unstable.
For companion planting success, try pairing tomatoes with basil and marigolds to deter pests naturally. Plant lettuce between larger plants to maximize space and provide shade during hot months. Nasturtiums cascading down the sides look gorgeous while repelling aphids.
One experienced gardener I spoke with swears by planting strawberries along the edges of her bales, letting them spill over the sides for easy picking and stunning visual appeal. She also tucks quick-growing radishes around slower vegetables to maximize her harvest before summer heat arrives.
The key is choosing plants that appreciate warmth, good drainage, and don’t require years of establishment. Experiment and have fun discovering what works best in your climate!
Troubleshooting Common Planting Mistakes
Don’t worry if your first straw bale garden doesn’t go perfectly—most of us learn through trial and error! Let’s walk through the most common hiccups and how to fix them.
If your plants aren’t establishing well, the bale likely needs more conditioning time. A common mistake is planting too early, before the internal temperature drops below 100°F. Feel the bale’s center with your hand—if it’s still warm, wait another few days. You can transplant seedlings into a better-conditioned bale if needed, though they’ll experience some stress.
Bales drying out too quickly is one of the most frequent watering issues you’ll face. During hot summer months, check moisture levels twice daily by sticking your finger deep into the bale. If the top three inches feel dry, water thoroughly. Adding a layer of compost on top acts like a moisture-retaining blanket and reduces evaporation significantly.
Over-fertilization shows up as burnt leaf edges or stunted growth. If you spot these symptoms, flush the bale by watering heavily for several consecutive days to wash out excess nutrients. Then resume a gentler feeding schedule, cutting your fertilizer amount in half.
Started too early in the season and your seedlings got frost-nipped? Cut them back to healthy growth and they’ll often rebound beautifully. The beauty of straw bale gardening is its forgiving nature—the decomposing straw creates such a nutrient-rich environment that plants recover remarkably well from early setbacks.
You’ve now got all the tools you need to grow a thriving straw bale garden! Remember, the key steps are conditioning your bales properly, choosing the right plants, and maintaining consistent moisture. Don’t worry if your first attempt isn’t perfect—like any gardening method, straw bale planting gets easier with each season. Many gardeners find their second year much smoother than their first. Have you tried straw bale gardening yet? We’d love to hear about your successes, challenges, or any questions you might have. Your experiences could help fellow gardeners on their journey!