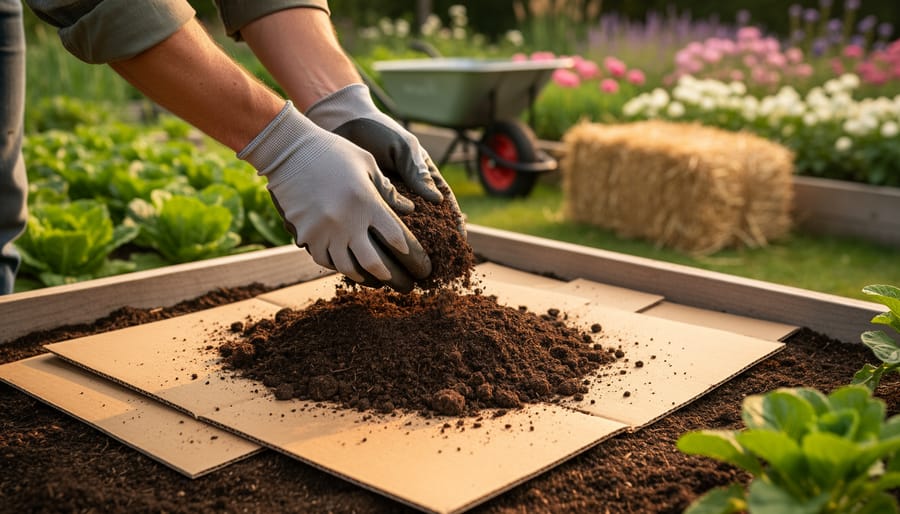
Choose potting mix specifically labeled for containers—never garden soil, which compacts and suffocates roots in pots. The difference between thriving tomatoes and disappointing harvests often comes down to this single decision. Regular dirt from your yard, no matter how rich, lacks the drainage and aeration that container plants desperately need.
Mix your own superior blend using equal parts peat moss (or coconut coir), perlite, and quality compost. This combination creates the perfect balance: the organic matter retains moisture and nutrients, while perlite ensures excess water drains away before roots rot. I’ve watched countless gardeners transform their container gardens simply by switching from heavy, water-logged soil to this lighter formula.
Test your soil’s drainage by watering thoroughly—if puddles sit on the surface for more than a few seconds, your mix is too dense. Container plants need soil that stays moist but never soggy, a critical distinction that makes or breaks your success.
Add slow-release fertilizer at planting time because container soil depletes nutrients faster than ground gardens. Your plants are entirely dependent on what you provide in that limited space, unlike in-ground plants that can extend roots to find nutrients.
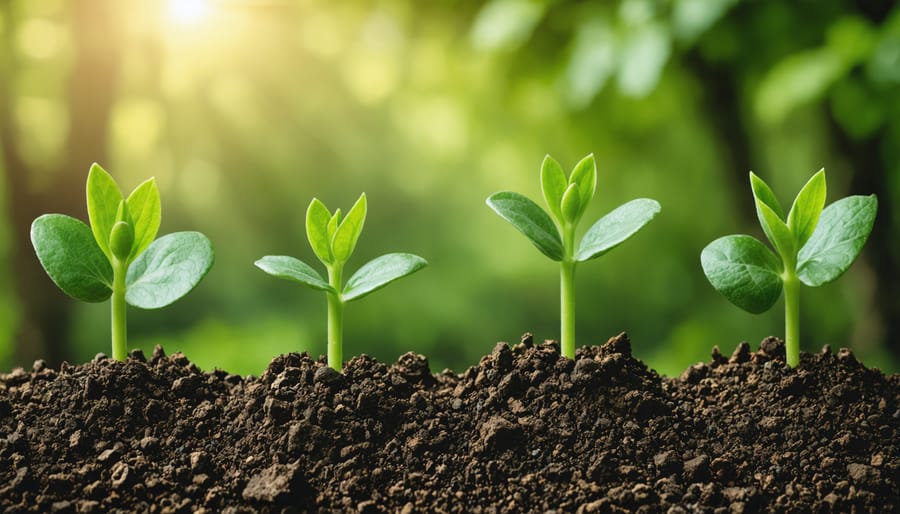
Whether you’re just starting out with container gardening basics or troubleshooting existing problems, understanding soil requirements sets the foundation for everything else. The right growing medium transforms containers from frustrating failures into abundant, productive gardens that reward your efforts throughout the season.
Why Garden Soil Fails in Containers
I learned this lesson the hard way when I excitedly filled my first balcony containers with rich garden soil from my yard. Within weeks, my tomatoes looked miserable, and I couldn’t figure out why. Here’s what I wish I’d known from the start.
Garden soil behaves completely differently in containers than it does in the ground. Think of it like this: in-ground soil is part of a vast ecosystem with natural drainage pathways, earthworm activity, and room for roots to spread. But when you scoop that same soil into a pot, you’ve essentially trapped it in a confined space where the rules change dramatically.
The biggest culprit is drainage. Garden soil contains clay particles that cling together tightly. In the ground, gravity pulls excess water down through feet of soil profile. In a container, water has nowhere to go except those few drainage holes at the bottom. The soil compacts under its own weight, creating a dense, waterlogged mass that blocks oxygen from reaching roots. It’s like trying to breathe through a wet towel—your plants literally suffocate.
I’ve also discovered that garden soil is surprisingly heavy when wet, making containers difficult to move and potentially causing structural issues on balconies or decks. Plus, outdoor soil often harbors weed seeds, diseases, and pests that you definitely don’t want concentrated in your pots.
The solution isn’t just adding better drainage holes or watering less frequently. You need fundamentally different growing media designed specifically for container gardening solutions. These specialized mixes create the light, airy environment container plants desperately need to thrive, transforming frustrating failures into flourishing success stories.
The Three Must-Have Ingredients for Container Success
Drainage Champions: Keeping Roots Happy
Think of drainage materials as the unsung heroes of your container garden—they create those crucial air pockets that keep roots breathing and prevent the dreaded waterlogged soil.
Perlite, those little white volcanic rocks you’ve probably noticed in commercial mixes, is my go-to drainage champion. It’s lightweight, inexpensive, and creates fantastic air spaces. I typically add about 10-20% perlite to my container mixes.
Coarse sand (not beach sand!) works wonderfully too, though it adds weight—perfect if you need stability for tall plants. Pumice is another excellent option, similar to perlite but more sustainable since it doesn’t require mining processing.
For a natural touch, I love using pine bark fines. They provide drainage while slowly breaking down to add organic matter. Master gardener Susan Chen from Portland Botanical Gardens shared with me that she uses a combination: “I blend perlite for immediate drainage with bark fines for long-term structure. It’s the best of both worlds.”
Remember, good drainage isn’t about making soil dry—it’s about preventing water from suffocating roots while keeping moisture available.
Moisture Managers: The Goldilocks Balance
Just like Goldilocks searching for the perfect porridge, your container plants need soil that’s neither too wet nor too dry—it needs to be just right! This is where moisture-retaining components become your secret weapon.
Coco coir is my personal favorite moisture manager. Made from coconut husks, it holds water beautifully while maintaining good drainage. I remember switching to coco coir-enriched mixes and watching my impatiens finally thrive during hot summers without constant watering.
Peat moss is another excellent water-holder, though I prefer coco coir for sustainability reasons. Vermiculite, those shiny gold flakes you’ll spot in potting mixes, acts like tiny sponges, absorbing water and slowly releasing it to roots.
Master gardener Susan Chen shared with me that she combines these moisture managers in a 2:1 ratio with perlite. “The goal,” she explains, “is creating tiny reservoirs throughout your soil that plants can tap into between waterings.”
For containers in full sun or windy spots, boost your moisture-retaining components slightly. Your plants will thank you with consistent, healthy growth!
Nutrient Boosters: Feeding Your Plants
Think of soil amendments as your plants’ long-term meal plan. While potting mix provides the foundation, organic matter keeps feeding your containers throughout the growing season.
**Compost** is the superstar here—it improves soil structure while slowly releasing nutrients. Mix in about 20-30% mature compost when filling containers, and your plants will thank you with vigorous growth. I always add an extra handful to heavy feeders like tomatoes.
**Worm castings** are another favorite amendment. They’re packed with beneficial microbes and nutrients in forms plants can easily absorb. Just a few tablespoons per gallon of soil makes a noticeable difference.
For sustained nutrition, consider adding **slow-release organic fertilizers** like bone meal (phosphorus), blood meal (nitrogen), or kelp meal (trace minerals) to your mix. These break down gradually, providing steady nourishment for weeks.
Renowned gardener Margaret Roach recommends refreshing container soil annually: “Remove the top few inches, add fresh compost and amendments, and you’re set for another season.” This simple practice keeps your containers productive year after year without completely replacing the soil.
Store-Bought vs. DIY: Which Path Should You Take?
Let me tell you a secret: there’s no wrong answer here! Both store-bought and DIY container soil have their champions, and I’ve seen gorgeous gardens thrive with each approach.
**Store-bought pre-mixed soil** is your friend when convenience matters most. It’s ready to go, requires zero mixing, and quality brands have already balanced the ingredients for you. For beginners or anyone with just a few containers, purchasing pre-mixed soil makes perfect sense. You’re not buying enormous bags of individual components that might sit unused for years. Plus, reputable brands conduct quality testing that’s hard to replicate at home. The trade-off? Cost adds up quickly when you’re filling multiple large containers, and you have less control over specific ingredient ratios.
**DIY mixing** becomes increasingly appealing as your container collection grows. I spoke with master gardener Elena Rodriguez, who manages over 40 containers on her urban balcony. “Once I started mixing my own soil, I saved about 60% compared to buying premium mixes,” she shared. “But the real benefit is customization—I adjust recipes for my thirsty tomatoes versus my drought-loving succulents.”
Making your own soil requires storage space for ingredients and some initial investment, but it offers tremendous flexibility. You can source organic components, adjust drainage for specific plants, and create larger batches economically. If you’re already making a raised bed soil recipe, transitioning to DIY container mixes feels natural.
**My recommendation?** Start with quality store-bought mixes to understand what good container soil feels like. Once you’re comfortable, experiment with DIY batches. Many successful gardeners use both—store-bought for quick projects and DIY for their main container gardens. You’ll discover your perfect balance based on budget, time, and gardening scale.
Reading the Bag: How to Choose Quality Potting Mix
Walking down the garden center aisle, staring at rows of colorful bags promising lush growth can feel overwhelming. But once you know what to look for, choosing quality potting mix becomes surprisingly straightforward—and honestly, a bit empowering!
Start by flipping that bag around and examining the ingredient list. Quality mixes typically list specific components like peat moss or coconut coir, perlite, vermiculite, and compost. If you see vague terms like “forest products” or “other organic materials,” that’s your first red flag. Transparency matters! The best manufacturers aren’t shy about telling you exactly what’s inside.
Look for mixes that mention being “soilless” or “peat-based” for containers. Remember, garden soil in bags is not the same as potting mix—it’s too heavy for containers and will compact over time. I learned this the hard way with a balcony full of struggling tomatoes years ago!
Check for certification seals from organizations like the Mulch and Soil Council or OMRI (Organic Materials Review Institute) if you prefer organic options. These indicate the product has been tested and meets quality standards.
Weight can be telling too. Pick up a few bags—if one feels unusually heavy and dense, it likely contains too much actual soil or sand, which isn’t ideal for containers. Quality potting mix should feel relatively light and fluffy.
Pay attention to moisture level as well. The mix should be slightly damp, not bone dry or dripping wet. Extremely dry mix can be difficult to rewet initially, while overly wet bags might harbor mold.
Finally, trusted brands like Espoma, FoxFarm, Pro-Mix, and Black Gold have earned their reputations through consistent quality, though regional brands can be excellent too.
My Proven Recipe for DIY Container Soil
After years of trial and error (and a few plant casualties I’d rather not discuss), I’ve settled on a container mix that’s never let me down. I’m excited to share it with you because it’s genuinely foolproof and won’t break the bank.
Here’s my go-to recipe that works beautifully for most container plants:
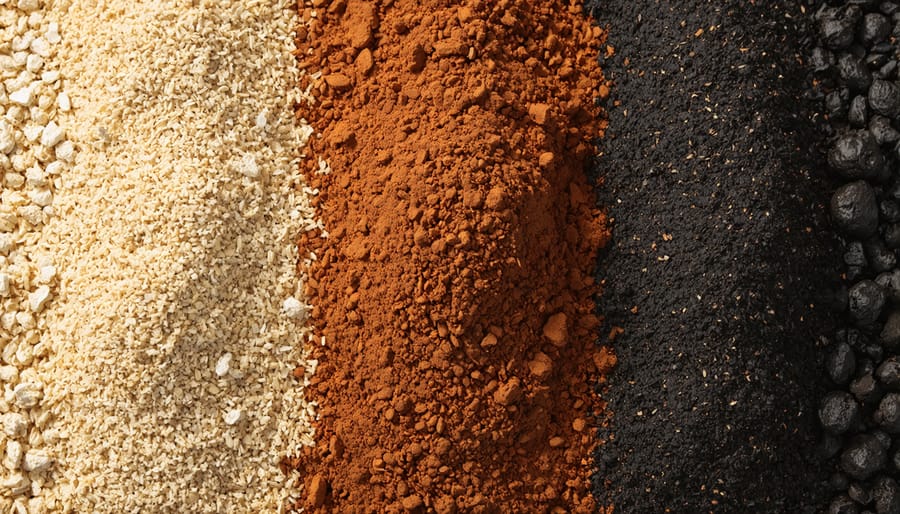
**The Magic Ratio:**
– 40% high-quality peat moss or coco coir
– 30% compost (homemade or bagged)
– 20% perlite or coarse vermiculite
– 10% worm castings (trust me on this one!)
**Where to Find These Ingredients Affordably:**
I buy my peat moss or coco coir in compressed blocks from big-box stores—they expand dramatically, so you get more bang for your buck. For compost, I use my own backyard compost when possible, but Coast of Maine or Black Gold bagged compost are solid alternatives. Perlite comes cheapest in large bags from hydroponic supply stores or online. Worm castings might seem like a splurge, but a small bag lasts ages since you only need a little.
**Mixing Made Easy:**
I mix mine in a wheelbarrow or large plastic storage bin. Start by breaking up any compressed materials, then layer everything in roughly. Use a garden trowel or your hands (wear gloves!) to blend thoroughly—I find the physical mixing therapeutic! The goal is a uniform texture with no clumps.
**Pro Tips for Batch Preparation:**
I always make extra and store it in sealed containers or heavy-duty trash bags. This mix stays fresh for months if kept dry. When I’m mixing large batches for my entire patio garden, I do it on a tarp in the driveway, which makes cleanup a breeze.
One game-changing tip: slightly moisten your mix before filling containers. Dry ingredients can be dusty and actually repel water initially, so a light pre-dampening helps everything settle properly.
Matching Soil to Your Plants’ Personalities
Think of your base potting mix as a little black dress—perfect on its own, but even better when accessorized for the occasion! The beauty of container gardening is that you don’t need entirely different soil recipes for every plant. A few simple tweaks to your base mix will keep all your green friends happy.
**For succulents and cacti**, these desert dwellers need extra drainage to prevent root rot. Add one part coarse sand or perlite to every two parts of your base mix. This creates those air pockets they crave and mimics their natural rocky habitat. Think of it as giving them the well-draining home they’d choose themselves!
**Vegetables** are the hungry athletes of the garden world. They’ll thrive in your standard base mix, but boost it with an extra handful of compost or worm castings per container. This provides the nutrients they need for producing those delicious harvests. Feed them monthly during the growing season, and they’ll reward you generously.
When growing herbs in containers, most Mediterranean varieties like basil, rosemary, and thyme prefer slightly drier conditions. Use your base mix as-is, or add a handful of perlite for extra drainage. These aromatic beauties appreciate good air circulation around their roots.
**Annual flowers** are typically content with your standard base recipe—it’s already designed with their needs in mind! For heavy feeders like petunias or geraniums, just add a slow-release fertilizer at planting time.
**Moisture-loving plants** like ferns, impatiens, or hydrangeas need the opposite approach. Mix in extra coconut coir or peat moss (about 20% more than your base recipe) to help retain moisture longer between waterings. These thirsty friends will thank you for the extra drink!
Common Soil Mistakes That Sabotage Your Containers
We’ve all been there—eagerly filling containers with whatever soil is handy, only to watch our plants struggle. The good news? These common mistakes are easy to fix once you know what to look for.
**Using garden soil straight from the ground** is probably the most frequent misstep. Garden soil becomes rock-hard in containers, suffocating roots and preventing proper drainage. The solution is simple: stick with potting mixes designed specifically for containers, which stay fluffy and allow air circulation.
**Over-fertilizing** can burn roots and create more harm than good. Container plants do need nutrients, but start with half the recommended dose and observe how your plants respond. They’ll tell you if they need more through their growth patterns.
**Ignoring drainage** leads to waterlogged, unhappy plants. Always ensure your containers have drainage holes, and add a layer of pebbles at the bottom if you’re concerned about soil washing through large openings.
**Reusing old potting soil** without refreshing it depletes nutrients and may harbor diseases. You can absolutely reuse soil—just mix in fresh compost, remove dead roots, and consider sterilizing it in the sun for a few days.
**Packing soil too tightly** seems logical but actually prevents water from penetrating and roots from spreading. Instead, fill containers loosely, allowing the soil to settle naturally with watering. Your plants will thank you with vigorous, healthy growth!
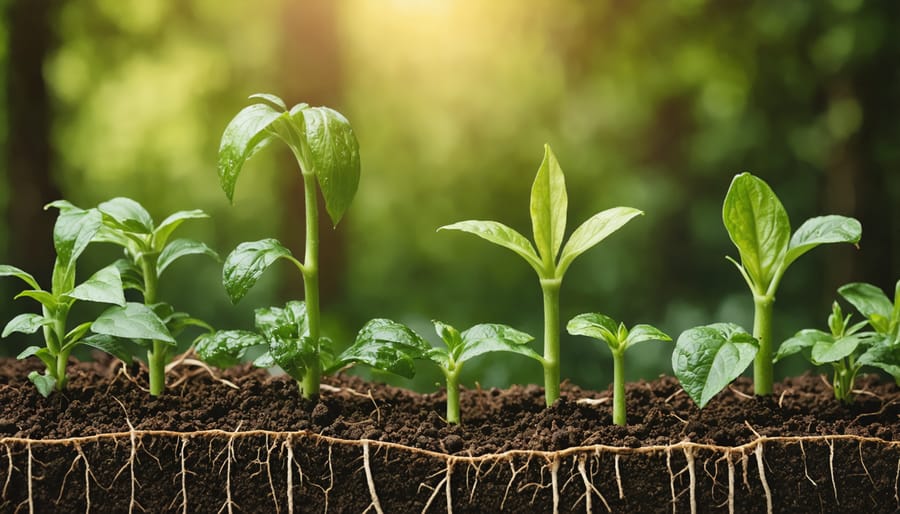
Keeping Your Container Soil Alive Year After Year
Think of your container soil as a living community rather than just dirt in a pot. Just like any ecosystem, it needs regular care to stay vibrant and productive season after season.
I learned this lesson the hard way when my once-thriving tomato containers started producing lackluster results. Master gardener Sarah Chen explained it perfectly during our interview: “Container soil is like a sponge that’s been wrung out – after one growing season, it’s compacted, depleted of nutrients, and often exhausted.”
**Recognizing Depleted Soil**
Your soil is crying out for help when you notice water pooling on the surface instead of absorbing, roots circling densely at the bottom, or plants showing poor growth despite adequate feeding. The soil might also pull away from container edges or feel heavy and dense rather than fluffy.
**Revitalizing Between Seasons**
Here’s the good news: you don’t always need to completely replace your soil. After harvesting, remove old roots and debris, then fluff the soil with a garden fork. Mix in fresh compost (about one-third of the volume) and a handful of worm castings to reintroduce beneficial microorganisms. This “refreshing” works beautifully for two to three seasons.
**When to Replace Completely**
After three years, or if you’ve dealt with disease issues, it’s time for fresh soil. But don’t toss that old mix! Spread it around perennial beds, add it to compost piles, or use it as a base layer in new raised beds. This sustainable approach keeps your garden’s ecosystem thriving while reducing waste.
You’ve now got everything you need to create thriving container gardens that’ll bring joy all season long! Remember, choosing the right soil isn’t just another gardening task—it’s the foundation that makes everything else possible. When you invest in quality potting mix or take the time to blend your own custom recipe, you’re setting your plants up for success from day one.
I’ve seen countless gardeners transform their spaces, from small balconies to sprawling patios, simply by understanding what their container soil needs to do. The beauty is that once you get the soil right, the rest becomes so much easier. Your plants will reward you with vibrant blooms, abundant harvests, and lush foliage that makes your neighbors wonder what your secret is.
Don’t let uncertainty hold you back from starting a container garden. Armed with the knowledge you’ve gained here, you’re ready to select or create the perfect soil mix for your plants. Start small if you’d like—maybe just a few containers—and watch as your confidence grows along with your garden. Your container gardening success story begins with that first scoop of quality soil!