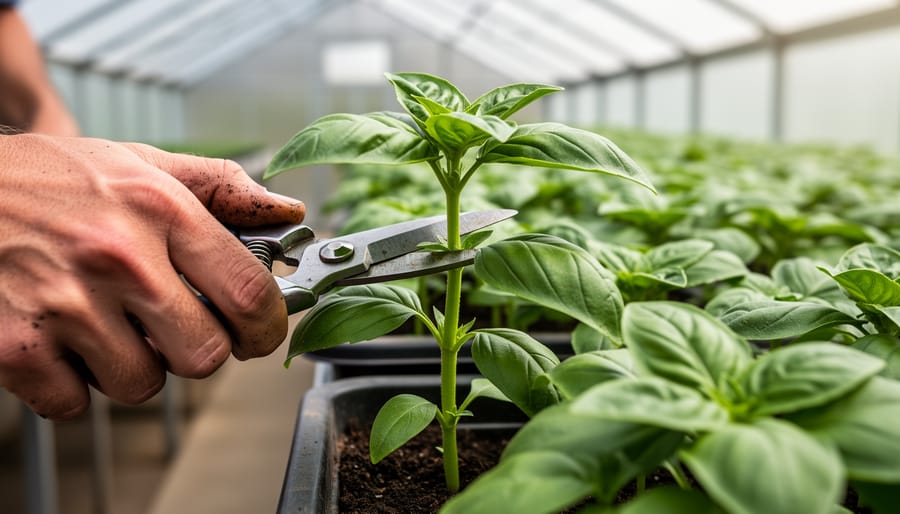
Separate seeds from their surrounding plant material within days of harvesting to prevent mold, maintain germination rates, and ensure your carefully grown seeds remain viable for next season’s planting. The process you choose depends entirely on how nature packages your seeds: tomatoes, cucumbers, and squash produce seeds embedded in wet flesh that requires fermentation or washing, while beans, lettuce, and marigolds develop dry seed heads or pods that need only crushing, rubbing, or shaking to release their contents.
Master dry processing first by collecting seed heads in paper bags once they’ve turned brown and brittle on the plant, then gently crush or rub them over a clean bowl to separate seeds from chaff. Use screens, shallow trays, or even your breath to winnow away the lightweight debris, leaving clean seeds ready for storage. For wet processing, scoop seeds and pulp into a jar with water, let the mixture ferment for two to three days until a layer of mold appears, then rinse thoroughly and spread seeds on paper plates or screens to dry completely for one to two weeks.
Test your processing success by checking seed dryness with the snap test: properly processed seeds should break rather than bend when you fold them. This final quality check confirms you’ve removed enough moisture to prevent storage issues and guarantees your seeds will remain healthy and ready to grow when spring arrives.
What Seed Processing Actually Means for Home Gardeners
If you’ve ever felt confused by the term “seed processing,” you’re not alone! When I first started saving seeds, I thought processing meant something complicated involving lab equipment and precision instruments. The reality is wonderfully simple: processing is just everything you do between picking your seeds and tucking them away for storage.
Think of it as preparing your seeds for their long winter nap. When you harvest a tomato or let a lettuce plant go to seed, those seeds aren’t quite ready to store yet. They might be surrounded by pulp, still attached to seed heads, or carrying excess moisture that could invite mold. Processing removes these barriers and gets your seeds clean, dry, and shelf-stable.
Why does this matter? Improperly processed seeds can lose viability quickly. A tomato seed left in its gel coating might rot before spring. Bean seeds stored with too much moisture can develop mold or fail to germinate. But when you process them correctly, you’re essentially hitting the pause button on their lifecycle, preserving their ability to sprout when you’re ready to plant them.
Here’s the encouraging news: you don’t need fancy equipment to achieve professional-level results. I’ve successfully processed hundreds of seed varieties using nothing more than bowls, sieves, paper towels, and patience. A local seed saver I interviewed recently shared that her most reliable tool is an old colander from her grandmother’s kitchen.
The key is understanding which processing method works for which seeds, and we’ll walk through those specific techniques together. With just a bit of knowledge and everyday household items, you’ll be processing seeds like a pro.
The Critical Window: Timing Your Seed Processing Right
Timing can make or break your seed saving efforts, friends! The window between harvest and processing is surprisingly short for many seeds, and getting this right ensures your seeds remain viable and healthy for seasons to come.
Just as seed harvesting timing matters, processing shouldn’t wait too long either. Most dry seeds like beans, lettuce, and flowers should be processed within a week of harvest to prevent mold and pest damage. Wet-processed seeds from tomatoes, cucumbers, and squash need attention within 24-48 hours to avoid fermentation problems or sprouting inside the fruit.
Watch for these warning signs that scream “process me now”: any visible mold growth, musty odors, or condensation inside storage containers. These indicate your seeds are in danger and need immediate attention.
Weather plays a huge role in your timeline. High humidity extends drying time and increases mold risk, so processing during dry, sunny periods is ideal. I learned this lesson the hard way one muggy August when my carefully harvested zinnia seeds developed mold overnight because I delayed processing.
Temperature matters too. Seeds stored above 70 degrees before processing can lose viability quickly. If you can’t process immediately, keep seeds in a cool, dry location and check them daily. Think of this window as a race against nature, where quick action preserves all your hard work in the garden.
Dry Processing: The Simple Method Most Seeds Need
Which Seeds Use Dry Processing
Most seeds you’ll encounter in your garden follow the dry processing method, making them wonderfully straightforward to save! These are the seeds that naturally dry out while still on the plant, requiring minimal intervention on your part.
Beans and peas are classic examples—simply leave the pods on the plant until they turn brown and papery. You’ll hear the seeds rattling inside when they’re ready. Lettuce, sunflowers, and marigolds produce seeds that dry naturally at the top of their stems, perfect for harvesting flower seeds on a sunny afternoon.
Herbs like basil, cilantro, and dill develop seed heads that dry beautifully on the plant. Just watch for that telltale color change from green to brown. Root vegetables including carrots, beets, and radishes (when allowed to bolt) produce umbrella-shaped flower clusters that eventually form dry seed heads.
Brassicas such as broccoli, kale, and cabbage create long seed pods called siliques that crack open when ready. Even members of the squash family, though their fruits are wet, produce seeds that simply need cleaning and air-drying to be viable for next season.
Step-by-Step Dry Processing Technique
Let’s walk through dry processing together—it’s easier than you might think! This method works beautifully for seeds that naturally dry on the plant, like beans, lettuce, sunflowers, and most herbs.
Start by gathering your harvested seed heads, pods, or capsules on a clean, dry day. I like to work on a large tray or a clean bedsheet spread on my kitchen table—it makes cleanup a breeze and keeps those tiny seeds from rolling away.
First, you’ll need to separate the seeds from their housings. For pods like beans or peas, simply open them and let the seeds tumble out. It’s satisfying work, and you can often do it while catching up on your favorite podcast. For seed heads like those from zinnias or marigolds, gently rub them between your palms over your collection tray. The seeds should release fairly easily. If they’re stubborn, they might need a bit more drying time.
Here’s a trick I learned from an experienced seed saver: place particularly tough seed heads in a paper bag and give them a gentle shake. The seeds often separate without the tedious hand-rubbing.
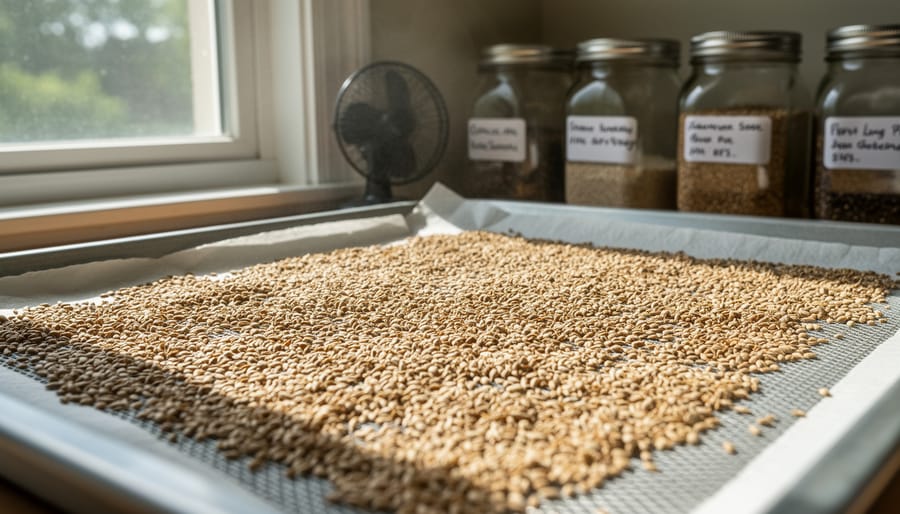
Once you’ve extracted the seeds, spread them in a single layer on screens, paper plates, or newspaper. Avoid using paper towels—trust me, seeds love to stick to them! Place them in a warm, dry location with good air circulation but away from direct sunlight. A spare bedroom or covered porch works wonderfully.
Let them dry for one to three weeks, stirring them every few days to ensure even drying. You’ll know they’re ready when they feel completely hard and brittle. Try bending a bean—if it snaps cleanly rather than bending, you’re good to go. Seeds should also bounce when dropped on a hard surface rather than making a dull thud.
Wet Processing: Handling Seeds from Fleshy Fruits
When and Why Wet Processing Is Essential
Wet processing is essential for seeds that develop inside fleshy fruits—think tomatoes, cucumbers, melons, and squash. These seeds are coated in a gel-like substance that contains natural germination inhibitors, which prevent the seeds from sprouting while still inside the fruit. Pretty clever, right? Nature designed this protective coating to stop seeds from germinating prematurely in conditions that might not support healthy seedlings.
By fermenting these seeds in water, you’re mimicking what happens in nature when overripe fruits decompose. The fermentation process breaks down that gelatinous coating and eliminates disease organisms that might cling to the seed surface, improving your heirloom seed quality for years to come. Without this step, seeds may germinate poorly or not at all—even if they look perfectly healthy.
The good news? Wet processing isn’t complicated or time-consuming. It simply requires a few days of patience while the fermentation works its magic. Most gardeners find the process surprisingly satisfying, watching the transformation as seeds separate from pulp and settle to the bottom of their container, ready for the next chapter in their seed-saving journey.
The Fermentation Method That Improves Germination
Fermenting tomato and cucumber seeds might sound a bit unusual at first, but it’s actually nature’s way of preparing seeds for successful germination. This method mimics what happens when fruits rot naturally on the ground, breaking down the gel coating around seeds that can inhibit sprouting.
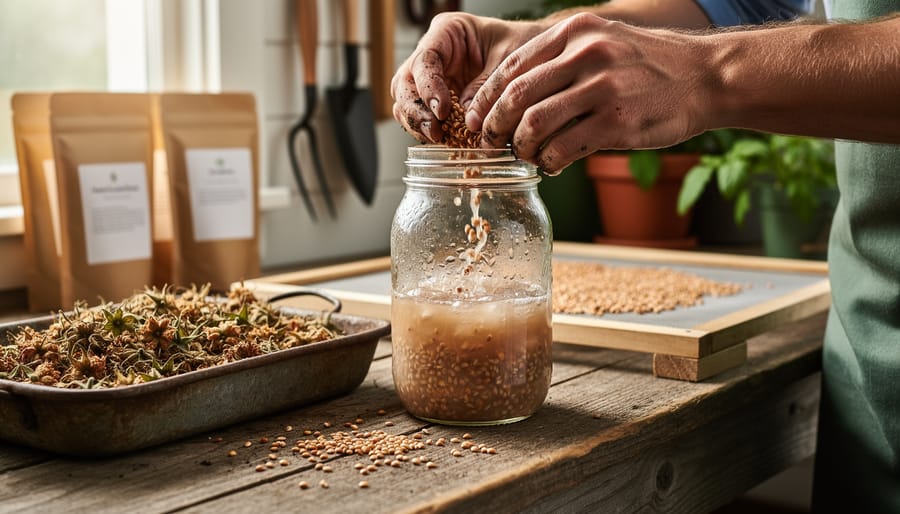
Here’s how to do it: After scooping out your tomato or cucumber seeds with their surrounding pulp, place everything in a jar with a small amount of water. Label the jar (trust me, after a few days you won’t want to guess what’s fermenting!), and set it in a warm spot out of direct sunlight.
Day one looks pretty normal, but by day two or three, you’ll notice a layer of mold forming on top—don’t panic, this is exactly what should happen. The mixture will develop a distinct fermented smell, which tells you the gel coating is breaking down. For tomatoes, this usually takes three to four days; cucumbers ferment a bit faster, typically within two to three days.
The key is watching for mold without letting seeds actually sprout. Once you see that white or grayish film covering the surface, it’s time to stop. Pour off the mold and floating debris, then rinse the seeds thoroughly in a fine-mesh strainer under running water. The good, viable seeds will sink to the bottom during this process.
Spread your clean seeds on a plate or screen to dry completely before storing. This fermentation process not only removes germination inhibitors but also helps eliminate seed-borne diseases, giving your future plants the healthiest possible start.
Simple Water Separation for Other Fleshy Fruits
Good news for those of you saving seeds from squash, melons, and cucumbers—these fleshy fruits don’t need the fermentation process! The wash-and-rinse method is wonderfully straightforward and much faster than dealing with tomatoes.
Start by scooping the seeds and pulp into a large bowl or bucket. Add plenty of water and give everything a good swish with your hands. The viable seeds will sink to the bottom, while the pulp and hollow seeds float to the top. Simply pour off the floating debris, add fresh water, and repeat until only clean seeds remain at the bottom. This usually takes three to five rinses.
I remember the first time I processed my grandmother’s heirloom butternut squash seeds—I was amazed at how easily the gel coating released with just water. No waiting, no fermenting smell, just quick and clean separation.
Once your seeds are thoroughly rinsed, spread them on a screen or non-stick surface to dry. Make sure they’re in a single layer with good air circulation. Within a week or two, depending on humidity, they’ll be ready for storage. It’s really that simple!
Removing Chaff and Debris: Getting Seeds Garden-Ready
Once you’ve dried your seeds thoroughly, it’s time for one of my favorite parts of seed processing—separating the good stuff from the chaff! This step might sound tedious, but trust me, it’s oddly satisfying and doesn’t require any fancy equipment. Let’s explore some practical methods using items you probably already have at home.
The winnowing method works beautifully for larger seeds and dried plant material. Simply place your dried seeds in a shallow bowl or basket and head outside on a breezy day. Gently toss the seeds upward, allowing the wind to carry away the lighter chaff while the heavier seeds fall back into your container. No wind? No problem! Position yourself in front of a box fan set on low, and pour the seed mixture slowly from one bowl to another, letting the fan blow away the debris. You’ll want to experiment with the distance from the fan to find that sweet spot where chaff blows away but seeds don’t.
For smaller seeds, screens become your best friend. Kitchen strainers, window screen material, or even old mesh produce bags work wonderfully. The trick is using different mesh sizes—larger holes let small seeds through while catching big debris, and finer mesh catches seeds while letting dust fall through. I like to stack different screens and shake them gently, watching the seeds separate like magic.
Here’s a technique I learned from veteran seed saver Margaret Torres: the water float test doubles as a cleaning method. Fill a bowl with water and add your seeds. Viable seeds typically sink while lightweight chaff and damaged seeds float to the surface. Skim off the floaters, then drain and dry the good seeds immediately on paper towels. This method works especially well for beans and larger seeds, giving you clean, high-quality results ready for storage.
The Drying Stage: Where Many Seed Savers Go Wrong
Here’s what I’ve learned the hard way: perfectly cleaned seeds can still fail if you don’t dry them properly. I once lost an entire batch of beautiful heirloom tomato seeds to mold because I rushed this stage. Don’t make my mistake!
The goal is simple but crucial: reduce seed moisture to 6-8% for safe storage. Too wet, and you’ll invite mold, fungus, and premature sprouting. Too dry in a hot environment, and you risk damaging seed viability.
Start by spreading your seeds in a single layer on screens, paper plates, or coffee filters. Avoid paper towels—seeds stick to them stubbornly! Place them in a warm, dry location with good air circulation. I use the top of my refrigerator, but a spare bedroom or covered porch works beautifully. Direct sunlight can overheat seeds, so choose shaded spots.
Most seeds need one to two weeks of drying time, though this varies by type and humidity. Larger seeds like beans dry faster than tiny tomato or pepper seeds. Stir them daily to ensure even drying and prevent clumping.
Here’s my favorite testing method: the snap test. Bend a seed between your fingernails. If it snaps cleanly, it’s ready. If it bends or dents, give it more time. For smaller seeds that are hard to test individually, try biting one gently. It should feel hard and crunchy, not soft or chewy.
Watch for these warning signs: clumping seeds indicate too much moisture, while a musty smell means mold is developing. If you spot either, spread seeds more thinly and increase air circulation immediately.
During humid weather, consider using a fan nearby or bringing seeds indoors. Avoid artificial heat sources like ovens or dehydrators set above 95°F—high temperatures can kill seeds faster than moisture can.
Once properly dried, your seeds are ready for their final destination: storage containers where they’ll wait patiently until planting season returns.
Simple Quality Checks Before Storage
Before tucking your precious seeds away for next season, spend a few minutes making sure they’re genuinely ready for long-term storage. Your future gardening success depends on it!
Start with a simple visual inspection. Properly dried seeds should look uniform in color and feel hard to the touch. Any seeds that appear shriveled, discolored, or show signs of mold should be discarded—they won’t store well and could compromise your entire collection.
The fingernail snap test is your best friend here. Take a seed and try to bend it between your fingers, then press your fingernail into it. If the seed snaps cleanly or resists your nail, it’s dry enough. If it bends instead of breaking, or if your nail leaves an indent, it needs more drying time. I learned this trick from my neighbor Margaret, who’s been saving tomato seeds for thirty years!
For an extra layer of confidence, you can also test seed viability before storage to ensure you’re keeping only the strongest candidates. These quick checks take just minutes but can save you disappointment come planting time.
From Processing to Preservation: Your Next Steps
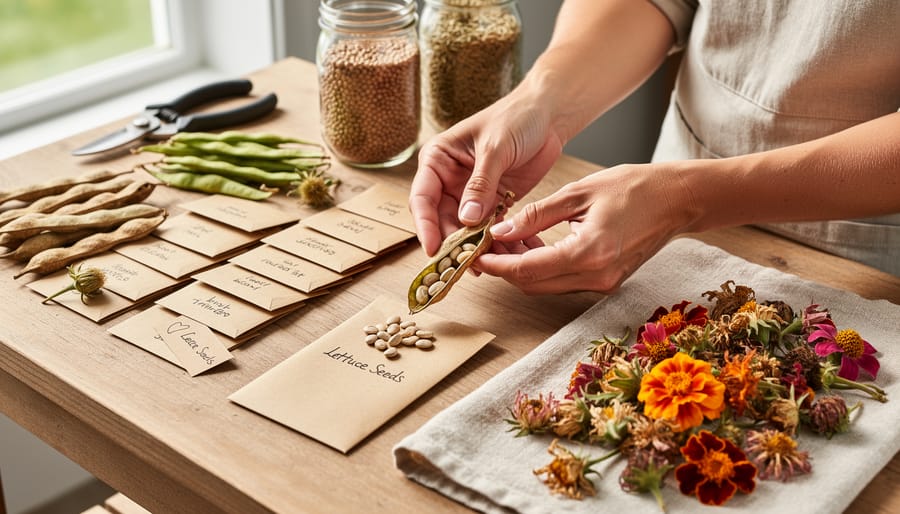
Once your seeds are clean and dry, you’re ready to move forward with proper labeling and storage—two steps that’ll ensure your hard work pays off next season. Take a moment to label each seed variety clearly with its name, the date you harvested it, and any special notes about the parent plant’s performance. This simple step prevents mix-ups and helps you track which seeds perform best in your garden.
Storage is equally important. Your processed seeds need a cool, dark, and dry environment to maintain their viability. Before tucking them away, consider doing germination testing on a small sample to establish a baseline for your seed quality.
You’ve now joined a time-honored tradition of seed stewardship that connects you to generations of gardeners. Each seed you’ve carefully processed represents not just next year’s harvest, but your growing expertise and commitment to sustainable gardening. These preserved seeds are your garden’s future—and you’ve just taken an important step in securing it.
Here’s the truth that experienced seed savers know: processing isn’t just another step in the journey—it’s the make-or-break moment that determines whether your seeds will thrive next season or disappoint you. But don’t let that intimidate you! Once you’ve processed your first batch of tomato seeds or watched bean pods dry perfectly on the vine, you’ll wonder why you ever thought it was complicated.
Start small and simple. Choose one or two easy crops like beans, lettuce, or marigolds for your first processing adventure. These forgiving plants practically process themselves and will build your confidence quickly. As you gain experience, you’ll develop an intuitive sense for when seeds are ready and which methods work best in your climate.
Remember, our gardening ancestors didn’t have fancy equipment or scientific guides—they had observation, patience, and practice. You have those same tools, plus the knowledge you’ve gained here. Every seed you successfully process is a small act of independence, a connection to generations of gardeners before you, and an investment in future harvests. Your garden is already calling for those seeds you’re about to save. Time to answer with confidence!