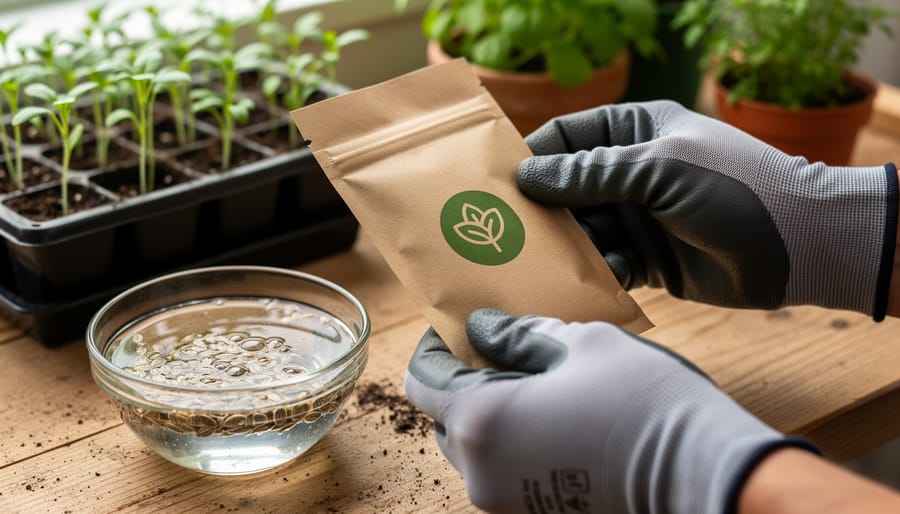
Inspect every seed packet for a phytosanitary certificate or USDA certification mark before purchasing, especially when buying from international suppliers or unfamiliar online vendors. These certifications indicate the seeds have been tested and treated to prevent the spread of plant diseases, invasive pests, and harmful pathogens that can devastate your garden and local ecosystem.
Soak purchased seeds in a hydrogen peroxide solution (one part 3% hydrogen peroxide to four parts water) for 5-10 minutes to sanitize surfaces and eliminate common fungal spores without harming germination rates. This simple step protects your investment and prevents introducing problems like damping-off disease that can wipe out entire seedling trays.
Source seeds exclusively from reputable domestic suppliers who follow voluntary USDA guidelines and state agricultural regulations, rather than accepting mysterious seed packets from unknown origins. Those unsolicited seed mailings that occasionally appear aren’t just questionable—they bypass proper inspection protocols and may carry destructive organisms that threaten native plants and agricultural crops in your region.
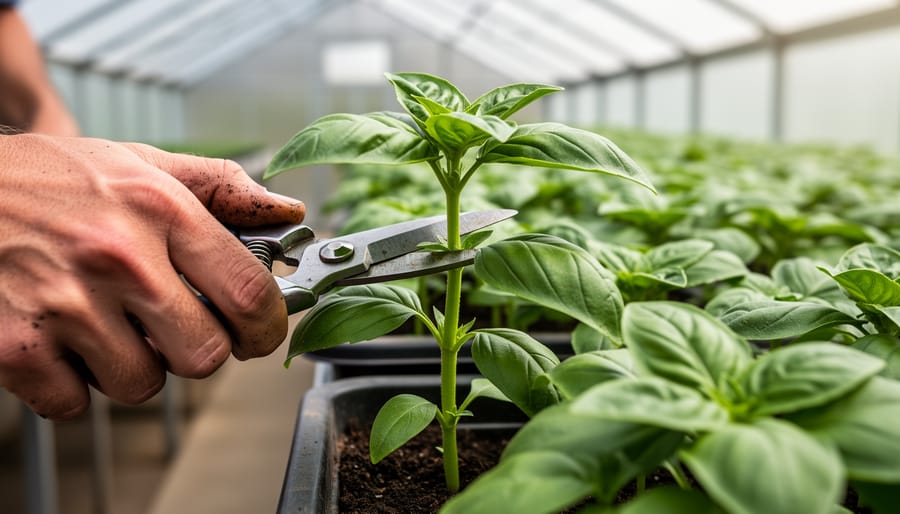
Quarantine and monitor any new seed varieties separately from your established garden for at least one growing season, watching carefully for unusual growth patterns, unexpected pests, or disease symptoms. This precautionary approach gives you time to identify potential problems before they spread throughout your entire garden space.
Understanding what USDA seed certification actually means empowers you to make informed decisions that protect both your garden’s health and your community’s agricultural well-being. While home gardeners aren’t legally required to follow commercial seed standards, adopting these practices demonstrates genuine environmental stewardship and increases your chances of growing vigorous, productive plants season after season.
What USDA Seed Certification Actually Means for Home Gardeners

The Three Things USDA Inspectors Look For
When USDA inspectors evaluate seeds, they focus on three essential criteria that directly impact your garden’s success. First, they verify genetic purity, ensuring tomato seeds will actually produce the tomato variety listed on the packet, not a random cross-pollinated surprise. Think of it as quality control for your garden’s future.
Second, inspectors check germination rates through testing seed viability. They want to confirm that a reasonable percentage of seeds will sprout when you plant them. For example, certified bean seeds might guarantee 85% germination, meaning if you plant 100 seeds, at least 85 should grow into healthy seedlings.
Third, they screen for disease pathogens like fungi, bacteria, and viruses that could devastate your garden or spread to neighboring plants. Imagine unknowingly introducing a seed-borne blight that wipes out your entire tomato crop. These inspections help prevent such scenarios by catching contaminated seed lots before they reach gardeners like you, protecting both your harvest and the broader gardening community.
Certified vs. Non-Certified Seeds: What You’re Really Paying For
When you’re browsing seed packets, you’ll notice certified seeds often cost a bit more. So what’s the difference, and is it worth it?
Certified seeds have been inspected and tested to meet strict standards for purity, germination rates, and freedom from disease. They’re essentially guaranteed to be what the label says they are. Non-certified seeds might be perfectly fine, but they haven’t undergone that verification process.
Here’s the honest truth: for home gardeners, certification matters most when you’re growing vegetables prone to seed-borne diseases, like tomatoes or beans, or when you’re starting a large garden from seed. If disease strikes, certified seeds can save you significant heartache and money.
For casual flower gardens or experimenting with small quantities, non-certified seeds from reputable suppliers often work beautifully. I’ve had wonderful success with both types over the years.
The key is knowing your source. Established seed companies typically maintain high standards regardless of certification status. If you’re buying from unfamiliar sources, especially online, certification provides valuable peace of mind. Think of it as insurance for your growing season, particularly important when you’re investing time and garden space into crops that feed your family.
The Hidden Dangers Lurking in Unhealthy Seeds
When One Bad Seed Ruins the Whole Garden
Let me share a story that might sound familiar. Last spring, my neighbor Sarah excitedly planted heirloom tomato seeds she’d saved from the previous season. Within weeks, her entire tomato patch showed telltale signs of bacterial spot—dark, water-soaked lesions on leaves and fruit. The culprit? The seeds themselves carried the pathogen from last year’s mildly infected plants.
What makes seed-borne diseases particularly sneaky is how easily they spread. That single packet of contaminated seeds didn’t just affect Sarah’s garden. She’d generously shared seedlings with three other neighbors, and soon we were all battling the same infection. Before we knew it, bacterial spot had hopscotched through our entire community garden.
This scenario plays out more often than you’d think. Common seed-borne pathogens like damping-off fungi, mosaic viruses, and bacterial blights can lurk invisibly on seed coats, waiting for the perfect conditions to multiply. Once they take hold, they can devastate entire crops and persist in your soil for years.
The good news? Understanding how these diseases spread is your first line of defense. When you choose certified seeds or practice proper seed sanitation, you’re not just protecting your garden—you’re being a responsible steward for your entire gardening community.

The Neighborhood Effect: How Your Seeds Impact Community Gardens
Think of your garden as part of a vibrant neighborhood. Just as we care about our neighbors’ wellbeing, the seeds we plant can affect gardens down the street and across town. This is what experts call phytosanitary stewardship, though I prefer to think of it as being a good garden neighbor.
When you plant seeds carrying diseases or pests, the problems don’t stay put. Fungal spores can drift on the breeze to community gardens. Infected plants might attract pests that then spread to neighboring yards. Even pollinators visiting your diseased plants can inadvertently carry pathogens to healthier gardens nearby.
I learned this lesson years ago when a friend’s tomato blight spread through our entire community garden plot. It was a gentle reminder that our choices ripple outward.
The good news? Being a responsible steward is straightforward. Start with quality seeds from reputable suppliers who follow USDA phytosanitary guidelines. Inspect your plants regularly for signs of trouble, like spots, wilting, or unusual growth. If you save seeds, only harvest from your healthiest plants.
Community gardens thrive when everyone practices these simple habits. Your attention to seed health protects not just your harvest, but the butterflies, bees, and fellow gardeners who share your local ecosystem. That’s gardening citizenship at its finest.
Simple Seed Sanitation Practices That Actually Work

Cleaning and Treating Your Saved Seeds at Home
Saving seeds from your garden is incredibly rewarding, but taking a few extra steps to clean and sanitize them ensures they’ll stay healthy and viable for seasons to come. Think of it as giving your seeds a fresh start, free from any lingering diseases or pests that might have hitched a ride from your garden.
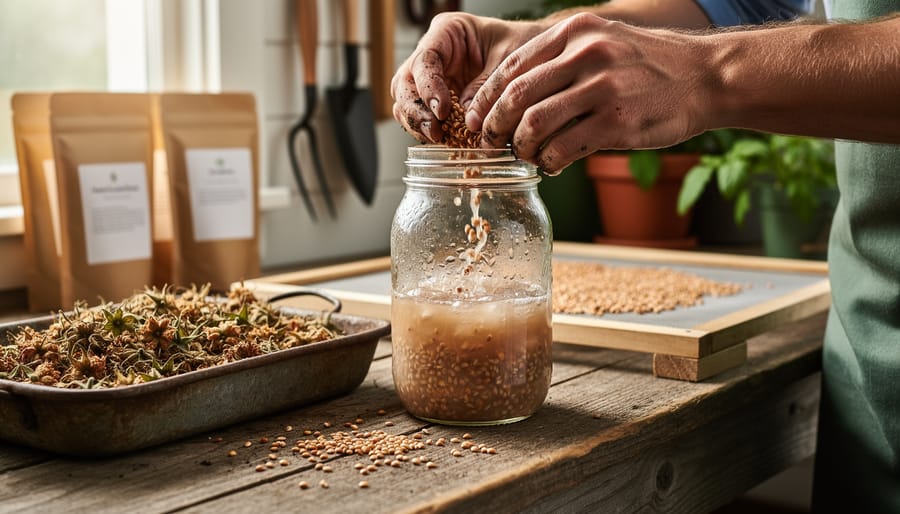
Start by cleaning off any plant debris or pulp. For tomatoes and cucumbers, ferment the seeds in water for two to three days, stirring daily. This natural process removes the gel coating and kills some pathogens. Rinse thoroughly and spread them on a paper plate or screen to dry completely.
Dry heat treatment is wonderfully effective and surprisingly simple. Place your cleaned, dried seeds in a paper envelope, then into an oven set to 140°F for about 30 minutes. Use an oven thermometer to maintain accuracy, as temperatures above 150°F can damage viability. This method works beautifully for beans, peas, and many flower seeds.
For a gentler approach, try a hot water treatment. Soak seeds in 122°F water for 25 minutes, stirring occasionally to maintain even temperature. This works particularly well for brassicas and some herbs.
Once treated, proper storage is essential. Store your seeds in paper envelopes labeled with variety and date, then place them in an airtight container with silica gel packets. Keep them in a cool, dark place. Your refrigerator’s vegetable drawer makes an excellent seed vault, maintaining the consistent conditions your carefully prepared seeds deserve.
How to Spot Problem Seeds Before You Plant
Before you sow, taking a few minutes to inspect your seeds can save you weeks of disappointment and potentially protect your garden from disease. Think of it as a quick health check for your future plants.
Start with a visual inspection. Healthy seeds should look plump and uniform in color, typical for their variety. Discard any seeds that appear shriveled, discolored, moldy, or damaged. If you notice fuzzy white or green growth, that’s mold, and those seeds should go straight into the trash, not your compost. Seeds with unusual spots, streaks, or an off smell may harbor pathogens that could spread throughout your garden.
Next, perform simple germination tests at home to check viability. Place ten seeds between moist paper towels, seal them in a plastic bag, and keep them in a warm spot. Check after the typical germination period for that variety. If fewer than six seeds sprout, the batch may be too old or improperly stored.
Pay special attention to seeds from unknown sources or those that arrived in mysterious packaging, especially unsolicited mail. These pose genuine risks. Master gardener Lisa Chen shares this advice: “When in doubt, throw it out. No single packet of seeds is worth potentially introducing invasive species or plant diseases to your community.”
Remember, healthy seeds are your garden’s foundation. Taking these simple precautions ensures you’re starting strong.
Where to Find USDA Certified Seeds and When It Matters Most
Reading Seed Labels Like a Pro
Learning to read seed labels is like unlocking a secret language that helps you become a more informed gardener. Start by checking the germination rate, which tells you what percentage of seeds should sprout under ideal conditions. Quality seeds typically show rates of 80% or higher. You’ll also find the crop year, which matters because seed viability decreases over time.
Look for noxious weed seed statements, as reputable suppliers test their products to ensure they’re free from invasive species that could wreak havoc in your garden. If you spot terms like “treated,” this means the seeds have been coated with fungicides or other chemicals, which is important to know if you’re gardening organically.
The USDA Organic seal is your green light for certified organic seeds, meaning they’ve been produced without synthetic pesticides or fertilizers. Some packets also display state certification stamps or testing laboratory information, which indicates the supplier takes quality control seriously. While these details might seem overwhelming at first, focusing on germination rates, crop year, and any organic certifications will guide you toward healthy, reliable seeds that set your garden up for success.
The Plants Where Certification Really Counts
Certification truly shines when you’re dealing with crops vulnerable to soil-borne diseases or those that’ll anchor your garden for years. Tomatoes, peppers, and other nightshades benefit enormously from certified seeds since they’re susceptible to diseases like bacterial spot and verticillium wilt. One contaminated seed can infect your entire plot, and the pathogens stick around in soil for seasons.
For perennials, fruit trees, and any plants you’re investing significant time and money into, certified seeds offer peace of mind worth the extra cost. They’re essentially insurance against introducing persistent problems to your garden.
On the flip side, many gardeners safely use non-certified seeds for hardy annuals like sunflowers, zinnias, and marigolds. These resilient bloomers typically shrug off minor issues, and they complete their lifecycle quickly. Herbs like basil and cilantro also fall into the lower-risk category for most home gardens.
Master gardener Elena Rodriguez told me she always buys certified for her heirloom tomatoes but happily saves her own zinnia seeds year after year. The key is understanding your plants’ vulnerabilities and making informed choices based on what you’re growing and your garden’s health history.
Building Your Own Seed Stewardship Practice
Becoming a responsible seed steward means more than just saving seeds for your own garden—it’s about protecting the health of your entire gardening community. Let me share how you can make a positive impact while keeping everyone’s plants thriving.
First, let’s talk ethics. Only save seeds from plants you know are healthy and disease-free. If a tomato plant struggled with blight or a squash showed signs of viral infection, those seeds aren’t candidates for saving, no matter how tempting. You’re essentially passing along potential problems to whoever receives those seeds, whether that’s future-you or a neighbor at a seed swap.
When sharing seeds, transparency is everything. Label your saved seeds clearly with the variety name, harvest year, and any relevant growing notes. If you’re not 100 percent certain about disease status, it’s perfectly fine to note “unknown health history” on your packet. Fellow gardeners will appreciate your honesty far more than discovering problems after planting.
Consider implementing simple cleaning protocols before sharing. A basic seed wash in clean water, followed by thorough drying, can remove surface debris that might harbor pathogens. For seeds from fleshy fruits like tomatoes, the fermentation method naturally reduces some disease organisms while cleaning the seeds.
Contributing to local seed health also means being a good observer. Keep notes about what thrives in your garden and what doesn’t. Share this knowledge at seed swaps or with gardening friends. When you find varieties that resist local disease pressures, you’re discovering treasures worth preserving and sharing.
Remember, seed stewardship is a community effort. By following these practices, you’re not just growing plants—you’re nurturing a healthier, more resilient local seed network for everyone.
At the end of the day, keeping our gardens healthy starts with the choices we make about seeds. Whether you’re selecting USDA-certified seeds for peace of mind or carefully sanitizing seeds from your own harvest, you’re playing an important role in protecting your garden and your community from disease.
Remember, USDA standards exist to safeguard commercial agriculture, but home gardeners benefit from understanding these principles too. You don’t need to be intimidated by official certifications or complex terminology. The key takeaways are simple: buy from reputable sources, practice basic seed sanitation when saving your own seeds, and stay observant about plant health throughout the growing season.
Think of seed stewardship as a shared responsibility. When you take steps to prevent disease in your garden, you’re also helping your neighbors and local growing community. Those simple practices we discussed, like cleaning seeds properly and avoiding plants that show signs of illness, make a real difference.
You have the knowledge now to make informed decisions that benefit everyone. Trust your instincts, ask questions when you’re unsure, and remember that every gardener, regardless of experience level, contributes to healthier gardens and stronger communities. Happy growing!