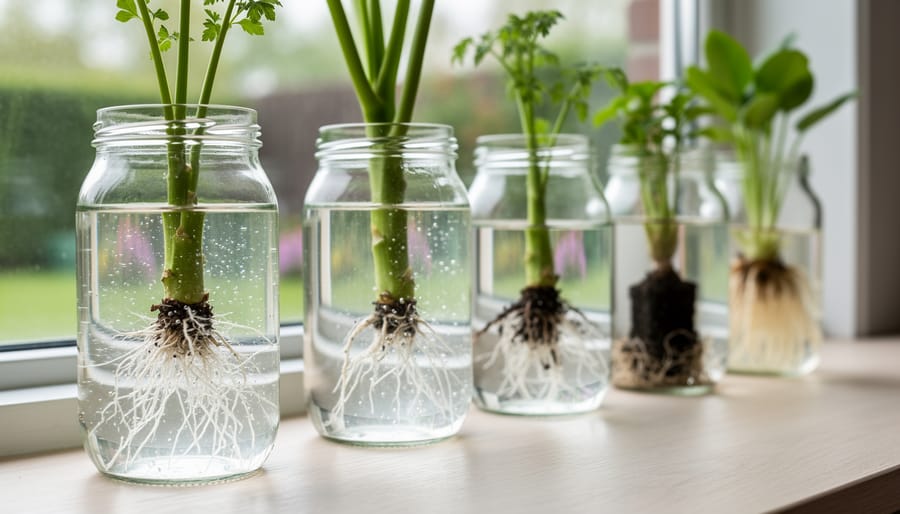
Multiply your favorite plants by taking stem cuttings in early morning when tissues are fully hydrated, snipping just below a leaf node at a 45-degree angle, and rooting them in moist vermiculite or perlite. Divide perennials in spring or fall by digging up the entire root ball and gently teasing apart natural sections, ensuring each division has both roots and shoots. Save seeds from your best-performing plants by harvesting when seed heads turn brown and papery, then storing them in labeled paper envelopes in a cool, dry location.
These fundamental propagation methods give you the power to create an entire garden from just a few plants. Whether you’re preserving heritage varieties passed down through generations, reducing your garden expenses, or sharing treasures with fellow gardeners, mastering propagation opens up endless possibilities.
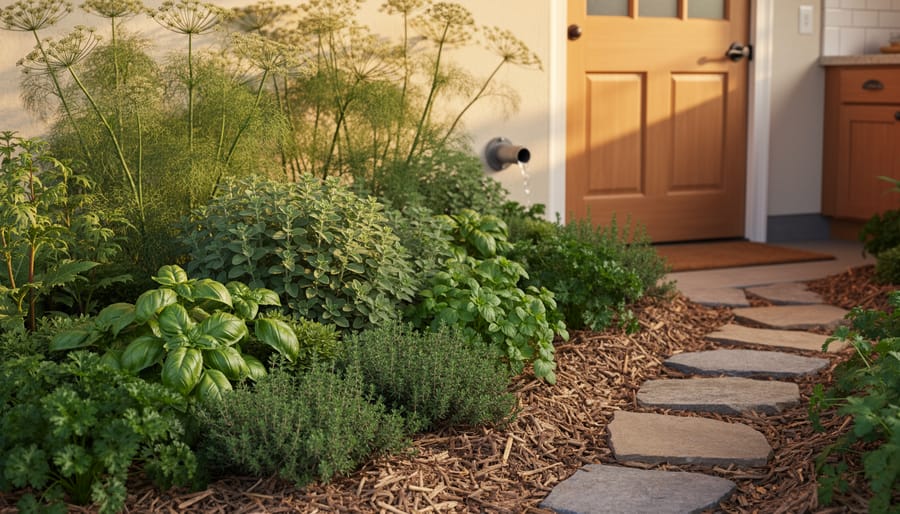
The beauty of plant propagation lies in its accessibility. You don’t need expensive equipment or specialized facilities to get started. A sunny windowsill, some basic supplies, and patience will see you through your first successful propagation projects. Each method suits different plant types and growing conditions, so you’ll discover which techniques work best for your garden’s unique needs. As you gain confidence, you’ll find yourself naturally experimenting with layering, grafting, and other advanced methods that seemed intimidating at first. The reward of watching new roots emerge or seeing divisions establish themselves makes every moment worthwhile.
Why Heritage and Herb Gardens Need Special Propagation Care
Heritage and herb gardens represent living libraries of genetic diversity, and propagating these precious plants requires a thoughtful approach that differs significantly from working with modern hybrids. When you understand why heritage plants matter, you’ll appreciate why special care during propagation is essential to maintaining their unique characteristics.
Unlike commercially bred varieties, heritage plants haven’t been manipulated for uniformity or shelf life. They carry centuries of genetic information, offering flavors, fragrances, and resilience that modern hybrids often lack. That gorgeous heirloom basil from your grandmother’s garden or that rare lemon thyme from a 19th-century estate garden possesses traits you simply cannot find at your local nursery. This makes every successful propagation an act of preservation.
The challenge with heritage varieties is their genetic variability. While modern hybrids produce predictable results, heritage plants can surprise you. That’s actually part of their charm, but it means you’ll need patience and attention to detail. When propagating from seed, you might notice variations in the offspring, which is completely normal and actually helps preserve the broader gene pool.
Many heirloom herbs also have specific propagation requirements that have been passed down through generations. Some prefer particular cutting methods, while others need precise timing or environmental conditions. These aren’t fussy preferences, they’re survival strategies that have worked for hundreds of years.
I spoke with master gardener Elena Rodriguez, who specializes in rare herb conservation, and she emphasized something crucial: “With heritage varieties, you’re not just growing a plant, you’re becoming a guardian of history. Every cutting you take, every seed you save, contributes to keeping these treasures alive for future generations.”
The stakes are higher because many heritage cultivars exist in limited numbers. If we lose them, we lose their unique disease resistance, drought tolerance, and irreplaceable flavors forever. That’s why learning proper propagation techniques for these special plants isn’t just good gardening, it’s essential conservation work.
Seed Saving: Your Heritage Garden’s Time Capsule
Selecting the Right Parent Plants
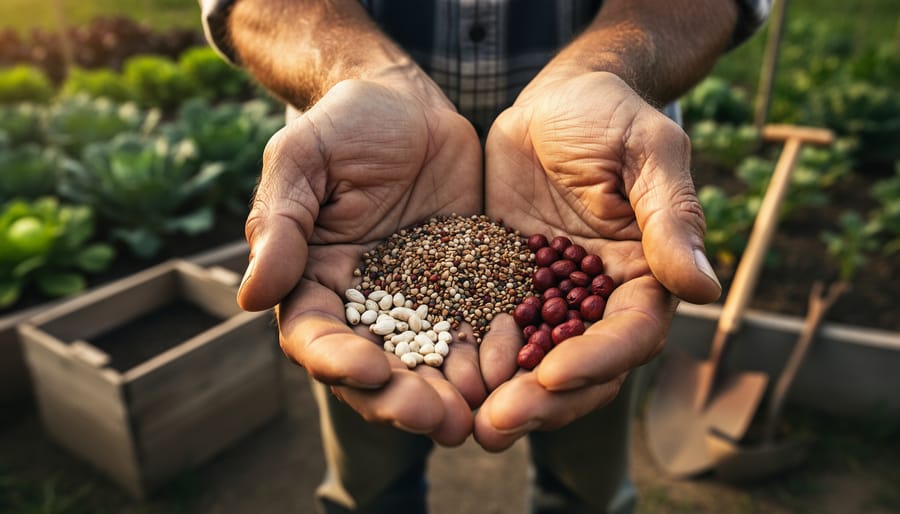
Choosing the right parent plants sets the foundation for successful propagation. Think of it as selecting the stars of your garden to create the next generation! Start by observing your plants throughout the growing season and identify the healthiest, most vigorous specimens. Look for plants with strong stems, vibrant foliage, disease-free leaves, and abundant flowers or fruit production.
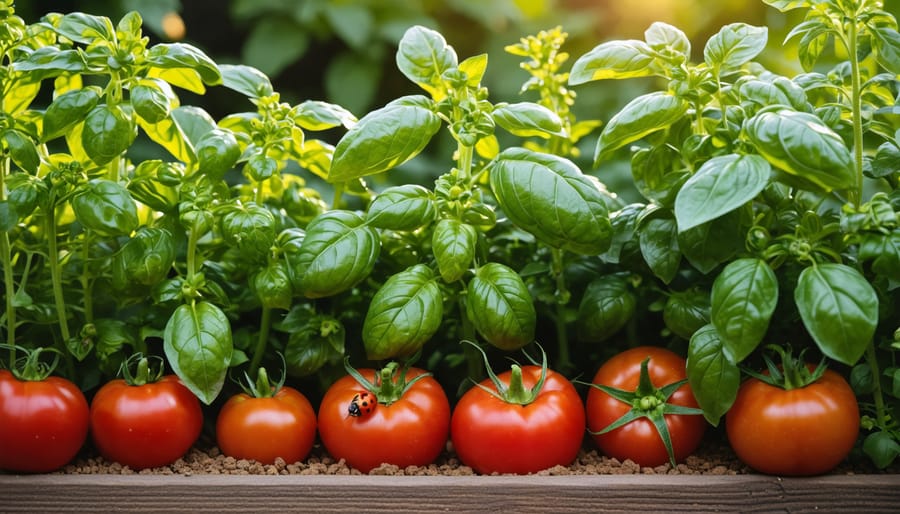
For heritage varieties, true-to-type selection is especially important. This means choosing plants that display the classic characteristics of their variety—whether that’s a particular flower color, leaf shape, or growth habit. I learned this lesson when a fellow gardener shared how her heirloom tomatoes lost their authentic flavor after she unknowingly saved seeds from a cross-pollinated plant.
To avoid cross-pollination issues, understand which plants are self-pollinating and which need isolation. Tomatoes and beans generally stay true, while squash, cucumbers, and many herbs readily cross-pollinate. If you’re saving seeds from these promiscuous plants, either grow only one variety or provide adequate spacing—sometimes several hundred feet for certain vegetables.
Take notes during the growing season about which plants perform best. This simple habit helps you remember your top candidates when propagation time arrives, ensuring you’re multiplying only your garden’s finest specimens.
Harvesting and Storing Seeds Properly
Timing is everything when it comes to seed collection! The key is catching seeds at that perfect moment when they’re mature but haven’t scattered yet. You’ll know they’re ready when seed pods turn brown and papery, or when flower heads dry out completely. For plants like lettuce and dill, watch for those telltale signs of seeds naturally wanting to drop.
Here’s my tried-and-true method: On a dry morning after the dew has evaporated, gently shake seed heads into a paper bag or snip them directly into a container. I learned the hard way that collecting after rain can introduce moisture that leads to mold, so patience pays off here.
Once you’ve gathered your precious seeds, spread them on newspaper or paper plates in a single layer. Place them in a warm, dry spot with good air circulation, away from direct sunlight. A spare bedroom or covered porch works wonderfully. Let them dry for one to two weeks, stirring occasionally to ensure even drying.
Now for storage, the secret to longevity: Pack your completely dry seeds in paper envelopes or small glass jars. Label everything with the plant name and collection date because trust me, you’ll think you’ll remember but won’t! Store in a cool, dark, dry place. Many gardeners swear by keeping seeds in the refrigerator, where they can remain viable for several years. Just remember to tuck in a silica gel packet or some dry rice to absorb any lingering moisture.
Starting Seeds Successfully
Starting seeds successfully is one of the most rewarding aspects of growing heritage varieties, though some old-timers have particular preferences you’ll want to know about. Many heritage seeds actually need a bit of tough love to germinate properly.
Cold stratification mimics winter conditions and is essential for certain perennial herbs and flowers. Simply place seeds between damp paper towels in a plastic bag, then refrigerate for the recommended period, usually between two to eight weeks. I’ve found that checking weekly for moisture prevents any disappointment.
Some seeds have incredibly hard coats that need scarification to break dormancy. You can gently nick the seed coat with a file or sandpaper, or soak seeds in warm water overnight. This works beautifully for morning glories and sweet peas that have been passed down through generations.
When troubleshooting germination problems, temperature is often the culprit. Most heritage varieties prefer consistent warmth between 65-75 degrees Fahrenheit. If seeds aren’t sprouting, check your soil moisture too. The surface should feel like a wrung-out sponge, not soggy or bone-dry.
Master gardener Patricia Freeman shared with me that patience is key: “Some heritage varieties take three times longer than modern hybrids, but they’re absolutely worth the wait.” Keep a garden journal noting germination times to build your knowledge for future seasons.
Stem Cuttings: The Fastest Way to Clone Your Favorite Herbs
Softwood vs. Hardwood Cuttings: When to Use Each
Understanding the difference between softwood and hardwood cuttings can really boost your propagation success! Softwood cuttings come from new spring growth when stems are flexible and green. They root quickly, usually within 2-4 weeks, making them perfect for herbs like lavender, rosemary, and sage. Take these cuttings in late spring through early summer when your plants are actively growing.
Hardwood cuttings, on the other hand, are taken from mature stems during the plant’s dormant season, typically late fall through winter. These woody stems take longer to root, sometimes 8-12 weeks, but they’re ideal for heritage roses, elderberries, and fruit trees. The advantage? They’re incredibly low-maintenance since they don’t need constant misting like their softwood cousins.
Here’s a helpful tip from master gardener Ellen Michaels: “Match the cutting type to your schedule. If you’re eager for quick results, go softwood. If you prefer a set-it-and-forget-it approach, hardwood cuttings are your friend.” Many heritage varieties respond well to both methods, so don’t be afraid to experiment and see what works best in your garden’s unique conditions.
The Simple Step-by-Step Cutting Process
Taking cuttings is easier than you might think! Let’s walk through this rewarding process together, and you’ll be multiplying your favorite herbs and heritage plants in no time.
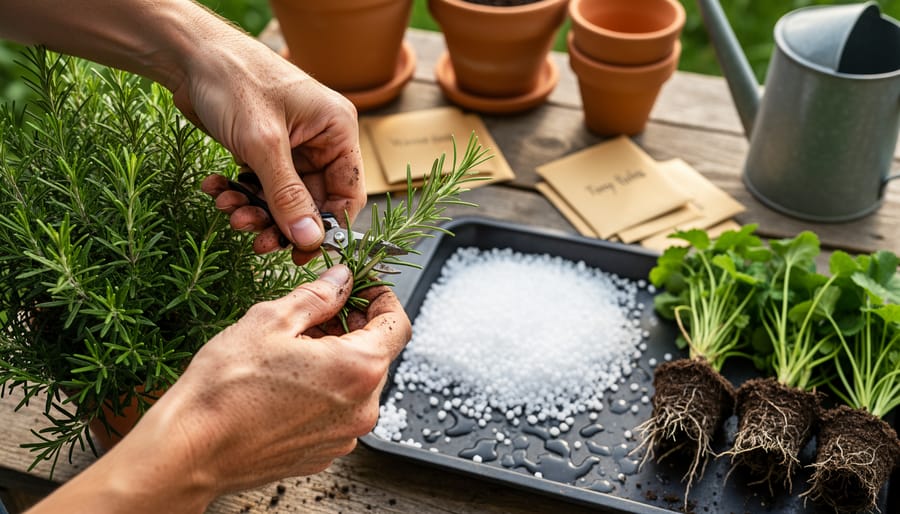
Start by selecting healthy, vigorous stems in the morning when plants are well-hydrated. For most herbs and heritage perennials, you’ll want 4-6 inch cuttings. Using clean, sharp scissors or pruning shears (clean tools prevent disease), make your cut just below a leaf node at a 45-degree angle. Remove the lower leaves, leaving just 2-3 sets at the top. This prevents rot and directs energy toward root development rather than sustaining foliage.
While not essential, rooting hormone significantly improves success rates. Simply dip the cut end about half an inch into the powder, tapping off any excess. Don’t worry if you don’t have any on hand—many herbs root beautifully without it, as shown in these simple propagation techniques.
Insert your cutting into moistened growing medium, which could be perlite, vermiculite, or seed-starting mix. Firm the soil gently around the stem. Create a mini greenhouse by covering the pot with a clear plastic bag, using chopsticks to keep it from touching the leaves. Place in bright, indirect light.
Keep the medium consistently moist but not waterlogged. After 2-4 weeks, gently tug the cutting. Resistance means roots have formed! You’ll also notice new leaf growth emerging. Once roots are about an inch long, your new plant is ready for its permanent home.
Troubleshooting Common Cutting Failures
Don’t be discouraged if your first attempts at taking cuttings don’t all succeed—even experienced gardeners face occasional failures! If your cuttings are rotting, the most common culprit is too much moisture combined with poor air circulation. Try using a lighter potting mix, reducing watering frequency, and ensuring your propagation container has drainage holes. Remove any plastic covers for a few hours daily to let fresh air circulate.
Wilting cuttings usually indicate they’re losing water faster than they can absorb it without roots. Increase humidity by misting more frequently or creating a mini greenhouse with a clear plastic bag, but remember to open it daily. Keep cuttings out of direct sunlight initially, as this speeds up moisture loss.
If your cuttings look healthy but simply won’t root after several weeks, they may need a boost. Try dipping them in rooting hormone, which I’ve found makes a remarkable difference with stubborn varieties. Also check that you’re taking cuttings at the right time of year for your specific plant—timing truly matters! Some plants root better from softwood cuttings in spring, while others prefer semi-hardwood later in summer.
Division: Multiply Your Perennial Herbs Without Buying New Plants
Which Heritage Plants Respond Best to Division
Many heritage plants practically beg to be divided, making them perfect for expanding your collection. Chives are wonderfully cooperative—simply dig up a clump every three to four years and tease it into several smaller sections. Each piece will quickly establish itself and provide fresh harvests. Mint varieties, including heirloom spearmint and peppermint, respond beautifully to division, though you’ll want to contain these enthusiastic spreaders when designing herb gardens. Oregano and marjoram form dense mats that divide easily in spring or fall, giving you multiple plants from one parent.
Heirloom irises are division superstars, actually requiring it every three to five years to maintain vigor. Other responsive heritage perennials include yarrow, bee balm, tansy, and lemon balm. Spring bloomers like primroses divide best after flowering, while fall-blooming varieties prefer spring division. These reliable performers make division an incredibly rewarding propagation method for preserving your heritage garden.
The Best Time and Method for Dividing
Timing makes all the difference when dividing plants. The golden rule? Divide spring and summer bloomers in fall, and divide fall bloomers in early spring. This gives your plants time to settle before their energy goes into flowering. I’ve found early morning on a cool, overcast day works wonderfully, as it reduces stress on both you and your plants.
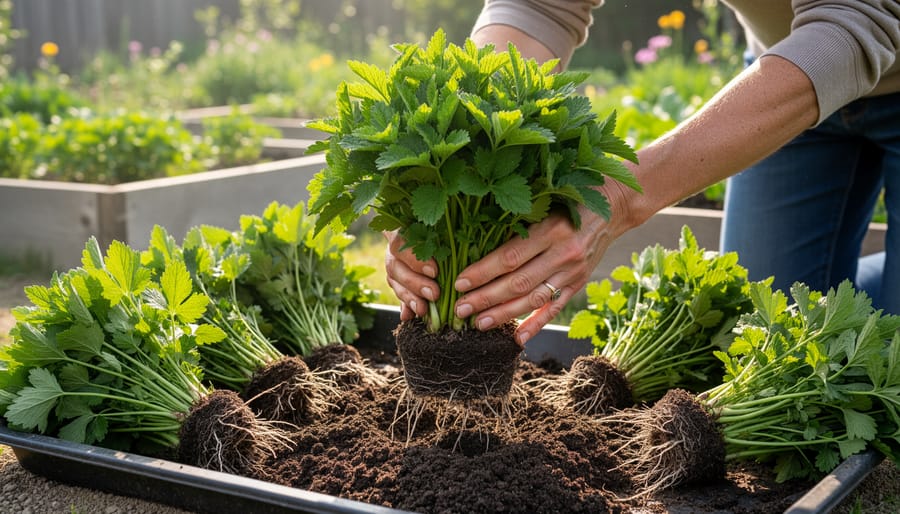
Here’s how to divide successfully: First, water your plant thoroughly the day before to make lifting easier. Using a garden fork rather than a spade, dig a generous circle around the plant, staying about six inches from the stems. Gently lift the entire root ball and shake off excess soil so you can see what you’re working with.
For most perennials, you can pull apart sections by hand or use two garden forks back-to-back to tease them apart. Each division should have at least three to five healthy shoots and a good root system. Tough, woody crowns might need a sharp knife or even a small saw, but make clean cuts to prevent disease.
Replant divisions immediately at the same depth they were growing before, firm the soil gently, and water thoroughly. Keep them well-watered for the first few weeks while they establish.
Aftercare That Guarantees Success
Your newly propagated plants are like babies—they need gentle care while establishing themselves. The first two weeks are crucial. Water consistently but don’t drown them; the soil should feel like a wrung-out sponge. I learned this the hard way when I lost several cuttings to overenthusiastic watering!
Place your plants in bright, indirect light initially. Direct sun can stress them before roots develop properly. Think of it as easing them into their new life.
Hold off on fertilizing for at least a month. New roots are delicate, and feeding too soon can burn them. When you do start, use a diluted liquid fertilizer at half-strength.
Protection matters too. Keep propagated plants away from drafts, extreme temperatures, and curious pets. A humidity dome or clear plastic bag works wonders for cuttings, creating a mini greenhouse effect.
Watch for signs of success: new growth means roots are establishing. Once you see vigorous growth, gradually transition your plants to normal care routines. Patience during this period truly guarantees success.
Layering: The Low-Risk Technique for Woody Herbs
Simple Layering for Beginners
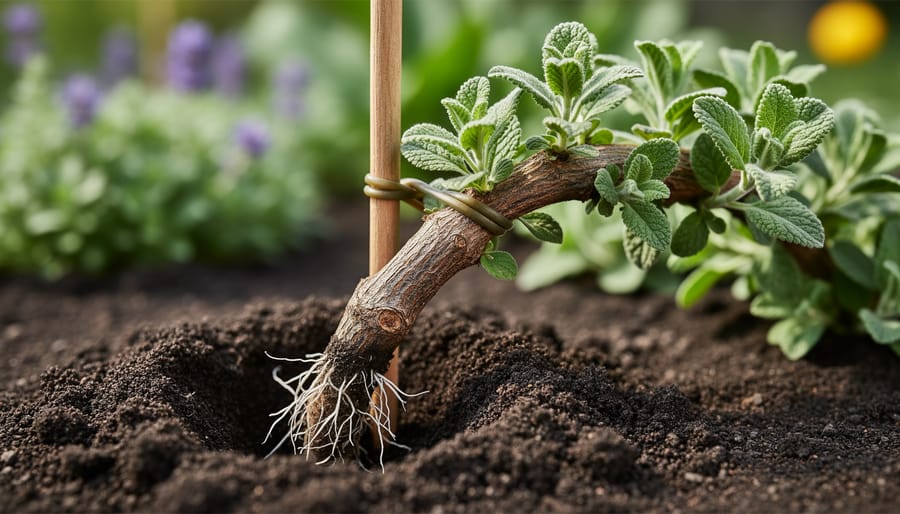
Ground layering is one of the most forgiving propagation techniques you can try, perfect for those just starting their plant multiplication journey. Here’s how it works: you’re essentially encouraging a stem to root while it’s still attached to the parent plant, giving it a safety net as it develops.
Choose a flexible, low-growing branch on your herb or heritage plant during spring or early summer. Gently bend it to the ground about 12 inches from the tip. Using your finger or a small trowel, create a shallow trench roughly 3-4 inches deep where the middle section of the stem touches the soil. Lightly scratch or nick the underside of the stem where it will sit underground – this wound stimulates root formation.
Bury the wounded section, leaving the tip exposed and pointing upward. You might need a bent wire or a small stone to hold it in place. Keep the area consistently moist but not waterlogged. Within a few months, roots will develop at the buried section. Once you feel resistance when gently tugging, cut the new plant free from its parent and transplant it. This method works beautifully with rosemary, lavender, and many traditional garden favorites.
Air Layering for Established Plants
Air layering is a wonderful technique for propagating those irreplaceable heritage plants you simply can’t risk losing. Think of it as encouraging roots to grow while the branch is still attached to the parent plant—like creating a safety net before taking the leap!
This method works beautifully for woody herbs like rosemary and lavender, as well as precious heirloom shrubs. Here’s how it works: Select a healthy branch about pencil-thickness, and make a small upward cut about one-third through the stem. Gently wedge it open with a toothpick, then dust the wound with rooting hormone. Wrap the area with moist sphagnum moss, securing it with plastic wrap to create a little greenhouse effect. Fasten both ends with twist ties to hold everything in place.
I learned this technique from master gardener Patricia Chen, who uses it exclusively on her century-old rose collection. “You get a mature plant faster, and there’s no shock to the parent,” she told me during our interview at her historic garden.
Within six to eight weeks, you’ll see roots growing through the moss. Once they’re well-developed, cut below the new root ball and pot up your new plant. It’s patience-testing but incredibly rewarding!
Creating the Perfect Environment for Propagation Success
Getting your propagation setup right can make the difference between thriving new plants and disappointing failures. The good news? You don’t need a fancy greenhouse to succeed. I’ve propagated hundreds of plants on a sunny kitchen windowsill and in a simple cold frame outdoors, and you can too.
Let’s start with light, which is absolutely crucial. Most cuttings and seedlings need bright, indirect light rather than harsh, direct sun that can scorch tender new growth. A south-facing window with a sheer curtain works beautifully indoors, or you can invest in an inexpensive grow light if natural light is limited. Outdoors, choose a spot with morning sun and afternoon shade, especially during hot summer months.
Humidity is your secret weapon for success. Young cuttings haven’t developed roots yet, so they lose moisture quickly through their leaves. Creating a humid environment prevents them from drying out before roots form. You can achieve this simply by covering pots with clear plastic bags supported by stakes, or by using a proper propagation dome. I remember my grandmother using old glass jars turned upside down over her cuttings, and they worked perfectly. Aim for humidity levels around 70-80% for most plants.
Temperature matters too, though it’s often overlooked. Most plants root best in slightly warm conditions, around 65-75°F. Bottom heat from a propagation mat can speed things up, but it’s not essential for most herbs and heritage varieties.
Finally, choose the right growing medium. A light, well-draining mixture is essential because heavy soil can suffocate developing roots. A simple blend of half perlite and half peat-free compost works wonderfully for most propagation projects.
Expert Wisdom: Interview Insights on Heritage Plant Propagation
We recently sat down with Margaret Chen, director of the Heritage Seed Conservancy, to discuss her favorite propagation tips for gardeners keen on preserving heirloom varieties. With over thirty years of experience saving rare plant genetics, Margaret shared wisdom that both inspires and reassures.
“The most important thing I tell people is that plants actually want to reproduce,” Margaret laughed. “Nature’s on your side! Don’t be intimidated by the process. Start simple with cuttings from herbs like rosemary or sage, and you’ll gain confidence quickly.”
When asked about common mistakes, Margaret emphasized patience. “People often give up too soon. That cutting that looks dead for three weeks might suddenly sprout roots on week four. I always say keep trying until you know for certain it hasn’t worked.”
Her most encouraging advice? “Every gardener I know, including myself, has killed plants while learning propagation. It’s part of the journey, not a reflection of your abilities. Even experienced propagators have success rates of 70 to 80 percent, not 100 percent.”
Margaret also stressed the community aspect of propagation. “Share your successes and your failures with other gardeners. Swap cuttings, exchange seeds, and pass along what you’ve learned. That’s how we’ve preserved heritage varieties for generations—through generosity and persistence.”
Her final tip was beautifully simple: “Celebrate every root that forms. You’re not just growing a plant; you’re continuing a living legacy.”
There’s something truly magical about watching a tiny cutting transform into a thriving plant, knowing you’ve played a part in continuing its story. Whether you’re preserving a treasured heirloom tomato from your grandmother’s garden or sharing cuttings of your favorite herbs with friends, plant propagation connects us to generations past and future in the most beautiful way.
The techniques we’ve explored aren’t reserved for experts with fancy equipment. With just a few basic supplies and a willingness to learn, you can successfully propagate nearly any heritage or herb variety in your collection. Yes, you’ll encounter some failures along the way—we all do—but each attempt teaches you something valuable about your plants and strengthens your gardening skills.
This season, I encourage you to choose just one technique that resonates with you. Perhaps you’ll try rooting some basil cuttings on your kitchen windowsill, or maybe you’ll save seeds from your most productive pepper plant. Start small, be patient with yourself, and celebrate each success.
Remember, every heritage variety that continues to grow does so because someone cared enough to propagate it. By learning these skills, you’re becoming part of that essential tradition, ensuring these precious plants will flourish for generations to come. Your garden—and the gardeners who follow—will thank you.