Mix equal parts peat moss or coco coir, perlite, and pine bark to create a fast-draining potting mix that prevents waterlogged roots and keeps your container plants thriving. Add coarse sand or pumice for cacti and succulents that need even sharper drainage. Test your mix by watering thoroughly—if puddles sit on the surface for more than a few seconds, add more perlite or bark.
Root rot ranks among the most devastating common houseplant problems, but the right potting mix makes all the difference. Well-draining soil allows water to flow through quickly while retaining just enough moisture for roots to absorb what they need. The secret lies in the particle size—larger chunks create air pockets that prevent compaction and let excess water escape.
Commercial mixes labeled for containers or succulents work well, but creating your own gives you complete control over drainage speed and cost. Choose containers with drainage holes, and never let pots sit in standing water. If your plants consistently wilt despite regular watering or their leaves turn yellow and mushy, poor drainage is likely the culprit. Switching to a properly formulated mix will transform struggling plants into vigorous growers.
What Makes a Potting Mix Drain Well (And Why It Matters)
Think of potting mix like a sponge with tiny highways running through it. When you water your plants, that moisture needs to flow through the mix, hydrate the roots, and then drain away, leaving behind little air pockets. These air pockets are just as crucial as the water itself because roots literally breathe through them. Without oxygen reaching the roots, even the healthiest plant will struggle.
Here’s where things get interesting: unlike regular garden soil, which compacts in containers and holds water like a wet blanket, good potting mix maintains those precious air spaces. The secret lies in the particle size and variety. Larger particles like perlite or coarse sand create gaps that allow water to flow downward while smaller organic materials hold just enough moisture for the roots to access when needed.
When potting mix doesn’t drain well, trouble starts quickly. I learned this the hard way with a beautiful fiddle leaf fig that suddenly dropped leaves after what I thought was careful watering. The problem? Water was sitting at the bottom of the pot, creating a soggy environment where beneficial oxygen couldn’t reach the roots. Root rot had set in, turning healthy white roots into mushy brown mush.
Watch for these telltale signs of poor drainage: leaves turning yellow despite regular watering, a sour or musty smell coming from the soil, water pooling on the surface that takes forever to soak in, or that squishy, waterlogged feeling when you stick your finger in the mix. Sometimes you’ll even see fungus gnats hovering around, drawn to the constantly damp conditions.
The good news? Understanding this balance between water and air means you can create the perfect environment where roots stay hydrated but never waterlogged, setting your plants up for thriving growth rather than survival mode.


The Essential Ingredients for Fast-Draining Indoor Potting Mix
Perlite: The Lightweight Champion
If you’ve ever wondered about those white, puffy bits in potting soil, meet perlite—your new best friend for better drainage! This volcanic glass is heated until it pops like popcorn, creating those distinctive lightweight chunks that work magic in your containers.
Here’s why perlite earns its champion status: those tiny white pieces are actually riddled with microscopic air pockets. When you mix perlite into your potting soil, it creates pathways for water to flow through while simultaneously holding onto just enough moisture for roots to access. Think of it as adding tiny drainage tunnels throughout your mix.
For most houseplants, I recommend starting with a ratio of 1 part perlite to 3 parts potting soil—that’s about 25% perlite. Succulents and cacti, which despise wet feet, thrive with a much grittier mix of 50% perlite. For moisture-loving plants like ferns, keep it lighter at around 15-20%.
One gardener I interviewed swears by the “squeeze test”: grab a handful of moistened mix and squeeze. It should hold together briefly, then crumble apart easily. If it stays compacted, add more perlite. Your plants will thank you with healthier roots and happier growth!
Coarse Sand and Grit: Adding Weight and Flow
For heavy containers or plants that need extra stability, coarse sand and granite grit are excellent drainage boosters. I’ve found horticultural sand particularly helpful when mixing soil for succulents and cacti, which absolutely demand sharp drainage to thrive.
Here’s the thing though: not all sand is created equal! Always choose horticultural or coarse builder’s sand, never fine play sand or beach sand, which can actually compact and worsen drainage. Granite grit works similarly but adds even more weight and lasts indefinitely without breaking down.
The benefits are clear: these materials improve drainage while anchoring tall plants that might otherwise topple over. They’re also fantastic for Mediterranean herbs like lavender and rosemary that prefer drier conditions. I typically add about 10-20 percent coarse sand to my succulent mixes.
The drawbacks? Weight is both a blessing and a curse. If you’re dealing with hanging baskets or need to move containers frequently, sand might make them impractically heavy. Also, these materials add no nutritional value whatsoever.
Best candidates for sand additions include all succulents, cacti, Mediterranean herbs, and alpine plants. These naturally grow in gritty, fast-draining soils and will reward you with healthy growth when you mimic their native conditions.
Bark and Coir: The Organic Drainage Boosters
If you’re looking for organic materials that boost drainage while keeping your plants happy, bark and coir are your go-to teammates. I’ve been using these in my potting mixes for years, and they’ve saved countless plants from soggy soil situations.
Orchid bark, typically made from fir or pine, creates wonderful air pockets in your mix. You’ll find it in chunks ranging from small to large, and I recommend choosing the size based on your plant’s needs. Succulents love the larger pieces, while herbs prefer smaller chips. Pine bark fines work similarly but break down more slowly than regular compost, giving you longer-lasting drainage benefits.
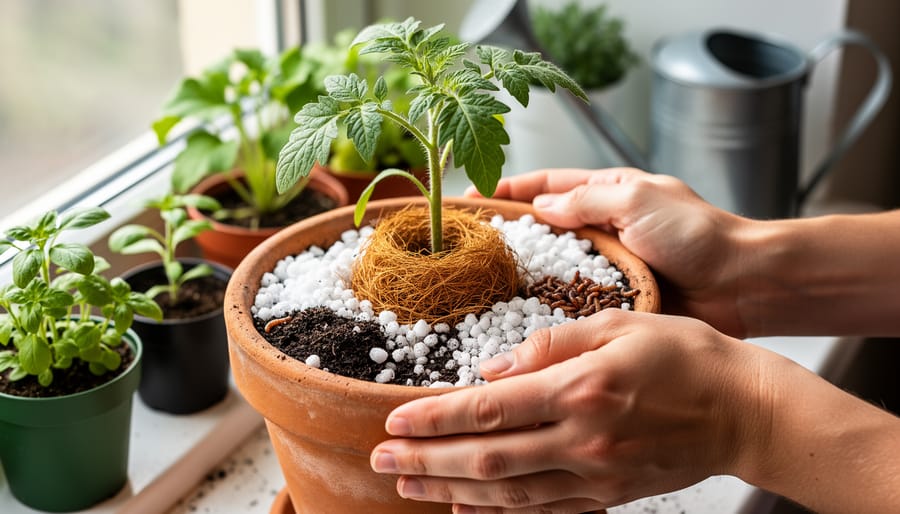
Coconut coir deserves special mention here. This sustainable byproduct of coconut processing acts like a moisture manager. It holds water when your plants need it but releases excess moisture quickly, preventing that dreaded waterlogged feeling. I always soak my coir brick thoroughly before mixing it in, and it fluffs up beautifully.
The magic happens when you combine these materials. A master gardener I interviewed last spring swears by mixing equal parts coir and bark for her container vegetables, and her thriving tomato plants are proof it works. These organic boosters decompose gradually, improving your soil structure over time while keeping roots breathing easy.
Pumice and Lava Rock: For Succulents and Beyond
If you’ve ever wondered what those lightweight, porous rocks are in commercial cactus mixes, they’re likely pumice or lava rock. These volcanic materials are drainage superstars, and I’ve found them absolutely invaluable for succulents and cacti that demand exceptionally fast-draining conditions.
Pumice is lighter and has more air pockets, while lava rock is slightly denser with larger pores. Both prevent compaction beautifully and create air channels that roots love to explore. I typically add about 50% pumice to my succulent mixes, sometimes even more for particularly finicky plants like lithops.
The beauty of these materials is their permanence. Unlike perlite, which can float to the surface during watering, pumice and lava rock stay put and won’t break down over time. They’re also pH-neutral and won’t affect your soil chemistry.
You’ll find them at garden centers, often sold as soil amendments or specifically for cactus gardens. While they cost more upfront than perlite, their longevity makes them worth the investment, especially if you’re building a collection of drought-loving plants.
DIY Potting Mix Recipes for Different Indoor Plants
All-Purpose Indoor Plant Mix
This workhorse mix works beautifully for most of your indoor plant family, especially those forgiving favorites like pothos and philodendrons. Combine equal parts standard potting soil, perlite, and coconut coir or peat moss. The potting soil provides nutrients, while the perlite creates air pockets that prevent water from sitting around the roots. Coconut coir holds just enough moisture without getting soggy.
I’ve used this recipe for years in my own plant collection, and it’s perfect for those times when you’re not sure exactly what your plant needs. Think of it as your go-to base recipe. If you notice water pooling on the surface after watering, simply add a bit more perlite next time you repot. The beauty of this mix is its flexibility. You can adjust the ratios slightly based on your watering habits: water-happy gardeners might add extra perlite, while those who sometimes forget can lean toward more coir.
Succulent and Cactus Super-Drain Mix
If your succulents and cacti seem to sulk no matter what you do, they’re probably telling you their soil stays wet too long. These desert dwellers need a super-gritty mix that drains almost instantly. I learned this the hard way when I lost three gorgeous echeverias to root rot before adjusting my approach.
For these moisture-sensitive plants, aim for a mix that’s 50-70% inorganic materials. Combine equal parts regular potting soil with coarse sand, perlite, and pumice or crushed granite. The result should feel almost gravelly in your hands. When you water, it should drain through in seconds, not minutes.
A good test? Squeeze a handful of moistened mix. If it clumps together, add more grit. It should barely hold its shape. Many experienced succulent growers use even less organic matter, sometimes just 30%, especially for cacti and lithops that demand bone-dry conditions between waterings.
Orchid and Epiphyte Special Mix
If you’re growing orchids, anthuriums, or other epiphytes (plants that naturally grow on trees in the wild), standard potting mixes just won’t cut it. These beauties need something completely different because their roots actually prefer being exposed to air rather than buried in soil. I learned this the hard way when my first orchid quickly declined in regular potting mix!
An orchid-specific mix typically contains large chunks of fir bark, charcoal pieces, and perlite, creating massive air pockets around the roots. You might also find sphagnum moss, coconut husk chips, or even Lava rock in quality blends. The texture should feel almost outrageously chunky compared to typical houseplant soil.
This specialized mix mimics the natural environment where orchid roots cling to tree bark, drying out between rainstorms. Water drains through almost instantly, which prevents the root rot these plants are notorious for developing. Don’t worry if the mix looks sparse or the roots are visible—that’s exactly what these air-loving plants need to thrive and produce those stunning blooms you’re hoping for.
Tropical Plant Balanced Mix
Tropical beauties like alocasia and calathea have roots that appreciate consistent moisture, but they absolutely despise sitting in waterlogged soil. I learned this the hard way when my first calathea developed yellowing leaves from overly wet conditions! The trick is creating a mix that drains excess water quickly while still holding enough moisture between waterings.
Here’s my go-to recipe: Combine 40% quality potting soil, 30% orchid bark (the chunky pieces create fantastic air pockets), 20% perlite, and 10% peat moss or coco coir. The orchid bark is the secret ingredient here—it prevents compaction and ensures water flows through freely, while the peat moss retains just enough moisture to keep those gorgeous leaves happy.
When mixing, break up any clumps and ensure everything’s distributed evenly. You’ll know you’ve got it right when water flows through within seconds of watering, yet the mix still feels slightly damp an inch below the surface the next day. This balanced approach mimics the forest floor conditions these tropical plants naturally thrive in, giving their roots both the oxygen and moisture they crave.
How Containers Impact Drainage (Beyond Just the Holes)
Terracotta vs. Plastic: The Drainage Debate
Here’s a truth I learned the hard way: your pot choice matters just as much as your soil mix. I once blamed my fiddle leaf fig’s droopy leaves on everything except my plastic pot collection, until a seasoned gardener friend set me straight.
Terracotta pots are the tried-and-true champion for drainage-loving plants. These porous clay beauties naturally wick moisture away from soil, allowing air to reach the roots and preventing that soggy situation we’re trying to avoid. They’re perfect for succulents, herbs, and anyone who tends to overwater. The downside? You’ll water more frequently, especially in hot weather.
Plastic pots get a bad rap, but they’re not villains. They retain moisture longer, which works wonderfully for thirsty plants like ferns or if you travel often. The key is pairing them with that well-draining mix we’ve been discussing and ensuring adequate drainage holes.
My advice? Match your pot to your plant’s needs and your watering habits. Forgetful waterer? Plastic might save your plants. Heavy-handed with the watering can? Terracotta will forgive you. And remember, any pot without drainage holes is asking for trouble, regardless of material.
The Drainage Hole Truth (And What to Do Without One)
Let’s be honest: drainage holes are your plant’s best friend. They allow excess water to escape, preventing that dreaded soggy soil situation that leads to root rot. When water can’t drain away, roots literally suffocate because they need oxygen pockets in the soil to survive.
But here’s the thing—I completely understand the temptation of that gorgeous ceramic pot without drainage holes. I’ve been there myself, falling in love with a beautiful planter only to discover it’s essentially a waterproof vessel.
If you’re set on using a pot without drainage holes, you have a few creative options. The double-pot method is my favorite workaround: keep your plant in a standard nursery pot with drainage, then nestle it inside the decorative container. When watering, simply lift out the inner pot, water it over a sink, let it drain completely, then return it to its pretty home.
Alternatively, you can create a false bottom using a thick layer of rocks or pebbles, but I’ll warn you—this is tricky and requires careful watering to avoid that hidden water reservoir at the bottom. You’ll need to be extremely conservative with water and monitor soil moisture religiously.
My honest advice? If you’re struggling with overwatering or you’re a beginner, stick with drainage holes whenever possible. You can always place a saucer underneath to protect your surfaces. Save those hole-free beauties for displaying cut flowers or use them as decorative cache pots instead.
Common Drainage Mistakes That Kill Indoor Plants
We’ve all been there – you bring home a beautiful plant, pot it up with the best intentions, and weeks later it’s struggling or worse. I’ve made every drainage mistake in the book, and honestly, those missteps taught me more than any perfect planting ever could. Let me share the most common drainage blunders so you can skip the heartbreak and jump straight to thriving plants.
The biggest mistake? Using garden soil indoors. I know it seems logical – plants grow in it outside, right? But garden soil becomes concrete-like in containers, holding moisture against roots far too long. Indoor plants need that lighter, fluffier potting mix we talked about earlier. Trust me, your plants will thank you for making the switch.
Another frequent error is forgetting drainage holes altogether. Those gorgeous decorative pots without drainage might look stunning, but they’re basically swimming pools for your plant’s roots. If you’ve fallen in love with a pot that lacks holes, use it as a cachepot – place your plant in a basic plastic pot with drainage inside the pretty one. Problem solved, and you get to keep that beautiful planter.
Many gardeners also add gravel or pebbles to the bottom of pots, thinking it improves drainage. Here’s the surprising truth: it actually creates something called a perched water table, where water sits right above that gravel layer instead of draining away. Skip the rocks and fill your entire pot with quality, well-draining mix instead.
Compacting soil too tightly is another sneaky culprit. When we pack soil down firmly, we squeeze out those air pockets that roots desperately need. Gently firm the mix around your plant, but let it stay loose and breathable.
Finally, using the same potting mix for every plant ignores their individual needs. Cacti and succulents need extra drainage amendments, while ferns prefer slightly more moisture retention. Learning your plant’s preferences makes all the difference.
Quick Tests to Check If Your Mix Drains Well Enough
Before you start mixing ingredients or buying new supplies, let’s figure out if your current potting mix actually needs improvement. I always recommend these two super simple tests that take just minutes but tell you everything you need to know.
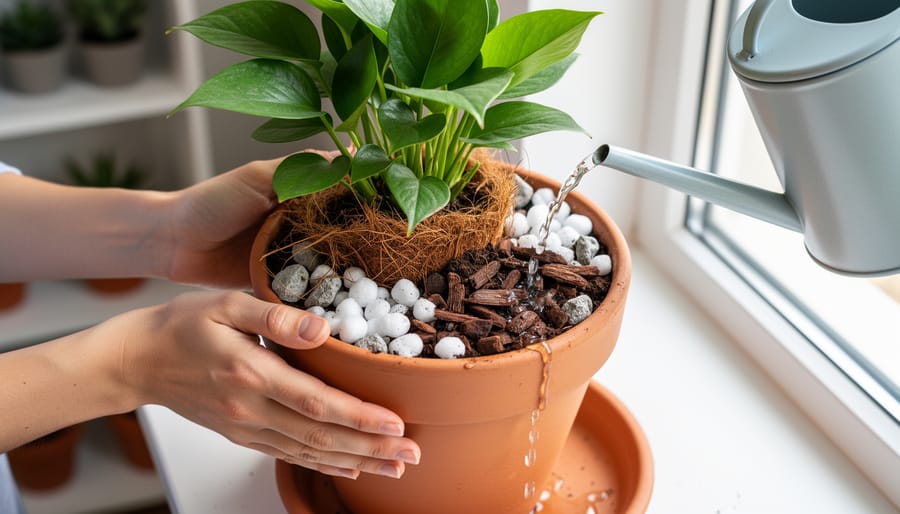
The Water Pour Test is my go-to method. Fill your container with potting mix and water it thoroughly until you see moisture throughout. Now watch what happens. Does water stream out the drainage holes within a few seconds? Perfect! If water pools on the surface for more than 10-15 seconds before soaking in, or if your container feels heavy and waterlogged an hour later, you’ve got drainage issues. Good potting mix should allow water to flow through relatively quickly while still holding enough moisture for roots.
The Squeeze Test works beautifully for evaluating mix that’s already in use. Take a handful of moist (not soaking wet) potting mix and squeeze it firmly in your palm. When you open your hand, the mix should crumble apart easily with just a light touch. If it stays compacted in a tight ball or feels slimy, that’s a red flag for poor drainage. Healthy mix has enough structure to hold together briefly but breaks apart without effort.
I’ve used both these tests countless times in my own garden, and they’ve saved me from plenty of root rot headaches. If your mix fails either test, don’t worry – we’ll get it sorted with some simple adjustments.

Where to Buy Quality Drainage Ingredients (And What to Look For)
Finding quality drainage ingredients doesn’t have to break the bank or require a treasure hunt. Your local garden center is an excellent starting point, where you can examine products firsthand and ask staff questions. Look for perlite in larger bags rather than those tiny expensive ones mixed into potting soil. The pieces should be bright white and roughly the size of popcorn kernels.
For budget-conscious gardeners, big-box home improvement stores often carry bulk bags of perlite and coarse sand at competitive prices. Just steer clear of those heavy, moisture-retaining potting mixes that many popular brands promote. You know the ones, they promise to feed your plants for months but often hold onto water like a sponge, which is exactly what we’re trying to avoid.
Online retailers like Amazon, specialty hydroponics stores, and agricultural suppliers offer excellent options for pumice, coarse perlite, and horticultural grit. The key advantage here is reading reviews from other gardeners who’ve actually used these products.
When evaluating peat moss or coco coir, squeeze a handful. Quality products should feel springy and fibrous, not dusty or compacted. For bark chips, look for pieces about the size of your pinky nail, angular rather than stringy.
Local landscape supply yards are my secret weapon for affordable ingredients. They sell materials by the cubic yard, perfect if you’re mixing large batches or splitting orders with gardening friends. Just bring your own containers and save even more money.
Here’s the good news: adjusting drainage in your potting mix is genuinely one of the easiest fixes you’ll tackle in your indoor gardening journey. Unlike diagnosing mysterious leaf spots or battling persistent pests, improving drainage is straightforward, affordable, and delivers visible results quickly.
If you’re feeling overwhelmed by all the options we’ve covered, don’t worry. I encourage you to start small and experiment with just one or two plants first. Mix up a batch of well-draining soil using perlite or bark, repot a struggling plant, and then simply observe. Within weeks, you’ll likely notice stronger growth, perkier leaves, and an overall healthier appearance.
Remember, healthy roots equal happy plants. When your plant’s roots can breathe and aren’t sitting in waterlogged soil, everything else falls into place more easily. The difference proper drainage makes is truly dramatic, and once you see it firsthand, you’ll wonder why you didn’t make the switch sooner. Your plants are already rooting for you to succeed.